How to Adjust Draw Length on Reflex Bow for Perfect Accuracy
If you shoot a reflex bow, you already know draw length is a crucial factor for accuracy and comfort. But what if your shots feel off, or you just bought a new bow and aren’t sure it’s set up for you?
Learning how to adjust draw length on a reflex bow can make a surprising difference. This guide walks you through every step, answers common questions, and gives you the confidence to fine-tune your bow for your unique shooting style.
Understanding Draw Length And Reflex Bows
Before making any adjustments, it’s important to know what draw length is and how it relates to a reflex bow. Draw length is the distance from the nocking point on the string to the grip’s pivot point plus 1.75 inches, when at full draw. For most archers, finding the correct draw length means smoother shots, better accuracy, and less fatigue.
A reflex bow has limbs that curve away from the archer at the grip. This design stores more energy, making the bow faster and often more compact. However, the unique shape can make draw length adjustments slightly more technical compared to other bows.
Why Draw Length Matters
- Accuracy: Too short or long, and your form suffers. The right length helps you anchor consistently.
- Comfort: Proper setup reduces muscle strain and makes long practice sessions easier.
- Safety: Overdrawing can overstress limbs, while underdrawing leaves potential energy unused.
Example: If you’re 5’10” and using a 28-inch draw length, but the bow is set at 29.5 inches, you’ll likely feel overextended at full draw, leading to poor shot groups.
Tools And Equipment Needed
You don’t need a full workshop to adjust your draw length, but having the right tools makes the process safer and more accurate. Here’s what you’ll need:
- Allen wrenches (most modern bows use these for limb bolts and modules)
- Bow scale (optional, for checking draw weight after adjustment)
- Tape measure or draw length arrow
- Bow press (only for major limb or cam changes; not always required)
- Manual or schematic for your specific bow model
Pro Tip: Always check your bow’s manual before starting. Some reflex bows have unique systems that require specific steps.
How To Measure Your Correct Draw Length
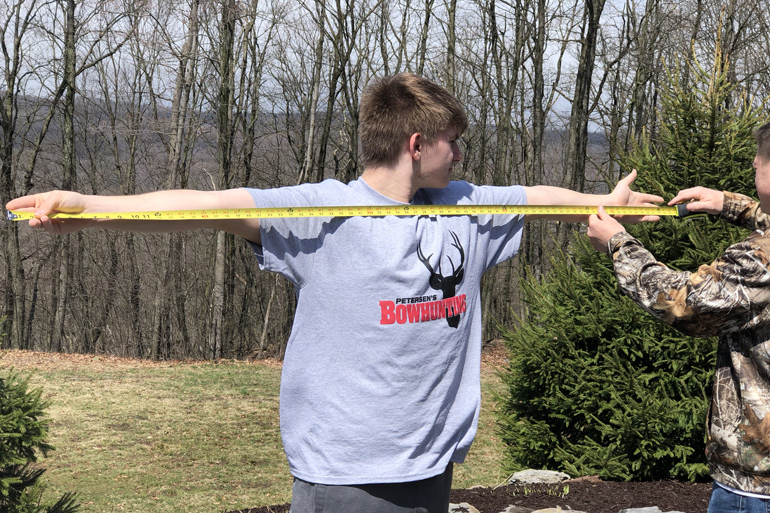
It’s tempting to guess, but an accurate draw length measurement is essential. The most common method is the “wingspan divided by 2. 5” technique.
- Stand with arms extended sideways, palms forward.
- Have someone measure the distance from fingertip to fingertip (in inches).
- Divide that number by 2.5.
For example, a 70-inch wingspan results in a 28-inch draw length. This is a starting point, you may need to fine-tune based on feel.
Another method involves using a draw length arrow (with markings) and drawing to your anchor point, then reading the measurement.
Types Of Draw Length Adjustment Systems
Not all reflex bows adjust the same way. Understanding your bow’s system is the first step to a proper adjustment.
| Adjustment System | How It Works | Common On |
|---|---|---|
| Rotating Cam Modules | Change module position on cam to set draw length | Modern compound reflex bows |
| Replaceable Modules | Swap out modules for different draw lengths | Older or high-end models |
| Adjustable Limb Pockets | Loosen/tighten limb bolts to alter geometry | Some hybrid reflex bows |
| String & Cable Adjustments | Change string/cable length (advanced, less common) | Traditional reflex bows |
Warning: Some adjustments require a bow press. If you’re unsure, seek help from a qualified technician.
Step-by-step: Adjusting Draw Length On A Reflex Bow
Ready to make your adjustments? Here’s a clear, step-by-step approach. Always follow your bow’s manual for specific instructions.
1. Identify Your Bow’s Adjustment System
Locate the cams and modules. Check if your bow uses rotating modules, fixed modules, or limb adjustment for draw length changes.
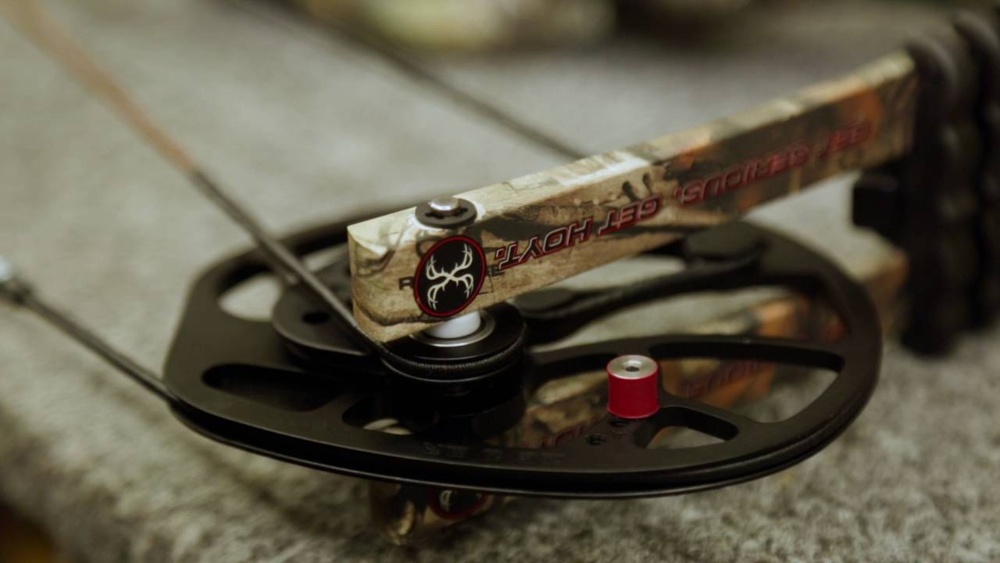
Example: Many Hoyt and Bowtech reflex bows use rotating cam modules, while some Mathews bows require module replacement.
2. Prepare Your Work Area
- Clear a table or bench.
- Gather your tools.
- Unstring the bow only if required for your model.
3. Make The Adjustment
Rotating Cam Modules
- Use the correct Allen wrench to loosen the module screws.
- Rotate the module to the desired setting (usually marked with numbers or letters).
- Tighten the screws securely.
- Repeat for the other cam if your bow is dual-cam.
Replaceable Modules
- Use a bow press if needed to relieve tension.
- Remove screws holding the module.
- Install the new module for your target draw length.
- Reassemble and check all screws are tight.
Adjustable Limb Pockets
- Loosen limb bolts slightly, usually no more than 2-3 turns.
- Adjust both top and bottom limbs equally to maintain tiller and balance.
- Retighten and check alignment.
String & Cable Adjustments
This is advanced and usually not recommended for beginners. If you need to shorten or lengthen the string/cables, use a bow press and precise measurements.
4. Check Your New Draw Length
Use a tape measure or draw length arrow. Draw the bow to your anchor point and measure. Repeat the adjustment if necessary.
5. Test Draw Weight And Let-off
Changing draw length can slightly alter draw weight and let-off. Use a bow scale to check, and adjust as needed.
6. Fine-tune Anchor Point And Peep Sight
After changing draw length, your anchor point or peep sight may need minor adjustments for comfort and accuracy.
Pro Tip: Take a few shots at a close-range target to test the feel before making further changes.
Common Mistakes To Avoid
Adjusting draw length isn’t difficult, but small mistakes can affect performance or safety.
- Ignoring the manual: Always check your manufacturer’s instructions.
- Uneven limb adjustments: If your bow uses limb bolts, adjust both sides equally.
- Over-tightening screws: This can strip threads or damage cams.
- Skipping anchor point adjustments: A new draw length may change your anchor point and affect accuracy.
- Forgetting to re-check draw weight: Adjustments can alter draw weight slightly.
In my experience, the biggest error is not checking peep sight alignment after a change. A misaligned peep can cause inconsistent shooting even if your draw length is perfect.
Credit: www.bowhunter.com
Signs Your Draw Length Needs Adjustment
How do you know if you need to adjust? Here are some clear signs:
- Inconsistent anchor: You can’t settle into the same anchor point each time.
- Overextension: Your drawing arm feels locked out or hyperextended.
- Short draw: Your bow arm bends more than necessary, losing power and accuracy.
- String contact: The string touches your arm or chest awkwardly.
- Poor arrow flight: Arrows fishtail or don’t group tightly.
These issues often disappear after setting the correct draw length.
How Draw Length Impacts Performance
A small change in draw length can have a big effect. Here’s how different draw lengths impact your shooting:
| Draw Length | Impact on Accuracy | Impact on Speed | Comfort Level |
|---|---|---|---|
| Too Short | Poor anchor, low consistency | Reduced arrow speed | Can cause muscle fatigue |
| Ideal | Consistent, accurate groups | Optimal speed | Comfortable, repeatable shots |
| Too Long | Overextension, string slap | May cause erratic flight | Risk of injury, fatigue |
Pro Tip: Small adjustments (as little as 0.5 inches) can make a dramatic difference in feel and accuracy.

Credit: www.wikihow.com
Comparing Reflex Bows To Other Bow Types
Understanding how reflex bows differ from other bow types can clarify why draw length adjustment is so important.
| Bow Type | Draw Length Adjustment Ease | Typical Draw Length Range | Adjustment Method |
|---|---|---|---|
| Reflex Bow | Moderate | 22″-31″ | Modules, limb bolts |
| Compound Bow | Easy to moderate | 24″-32″ | Rotating modules |
| Recurve Bow | Difficult (requires new limbs or string) | Varies | String/limb swap |
| Longbow | Not adjustable | Fixed | None |
Most reflex bows allow for adjustment within a 2-3 inch range without new parts, but always check your model’s specs.
Practical Tips For A Perfect Fit
Getting your draw length right is just the start. Here are some extra tips to help you fine-tune your setup:
- Use a mirror or video: Watch your draw cycle to check form and anchor consistency.
- Mark your anchor point: Use a small piece of tape or facial reference to confirm repeatable anchors.
- Check your stance: Stand naturally; don’t force your body to fit the bow.
- Shoot several arrows: Don’t judge the change after one or two shots. Give yourself time to adjust.
- Ask a coach or experienced archer: An outside perspective can spot issues you might miss.
Example: When I adjusted my draw length by just half an inch, my groups tightened, and my shoulder pain vanished. Sometimes, the smallest tweak makes the biggest difference.
When To Seek Professional Help
Some adjustments are best done by a professional, especially if:
- You’re unsure about using a bow press.
- You suspect a limb or cam is damaged.
- The bow doesn’t have clear adjustment markings.
- You want a full tune-up (timing, weight, etc. ).
A bow technician can also check for cam lean, timing, and other issues that affect performance.
Safety Considerations
Never overlook safety when adjusting draw length:
- Unstring the bow if your model requires it before making changes.
- Check for wear or damage on limbs, cams, and string before and after adjustments.
- Test fire at a safe target and close range after adjustments.
- Use only the specified tools for your bow.
Warning: Never attempt advanced string or cable changes without proper training and a bow press. Serious injury or bow damage can occur.

Credit: www.youtube.com
Next Steps After Adjusting Draw Length
You’ve set your draw length, but what now? Here are the follow-up steps to maximize your results:
- Sight in your bow: Adjust sights and test at various distances.
- Tune your arrows: Make sure spine and length are matched to your new draw length.
- Re-check peep sight alignment: You may need to move it slightly.
- Record your new settings: Write down the module setting, limb bolt turns, or other details for future reference.
- Practice regularly: Muscle memory develops with repetition at the new draw length.
Pro Tip: Small tweaks may be needed after your first few sessions. Don’t be afraid to fine-tune further.
Frequently Asked Questions
What’s The Difference Between Draw Length And Draw Weight?
Draw length is the distance the bowstring travels when pulled to full draw, measured in inches. Draw weight is the force needed to pull the string to full draw, measured in pounds. Both must be set correctly for comfort and safety. A mismatch can lead to poor shooting form or even injury.
Can I Adjust Draw Length On All Reflex Bows?
Most modern reflex bows allow some draw length adjustment, but not all. Older or traditional models may require professional modification or new parts. Always check your bow’s manual or consult the manufacturer’s website for specifications.
How Often Should I Check My Draw Length?
Check your draw length if you notice changes in your anchor point, if your form feels off, or after any equipment change. It’s also wise to re-check annually or after significant physical changes (growth, injury, etc. ).
Will Changing Draw Length Affect My Arrow Choice?
Yes. Changing draw length can mean you need different arrow lengths or spine ratings. If your draw length increases, you may need longer arrows; a decrease might require shorter ones. Always ensure your arrows are safe for your new setup.
Where Can I Find More Resources On Reflex Bow Tuning?
For deeper learning, consult archery organizations, your bow manufacturer’s website, or high-authority guides like Wikipedia’s Bow (archery) page. Local pro shops and certified coaches are also excellent resources.
Getting the right draw length on your reflex bow is a mix of careful measurement, following manufacturer guidelines, and a bit of trial and error. With these steps, you’ll be shooting more comfortably and accurately in no time. Remember to review your adjustments regularly, prioritize safety, and don’t hesitate to consult a professional for complex changes.
The right setup makes every shot more satisfying, and brings out the best in both you and your bow.