Build Your Own Carbon Arrows: A Step-by-Step Guide. Yes, beginners can craft precise and effective carbon arrows at home with the right tools and careful instructions. This guide breaks down the process, making it achievable and rewarding.
Ever looked at your arrows and wished they were just a little bit better? Maybe a bit straighter, or perhaps you’ve heard that building your own can save money and improve your archery game. If you’re new to this, it might seem daunting. But I’m here to tell you that crafting your own carbon arrows is totally achievable, even for beginners. It’s a rewarding process that gives you a deeper understanding of your gear. Think of it like tuning your own instrument – you get a feel for it, and the results are incredibly satisfying. We’ll walk through everything, step-by-step, so you can confidently build arrows that fly true.
Why Build Your Own Carbon Arrows?
Taking the plunge to build your own carbon arrows might seem like a lot of work, but the benefits are substantial, especially for the dedicated archer. It’s not just about saving a few dollars; it’s about quality, customization, and a deeper connection to your sport.
Unmatched Customization
Store-bought arrows are great, but they come in standard configurations. When you build your own, you become the designer. You can select:
- Shaft Spine: This is crucial for arrow flight. Matching the spine to your bow’s draw weight and length ensures your arrows will fly straight and predictably.
- Shaft Length: Getting the perfect length for your draw is vital for safety and accuracy. DIY allows for exact sizing.
- Fletching: Choose the size, shape, and material of your fletchings. This impacts arrow stability and flight trajectory. You can even pick your favorite colors!
- Arrow Points (Field Points/Broadheads): You can experiment with different weights to see how they affect your arrow’s balance and impact.
- Nocks and Inserts: Selecting the right components ensures a secure fit and proper alignment with your bowstring.
Cost Savings
While the initial investment in tools might seem high, building your own arrows over time can be significantly cheaper than buying pre-made ones, especially if you shoot a lot. When shafts are on sale, or you buy in bulk, the per-arrow cost drops considerably. This allows you to have more arrows in your quiver without breaking the bank, meaning more practice time for you!
Deeper Understanding and Skill Development
As an archery enthusiast, understanding how your equipment works is key. Building arrows demystifies the process. You learn firsthand how each component contributes to the arrow’s flight. This knowledge can make you a better archer, helping you troubleshoot issues and make informed decisions about future arrow purchases or builds. It’s a hands-on learning experience that truly elevates your game.
Quality Control and Consistency
When you build them yourself, you know exactly the care and attention that went into each arrow. You can ensure every component is perfectly aligned and every glue joint is strong. This level of quality control can lead to more consistent arrow flight, which is the holy grail for any archer striving for accuracy.
Essential Tools and Materials
Before you start building, gather your supplies. Having everything ready makes the process smooth and enjoyable. Don’t worry if you don’t have archery-specific tools yet; many can be found at hardware stores or online. Investing in quality tools will save you frustration down the line.
Materials Checklist:
- Carbon Arrow Shafts: Choose the correct spine for your bow’s draw weight and length. It’s best to buy a dozen or more at once for consistency.
- Arrow Points (Field Points): Decide on the weight. Start with 100 or 125 grains for most setups.
- Vaneless or Plastic Nocks: These are designed to fit your arrow shafts. It’s good to have extras.
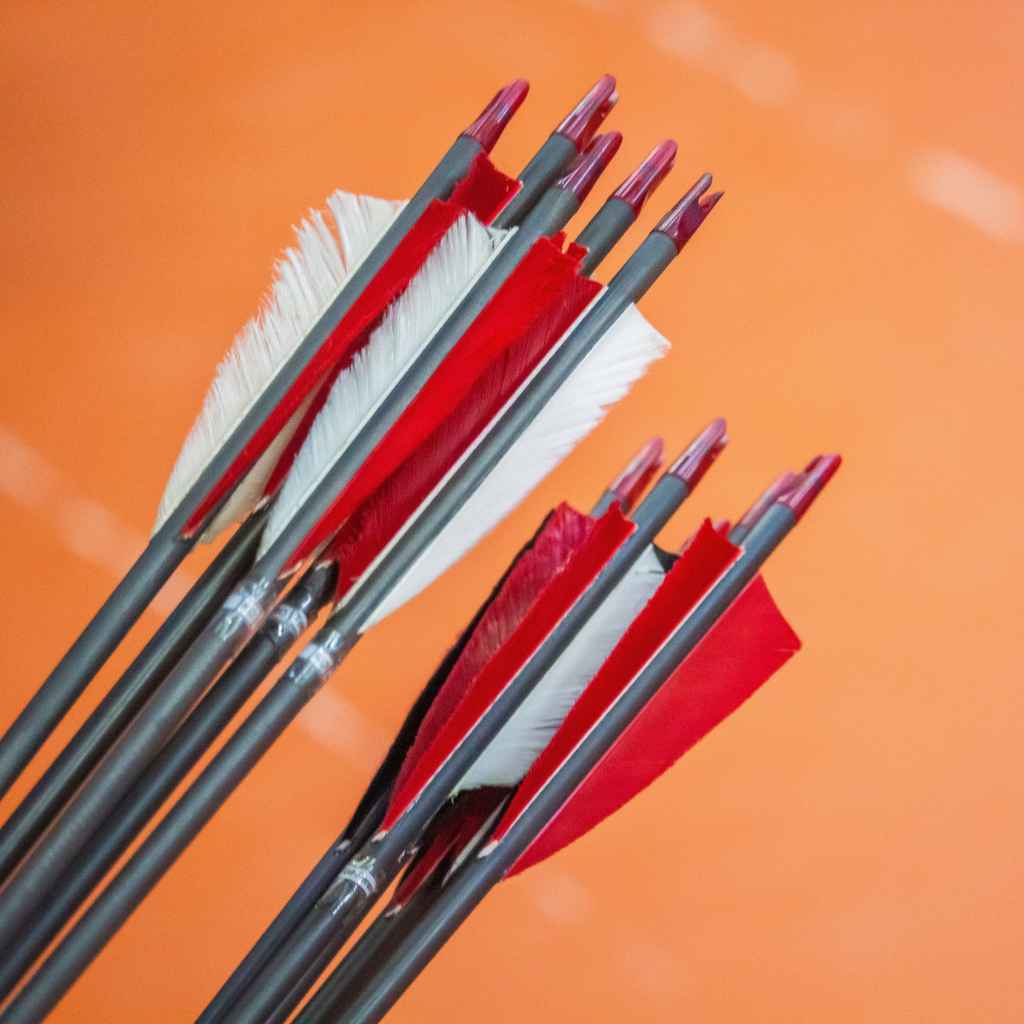
- Fletching: Typically vanes or feathers. Vanes are more durable and often preferred for compound bows, while feathers are classic for trad bows.
- Shaft-Specific Inserts: These are glued into the shaft’s front to hold the points.
- Shaft Cutters: A specialized saw that cuts shafts cleanly and squarely, essential for a good fit.
- Shaft Spinner/Fletching Jig: A tool to hold the shaft while you glue. Many fletching jigs can also spin-mount shafts for consistent fletching. See a great example of a fletching jig at Victor Archery’s Pro Shop Tools.
- Overshaft Tool (Optional but Recommended): This tool helps ensure consistent insert gluing.
- Accelerator/Glue: Specific glues for arrow components. There are different types for nocks, inserts, and points, so choose wisely.
- Acknowledge Insert Glue.
- A Fletching Cement or Vaneless Glue: Used for attaching your vanes or feathers.
- Sandpaper: Fine-grit sandpaper (around 220-grit) for preparing surfaces.
- Rubbing Alcohol or Acetone: To clean surfaces before gluing.
- Measuring Tape or Ruler: For accurate shaft cutting.
- Safety Glasses: Always protect your eyes, especially when cutting or gluing.
- Gloves: To keep your hands clean and prevent oils from interfering with glue adhesion.
Tools Checklist:
| Tool | Purpose | Why it’s Important |
|---|---|---|
| Arrow Saw or Shaft Cutters | Cutting arrow shafts to precise length. | Ensures consistent shaft length and a square cut for proper component fit. |
| Fletching Jig | Holding the arrow shaft while attaching fletchings. | Guarantees consistent placement and angle of fletchings for optimal flight. |
| Acknowledge Insert Tool | Ensuring inserts are perfectly aligned inside the shaft. | Prevents misalignment that can affect arrow straightness and flight. |
| Tungsten Tipped Grinding Wheel | Finishing the front of the shaft, for an even surface. | Prepares the shaft tip for a smooth, even glue surface for inserts. |
| Digital Calipers | Measuring critical dimensions. | Useful for checking shaft diameter, insert fit, and other precise measurements. |
| Scale (Grain Scale) | Weighing components and finished arrows. | Helps in creating uniform arrows by ensuring consistent weight and balance. |
Step-by-Step Guide to Building Your Carbon Arrows
Now, let’s get down to business! Building carbon arrows is a process that requires patience and precision. Follow these steps carefully, and you’ll have a set of arrows you can be proud of.
Step 1: Cut Your Arrow Shafts
This is perhaps the most critical step. An improperly cut shaft can lead to wobbly arrows and poor accuracy. You need to determine the correct length for your arrows. A good starting point is to measure from the nock groove of your bowstring (when it’s on the bow at full draw) to the point where your arrow rests on your rest, plus about 1 to 1.5 inches. This extra length gives you room for the insert and point and ensures the arrow is slightly longer than your draw to prevent “dry firing.”
- Measure Carefully: Use a good measuring tape or ruler. Mark the desired length clearly on the shaft.
- Cut Squarely: Use a dedicated arrow saw or a very fine-toothed hacksaw with a miter box to ensure the cut is perfectly perpendicular to the shaft. A square cut is essential for the insert to sit flush. If using a saw, turn the shaft as you cut to achieve a cleaner edge.
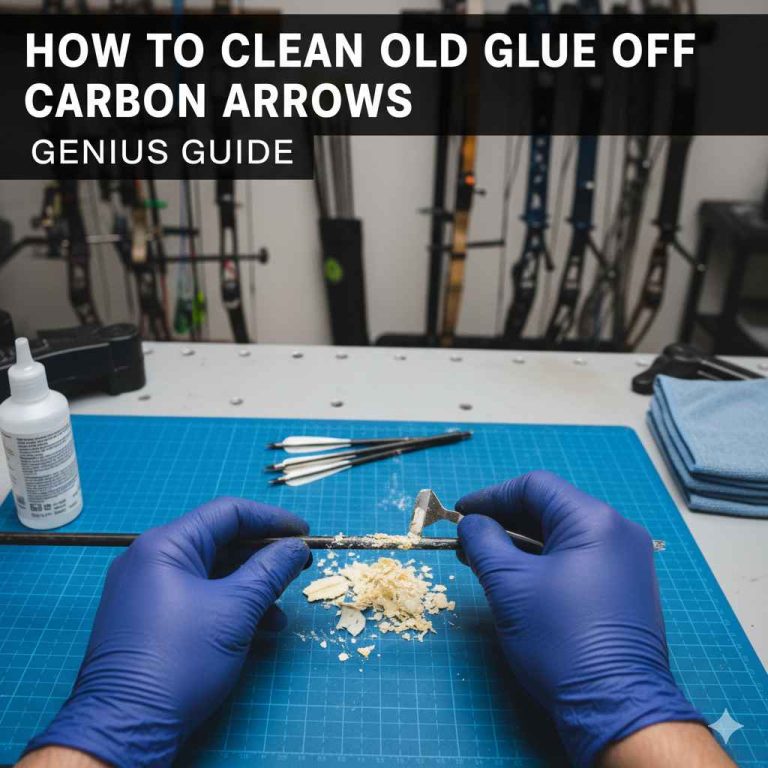
- Clean the Edge: Remove any burrs or plastic shavings from the cut end with a fine-grit sandpaper or a specialized shaft deburring tool. This creates a clean surface for gluing.
Step 2: Install the Inserts
The insert is what the point screws into and it glues into the front of the shaft. It needs to be perfectly straight.
- Prepare the Shaft End: Clean the inside of the shaft opening and the outside of the insert with rubbing alcohol or acetone. Let them dry completely.
- Apply Insert Glue: Use a specialized insert glue. Apply a generous but not excessive amount to the outside of the insert. Some glues come with long applicator tips that are perfect for this.
- Use the Overshaft Tool (if you have one): Slide the insert into the shaft using the tool. This ensures it goes in straight and butts up against the shaft’s internal taper. If you don’t have this tool, carefully push the insert in using a dowel rod or your fingers, ensuring it goes in straight and fully.
- Check Alignment: Before the glue sets, check that the insert isn’t crooked. You can do this by looking down the shaft. If it’s crooked, you might need to gently twist it back into place. Many archers also use a flat surface and a straight edge to ensure the insert sits perfectly flush.
- Let it Cure: Allow the glue to cure fully according to the manufacturer’s instructions. Some glues cure faster than others, but an overnight cure is often best.
Step 3: Install the Nocks
Nocks are what attach to your bowstring. They are usually glued into the back of the shaft.
- Prepare Surfaces: Just like with the inserts, clean the inside opening of the shaft and the outside of the nock with rubbing alcohol or acetone.
- Apply Nock Glue: Use a nock-specific glue. Apply it evenly to the shaft opening or the nock itself, depending on the glue type.
- Seat the Nock: Push the nock straight into the shaft. Ensure it’s fully seated. Many nocks have a small collar that slides onto the shaft, ensuring perfect alignment.
- Positional Alignment (Optional but Recommended): Some archers like to index their nocks. This means spinning the nock to a specific position relative to a sight or rest. A simple way to do this is to place the arrow on your shooting finger and align the nock slot perpendicular to your finger.
- Cure Time: Let the glue cure completely per the manufacturer’s recommendations.
Step 4: Fletch Your Arrows
Fletching (the vanes or feathers at the back of the arrow) is crucial for stabilizing your arrow in flight. This is where the fletching jig comes in.
- Prepare the Shaft: Clean the area where the fletchings will attach with rubbing alcohol. This is often a textured area on the shaft.
- Calibrate Your Jig: Read your fletching jig’s instructions carefully. Set it up for the number of fletchings (usually three), the angle (offset or helical), and the spacing.
- Apply Glue to the Vanes/Feathers: Apply a thin, even bead of fletching glue to the base of the vane or feather.
- Place the Vane on the Jig: Carefully place the glued vane into the jig’s clamp.
- Attach the Vane to the Shaft: Bring the clamp down onto the arrow shaft, ensuring the vane is straight and positioned correctly.
- Repeat for All Fletchings: Rotate the arrow in the jig and repeat the process for the remaining fletchings. If you’re doing a helical (curved) fletch, the jig will automatically impart the curve. If you’re doing a straight or offset fletch, ensure your angles are consistent.
- Curing: Let the glue cure completely. Some fletching cements cure very quickly, while others need several hours.
Step 5: Install the Points
This and the next step are often done together, but for clarity, we’ll keep them separate. Installing the point is the final assembly step before weighing and tuning.
- Screw in the Point: Simply screw your chosen field point or broadhead into the insert.
- Tighten Firmly (but don’t overtighten): Ensure the point is snug. You don’t want it coming loose during shooting, but overtightening can strip the threads of the insert.
Step 6: Weigh and Inspect
Consistency is key for accurate shooting. Weighing your arrows helps ensure they are all the same weight, which leads to more predictable flight.
- Weigh Each Arrow: Use a grain scale to weigh each finished arrow, including the point. Weighing them from tip to nock tail.
- Sort Arrows: Group arrows that are within a few grains of each other. For serious target archers, this tolerance can be even tighter.
- Inspect Everything: Give each arrow a final once-over. Check that fletchings are secure, nocks are straight, and inserts are solid. Look for any cracks or imperfections in the carbon shaft. Safety Note: Always inspect your arrows before every shot. Damaged carbon arrows can shatter.
Troubleshooting Common Issues
Even with the best intentions, you might run into a few snags. Here are some common problems and how to fix them:
Wobbly Fletchings
Cause: Glue didn’t adhere properly, or the vane/feather was damaged during application.
Fix: Carefully remove the offending fletching using a degreaser or solvent recommended for your glue. Clean the area and re-fletch following the instructions precisely. Ensure the shaft is clean and dry.
Insert or Nock is Crooked
Cause: Didn’t install straight, or glue was applied unevenly.
Fix: This is tricky once cured. Ideally, you want to remove the component. For inserts, you might be able to gently twist it out or use a specialized insert removal tool. For nocks, they are sometimes easier to pry off. If removal isn’t feasible, you might have to repurpose the shaft for practice or discard it if it’s severely impacting flight. Proper installation is key to avoiding this.
Arrows Not Flying Straight
Cause: Numerous possibilities, including crooked fletchings, bent shaft, improper spine, or uneven arrow weight.
Fix: First, ensure the arrow is straight by rolling it on a flat surface. If it wobbles, the shaft is bent. Check fletching and nock alignment. Ensure all components are securely glued. If all else fails, your arrow spine might be too weak or too stiff for your bow, or the arrow length is incorrect. Consult a local pro shop for advanced tuning advice.
FAQ: Building Carbon Arrows
Q1: How much does it cost to build my own carbon arrows?
The initial cost of tools can range from $100-$300, depending on quality. The materials themselves (shafts, points, vanes, nocks, glue) can cost $8-$15 per arrow if bought in bulk. So, while there’s an upfront investment, building a dozen arrows can end up costing between $100-$180, often less than buying identical pre-made arrows.
Q2: What is “spine” and why is it important?
Spine refers to the stiffness of an arrow shaft. It’s measured in pounds (e.g., 350 spine, 400 spine). An arrow that is too stiff or too weak for your bow will fly erratically. You need to match the arrow’s spine to your bow’s draw weight and your draw length. Your bow manufacturer or a pro shop can help you determine the right spine.
Q3: Can I use a regular saw to cut carbon shafts?
While a fine-toothed hacksaw can be used in a pinch, it’s not ideal. You risk splintering the carbon or not getting a perfectly square cut, which is vital for component adhesion. A dedicated arrow saw is highly recommended for accuracy and safety. If you must use a hacksaw, use a miter box for a straight cut and be extremely careful.
Q4: How many fletchings should I use?
Most archers use three fletchings. You can choose between traditional feathers or more durable plastic vanes. The shape and size of the fletching also matter, affecting arrow stability and speed. For beginners, 2-inch parabolic or shield-cut vanes are a good, versatile choice.