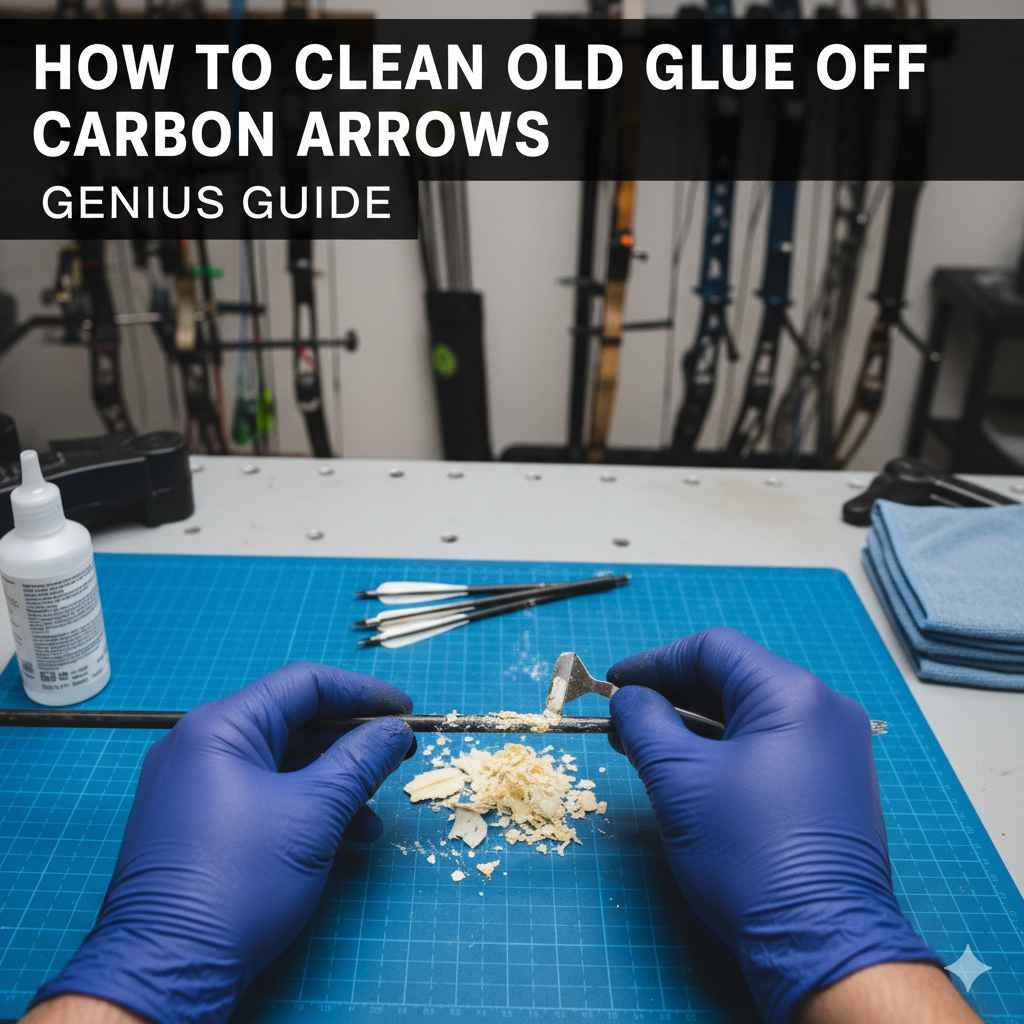
Easily clean old glue off carbon arrows using simple household items like rubbing alcohol and a soft cloth. This gentle, step-by-step method preserves your arrow shafts and ensures they remain ready for accurate shots, making maintenance a breeze for every archer.
Welcome, fellow archers! If you’ve ever found yourself staring at your trusty carbon arrows, only to be met with stubborn, sticky residues from old fletching glue, you know it can be frustrating. It’s like trying to peel a stubborn sticker off a brand new piece of gear. But don’t worry, keeping your arrows in top shape doesn’t require a degree in advanced chemistry.
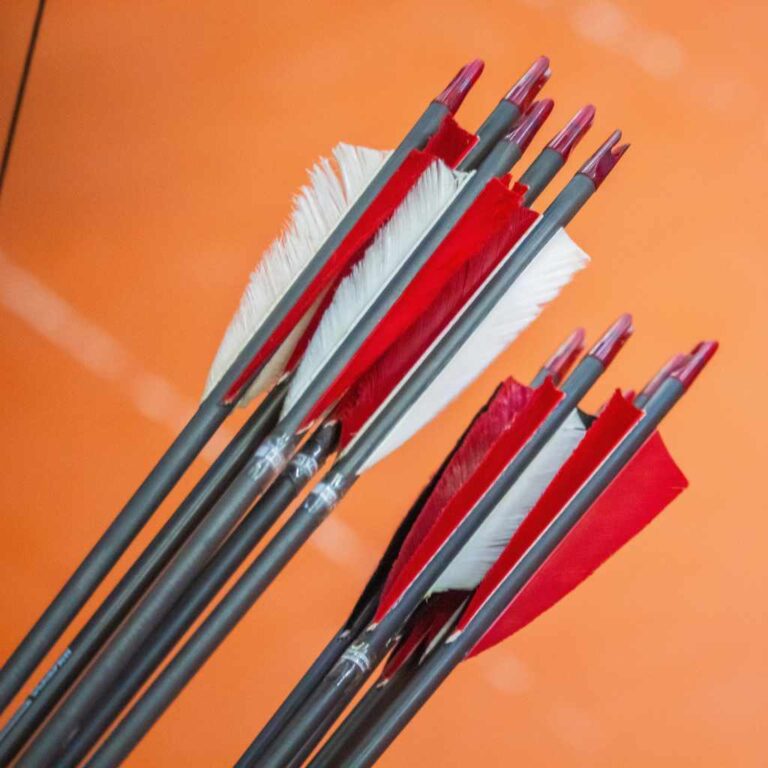
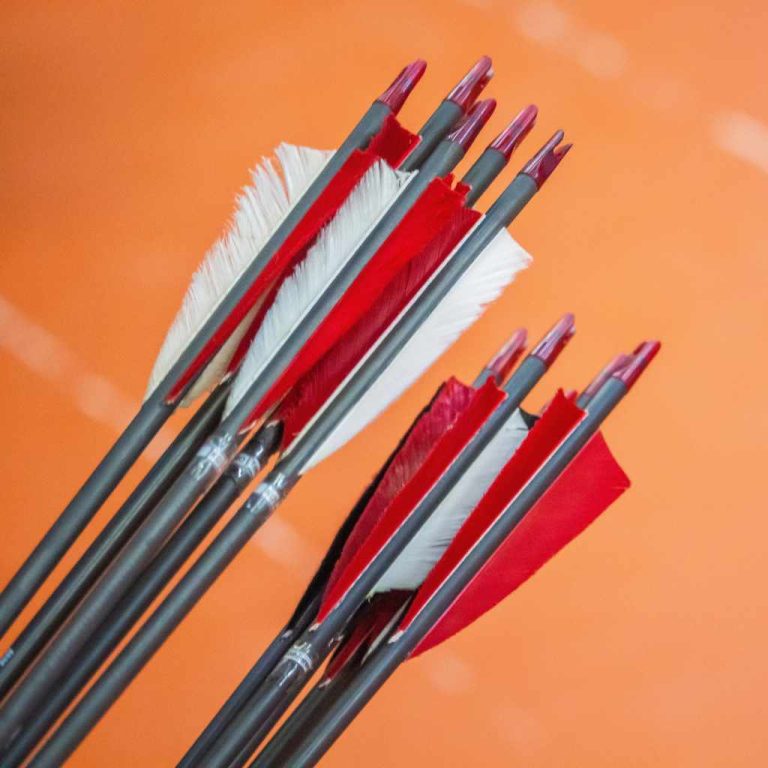
Over time, as we switch out vanes or simply due to wear and tear, old adhesive can build up. This not only looks messy but can potentially affect how your arrows fly if left unchecked. The good news is that with a few common household items and a little patience, you can have your carbon arrows looking and performing like new again. Let’s walk through a simple, effective process that will have you back at the range with confidence in no time!
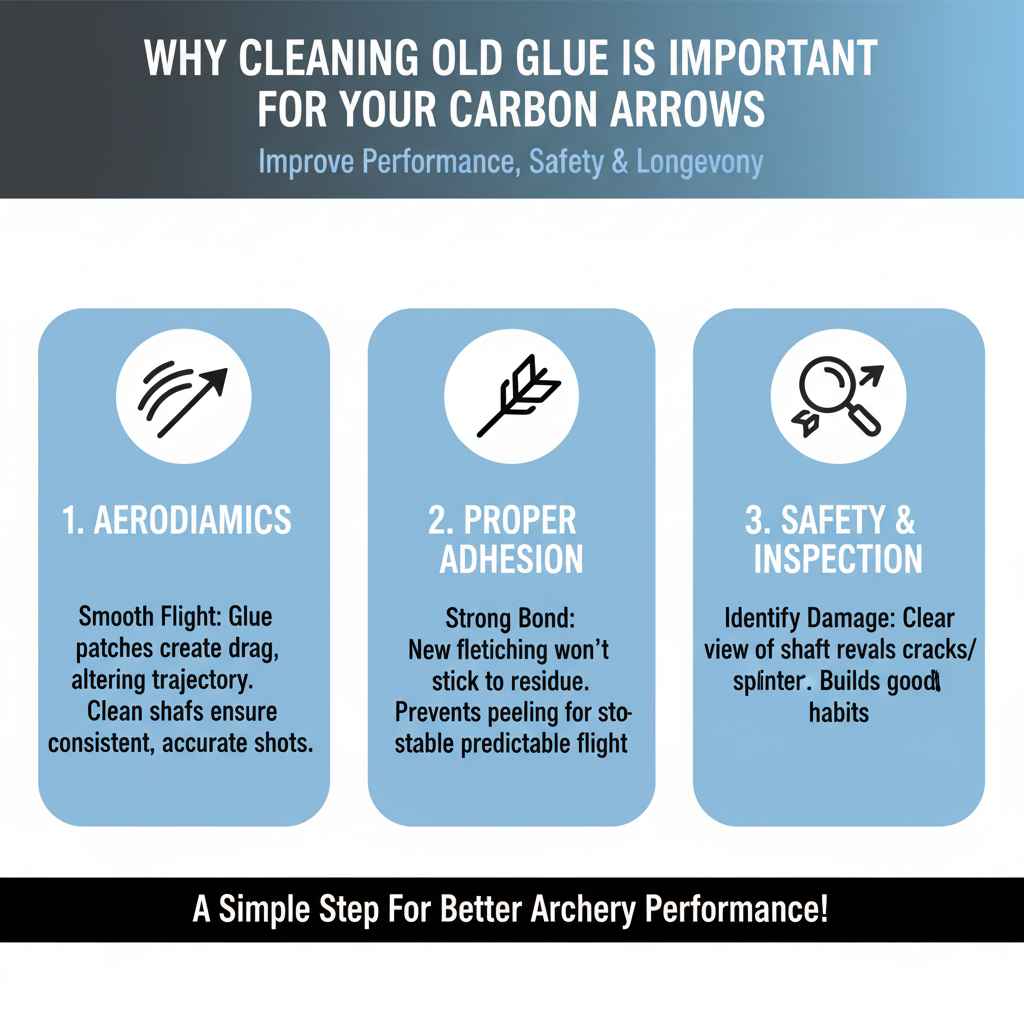
Why Cleaning Old Glue is Important for Your Carbon Arrows
Keeping your carbon arrows clean is more than just an aesthetic choice; it plays a vital role in their performance and longevity. Old glue residue, often left behind after removing vanes or wraps, can cause several issues that every archer, especially beginners, should be aware of.
Firstly, think about aerodynamics. The smooth flight of an arrow depends on its sleek profile. Stubborn glue patches can create drag, subtly altering the arrow’s trajectory and reducing accuracy. While it might seem like a small detail, in archery, every little bit counts. A clean shaft ensures your arrow interacts with the air as intended, leading to more consistent and predictable shots.
Secondly, new fletching or wraps won’t adhere properly to a surface that’s slick with old adhesive. This can lead to fletching peeling off mid-flight, which is not only frustrating but can also be dangerous as it compromises the arrow’s stability. A properly prepared surface is crucial for a strong, lasting bond, ensuring your vanes stay put shot after shot.
Finally, regular cleaning helps you inspect your arrows for any potential damage like cracks or splinters, which are critical for safety. Removing the old glue gives you a clear view of the carbon shaft itself. For beginners, understanding these maintenance steps builds good habits and ensures they get the most out of their equipment and their practice sessions. It’s a simple form of care that pays off big time on the range.
Understanding Your Carbon Arrows and Glue Residue
Carbon arrows are incredibly popular for their strength, light weight, and durability, making them a favorite among archers of all levels. However, being made of composite materials means they require specific care. Unlike traditional wooden or aluminum arrows, carbon shafts can be more susceptible to certain chemicals and abrasive cleaning methods. It’s essential to know what you’re dealing with before you start scrubbing.
Glue residue on carbon arrows typically comes from two main sources: fletching glue (used to attach vanes or feathers) and arrow wrap adhesive. These glues are designed to be strong, which is why removing them can sometimes feel like a challenging task. The challenge lies in finding a cleaning agent and method that is strong enough to break down the adhesive but gentle enough not to damage the carbon fibers of the shaft.
The primary concern with improper cleaning is delamination, a process where the outer layers of the carbon composite start to separate. Harsh solvents, excessive heat, or aggressive scraping can compromise the integrity of the carbon weave. This is why using the right products and techniques is paramount. Our goal is to remove the sticky mess without weakening the arrow itself, ensuring it remains safe and effective for shooting.
Gathering Your Supplies: What You’ll Need
Before we dive into the cleaning process, let’s make sure you have everything ready. Having all your supplies at hand will make the job smoother and more efficient. Think of this as preparing your workspace for a precise task – which, in a way, it is!
For most carbon arrow glue residue situations, you won’t need specialized archery tools. Instead, common household items will do the trick. The key is to use gentle methods that won’t harm the carbon shaft.
Essential Cleaning Supplies:
- Rubbing Alcohol (Isopropyl Alcohol): This is your best friend for dissolving most fletching glues. Aim for a concentration of 70% or 91%. The higher percentage is generally more effective.
- Soft Cloths: You’ll need a few. An old cotton t-shirt, microfiber cloths, or even paper towels can work. Microfiber cloths are excellent because they’re absorbent and non-abrasive.
- Plastic Scraper or Old Credit Card: For gently lifting thicker glue deposits after the alcohol has softened them. Avoid metal scrapers, which can easily scratch the carbon.
- Warm Soapy Water (Optional): In some cases, for a final wipe-down to remove alcohol residue or prepare for re-fletching. Use a mild dish soap.
- Gloves (Optional but Recommended): To keep your hands clean and to prevent oils from your skin from transferring onto the arrow shaft, especially if you plan to re-fletch soon.
- Patience: This isn’t usually a quick fix, especially for very stubborn glue. Work slowly and deliberately.
Once you have these items, you’re ready to tackle that sticky situation. Remember, the gentler you are, the better you’ll preserve your arrows.
Step-by-Step Guide: How to Clean Old Glue Off Carbon Arrows
Cleaning old glue off your carbon arrows is a straightforward process, but it requires a bit of care. We want to dissolve the adhesive without damaging the delicate carbon fibers. Follow these steps, and you’ll have your arrows looking clean and ready for new vanes or wraps in no time.
Step 1: Initial Preparation
First, make sure your workspace is well-ventilated, especially if you’re using rubbing alcohol. Lay down a protective layer, like a towel or newspaper, to catch any drips. If the glue residue is thick, you might want to try gently scraping off the excess first. Use your plastic scraper or old credit card at a shallow angle. The goal here is to remove the bulk of the material without digging into the carbon shaft.
Step 2: Apply Rubbing Alcohol
Now, take one of your soft cloths and dampen it with rubbing alcohol. You don’t want to soak it, just make it damp enough to transfer the alcohol onto the glue residue. Gently rub the affected area of the arrow shaft with the alcohol-dampened cloth. Focus on the areas with the glue.
Let the alcohol sit on the glue for a minute or two. The isopropyl alcohol works by breaking down the chemical bonds in the adhesive, making it softer and easier to remove. You might start to see the glue softening or bubbling slightly. This is a good sign!
Step 3: Gentle Scraping and Rubbing
After the alcohol has had a moment to work, use your plastic scraper or credit card again. With a gentle, consistent pressure, try to lift the softened glue away from the arrow shaft. Work in the direction of the arrow’s length to avoid gouging the carbon. You’ll likely be able to peel or scrape off softened chunks of glue.
If the glue is still stubborn, repeat step 2: apply more alcohol and let it sit. You may need to go through this process of applying alcohol, waiting, and gently scraping a few times for particularly tough adhesive. Patience is key here. Continue to rub with the alcohol-dampened cloth as you scrape to help lift the residue.
Step 4: Persistent Residue Removal
For any remaining sticky spots or faint haziness left behind, you can apply a bit more rubbing alcohol directly to the spot with a cloth or cotton ball. Let it sit for a few minutes. Then, use a clean section of your cloth to rub firmly in small circular motions. The friction, combined with the alcohol, should help lift the last bits of residue.
If you’re dealing with a very thin, almost paint-like layer of glue that won’t scrape off, you can try using a slightly more aggressive rubbing motion with the alcohol. However, always prioritize gentleness over speed. The integrity of your carbon arrow shaft is far more important than a perfectly pristine look if it means risking damage.
Step 5: Final Wipe-Down and Inspection
Once all the visible glue residue is gone, use a clean, dry cloth to wipe down the entire area. This removes any lingering alcohol and loosened glue particles. If you plan on immediately applying new vanes or wraps, this is also a good time for a final clean with a specialized arrow prep solution or a light wipe down with warm, soapy water, followed by a thorough rinse and drying. This ensures a perfectly clean surface for optimal adhesion.
Inspect the arrow shaft closely. It should feel smooth to the touch, with no stickiness or raised areas. If you notice any dull spots or slight discoloration from the cleaning, don’t be alarmed – this is usually superficial and doesn’t affect the arrow’s performance. What you do want to check for is any sign of damage to the carbon fibers themselves, which would indicate that your cleaning method was too aggressive.
Alternative Methods and What to Avoid
While rubbing alcohol is the go-to for most situations, sometimes you might encounter incredibly stubborn glue, or you might be tempted by other, less conventional methods. It’s important to know what works best and, perhaps more critically, what to steer clear of to protect your valuable carbon arrows.
Effective Alternatives and Additions:
- WD-40 or Goo Gone: These adhesive removers can be effective on some glues. However, they can leave an oily residue that needs thorough cleaning with a degreaser or alcohol before you can re-fletch. Use with caution and always follow up with a clean wipe.
- Heat Gun (on low setting): For extremely tough, dried glue, a heat gun on its lowest setting held at a distance can help soften the adhesive. Apply heat for short bursts and test the glue’s pliability with a plastic scraper. Be extremely careful not to overheat the carbon, as this can cause structural damage. Always keep the gun moving and never apply direct, prolonged heat.
- Specialized Arrow Prep Solvents: Some archery shops offer specific solvents designed to remove fletching glue. These are often a good, safe bet, though they can be more expensive than household options.
What to Absolutely Avoid:
- Metal Scrapers: Knives, razor blades, or metal putty knives will scratch and gouge carbon shafts, compromising their strength and potentially causing critical failure.
- Harsh Solvents: Acetone (nail polish remover), paint thinner, or strong industrial degreasers can break down the epoxy resins that hold the carbon fibers together, leading to delamination and brittleness.
- Abrasive Pads: Steel wool, rough sponges, or sandpaper can scratch the surface of the carbon and weaken it.
- Excessive Heat: As mentioned, overheating carbon can cause permanent structural damage. Never use a hairdryer on high heat or hold a heat gun too close or for too long.
- Soaking the Arrows: Never submerge your carbon arrows in any liquid, especially solvents or soapy water, as it can seep into the fibers over time.
Always remember that the glossy finish on your carbon arrow is a protective layer. Aggressive cleaning can remove or damage this finish, exposing the carbon weave to moisture and potential damage. Stick to the gentle, proven methods, and your arrows will thank you.
When to Replace Your Arrows (And How Cleaning Helps)
Even with diligent cleaning and maintenance, there comes a time when an arrow may need to be retired from service. Understanding the signs of damage is crucial for safety, and regular cleaning actually helps you spot these issues.
Signs Your Arrows Need Replacing:
- Cracks or Splinters: This is the most critical indicator. Look for any visible cracks, especially near the nock or the front of the shaft. If you see any splintering or fraying of the carbon fibers, the arrow is unsafe to shoot.
- Bent Shafts: While carbon arrows are durable, they can sometimes bend. A bent arrow will fly erratically and pose a safety risk. While minor bends can sometimes be straightened with heat, significant bending usually means replacement.
- Loose Inserts or Nocks: If the insert (where the point screws in) or the nock (where the string attaches) is loose and cannot be re-secured with glue, the arrow is compromised.
- Significant Damage to the Shaft: Deeper gouges or areas where the carbon weave looks compromised, even after cleaning, might mean the arrow’s structural integrity is reduced.
Cleaning away old glue and residue provides a clear canvas to inspect your arrows thoroughly. It allows you to see any subtle damage that might be hidden beneath sticky layers. Think of it as part of your pre-shot routine: clean, inspect, and then shoot.
If your arrows are showing signs of wear beyond what simple cleaning can fix, it’s always better to err on the side of caution and replace them. The cost of new arrows is far less than the potential injury from a damaged arrow failing during a shot. For beginners, this thorough inspection process can seem daunting, but it quickly becomes second nature and is a vital part of responsible archery.
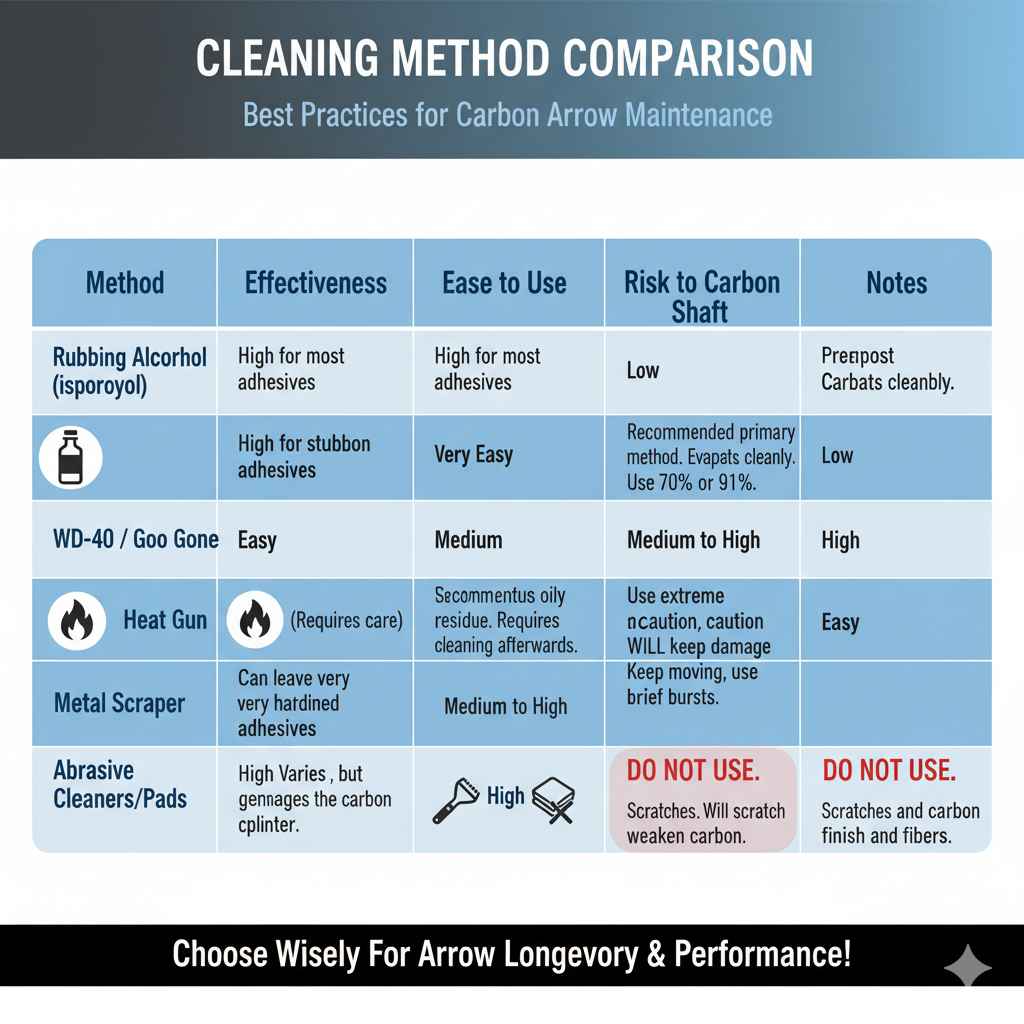
Table: Cleaning Method Comparison
To help you decide on the best approach, here’s a quick comparison of common cleaning methods for old glue on carbon arrows.
| Method | Effectiveness | Ease of Use | Risk to Carbon Shaft | Notes |
|---|---|---|---|---|
| Rubbing Alcohol (Isopropyl) | High for most adhesives | Very Easy | Low | Recommended primary method. Evaporates cleanly. Use 70% or 91%. |
| WD-40 / Goo Gone | High for stubborn adhesives | Easy | Medium | Can leave oily residue. Requires thorough cleaning afterwards. Test in an inconspicuous area if unsure. |
| Heat Gun (Low Setting) | High for very hardened adhesives | Medium (Requires care) | Medium to High | Use with extreme caution. Overheating WILL damage carbon. Keep moving, use low heat, brief bursts. |
| Metal Scraper | High for removal | Easy | Very High | DO NOT USE. Will scratch and weaken carbon. |
| Abrasive Cleaners/Pads | Varies, but generally moderate | Easy | High | DO NOT USE. Scratches and damages the carbon finish and fibers. |
Frequently Asked Questions (FAQ) about Cleaning Carbon Arrows
Q1: How quickly should I clean glue residue off my carbon arrows?
It’s best to address glue residue as soon as you notice it, or after removing vanes. Leaving it for extended periods can make it harder to remove and might attract dirt.
Q2: Can I use nail polish remover to clean my carbon arrows?
No, absolutely not. Nail polish remover (acetone) is a very strong solvent that can damage and delaminate the carbon fibers of your arrow shaft. Stick to rubbing alcohol.
Q3: My carbon arrows feel a bit sticky even after cleaning. What should I do?
This might mean some adhesive residue remains. Try applying more rubbing alcohol and rubbing more firmly with a clean cloth. Ensure the cloth is damp, not soaking wet. If it persists, a specialized arrow prep solvent might be needed.
Q4: Will cleaning old glue affect the finish on my carbon arrows?
Gentle cleaning with rubbing alcohol is unlikely to damage the finish. However, using harsh chemicals, excessive force, or abrasive materials can dull or scratch the finish. If the finish is slightly dulled by alcohol, it’s usually superficial and doesn’t impact performance.
Q5: How do I prepare my arrows for re-fletching after cleaning off old glue?
After removing all glue residue with rubbing alcohol, ensure the shaft is completely dry. For best results, wipe the area where the vanes will be attached with a clean cloth dampened with rubbing alcohol or a dedicated arrow prep solution. This removes any oils or contaminants, ensuring a strong bond for your new vanes. You can find more info on arrow prep from sources like Easton Archery’s technical guides, which are highly reputable in the industry.
Q6: Is it necessary to clean off all traces of old glue?
Yes, it’s highly recommended. Any significant bumps or unevenness from old glue can affect the aerodynamics of your arrow. More importantly, new fletching glue won’t adhere properly and securely to a surface that isn’t clean and smooth, which can lead to fletching separation during flight.