Accurately determining your carbon arrow length is crucial for consistent shooting and better accuracy. Measure from your bow’s string nock to the end of your arrow’s riser or just past the grip for a good starting point. This guide simplifies the process, making it easy for beginners to get it right.
Welcome, archery enthusiasts! Ever feel like your arrows aren’t flying as straight as they could, even though you’re doing everything else right? One of the most common, yet often overlooked, reasons is simply having the wrong arrow length. It sounds simple, but an incorrectly measured arrow can throw off your aim and make practice frustrating. Don’t worry, though! As your friendly guide to all things archery, I’m here to break down how to find the perfect carbon arrow length for your setup. We’ll go through it step-by-step, making sure you get it right the first time. Let’s make sure your arrows find their mark!
Why Arrow Length Matters More Than You Think
In archery, precision is key, and every component of your setup plays a vital role. Your arrow’s length is one of them. When an arrow is too short, it can flex excessively as it leaves the bow, leading to unpredictable flight and poor accuracy. Conversely, an arrow that’s too long can be unwieldy and might interfere with your bow’s parts, also negatively impacting its performance. Getting the length just right ensures your arrow flies true, maximizing your shooting potential. It’s like having a perfectly tailored suit for your bow – everything just fits and performs better!
Understanding the Basics of an Arrow
Before we dive into measuring, let’s quickly review the parts of a carbon arrow:
- Shaft: The main body of the arrow, usually made of carbon for its strength and lightness.
- Nock: The small plastic piece at the back of the arrow that attaches to your bowstring.
- FLETCHING (Vanes or Feathers): These small fins or feathers at the back help stabilize the arrow in flight.
- Insert: A small metal or plastic piece inside the front of the shaft where the point is attached.
- Point (Broadhead or Field Point): The tip of the arrow that hits the target.
For measuring, we’re mainly concerned with the shaft, the nock, and how it relates to your bow. The point, often called the “head” of the arrow, is generally not included in the standard arrow length measurement.
How To Determine Carbon Arrow Length: A Step-by-Step Guide
There are a couple of reliable methods to determine your carbon arrow length. We’ll cover the most common and easiest ones for beginners.
Method 1: The Bow Measurement (Most Common & Easiest for Beginners)
This is the go-to method for most archers, whether you shoot a recurve, compound, or traditional bow. It focuses on measuring the distance from your bow handle (riser) to the point where the arrow is typically set on the string.
What You’ll Need:
- Your Bow
- A Measuring Tape (flexible cloth or metal tape measure)
- A Pen or Pencil
- Optional: A friend to help hold the bow steady
Steps:
- Set Up Your Bow: Place your bow on a stable surface or have a friend hold it for you. The bow should be unstrung or in a position where the string is not under tension, making it safe to handle.
- Locate Your Arrow Rest: Find where your arrow rests on the bow. This is usually a small ledge or mechanism situated next to the riser, often called the arrow rest.
- Identify the Nocking Point: On your bowstring, you’ll find a nocking point. This is usually a small brass crimp or a tied knot where you place the nock of your arrow. If you don’t have a visible nocking point, you’ll use the general area where the arrow is seated.
- Measure from the Riser: Start your measuring tape at the inside edge of the bow’s riser, directly in front of the arrow rest. Imagine where the shaft of the arrow would sit.
- Add for the Arrow Rest and Nock: You need to account for the thickness of your arrow rest and the part of the arrow’s nock that grips the string. A good rule of thumb is to add about 1 to 1.5 inches to your measurement from the riser. Some archers prefer to simply measure to the furthest point the arrow will extend beyond the riser grip.
- Measure to the Nocking Point: Continue the measurement along the imaginary path of the arrow shaft until you reach the nocking point on the string.
- Add for Clearance (Crucial Step): This is where many beginners get it wrong! You need to add extra length so the arrow isn’t riding flush against your bow. A common and highly recommended practice is to add 1.75 inches to your measurement from the riser to the leading edge of the arrow rest. This extended length ensures the arrow clears the bow cleanly when released. So, a typical measurement might be from the inside of the riser, out to the nocking point, plus this additional clearance.
- Record Your Measurement: Note down the total measurement. This is often expressed in inches and forms the basis for selecting your arrow length from a manufacturer’s specifications.
Example: Let’s say you measure from the inside edge of your riser to your nocking point, and it’s 27 inches. If you’re adding 1.75 inches for clearance beyond the arrow rest (which is a very standard amount), your rough arrow length specification might be around 28.75 inches. However, manufacturers usually list arrow lengths in whole or half inches. So, you’d likely choose a 29-inch arrow.
Method 2: Measuring an Existing Arrow
If you have a set of arrows that currently shoot well, or if you’re getting advice from an experienced archer who has arrows you can borrow, measuring an existing arrow is a straightforward way to determine your correct length. Remember, this is if your current arrows are already the right fit!
What You’ll Need:
- A carbon arrow that fits you well (or one you’re testing)
- A Measuring Tape
Steps:
- Prepare the Arrow: Ensure the arrow is not nocked onto a bowstring.
- Find the Start Point: Place the tape measure against the inside of the nock. Measure from the inside bottom of the nock.
- Measure to the End of the Shaft: Extend the tape measure to the very end of the carbon shaft. Do NOT include the point (field point or broadhead) in this measurement.
- Record the Measurement: Note down this length. This is the “shaft length.”
Important Note: Arrow lengths are typically listed as “cut length” or “to nock groove.” Manufacturers often specify length from the throat of the nock to the end of the shaft. So, if you measure 28 inches from the inside of the nock to the end of the shaft, you would generally look for a 28-inch cut carbon arrow.
Understanding Arrow Spine and Length Interaction
While this guide is about determining arrow length, it’s worth a brief mention of “spine.” Spine refers to the stiffness of an arrow shaft. A shorter arrow is stiffer than a longer arrow of the same model. This means if you cut an arrow that’s too long down significantly, you might make it too stiff for your bow, affecting its performance. Conversely, if you shoot an arrow that’s too short, it might be too flexible. Manufacturers provide spine charts that correlate arrow length with the correct spine stiffness for specific draw weights and bow types. Always consult these charts when choosing new arrows.
For example, a common range for beginner compound bows (30-50 lbs draw weight) might typically use arrows ranging from 26 to 30 inches. However, the spine rating is critical. A 400 spine arrow cut to 28 inches will have a different actual stiffness than the same 400 spine arrow cut to 26 inches.
You can find helpful spine charts from reputable archery manufacturers or retailers. Many online archery shops provide detailed resources. For instance, Lancaster Archery Supply, a highly respected source in the archery community, offers a wealth of information, including spine selection guides that often help beginners understand these nuances. (https://www.lancasterarchery.com/)
Factors Influencing Your Arrow Length
Beyond the basic measurement, a few other things can fine-tune your ideal arrow length.
Bow Type
- Compound Bows: These often have a more consistent point from which to measure. The 1.75-inch clearance rule is very common here to ensure the arrow clears the riser and other accessories.
- Recurve Bows: They also benefit from proper arrow length. Measurement is similar, focusing on clearing the rest and any center shot window.
- Traditional (Longbow/Take-down Recurve) Bows: For simplicity, many traditional shooters like to have their arrow points sit about an inch or so forward of the riser, so the shaft extends about an inch beyond the arrow rest. This can sometimes result in a slightly shorter arrow compared to compound, but it’s about function and feel.
Arrow Rest Type
Different arrow rests might require slightly different clearances. Drop-away rests, for example, retract upwards, so ensuring the arrow is long enough to clear it smoothly during its arc is key. Most standard rests, like the stick-on or blade rests, work well with the 1.75-inch clearance guideline.
Shooting Style
Some archers have a very consistent anchor point and release. Others might have a slightly more variable technique. While the 1.75-inch clearance is a great starting point, very experienced archers might make minor adjustments based on their personal shooting habits and bow tuning.
Common Mistakes to Avoid
Getting your arrow length wrong is frustrating. Here are common pitfalls and how to sidestep them:
- Forgetting Clearance: The most frequent mistake is only measuring to the arrow rest or nocking point without adding the crucial clearance length. This leads to arrows flexing too much.
- Including the Point: When measuring an existing arrow, don’t measure the point. The point’s length can vary significantly between field points, broadheads, and even different brands of the same type.
- Inaccurate Measuring Tools: Using a flimsy or stretched measuring tape can lead to incorrect measurements. Use a reliable tape.
- Assuming All Arrows Are the Same: Even arrows of the same model can have slight manufacturing variations. Always double-check.
- Not Consulting Spine Charts: Cutting an arrow too short can make it too stiff, and too long makes it too weak. Always check how length affects spine.
Arrow Lengths: A General Comparison (for Common Bow Weights)
This table provides a very general idea of arrow lengths often used with common draw weights. Remember, draw length and specific bow mechanics play a much bigger role. Always measure your specific bow setup!
| Typical Bow Draw Weight (lbs) | Common Arrow Length Range (inches) | Typical Spine Rating Range |
|---|---|---|
| 20-30 | 26-28 | 500-700+ |
| 30-40 | 27-29 | 400-600 |
| 40-50 | 28-30 | 300-500 |
| 50-60 | 29-31 | 250-400 |
| 60+ | 30-32+ | 200-350 |
This table is for illustrative purposes only. Your draw length (the distance your fingers pull the string back from the bow riser) is a primary driver of arrow length. For example, someone with a long draw length and a 40-pound bow might need a 30-inch arrow, while someone with a shorter draw length on the same bow might need a 28-inch arrow. The best way to determine is through the measurement methods described earlier.
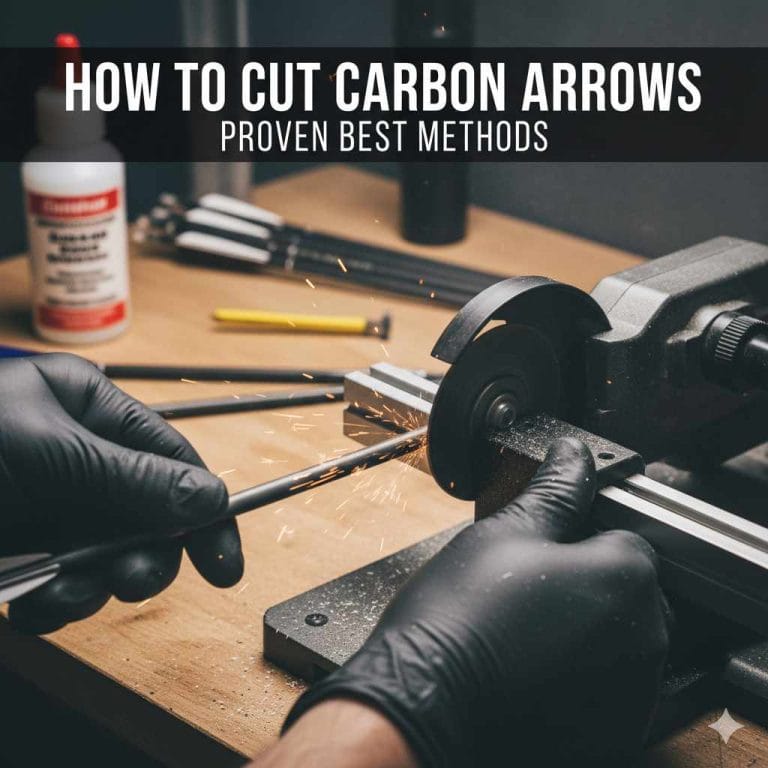
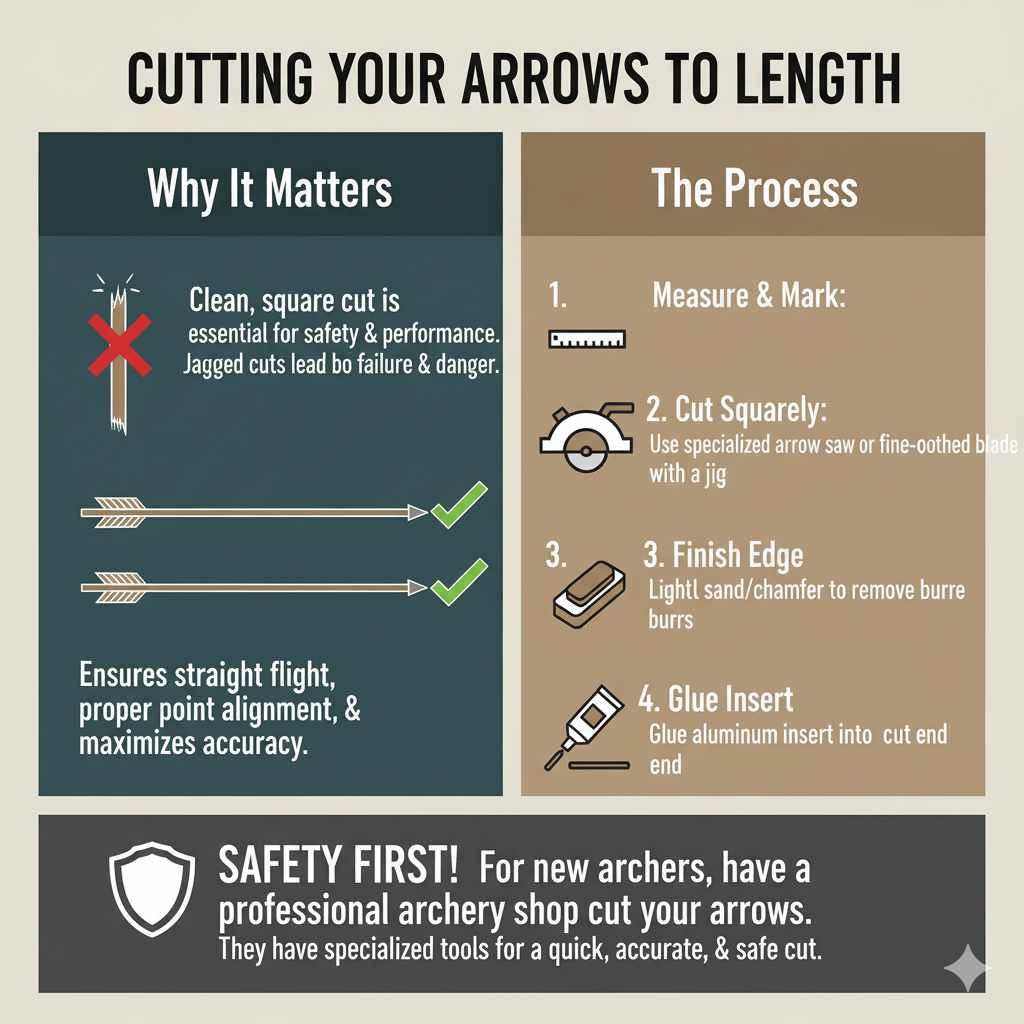
Cutting Your Arrows to Length
Once you’ve determined the correct length, you may need to cut your carbon arrows. This is a task best done with proper equipment to ensure a clean, square cut, which is essential for safety and performance. Carbon arrows must be cut with a specialized arrow saw or a very fine-toothed blade with a jig to ensure the cut is perfectly straight and doesn’t splinter the carbon. Jagged or angled cuts can lead to arrow failure or dangerous conditions. Many archery shops offer arrow cutting services if you don’t have the right tools. Always ensure your cut end is smooth and square before installing inserts.
When cut, the new end of the shaft is where your insert will be glued. The insert then provides a threaded hole for your field point or broadhead. The process usually involves:
- Measuring and marking the exact cut line on the arrow shaft.
- Using an arrow saw or a fine-toothed blade and jig to make a precise, square cut.
- Lightly sanding or chamfering the cut edge to remove any sharp burrs.
- Gluing the aluminum or nock-end insert into the cut end of the shaft.
For safety reasons, it’s often best to have a professional archery shop cut your arrows, especially if you are new to archery. They have the specialized equipment to do it quickly, accurately, and safely. The Eastern Archery Association is a good resource for general archery advice, though they may not specifically detail arrow cutting.
FAQ: Your Carbon Arrow Length Questions Answered
Q1: What is the most accurate way to measure arrow length?
A1: The most accurate way for beginners is to measure from the inside edge of the bow riser (in front of the arrow rest) to the nocking point on the string and then add the standard 1.75 inches for clearance past the arrow rest. This ensures the arrow will clear your bow cleanly.
Q2: Should I include the arrow point when measuring?
A2: No, you should never include the arrow point (field point or broadhead) in your measurement for arrow length. Arrow length is typically measured from the nock groove to the end of the carbon shaft.
Q3: My arrows feel a bit wobbly when they fly. Could it be the length?
A3: Yes, it absolutely could be! If your arrows are too short, they can flex excessively (“porpoising”) as they leave the bow, causing wobbling. If they are too long, they might be too weak for your bow’s draw weight, also causing flight issues. Ensuring the correct length is crucial for stable flight.
Q4: What if I don’t have a clear nocking point on my string yet?
A4: If you don’t have a nocking point installed, you can use the general area where the arrow nock would sit on the string for your measurement. However, it’s highly recommended to get a nocking point installed by a qualified pro shop or learn to do it yourself. It significantly improves consistency. In the meantime, estimate the point where the arrow sits.
Q5: What is “arrow clearance,” and why is it important?
A5: Arrow clearance refers to the space an arrow needs to fly freely away from your bow, especially the riser and any accessories. Adding about 1.75 inches past the arrow rest ensures the arrow shaft and fletching have enough room to pass the bow without hitting it during the shot. This is vital for accuracy and preventing damage to your arrow or bow.
Q6: Do compound bows and recurve bows have different arrow length requirements?
A6: The measurement method is similar, but the exact length can differ due to the bow’s geometry and accessories. For example, compound bows often have more accessories that the arrow must clear. However, focusing on measuring from the riser and adding clearance applies to both types. Always measure your specific bow.
Conclusion
Determining the right carbon arrow length is a foundational step in your archery journey. It’s not just about picking a number; it’s about ensuring your arrows fly straight, true, and safely. By following the measurement techniques outlined in this guide, you can confidently select or prepare arrows that work in harmony with your bow.