Bolded Quick Summary: Installing brass inserts into carbon arrow shafts is a simple process involving measuring, gluing, and curing. This guide breaks down the exact steps, tools, and safety precautions needed to securely set your inserts, ensuring your carbon arrows are balanced and ready for accurate shooting.
Welcome to the world of precise arrow tuning! If you are getting serious about archery, you might have heard about upgrading to brass inserts for better front-of-center (FOC) weight, which greatly aids in arrow flight stability. Many beginners feel nervous about modifying their expensive carbon arrows. I understand that feeling. It seems delicate, but trust me, installing brass inserts—the small metal pieces that hold your broadheads or field points—is easier than you think when you follow clear directions. We will walk through this step-by-step, making sure you handle your carbon shafts correctly and achieve a rock-solid fit. Get ready to boost your arrow performance without the stress!
Why Upgrade to Brass Inserts for Carbon Arrows?
Before we start gluing, let’s quickly understand why archers, especially those aiming for better accuracy, swap out standard aluminum inserts for brass ones. It all comes down to weight distribution and durability.
The Role of Front-of-Center (FOC) Weight
The secret to a stable arrow flight is proper FOC. This measurement tells you how much of the arrow’s total weight is concentrated toward the front (the tip end).
- Stability: A higher FOC (generally 10% to 15% for hunting or target setups) makes the arrow fly straight, much like how a dart flies true.
- Penetration: Heavier points translate to better energy transfer upon impact, crucial for big game hunting.
- Brass Advantage: Brass is significantly denser than aluminum. By using brass inserts, you add weight right where you need it without adding much bulk to the overall arrow diameter. This easy weight addition is the main reason archers choose them.
Durability and Consistency
Brass is tougher. When you screw and unscrew broadheads or field points repeatedly, aluminum inserts can wear out internally, leading to a loose fit. Brass holds those threads much longer, ensuring consistent point attachment shot after shot.
Gathering Your Tools: What You Need for a Successful Installation
Preparation is key! Having the right, clean materials on hand prevents mistakes down the line. Here is your essential checklist for installing brass inserts successfully.
Essential Equipment List
Make sure to procure these items before you sit down at your workbench. Safety first—always wear eye protection when working with strong adhesives or cutting tools.
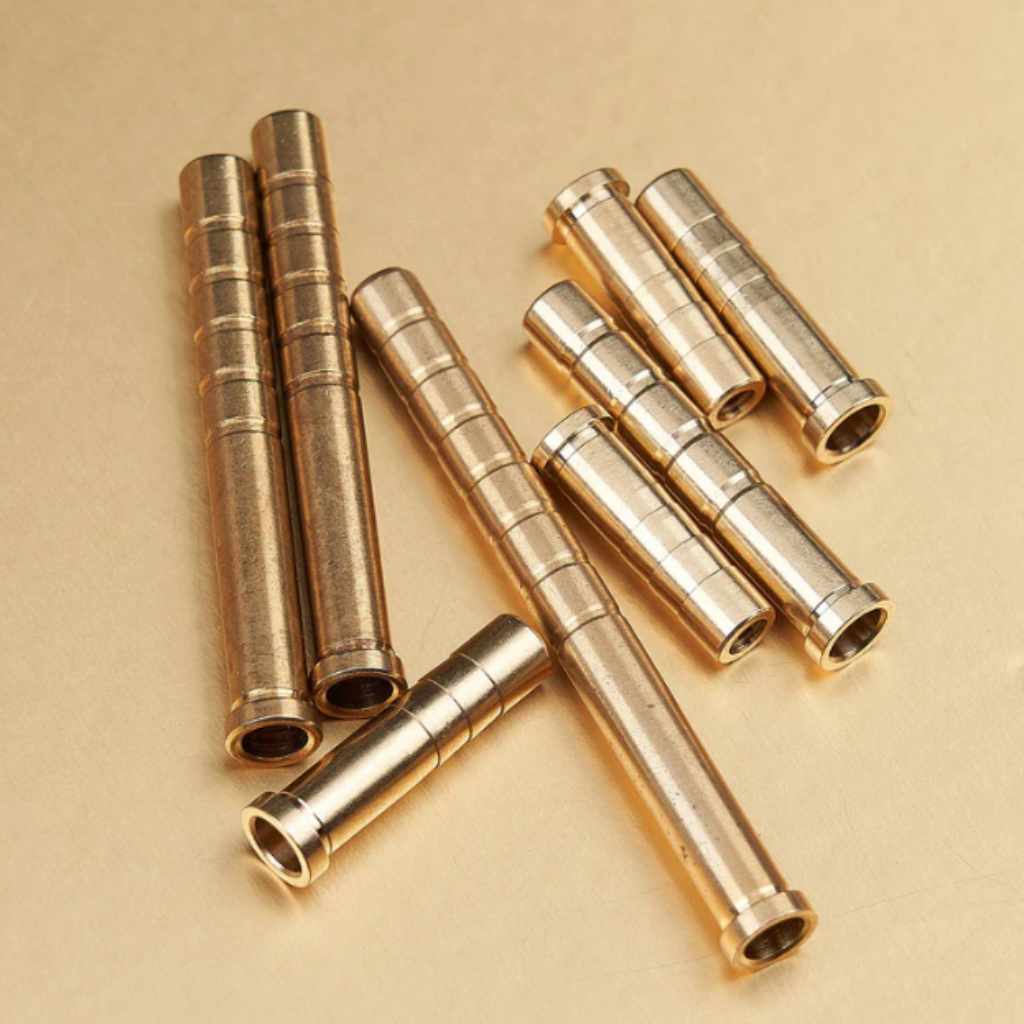
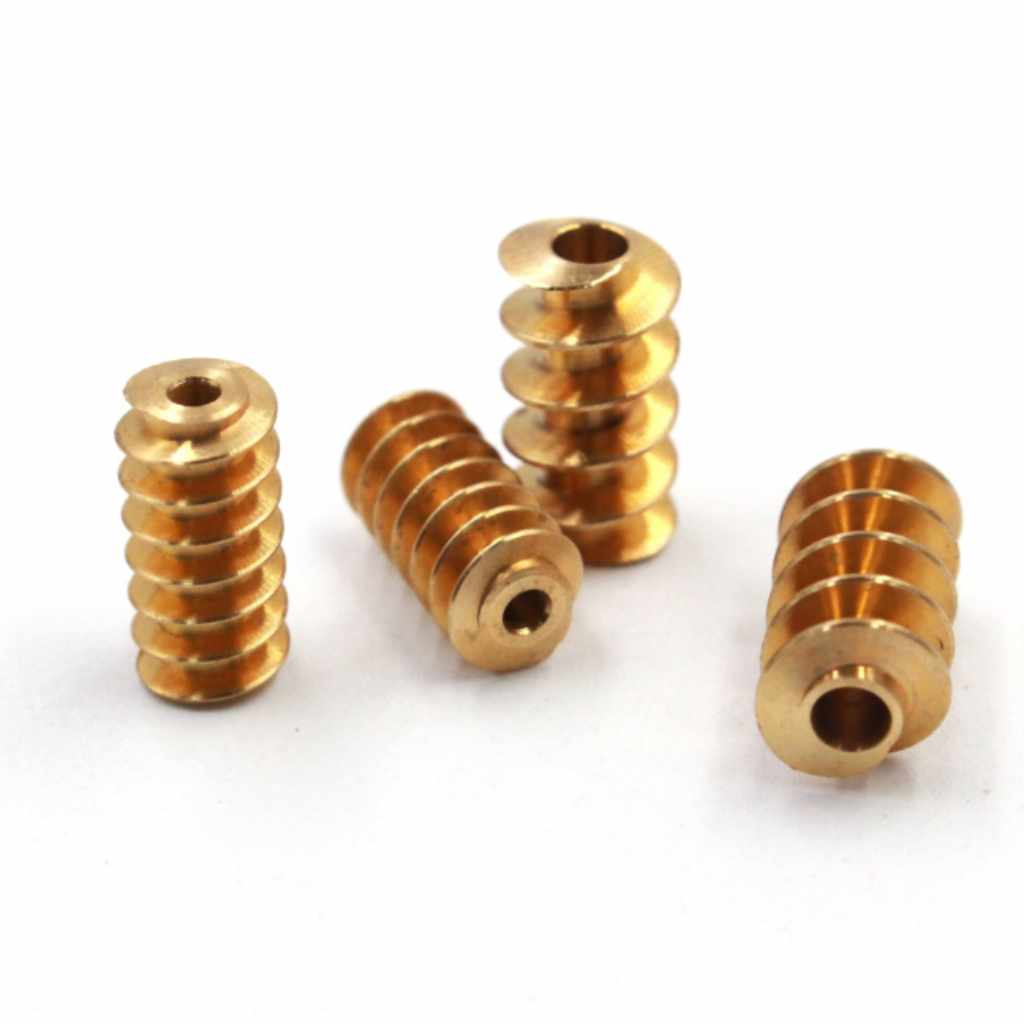
- Brass Inserts: Ensure these match the outer diameter (OD) and inner diameter (ID) of your carbon arrow shaft precisely. Common sizing is 0.245″ or 0.297″ for standard target/hunting arrows.
- Appropriate Carbon Arrow Shafts: These should be cut to your finished length already.
- High-Quality Carbon Arrow Insert Glue: Most archery experts recommend a strong, slow-curing epoxy or specialized carbon arrow glue. Avoid simple superglue (CA glue); it often fails under the stress of shooting. Look for products designed for bonding dissimilar materials, like those used in high-end shaft assembly.
- Acetone or Denatured Alcohol: For cleaning surfaces—crucial for a strong bond.
- Clean, Lint-Free Rags or Cotton Swabs.
- A Precise Measuring Device: Calipers or a very accurate ruler.
- A Deburring Tool or Fine Sandpaper (Small grit, like 400-600): For surface prep inside the shaft.
- Safety Glasses.
Pro Tip: When buying glue, remember that slow-curing epoxy often provides a stronger, more flexible bond than fast-setting glues, giving you a little more time to work and ensuring better adhesion deep inside the shaft.
Step-by-Step Guide: How to Install Brass Inserts in Carbon Arrows
We will break this process down into three manageable phases: Preparation, Installation, and Curing. Follow these steps closely, and your new inserts will be solid as a rock.
Phase 1: Preparation – The Key to Adhesion
A clean surface is a glued surface! Any oil, dust, or residue inside the arrow shaft will prevent your glue from bonding correctly. This preparation step cannot be rushed.
Step 1: Determine the Insert Depth
Before you insert anything, you need to know how far in the insert needs to go. This is usually determined by the manufacturer’s recommendation or the length needed to flush with the internal nock adapter, but generally, you want the insert to sit slightly recessed—enough so the tip screws in without bottoming out before the threads engage fully, but not so deep that it interferes with the nock system.
- Measure the length of the brass insert.
- Mark the desired seating depth on the inside of your arrow shaft using a pencil mark on a thin dowel or a piece of scrap wire. Some archers prefer marking the outside of the arrow shaft itself.
Step 2: Cleaning the Shaft Interior
This is the most vital step for longevity. We must remove any mold release agents or factory residues.
- Pour a small amount of acetone (or quality denatured alcohol) into the front (tip end) of the carbon arrow shaft.
- Swirl the solvent around thoroughly for about 30 seconds.
- Pour the solvent out immediately onto a rag. Do not let it pool inside.
- Repeat this process two more times until the rag comes away relatively clean.
- Allow the shaft to air dry completely. This might take 5–10 minutes. Ensure no fumes remain.
Step 3: Roughing the Insert Surface (Optional but Recommended)
Very fine abrasion helps give the glue something physical to grip onto.
- If your inserts are smooth, lightly score the outer edge of the whole surface of the brass insert using very fine grit sandpaper (e.g., 600 grit). Do not remove a lot of material; just scratch the surface lightly.
- Wipe the insert down with a clean rag lightly dampened with acetone to remove any brass dust.
Phase 2: Mixing and Applying the Adhesive
Work in a well-ventilated area. Once the glue is mixed, you have limited working time (pot life).
Step 4: Mixing the Epoxy
If you are using a two-part epoxy, carefully mix the resin and hardener according to the manufacturer’s instructions. For specialized single-part carbon glues, follow their specific activation process. Mix thoroughly until the color is uniform—no streaks!
Step 5: Applying Glue to the Insert
You want full coverage, but not so much glue that it oozes uncontrollably.
- Use the end of a clean cotton swab or a small applicator to coat the brass insert thoroughly.
- Apply a thin, even layer over the entire surface that will sit inside the carbon shaft.
- Do not apply glue directly to the inside of the carbon shaft unless your glue instructions specifically call for it; usually, focusing the glue on the insert ensures the best seal.
Phase 3: Installation and Curing
Now we bring it all together. Work deliberately and smoothly.
Step 6: Inserting the Brass Insert
Insert the glued brass insert into the front (tip end) of the arrow shaft.
- Slide it in smoothly. Avoid twisting, as this can scrape off the glue layer and introduce air bubbles.
- Push it in until you hit your predetermined depth marker (from Step 1). A clean push is better than forcing it.
- If you feel too much resistance, pull it out, wipe off the excess glue, reapply a thin layer, and try again. Air bubbles cause weak spots!
Step 7: Cleaning Up Excess Glue
This step is important for aesthetics and function.
- As you push the insert in, some glue will likely squeeze out around the circumference at the opening of the shaft.
- Immediately use a clean rag or cotton swab dipped slightly in acetone to wipe away any visible excess glue from the outside edge of the carbon shaft. This prevents a messy look and ensures your point threads smoothly later.
Step 8: Curing Time
Patience pays off here. The bond needs time to fully harden and achieve maximum tensile strength.
- Set the arrows aside horizontally where they will not be disturbed.
- Check your epoxy/glue instructions. Most high-strength bonding agents require at least 12–24 hours to set enough to handle, but 48–72 hours for a full cure under load.
- Do NOT install points or attempt to test the strength of the bond until the recommended cure time has passed. Rushing this will almost certainly lead to a loose insert later.
Troubleshooting Common Concerns for Beginners
Even when following steps perfectly, questions pop up. Here are a few common issues beginners face when first installing specialized components like brass inserts.
What If the Insert Doesn’t Fit Snugly?
If the brass insert is loose before applying glue, you have a problem with sizing. Carbon arrows are manufactured within tight tolerances. If the fit is too sloppy, the glue bond will likely fail under the shock of impact.
Solution: You might need a specialty wrap, or you may have the wrong size insert. For small gaps, some archers use thread tape (Teflon tape) sparingly on the insert surface before gluing, but for carbon shafts intended for high-speed bows, getting the correct size is paramount. If in doubt, contact the arrow manufacturer or a reputable archery pro shop.
How Can I Ensure the Glue Penetrates Fully?
If you are worried about voids (air pockets), try this advanced technique (only if your glue allows for it): after applying the glue, gently thread a field point into the insert a few rotations, then immediately back it off. This slight drawing action can help pull the glue deeper into the micro-gaps between the brass and the carbon wall. Remove the point before the curing begins.
Do Different Glue Types Matter?
Yes, significantly. For structural components like inserts, you need high shear strength. Here is a quick look at common adhesive choices:
| Glue Type | Best For | Why It’s Good/Bad |
|---|---|---|
| 2-Part Epoxy (Slow Cure) | Maximum Strength Bonds | Excellent gap-filling and structural strength. Slower working time, allowing for repositioning. |
| Specialized Carbon Glue | Manufacturer Recommended Systems | Often formulated specifically for the interaction between carbon fiber and metal. Highly reliable. |
| CA Glue (Super Glue) | Quick, Temporary Repairs (Not Recommended Here) | Too brittle. It can crack instantly upon a hard landing or impact, creating immediate failure point. |
Safety and Precision: Handling Carbon Components
Carbon arrows are lightweight and fast, but the material itself requires respect during modification.
Carbon Dust Hazard
When sanding the inside of the shaft or sanding the brass insert, you create carbon dust. Inhaling fine carbon particles is hazardous to your lungs. This is why preparation work must be done carefully in a well-ventilated space.
- Always use a good quality dust mask or respirator during any sanding of the carbon shaft interior.
- Wipe surfaces clean rather than brushing off dust, which can aerosolize the particles.
External Resources for Arrow Building Standards
For detailed technical specifications regarding arrow spine, FOC calculation, and component guidelines, referencing established industry standards is crucial. Organizations like the National Field Archery Association (NFAA) often publish resources detailing best practices for safe and effective arrow customization. Check their official publications for advanced tuning tips, which rely on components like these brass inserts being perfectly seated!
Integrating Brass Inserts with Components: The Final Fit
Once your glue has fully cured (wait the full recommended time!), it’s time to seat your field points or broadheads and check your work.
A Note on Thread Compatibility
Most modern brass inserts are designed for standard 8-32 threads (for field points) or specialized broadhead mounting threads. Always ensure the thread of your tip matches the insert you bought. Some high-end brass inserts come with proprietary systems.
Testing the Connection Strength
Once the point is screwed in, gently pull on the point while carefully holding the shaft. You should feel zero wiggle or play where the point meets the insert, and the insert itself should feel immovable inside the carbon shaft.
When you screw the point in, make sure it seats perfectly flush or just slightly recessed against the brass seat. If the point bottoms out against the glue surface before the threads fully engage, your FOC will be slightly off, and the point might loosen easier. This confirms why setting the correct seating depth in Step 1 is so important.
For serious hunting, always use a high-quality thread-locking compound (which is removable with heat or specific solvents) on the threads of your broadheads after you have zeroed your bow. This prevents vibration from unscrewing your expensive hunting heads downrange.

Frequently Asked Questions (FAQ) about Brass Arrow Inserts
Q1: Do I need to rough up the inside of my carbon arrow shaft before gluing the insert?
A: Simply cleaning with acetone is often enough, but lightly abrading the carbon interior with very fine sandpaper (400 grit or higher) gives the epoxy a better mechanical bite. Always clean the dust away afterward.
Q2: How long do I have to work once I mix the epoxy?
A: This depends entirely on the epoxy. Standard 5-minute epoxy gives you very little time. For arrow inserts, an epoxy with a 30-minute to 2-hour working time (pot life) is usually better, allowing you to insert it perfectly without rushing.
Q3: Can I use Gorilla Glue or standard wood glue on carbon arrows?
A: Absolutely not. These glues lack the necessary shear strength and flexibility required to hold up against the extreme vibrations and forces generated when a carbon arrow is shot from a modern bow. Stick strictly to high-quality 2-part epoxy or specialized archery adhesives.
Q4: What should I do if I accidentally push the insert too deep?
A: If you realize too late that it’s too deep before the glue sets, carefully try to pull it out with a clean dowel and a small amount of suction. If the glue has started to set, you might need to risk slowly wiggling it out, wiping the glue off both surfaces, and starting over with a fresh application. If the glue is fully cured, removing it usually means cutting the carbon shaft or using specialized chemical removers, which might ruin the shaft.
Q5: How does adding brass inserts affect my arrow spine rating?
A: Adding weight to the front of the shaft effectively makes the arrow effectively stiffer because the center of mass shifts forward. However, the actual physical spine rating of the carbon tube itself remains the same. When tuning, be aware that your setup will tune slightly differently than with lighter inserts, usually requiring minor sight adjustments.
Q6: Is it safe to heat the joint later if I need to remove the brass insert?
A: Yes, controlled heat is the standard removal method. Applying gentle heat (like from a hairdryer or a heat gun on a very low setting, never a direct torch) softens the epoxy, allowing you to twist the insert out. Be careful not to overheat the carbon itself, as excessive heat can damage the structural integrity of the shaft material, often cited as anything over 250°F (121°C).
Conclusion: Confident Tuning for Better Shooting
You’ve done it! By taking the time to carefully clean the carbon, select the right adhesive, and ensure that brass insert is seated perfectly flush, you’ve made a significant upgrade to your archery setup. Installing brass inserts might seem like a technical task reserved for professional tuners, but as we’ve seen, it’s really about methodical preparation and patience during the curing phase.
Remember, the strength of your arrow setup rests on those crucial connection points. A perfectly seated brass insert means better FOC, more stable flight, and the supreme confidence that when you draw back your bow, your arrow is ready to perform exactly as intended. Go ahead, finish setting your points, head to the range, and enjoy the noticeably improved performance that properly tuned arrows bring to your archery experience. Happy shooting!