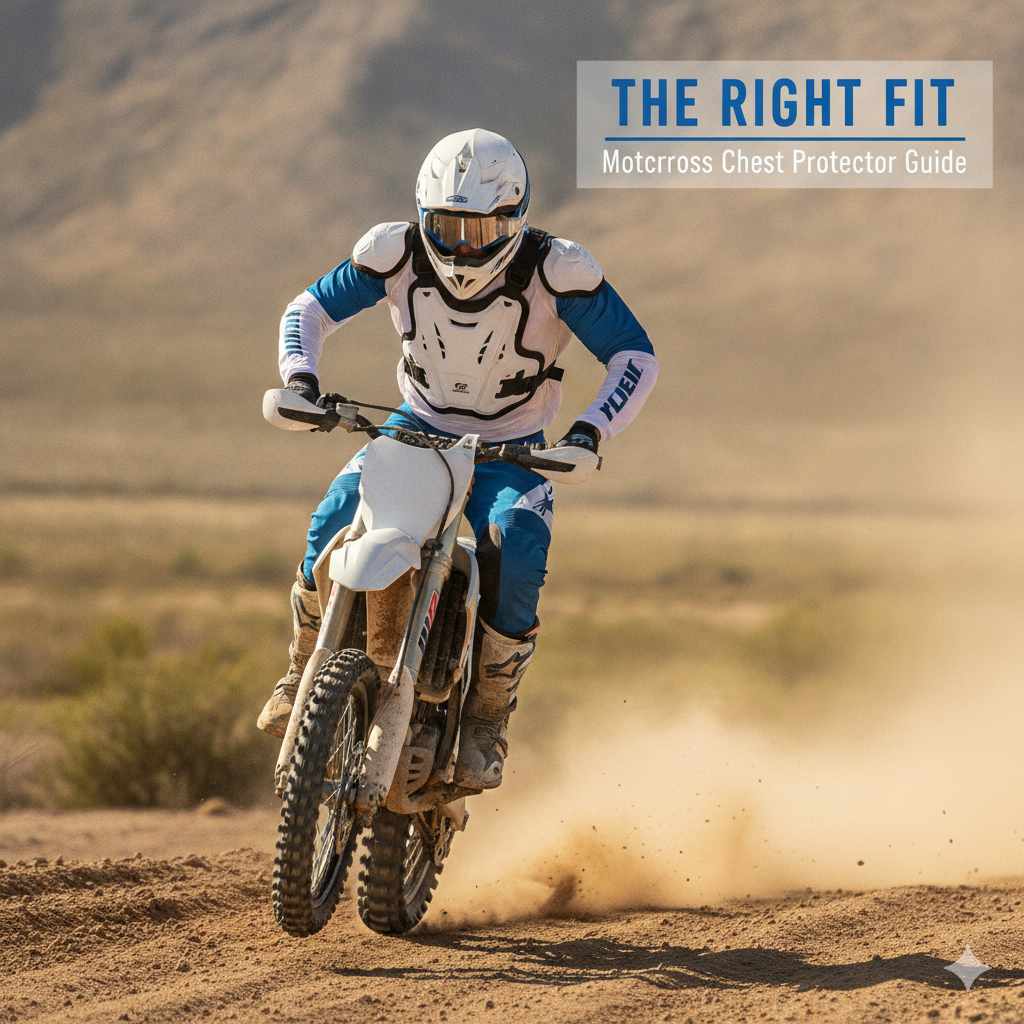
How A Motocross Chest Protector Should Fit
A motocross chest protector should fit snugly but not too tight, allowing full range of motion without pinching or rubbing. It should cover your sternum and ribs completely, with no gaps at the shoulders or waist. The straps should be adjustable and secure, keeping the protector in place during riding.
Understanding Chest Protector Fit
It’s a common question for anyone new to motocross, or even those looking to upgrade. You’ve got your bike, your gear is mostly sorted, but then you stare at that pile of chest protectors. They all look a bit different, and you wonder: how am I supposed to know if this thing actually fits right?
Getting the fit wrong means it might not do its job when you need it most. Or, it could just be super uncomfortable and distracting. That’s no fun when you’re trying to focus on the track.
Let’s dive into what makes a good fit.
What is a Motocross Chest Protector?
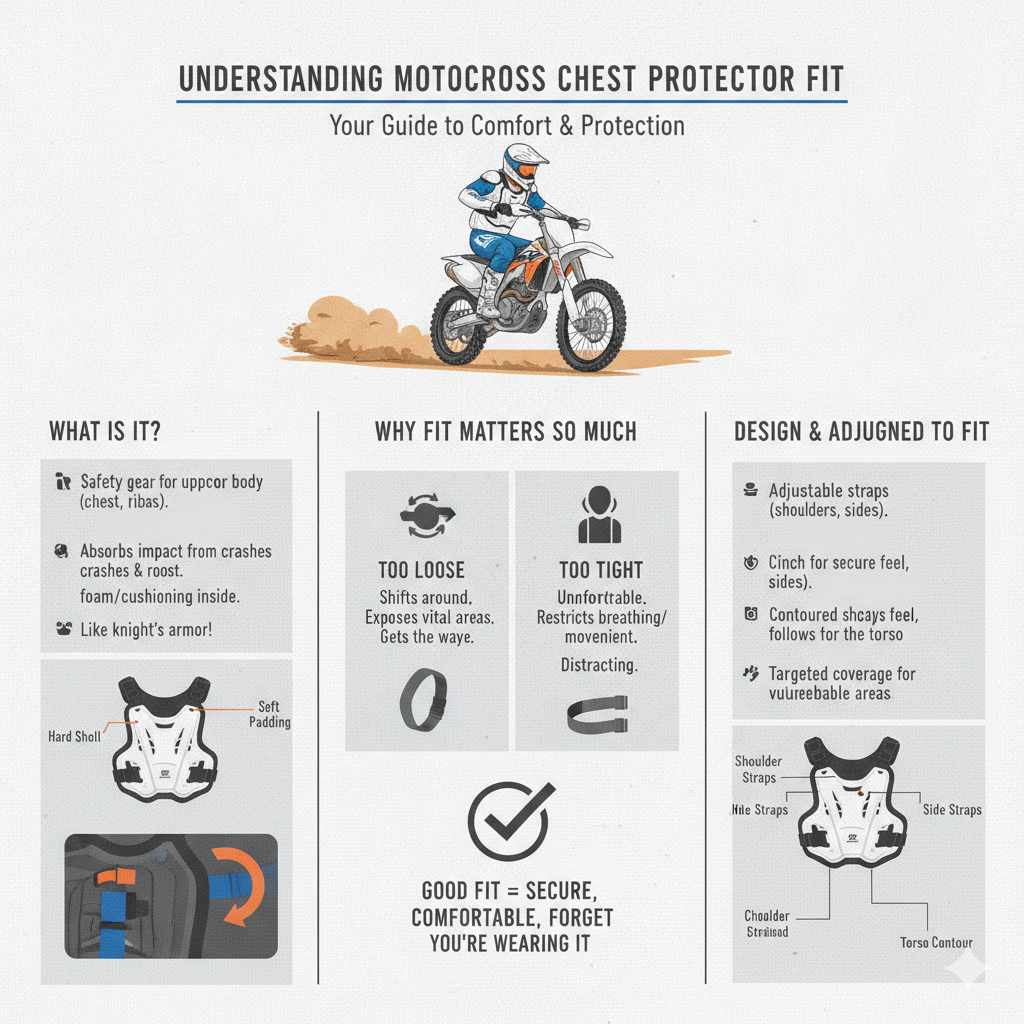
Simply put, a motocross chest protector is a piece of safety gear. It shields your upper body. This includes your chest, ribs, and often your back.
Its main job is to absorb impact. This protects you from crashes and roost (rocks and dirt thrown by other bikes).
Think of it like a knight’s armor. It’s designed to take the hit so you don’t have to. They are usually made of hard plastic.
This is often backed with foam or other cushioning material. This combination is key to its protective power.
Why Fit Matters So Much
Fit is everything with safety gear. If it doesn’t fit well, it won’t work right. A protector that’s too loose might shift around.
It could expose areas that need protection. It might even get in your way as you ride.
On the flip side, one that’s too tight can be very uncomfortable. It can restrict your breathing or movement. This can make you tired faster.
It can also be a distraction, taking your mind off riding safely. A good fit means you forget you’re even wearing it.
How They Are Designed to Fit
Most chest protectors are designed with adjustability in mind. They usually have straps. These straps go over the shoulders and around the sides.
This lets you cinch them down or loosen them. The goal is a secure feel. It should hug your body without squeezing.
The shape of the protector itself is also important. It’s made to follow the contours of your torso. This helps it sit flat.
It also reduces the chance of snagging on things. The coverage area is also carefully designed. It aims to protect the most vulnerable parts of your upper body.
My First Time Trying One On
I remember my first time buying a chest protector. I was so excited to get out on the track. I walked into the gear shop and saw them hanging up. They looked pretty bulky. I grabbed one that looked cool. I tried to put it on, but the straps were confusing. I fiddled with them for a bit. It felt kind of weird. It was tight in some spots and loose in others. I thought, “This must be how it’s supposed to be.” I bought it and headed home.
The next weekend, I went riding. During the first lap, I could feel it digging into my shoulders. When I tried to lean forward, it felt stiff. I kept adjusting it. I was so focused on the discomfort. I wasn’t even thinking about the ride. I remember a friend noticing. He said, “Hey, that thing looks like it’s about to fall off.” That’s when I knew something was wrong. I ended up taking it off for the rest of the day. It was just too uncomfortable to wear. That experience taught me a lot about what a bad fit feels like.
Chest Protector Fit Checklist
Shoulders: Straps should not dig in. They should rest flat.
Chest: Should be fully covered. No gaps over sternum.
Ribs: Sides should feel protected. No pinching.
Waist: Straps should hold it snug. Not ride up.
Movement: You should be able to move freely. Bend and twist easily.
Sizing Your Motocross Chest Protector
How to Find Your Size
Most chest protectors use a general sizing system. This is often based on your chest measurement. Some might use your height or weight.
Always check the manufacturer’s size chart. These charts are usually on the product page online. Or they’re on a tag inside the gear.
To measure your chest, use a soft tape measure. Wrap it around the fullest part of your chest. This is usually right across your nipples.
Keep the tape measure snug but not tight. It should be level all the way around.
Understanding the Numbers
The size chart will give you a range of measurements. For example, it might say “Medium: 36-40 inches.” If your chest measures 38 inches, a medium should fit. It’s important to note that these are guidelines.
Body shapes vary.
Some brands might run larger or smaller. This is why trying it on is best if you can. If buying online, look at reviews.
See if other people mention sizing. Some reviews might say, “runs small” or “true to size.” This can be very helpful.
Size Chart Tips
Always check the brand’s chart. Don’t assume.
Measure yourself accurately. Use a soft tape.
Consider your body shape. Are you broad-shouldered? Slim?
Read reviews. They offer real-world sizing insights.
When in doubt, size up. You can often adjust down.
Trying It On: The Crucial Step
When you try on a chest protector, wear the kind of clothes you’d ride in. This usually means a jersey. The jersey adds a layer.
It affects how the protector sits. Put the protector on. Adjust the shoulder straps first.
They should sit comfortably on your shoulders. They shouldn’t dig in or feel too loose.
Next, adjust the side straps. These often use Velcro or buckles. You want them snug.
The protector should stay in place. It shouldn’t move when you push on it. You should be able to take a deep breath without feeling restricted.
Bend forward, backward, and twist your torso. The protector should move with you. It shouldn’t bind or chafe.
Common Fit Mistakes and How to Avoid Them
Mistake 1: Too Loose
This is a big one. A chest protector that’s too loose is useless. It can slide around.
It might not cover you properly. This leaves you exposed. It also means it can’t absorb impact effectively.
Imagine wearing a shield that flops around – not very helpful.
How to avoid it: Use all the adjustment points. Make sure the side straps are secure. If it’s still too loose, it might be the wrong size.
Or, it might not be the right design for your body type. Some protectors have more adjustability than others.
Loose Protector Signs
- Shifts when you move.
- Gaps appear at the sides or shoulders.
- Can be easily pushed around.
- Doesn’t feel secure.
Mistake 2: Too Tight
This is uncomfortable and can be dangerous. A protector that’s too tight can restrict breathing. This makes you tired quickly.
It can also limit your movement. You might feel like you can’t reach the handlebars properly. Or you might struggle to shift your weight.
How to avoid it: If you can’t take a full breath, it’s too tight. If it pinches or digs in anywhere, it’s too tight. You should feel supported, not squeezed.
Make sure the straps are not over-tightened. You need room for a jersey underneath too.
Tight Protector Signs
- Restricts deep breathing.
- Causes pinching or rubbing.
- Limits arm or torso movement.
- Feels like it’s constricting you.
Mistake 3: Wrong Style for Your Body
Not all chest protectors are created equal. Some are bulkier. Others are more streamlined.
Some have different strap designs. What fits one person perfectly might not work for another. This is especially true if you have a unique body shape.
How to avoid it: Try different brands and styles. Look for protectors known for their adjustability. If you have a very athletic build, you might need something with more flex.
If you’re slimmer, you might need a protector that can cinch down really small.
Style Matchup
Sleek & Streamlined: Good for racers. Less bulk. Less snagging.
Might offer less coverage.
Full Coverage: Offers maximum protection. Can be bulkier. Better for aggressive riding or beginners.
Articulated Designs: Move better with the body. Less restrictive. Can be more complex to fit.
Mistake 4: Ignoring Shoulder and Side Straps
These straps are the key to a good fit. They allow you to customize how the protector sits on your body. Many people just cinch them down as tight as they can.
Or they leave them too loose. This is a mistake.
How to avoid it: Spend time adjusting these. The shoulder straps help set the height. The side straps help secure the protector against your ribs.
They should be snug enough to prevent movement. But not so tight that they cause discomfort or restrict breathing. Think of them as fine-tuning controls.
Checking Coverage and Protection Levels
What Should Be Covered?
A good chest protector should cover your entire sternum. This is the breastbone. It should also extend down to protect your lower ribs.
Ideally, it should also offer some side protection for your rib cage. The shoulder areas should also be covered.
Look for protectors that offer ample overlap. This means the different pieces of plastic overlap each other. This helps prevent gaps.
When you move, these overlaps should stay in place. This ensures continuous protection.
Key Coverage Areas
Sternum: Your entire breastbone.
Ribs: Both front and sides of your rib cage.
Collarbone Area: Some protectors offer minor protection here.
Upper Abdomen: Important for impact absorption.
Understanding Different Protection Types
Protectors come with different certifications. The most common in the US is from the American Motorcyclist Association (AMA). Some protectors might have European certifications like CE.
These ratings tell you about the impact absorption capability.
Look for protectors that mention impact-resistant materials. This usually means hard plastic shells. They should also have some form of padding.
This padding absorbs shock. It makes the impact less jarring. More expensive protectors often use better materials.
They might also offer more adjustability.
Testing Coverage in Real-Time
While wearing the protector, try to mimic riding movements. Bend your elbows as if reaching for handlebars. Twist your body as if maneuvering the bike.
Look in a mirror if possible. Does the protector stay put? Are there any areas that become exposed when you move?
Imagine a fall. How would the protector distribute an impact? You can’t perfectly simulate this, of course.
But you can get a sense of its coverage. If you feel any sharp edges or areas that seem thin, that’s a concern.
The Role of a Jersey Over the Protector
How the Jersey Affects Fit
Your motocross jersey is not just for looks. It plays a role in how your chest protector feels. A loose, baggy jersey can bunch up.
This can create pressure points. It can make the protector feel awkward.
A tighter jersey will hug the protector. This can make it feel more integrated. However, it shouldn’t be so tight that it restricts you.
Many riders prefer a jersey that’s slightly looser than their everyday clothes. This allows for better movement with the gear underneath.
Jersey Fit for Protection
Room to Breathe: The jersey should allow the protector to sit flat.
No Bunching: Avoid excessive fabric folding under the protector.
Smooth Surface: A smoother jersey helps the protector slide easily if needed.
Layering: Remember you have a base layer, jersey, and protector.
Finding the Right Jersey Size
When buying a jersey to wear over a chest protector, consider sizing up. If you normally wear a large, you might need an extra-large. This gives you enough room.
It prevents the jersey from pulling or binding over the protector.
Try the jersey on with the chest protector. This is the best way to be sure. You should be able to move your arms freely.
The jersey should hang nicely. It shouldn’t be so tight that it outlines the protector too much. This can look awkward and feel restrictive.
Should You Wear a Jersey Inside or Outside?
Most riders wear their jersey over their chest protector. This is the standard practice. It keeps the jersey from snagging on branches or the bike.
It also helps hold the protector in place. It provides a smoother surface. This is important if you slide.
Occasionally, some riders might tuck their jersey in. But for motocross, wearing it out is more common. The key is that the jersey doesn’t interfere with the protector’s fit or function.
It should work together.
Real-World Scenarios: When Fit Really Counts
Scenario 1: The Unexpected Crash
You’re carving a turn. Your front wheel washes out. You go down hard.
You slide for a bit. The impact jars your chest. If your chest protector fit perfectly, it absorbed the hit.
It stayed in place. It protected your ribs and sternum. You might have some bruises, but you avoided a serious injury.
If the protector was too loose, it might have twisted. It might have shifted. It could have exposed your chest.
Or, if it was too tight, it might have concentrated the impact. It could have dug in. In either case, a bad fit makes the situation worse.
A good fit is a silent guardian.
Scenario 2: Long Ride Comfort
You’re out for a full day of riding. The sun is beating down. You’re doing lap after lap.
Your gear needs to be comfortable. If your chest protector is pinching your ribs or digging into your shoulders, you’ll be miserable. You’ll be distracted.
You might even cut your ride short.
A well-fitting protector feels like a part of you. You forget you’re wearing it. It allows you to focus on your riding.
It helps you conserve energy. Because it’s not causing discomfort, you can ride longer and stronger. Comfort directly impacts performance and endurance.
Fit in Action
Moment of Impact: A snug fit distributes force evenly.
Endurance: Proper fit prevents fatigue from discomfort.
Agility: Allows for free movement on the bike.
Focus: Eliminates distractions caused by ill-fitting gear.
Scenario 3: Navigating Technical Terrain
You’re picking your way through rocks and roots. You’re constantly shifting your weight. You’re leaning from side to side.
You need your body to be agile. Your gear needs to allow for this. A bulky or ill-fitting chest protector can hinder you.
If it’s too stiff or tight, it can restrict your ability to twist and turn. It might even get caught on things. A protector that fits well moves with you.
It feels like a second skin. This allows you to maintain balance and control. It’s crucial for technical riding.
When is Fit Not Quite Right? Simple Checks
The Shoulder Strap Test
Lift your arms straight up. Do the shoulder straps dig into your shoulders? Do they feel like they’re about to slip off?
When you bring your arms down, do they settle back into place easily? They should feel secure but not constricting.
If they constantly slide down, the protector is likely too big or the straps aren’t adjusted correctly. If they dig in, it’s too tight or the angle is wrong. You want them to sit flat and feel comfortable under your jersey.
The Torso Twist Test
Stand up straight. Now, twist your torso as far as you can to the left. Then to the right.
Does the protector move with you? Does it pinch your sides? Do you feel any pulling or resistance?
You should be able to twist easily.
If the protector feels like it’s stuck to one side, or it’s pulling away from your body, the fit isn’t optimal. This restriction can be a problem when riding. It affects your ability to control the bike.
Quick Fit Checks
Shoulder strap comfort: No digging, no slipping.
Torso twist freedom: Moves with you easily.
Deep breath: No restriction on your lungs.
No pinching: Sides and underarms are clear.
Stays put: Doesn’t shift when you move.
The Deep Breath and Bend Test
Take your deepest breath. Does the protector restrict your lungs at all? It shouldn’t.
It should allow your chest to expand fully. Then, bend forward at the waist. Does the protector dig into your stomach or chest?
It should follow your body’s natural curves.
These simple tests reveal a lot. If you feel any discomfort or restriction, it’s a sign the fit needs adjustment. Or it could mean the protector itself isn’t the right shape for you.
Adjusting Your Chest Protector for the Perfect Fit
Mastering the Shoulder Straps
Shoulder straps are usually adjustable with Velcro or buckles. Start by loosening them. Put the protector on.
Then, pull the straps snug. They should rest on the top of your shoulders. They should not fall off.
They also should not dig into your skin.
The goal is to get the protector hanging at the right height. You want it to cover your sternum fully. You might need to experiment.
Try different tension levels. Ensure they are even on both sides. This is a key step in setting the initial fit.
Fine-Tuning the Side Straps
These straps are often around the back or sides. They might be elastic with Velcro or have plastic buckles. Tighten these straps until the protector feels secure.
It should not move when you push on it. But it should not be so tight that it’s painful.
These straps are what really hold the protector against your body. Make sure they are flat. They should not be twisted.
Proper adjustment here prevents the protector from riding up. It also helps keep it from shifting side-to-side. This is critical for consistent protection.
Adjustment Strategy
Shoulders First: Set the height and initial hold.
Sides Next: Secure it firmly but comfortably.
Test Movement: Bend, twist, and breathe deeply.
Fine-Tune: Make small adjustments as needed.
Jersey Layer: Always adjust with your jersey on.
Making It Work with Your Jersey
Once you have the protector adjusted, put your jersey on. Do a final check. Does the jersey bunch up anywhere?
Does it make the protector feel tighter or looser? You might need to slightly re-adjust the protector straps.
Sometimes, the jersey itself can interfere. If you have a very baggy jersey, it might sag. This can cause the protector to sit lower.
If your jersey is too tight, it can pull the protector. Finding the right balance between your jersey and protector is important.
When to Consider a New Protector
Signs Your Protector is Worn Out
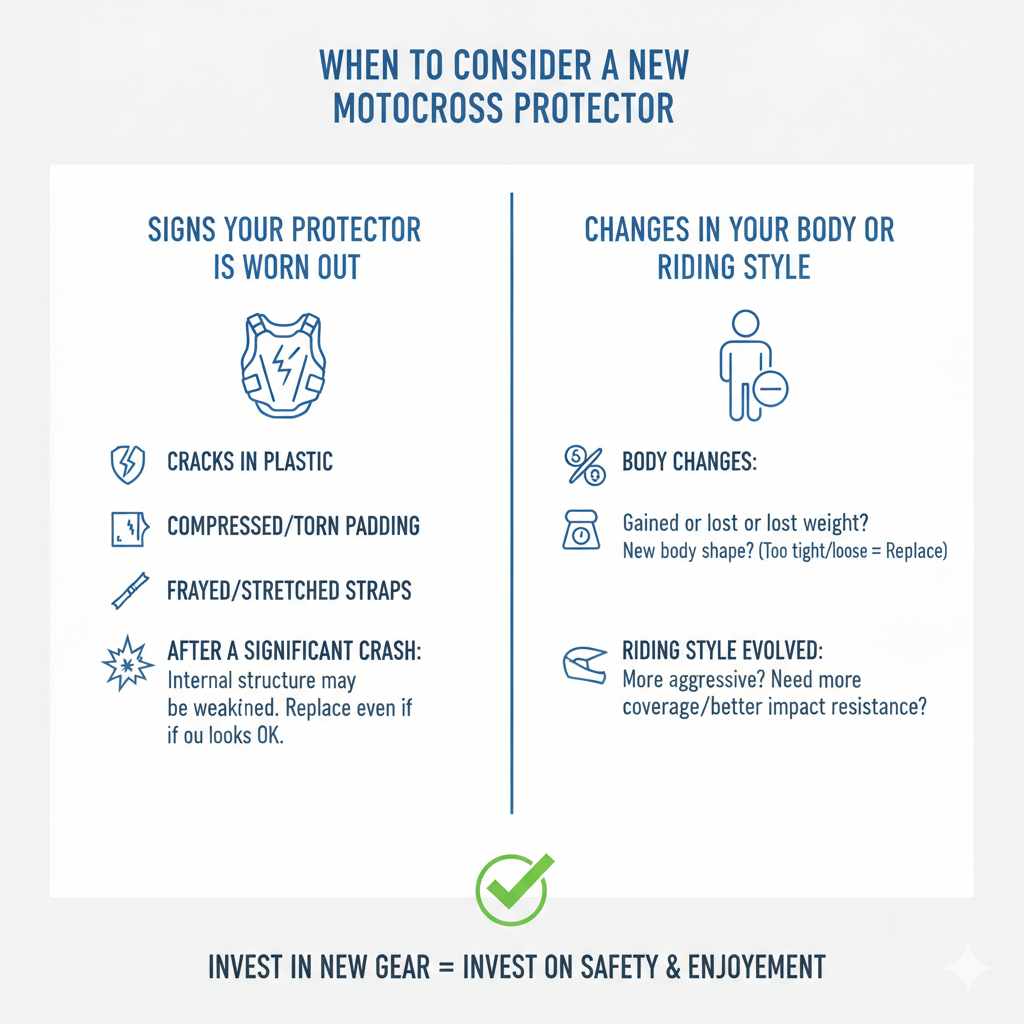
Even the best gear wears out. Look for cracks in the plastic. Check the padding.
Is it compressed or torn? Are the straps frayed or stretched out? If the protector has taken a big hit, it might be compromised.
Safety gear is designed to absorb impact once. After a significant crash, it’s often recommended to replace it. Even if it looks okay, the internal structure might be weakened.
It might not protect you as well next time.
Changes in Your Body or Riding Style
Have you gained or lost weight? Has your body shape changed? This can affect how your gear fits.
If your protector is now too tight or too loose, it needs to be replaced. Your riding style might also change. You might be riding more aggressively.
This could mean you need a protector with more coverage or better impact resistance. Don’t let outdated or ill-fitting gear hold you back. Investing in new gear is investing in your safety and enjoyment.
Replace When.
- Plastic is cracked or damaged.
- Padding is compressed or torn.
- Straps are worn or stretched.
- It no longer fits correctly.
- It has sustained a major impact.
Frequently Asked Questions
What is the primary function of a motocross chest protector?
The primary function of a motocross chest protector is to shield your upper body, including your chest, ribs, and back, from impacts during crashes or from debris (roost) thrown by other riders. It is designed to absorb and distribute force.
How do I measure myself for a chest protector?
To measure yourself, use a soft tape measure. Wrap it around the fullest part of your chest, typically across your nipples, keeping the tape snug but not tight. Ensure the tape is level all the way around.
Compare this measurement to the manufacturer’s size chart.
Can I wear a chest protector that is slightly too big?
Wearing a chest protector that is too big is not recommended. It can shift during riding, leaving vital areas exposed and reducing its protective effectiveness. It’s better to get a size that fits snugly and can be adjusted, rather than one that is significantly too large.
What should I do if my chest protector feels uncomfortable?
If your chest protector is uncomfortable, first ensure the shoulder and side straps are adjusted correctly. Try different tension levels. If it still pinches, rubs, or restricts movement, it may be the wrong size or style for your body type, and you should consider trying a different model.
How often should I replace my motocross chest protector?
You should consider replacing your chest protector if it shows signs of wear and tear, such as cracks in the plastic, compressed or torn padding, or damaged straps. It is also highly recommended to replace it after any significant crash, as it may have lost its protective integrity.
Does the fit of my jersey affect my chest protector fit?
Yes, the fit of your jersey can affect how your chest protector fits. A jersey that is too tight can create pressure points or restrict movement. A jersey that is too baggy can bunch up under the protector, making it feel awkward or unstable.
It’s best to wear a jersey that allows for free movement over the protector.
Conclusion
Getting the fit of your motocross chest protector right is not just about comfort. It’s a critical part of your safety. Take the time to measure yourself correctly.
Always consult the size charts. Try on different options if possible. Pay close attention to how it feels when you move.
A well-fitting protector is one you’ll forget you’re wearing. It will move with you. It will protect you when you need it most.
Don’t let a bad fit compromise your ride. Prioritize safety and enjoy the track!