To draw a Minecraft Bow and Arrow, you must first assemble the basic components (string and stick arrangement) in your crafting grid. Then, position the bow in your hand, aim, and hold down the action button (right-click on PC) to draw the string back until your character is fully braced, ready to release for maximum power.
Welcome, aspiring artist! Drawing anything from scratch can feel tricky, especially when aiming for that blocky, recognizable style of Minecraft. You might look at the simple in-game bow and think, “How can I capture that iconic look on paper?” Many beginners get stuck trying to make it look too detailed or realistic. Forget the complexity! We are going to break down the Minecraft bow and arrow into easy shapes. This guide will show you exactly how to capture the spirit of the game simply and clearly. Let’s turn that blank page into a fantastic, pixelated weapon!
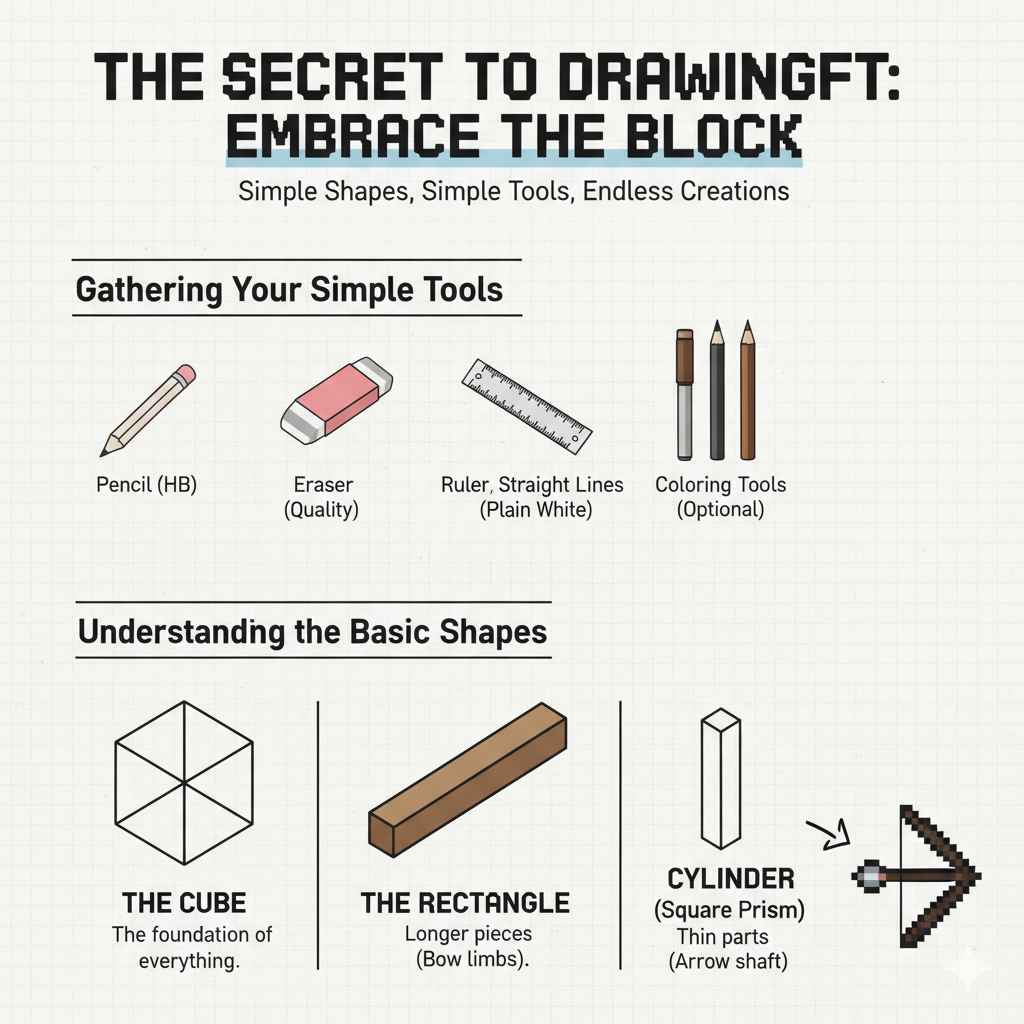
The Secret to Drawing Minecraft: Embrace the Block
The magic of Minecraft lies in its simplicity. Everything is built from cubes. When drawing a Minecraft item, your goal isn’t smooth curves; it’s sharp, predictable angles. Think like a builder, not a sculptor. This makes drawing surprisingly easy for newcomers!
Gathering Your Simple Tools
You do not need fancy art supplies to capture this style. Keep it basic, just like the game itself.
- Pencil (HB is perfect for sketching).
- Eraser (A good quality one prevents smudges).
- Ruler (Essential for getting those straight, blocky lines).
- Paper (Plain white paper works great).
- Coloring Tools (Optional: Felt-tip pens or colored pencils in brown, black, and light gray).
Understanding the Basic Shapes
Every Minecraft item can be broken down into three fundamental shapes. Master these, and you can draw anything from a sword to a pickaxe.
- The Cube: The foundation of everything.
- The Rectangle: Used for longer pieces, like the bow’s limbs.
- The Cylinder (Drawn as a square prism): Used for thin parts, like the arrow shaft.
Step-by-Step: How to Draw the Minecraft Bow
The bow is the main star here. We will draw it flat first, showing its full shape, then we’ll look at how to draw it angled, which is often how you see it held in the game.
Phase 1: Creating the Bow Outline (Front View)
Start very lightly with your pencil. We are building a blueprint before making any heavy lines.
Step 1: The Center Grip
Draw a small, thick square in the center of your paper. This will be the handle area where the player holds the bow. Make this square about 1 inch by 1 inch (adjust size based on your paper).
Step 2: Adding the Limbs
From the top and bottom of that center square, extend two long, rectangular shapes outward. These are the ‘limbs’ of the bow.
- The rectangles should be narrower than the center grip.
- Keep the lines perfectly parallel to each other to maintain that blocky look.
- These limbs should be roughly three times as long as the center grip is wide.
Step 3: Shaping the Ends
At the very end of each long rectangle, draw another, slightly smaller square that sits on top of the limb end. This gives the bow tips its distinct, chunky appearance.
Step 4: Adding the String Channel (The Details)
This is where we add the subtle details that separate a simple stick from a Minecraft bow.
- On the inside edge of the bow (the side that faces inward when held), draw a very thin, indented line running down the length of both limbs, stopping just short of the tips.
- In the center grip, draw a small ‘U’ shape pointing upward. This represents the notch where the arrow will rest.
Step 5: The Bowstring
Draw a single, straight line connecting the ends of the two limbs. This line should sit slightly outside the main body of the bow shape you just drew. It might look like a very taught, flat line right now.
Phase 2: Adding Shading and Texture
Minecraft items use simple shading to show depth. We use dark lines for edges and slightly lighter tones for surfaces.
- Outline: Go over your final pencil lines with a darker pencil or black pen. Keep the lines crisp and straight.
- Shading Direction: Decide where your light is coming from (let’s assume top-left). Any surface facing away from the light gets a light gray wash or light shading. The bottom and right sides of the limbs are good candidates for darker shading.
- Wood Texture: To give it a wooden look, draw very faint, slightly wavy lines parallel to the length of the limbs, but keep these lines very subtle—they should look like grain, not scratches.
Step-by-Step: Drawing the Minecraft Arrow
The arrow is even simpler than the bow. It’s essentially a long rectangular body with a pointy head and small tail feathers.
Phase 1: The Arrow Structure
Step 1: The Shaft
Draw a long, thin rectangle. This is the arrow shaft. For a good visual match, the shaft should be about 4 to 5 times longer than the height of the bow’s center grip from our previous drawing.
Step 2: The Fletching (Feathers)
At one end of the shaft (the back end), draw three small, thin triangles sticking out. They should angle backward slightly, like a small fan. These are the fletchings.
Step 3: The Nock
Right before the fletchings, draw a very small, shallow notch cut into the back of the shaft. This is where the bowstring sits.
Step 4: The Point (Arrowhead)
At the front end of the shaft, draw a simple, sharp triangle pointing forward. In Minecraft, arrowheads are often just slightly sharper than the shaft, not overly large.
Phase 2: Coloring and Detail
Use your colors to define the different parts of the arrow.
| Part of Arrow | Color Suggestion (Minecraft Style) | Detail Note |
|---|---|---|
| Shaft | Light Brown or Tan | Can add thin, vertical lines for wood grain. |
| Arrowhead | Gray or Flint Color | Keep it solid; sharp edges are key. |
| Fletching (Feathers) | White, Red, or Yellow | These are usually colored distinctly in-game. |
Drawing the Bow and Arrow in Action (The Drawn State)
The biggest challenge is drawing the bow when it is pulled back, ready to fire. This requires slightly curved lines, but we keep the overall shape blocky.
Step 1: Adjusting the Limbs
In the drawn state, the limbs are no longer perfectly straight rectangles extending from the handle. They curve inward towards the center.
- Start with your center grip (the square handle).
- From the top and bottom edges of the grip, draw two slightly bowed lines that angle inward, meeting at a point slightly closer to the center grip than they were in the relaxed state. Imagine squeezing the two ends of a spring closer together.
Step 2: Positioning the String
This is crucial. The string is now pulled far back.
- Draw the bowstring running from the tip of the top limb to the tip of the bottom limb.
- This string should now be significantly closer to the center grip than it was when the bow was relaxed. It will look tense and tight.
Step 3: Placing the Arrow
The arrow sits right against the pulled string.
- Place the nock (the back notch) of your arrow directly onto the bowstring, right next to the center grip.
- The arrowhead should be pointing out, away from the center grip, aligned with the open space where the arrow will fly.
- The shaft of the arrow should run parallel to the center grip square.
Step 4: Adding Depth to the Draw
To show the player’s hand drawing it back, you don’t necessarily need to draw the hand (unless you want to!). Instead, focus on the tension.
Add a slight shadow where the string meets the limbs, showing that the wood is slightly compressed. This visual cue communicates the ‘drawn’ state effectively.
Pro Tips for Achieving Perfect Pixel Aesthetics
If you want your drawing to look authentically like it jumped straight out of the game world, focus on consistency and hard edges.
Tip 1: Use a Grid or Graph Paper
For ultimate blocky precision, sketch your entire design on graph paper first. Each square on the paper represents one pixel or one block. This forces you to use straight lines and right angles, instantly giving you the Minecraft look. You can always transfer this design to plain paper later by tracing heavily.
Tip 2: Perfecting the Line Weight
In many pixel art representations, the outline (the dark line surrounding the item) is slightly thicker than the internal details. When you ink your drawing, use a thicker pen for the very edge of the bow and arrow, and a thinner pen for the grain or the string channel.
Tip 3: Consistent Color Palettes
Minecraft relies on very limited, specific color palettes. When coloring your bow (made of wood), stick to a few shades of brown. Don’t blend them smoothly; instead, place the colors next to each other in defined blocks. This mimics the low-resolution texture mapping of the game. For more information on how color theory applies to digital graphics, resources like those found at major university graphics departments often cover foundational color theory principles applicable here.
Tip 4: Drawing the Bow String Taut
A relaxed bow has a slightly loose string. A drawn bow never looks droopy. Always draw the string in the drawn state as if it is pulling against extreme tension. This tension sells the action of the draw.
Comparing Bow and Arrow Dimensions (For Reference)
To help you maintain correct proportions, here is a basic comparison of the relative sizes you should aim for in your drawing.
| Component | Relative Length/Size | Key Feature |
|---|---|---|
| Bow Shaft (Total Length) | Medium-Long | Symmetrical limbs extending from a central grip. |
| Arrow Shaft | Longer than the Bow (when relaxed) | Thin rectangle. |
| Arrowhead | Small Triangle | Must be visibly distinct from the shaft. |
| Fletching | Very Small Triangles | Three evenly spaced tail stabilizers. |
Common Beginner Mistakes to Avoid
Don’t worry if your first attempt isn’t perfect; that’s why we practice! However, knowing what trips up most people can speed up your progress.
- Using Curves: The biggest error! Avoid gentle, natural curves unless you are specifically depicting the drawn bow state, and even then, make the curves shallow and angular.
- Forgetting the Center Grip: The bow looks unfinished without the thick, blocky section where the hand grips it.
- Arrow Too Thick: The arrow shaft should always look significantly thinner than the bow limbs. If they look the same width, the arrow looks heavy and unnatural.
- Over-detailing: Resist the urge to draw every wood grain line or every block edge. Minecraft style is about suggestion, not photorealism. Stick to 2-3 key internal lines per component.
Drawing Perspective: Making the Bow Look 3D
When you look at your character holding a bow, you see it from an angle, not perfectly flat. This is called perspective.
Step 1: Establish the Viewing Angle
Decide if you are looking slightly down, slightly up, or straight on. For a typical over-the-shoulder view, you will be looking slightly down and across the bow.
Step 2: Drawing the Center Grip in Perspective
Instead of a flat square for the grip, draw a 3D block shape (a small rectangular prism). This means the front face might be a square, but the sides recede slightly backward using parallel diagonal lines.
Step 3: Angling the Limbs
The limbs will now angle away from you. The limb closest to you will look wider or longer than the limb farther away. This helps create depth.
Step 4: The String in 3D
The bowstring, when viewed from an angle, will appear to follow the same receding lines as the limbs, looking slightly distorted rather than perfectly flat across the middle.
Drawing in perspective takes practice, but focusing on the block shapes receding into the distance is the key. Remember, even when viewed at an angle, the edges of the blocks remain sharp and defined.
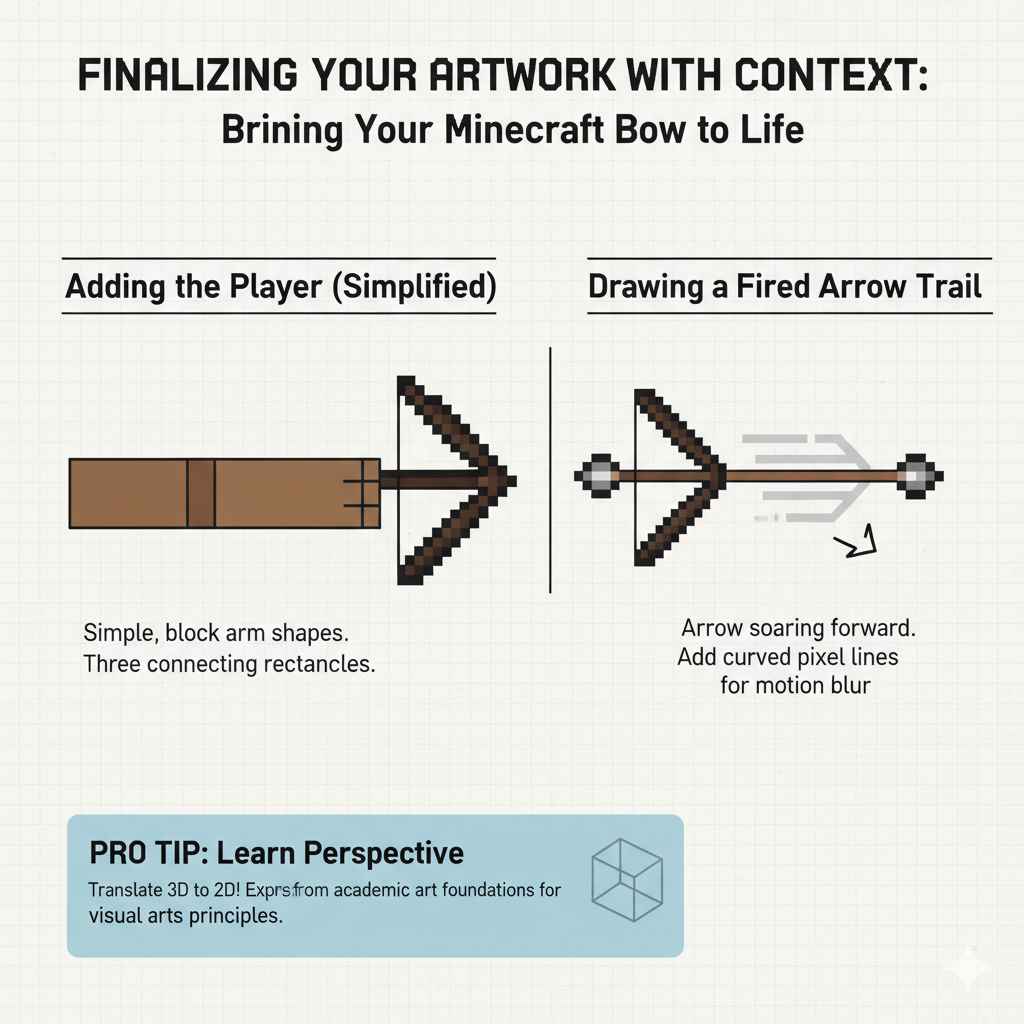
Finalizing Your Artwork with Context
A bow looks much better when it’s doing something! Here are a few ways to contextualize your drawing.
Adding the Player (Simplified)
If you want to show the bow being held, draw a very simple, blocky arm shape extending from the side of the center grip. Keep the arm itself made of three connecting rectangles (upper arm, forearm, hand).
Drawing a Fired Arrow Trail
If you drew the bow in the fired state (bow relaxed, string released), draw the arrow soaring away.
- Draw the arrow shaft moving forward.
- Behind the fletching, draw a few slightly curved, slightly staggered lines to indicate motion blur or the path of the projectile.
For a great resource on general drawing perspective that can help translate 3D concepts to 2D paper, exploring materials from academic art foundations can be very helpful, such as guides found on reputable educational websites focusing on visual arts principles.
Frequently Asked Questions (FAQ) About Drawing Minecraft Items
Q1: Why do my Minecraft drawings look too “round”?
A: This usually happens when you try to soften the corners. Minecraft items are entirely made of cubes. Always use a ruler and focus on 90-degree angles to keep the lines sharp and blocky, avoiding natural, smooth curves.
Q2: How much detail should I put into the wood grain?
A: Very little! Minecraft textures are low resolution. Stick to 2-3 very faint, straight lines running along the length of the bow limbs. Heavy, dark graining will make it look like a real wooden bow, not a game item.
Q3: Should I color my drawing immediately?
A: No. Always sketch your entire shape lightly in pencil first. This allows you to use your ruler effectively and easily erase mistakes. Once the pencil lines are perfect, ink them dark, and then color on a separate layer or gently over the ink.
Q4: How do I draw the bowstring when it’s just resting (not drawn)?
A: When relaxed, the string should sit further away from the bow’s center grip. The distance between the string and the grip is noticeably wider than it is when the bow is fully drawn back.
Q5: What color should a standard, non-enchanted bow be?
A: A standard bow is primarily shades of brown—a medium, warm brown for the main surfaces and a slightly darker brown for shaded edges, mimicking oak or spruce wood textures.
Q6: How can I make my arrow look like it is moving fast?
A: Motion is shown using “speed lines.” After the arrow, draw faint, slightly curved lines radiating backward from the fletching. These lines should follow the arrow’s path, showing where it has just been.
Conclusion: Ready to Shoot Your Art?
You now have everything you need to confidently draw a Minecraft Bow and Arrow with clean, blocky precision. The key is simple: think in shapes, not curves. Every part of the bow and arrow can be broken down into squares and rectangles. When you focus on straight lines, consistent proportions, and minimal detail, your drawing instantly captures that unmistakable Minecraft style.
Remember:
- 📏 Use a ruler for sharp, 90-degree angles.
- 🧱 Build from basic blocks before adding details.
- 🎨 Keep colors simple and bold — no heavy blending.
- 🏹 Show tension in the string if drawing the bow pulled back.
Most importantly, practice makes pixel-perfect. Your first sketch might feel stiff — that’s completely normal. Each drawing improves your understanding of proportion and perspective. Try drawing it relaxed, then drawn, then in action. Add a blocky arm. Add motion lines. Build a full Minecraft scene around it.
Before long, that blank page won’t feel intimidating anymore — it’ll feel like an open world waiting to be built.
So grab your pencil, line up those blocks, and start crafting your masterpiece — one square at a time. 🧱✨