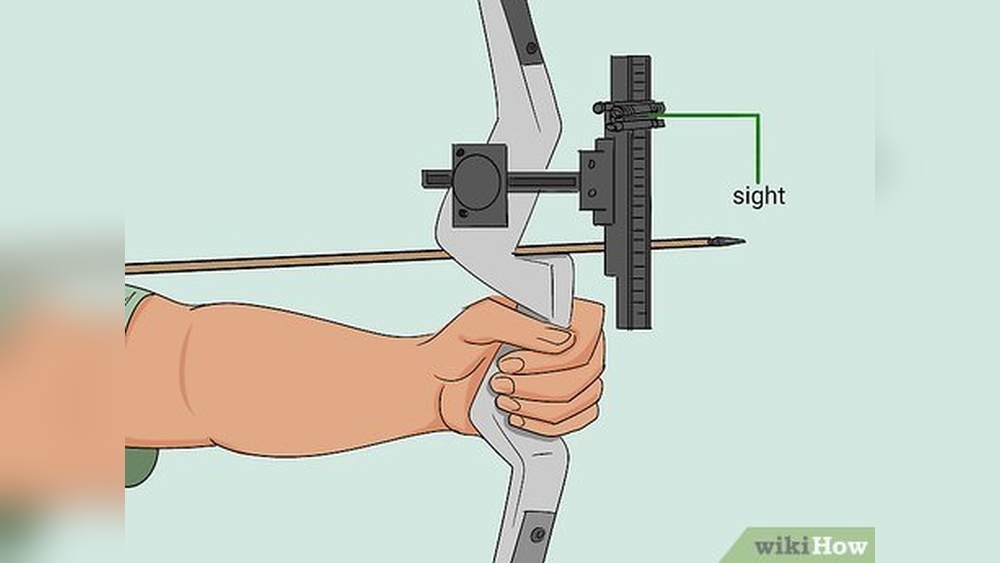
How To Attach Sight To Bow
Attaching a sight to your bow is a critical step in archery, whether you’re a seasoned hunter, a competitive target shooter, or a beginner. The process can dramatically improve your accuracy, consistency, and overall confidence. But improper installation can lead to frustration, missed shots, and even equipment damage.
This article guides you through every aspect of attaching a sight to a bow, covering detailed steps, expert tips, and practical examples. You’ll also find comparisons of sight types, troubleshooting advice, and answers to questions you won’t find elsewhere.
From my experience working with archers of all skill levels, the right sight installation transforms the shooting experience. It turns guesswork into precision, and a well-mounted sight is the foundation of reliable performance. This comprehensive guide is designed to empower you with the knowledge and step-by-step confidence to attach a sight correctly, avoid common pitfalls, and maximize your bow’s potential.
Key Takeaways
- Proper sight installation is essential for consistent accuracy and safety.
- Understanding sight types and mounting standards helps you choose and install the right sight.
- Thorough preparation and correct alignment prevent equipment damage and shooting errors.
- Calibration and adjustment are crucial after mounting to achieve optimal performance.
- Real-world examples demonstrate how correct installation impacts results.
- The FAQ section provides additional insights not covered in the main article.

Credit: www.americanhunter.org
Understanding Bow Sights: Types And Features
The first step to attaching a sight is knowing which type suits your needs. Bow sights vary in design, purpose, and compatibility. Choosing the right sight ensures a smoother installation and enhances your shooting experience.
Fixed Pin Sights
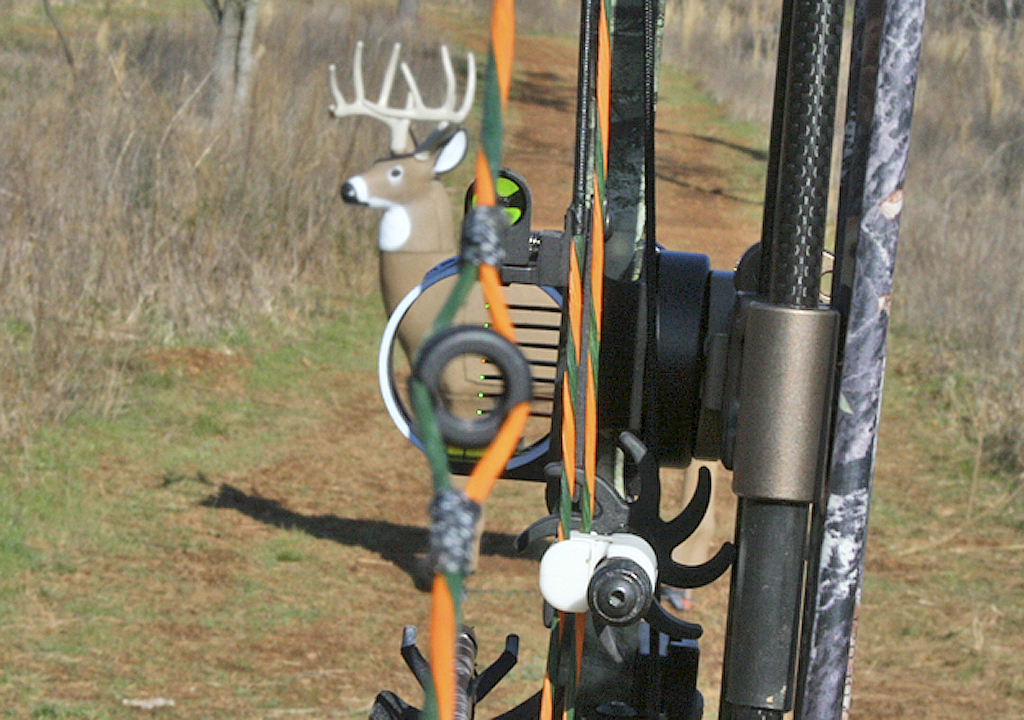
Fixed pin sights are the most common for hunting and recreational archery. They feature multiple pins, each set for a specific distance. Typically, 3-5 pins are adjusted for ranges like 20, 30, and 40 yards. Fixed pins are reliable and quick to use, especially when split-second decisions matter.
Advantages:
- Fast, instinctive aiming
- Durable and simple to adjust
- Ideal for hunting
Drawbacks:
- Limited flexibility for varying distances
- Can clutter the sight picture
Movable Single Pin Sights
Movable single pin sights allow the shooter to adjust the pin for exact distances, making them popular among target archers and hunters who value precision. Adjustments are made using a dial or slider, and the sight often includes markings for yardage.
Advantages:
- Clean sight picture
- Flexible for any range
Drawbacks:
- Slower adjustment in the field
- Risk of forgetting to reset yardage
Digital And Hybrid Sights
Technological advances have introduced digital sights and hybrid models. Digital sights often use a screen and electronic pins, while hybrid sights combine fixed and movable pins.
Advantages:
- Enhanced precision
- Customizable settings
Drawbacks:
- Higher cost and complexity
- Dependence on batteries
Mounting Standards And Compatibility
Most sights use a universal mounting bracket that fits standard bow risers. However, some bows and sights may require adapters or have proprietary mounts. Always check the compatibility before purchase.
Pro Tip: Consult your bow’s manual or manufacturer’s website to verify mounting specifications. Installing an incompatible sight can damage your bow or void its warranty.
| Type | Best For | Adjustment Speed | Typical Price Range |
|---|---|---|---|
| Fixed Pin | Hunting | Fast | $40, $120 |
| Single Pin | Target Shooting | Moderate | $70, $250 |
| Digital/Hybrid | Advanced Users | Variable | $200, $800+ |
Credit: www.bowhunter.com
Preparing Your Bow And Sight For Installation
Proper preparation ensures a safe, effective installation and minimizes the risk of damage or misalignment. This section details essential steps before mounting the sight.
Cleaning And Inspecting The Bow
Before attaching the sight, inspect the bow riser for any cracks, dents, or debris. Clean the area with a soft cloth and mild cleaner. Dirt or residue can interfere with mounting and cause alignment issues.
Warning: Never use harsh chemicals or abrasive materials on your bow, as these can degrade the finish and affect performance.
Gathering Required Tools And Materials
Most bow sights come with mounting screws and an Allen wrench. However, having a complete toolkit improves efficiency and prevents stripping or overtightening.
Recommended tools:
- Allen wrench set (typically 3/32″ or 5/32″ for sight screws)
- Small screwdriver (for micro-adjustments)
- Thread locker (optional, for vibration resistance)
- Soft cloth for cleaning
Checking Sight Compatibility
Verify that the sight’s bracket matches the bow’s mounting holes. The industry standard is a four-hole pattern, spaced about 0.75 inches apart. Some sights may require an adapter; consult the manufacturer’s instructions.
Example: When I installed a digital sight on a Mathews V3, I discovered the need for a proprietary adapter. Checking compatibility in advance saved hours and prevented frustration.
Reviewing Manufacturer Instructions
Always review the sight’s manual and the bow’s documentation before installation. Manufacturers often include specific recommendations or torque values for mounting screws.
Pro Tip: Save the instruction manuals for future reference, especially when making adjustments or upgrading components.
Step-by-step Guide To Attaching A Sight
Mounting a sight requires precision and patience. Follow these detailed steps to ensure a secure and accurate installation.
Step 1: Positioning The Sight Bracket
Align the sight bracket with the mounting holes on the bow riser. Most bows have a recessed area for sight installation, which helps with proper alignment. Hold the sight flush against the riser, ensuring no gaps.
Pro Tip: Position the sight so that the pins are centered in the window of the bow. This provides a clear view and optimal alignment.
Step 2: Inserting And Tightening Screws
Insert the mounting screws through the bracket and into the riser. Tighten them gradually using an Allen wrench, alternating between screws to avoid uneven tension. Do not overtighten, as this can strip threads or damage the riser.
Warning: If your bow uses aluminum risers, overtightening can cause permanent damage. Use only moderate pressure.
Step 3: Checking Alignment
Once the sight is mounted, check the vertical and horizontal alignment. The pins should be perpendicular to the bowstring and parallel to the arrow rest. Use a bubble level if available.
Example: In my experience, even a slight tilt can cause arrows to drift off target. Spending extra time on alignment pays dividends in accuracy.
Step 4: Applying Thread Locker (optional)
If you shoot frequently or in rugged conditions, apply a small amount of thread locker to the screws. This prevents loosening due to vibration, especially in hunting situations.
Step 5: Adjusting Sight Pins
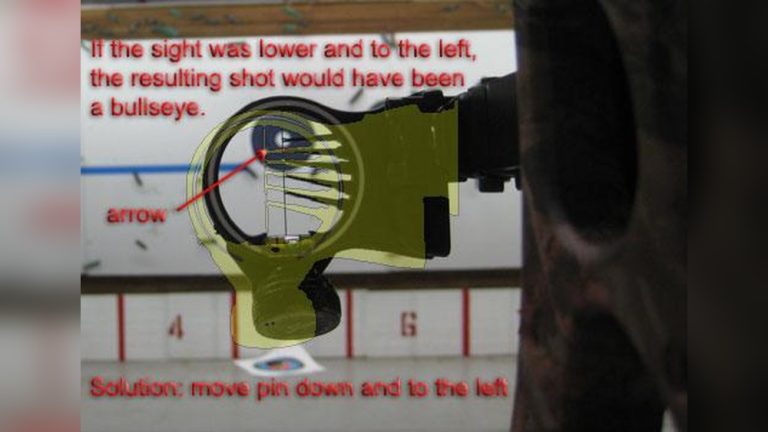
After installation, adjust the sight pins for your preferred distances. Most sights allow micro-adjustments for windage (left-right) and elevation (up-down). Use the provided screws or dials to set each pin.
Example: For a hunting setup, I set pins at 20, 30, and 40 yards, then fine-tuned each pin using field tests. The process is iterative but essential for confidence in the field.
Step 6: Testing For Clearance
Draw the bow and check for any interference between the sight and other accessories, like the arrow rest or stabilizer. Make adjustments as needed.
Pro Tip: Attach your quiver and other accessories before finalizing sight placement to ensure everything fits without obstruction.

Credit: www.bowhunting.com
Calibrating And Fine-tuning Your Sight
Mounting the sight is only half the job. Calibration ensures that your arrows hit the intended target. This section covers initial setup, ongoing adjustments, and troubleshooting.
Initial Calibration
Set your first sight pin (usually 20 yards) by shooting groups at a measured distance. Adjust windage and elevation until your arrows consistently hit the center.
Steps:
- Shoot a group of arrows at 20 yards.
- Adjust the pin up/down or left/right based on impact.
- Repeat until the group is centered.
Setting Multiple Pins
For fixed pin sights, repeat the calibration process for each pin at different distances (30, 40 yards, etc. ). Mark the pins clearly and test at each range.
Example: Competitive archers often use detailed logs to track pin settings for different distances and conditions.
Fine-tuning For Environmental Factors
External factors like wind, humidity, and lighting can affect accuracy. Periodically retest and adjust your pins to compensate for these variables.
Pro Tip: If you switch arrows or change your draw weight, recalibrate your sight. Small changes in equipment can require significant adjustments.
Troubleshooting Common Issues
Common problems:
- Loose screws: Retighten and apply thread locker if needed.
- Misaligned pins: Use micro-adjustment screws for precise tuning.
- Sight obstruction: Reposition accessories or sight bracket.
Warning: If you notice persistent accuracy issues after calibration, consult a certified archery technician. Incorrect installation can cause long-term problems.
| Issue | Cause | Solution |
|---|---|---|
| Loose Sight | Insufficient tightening | Retighten screws, use thread locker |
| Pins Off-Center | Improper alignment | Adjust windage/elevation |
| Obstructed View | Accessory interference | Reposition accessories |
Real-world Examples And Case Studies
Learning from real-world scenarios can help you avoid common mistakes and understand the importance of proper installation.
Example 1: Hunting Setup
A bowhunter installs a fixed pin sight on a Hoyt Carbon RX-7. After mounting, they calibrate pins at 20, 30, and 40 yards. During practice, they notice arrows consistently hitting left at longer ranges. Upon inspection, they find a slight misalignment in the sight bracket. Repositioning the bracket and recalibrating the pins resolves the issue, improving accuracy and confidence for the hunt.
Example 2: Target Archery Competition
A competitive archer uses a single pin movable sight on a Bowtech Reckoning. They install the sight and set the pin for 50 yards. During competition, the sight remains stable and accurate, allowing quick yardage adjustments. The archer keeps a detailed log of pin settings for various distances, achieving consistent results across tournaments.
Example 3: Recreational Archery
A beginner attaches a basic fixed pin sight to their entry-level compound bow. Initially, the sight is overtightened, causing slight damage to the riser. After consulting the manufacturer’s guide and using proper torque values, they reinstall the sight and calibrate pins at 15 and 25 yards. The beginner notices a dramatic improvement in accuracy and enjoys shooting more.
Comparing Bow Sight Brands And Models
Choosing the right sight involves considering features, durability, and price. The following table compares popular models and their attributes.
| Brand/Model | Type | Features | Price | User Rating |
|---|---|---|---|---|
| Trophy Ridge React Pro | Fixed Pin | Tool-less adjustment, React technology | $180 | 4.7/5 |
| HHA Optimizer Lite | Single Pin | Quick dial adjustment, durable build | $120 | 4.6/5 |
| Spot-Hogg Fast Eddie XL | Hybrid | Micro-adjust, dual pin | $250 | 4.8/5 |
| Garmin Xero A1i | Digital | Auto-ranging, digital pins | $799 | 4.5/5 |
Pro Tip: Read user reviews and consult archery forums before purchasing. Real-world feedback often reveals strengths and weaknesses not apparent in marketing materials.
For authoritative information on archery equipment, visit the Wikipedia Bow Sight page.
Maintaining Your Bow Sight After Installation
Proper maintenance prolongs the life of your sight and ensures reliable performance. Neglect can lead to loose components, inaccurate shots, and costly repairs.
Regular Inspection
Inspect the sight regularly for:
- Loose screws or brackets
- Pin damage or misalignment
- Debris buildup
Example: Monthly checks can prevent issues during critical moments, such as hunts or competitions.
Cleaning And Protection
Clean the sight pins and bracket with a soft brush or cloth. Avoid moisture and store the bow in a dry, secure location. For digital sights, replace batteries as recommended.
Pro Tip: Use a protective bow case when transporting to prevent accidental damage.
Recalibration And Adjustment
After extensive use or changes in equipment (new arrows, altered draw weight), recalibrate your sight. Small changes can impact pin settings and overall accuracy.
Professional Service
If you experience persistent issues, seek help from a certified archery technician. Professionals can diagnose and repair complex problems beyond basic maintenance.
For more advanced tips, the Archery Trade Association Bow Sight Setup resource provides detailed recommendations.
Safety Considerations When Attaching And Using Bow Sights
Safety should always be a priority during installation and use. Improper handling can result in equipment damage or personal injury.
Handling Tools Safely
Use tools as intended and avoid excessive force. Stripped screws or overtightened brackets can compromise the integrity of your bow.
Avoiding Pinch Points
Be mindful of finger placement when tightening screws near the riser and sight bracket. Pinch points can cause injury if tools slip.
Inspecting For Structural Damage
After installation, check the bow for any signs of stress or cracking. If you notice unusual noises or movement, stop using the bow and seek professional inspection.
Safe Storage And Transport
Store your bow with the sight attached in a secure case. Avoid dropping or exposing it to extreme temperatures, as these can affect sight performance and longevity.
Warning: Never attempt repairs or modifications beyond your skill level. Consult a professional for complex issues.
Frequently Asked Questions
What Are The Signs Of A Poorly Installed Bow Sight?
A poorly installed sight may show loose screws, tilted pins, or uneven alignment with the arrow rest. You might experience inconsistent shot grouping, unexpected misses, or physical damage to the riser. In rare cases, sight movement during shooting can cause injury.
Can I Attach A Sight To A Recurve Bow?
Most recurve bows feature pre-drilled holes for mounting sights, but not all models are compatible. Specialized recurve sights are available, often with different mounting standards than compound bows. Check with the manufacturer or consult an archery technician for guidance.
How Often Should I Recalibrate My Bow Sight?
Recalibration is recommended:
- After every equipment change (new arrows, altered draw weight)
- Following extended use
- Before important events (hunts, competitions)
- Whenever you notice a decline in accuracy
Regular calibration ensures consistent performance and prevents bad habits.
What Is The Best Way To Prevent Sight Screws From Loosening?
Applying a medium-strength thread locker to the screws is effective for preventing loosening due to vibration. Alternatively, check screw tightness regularly and avoid overtightening, which can strip threads and reduce holding power.
Are Digital Bow Sights Allowed In Competitions?
Digital sights are restricted or banned in many archery competitions, particularly those governed by organizations like USA Archery or World Archery. Always review the rules for your event before using a digital or electronic sight.
Attaching a sight to your bow is a foundational skill for archers. With proper preparation, careful installation, and ongoing maintenance, you can enjoy improved accuracy and reliability. Whether you shoot for sport, competition, or hunting, following these guidelines ensures your equipment performs at its best.
Remember to consult professionals for complex issues and stay safe throughout the process.