Building your own archery target might seem tough if you’re just starting out. Many guides can be tricky to follow. But don’t worry!
This guide makes How to Build an Archery Target (Simple DIY Guide) easy. We will walk you through every step. You will be shooting arrows at your new target in no time.
Your First Archery Target How To Guide
Creating your own archery target is a rewarding project for any archer. It allows you to save money and customize a target that suits your specific needs. This section breaks down the essentials of building a basic yet effective archery target.
We focus on materials that are easy to find and work with, ensuring a smooth process from start to finish.
Choosing Your Target Materials
The heart of any good archery target is its ability to stop arrows safely and reliably. Different materials offer varying degrees of stopping power and longevity. Understanding these differences will help you select the best components for your DIY project.
We’ll explore common and effective choices.
- Wood Frames: Building a sturdy frame is your first step. This frame will hold all the other materials together. A simple box made from 2×4 lumber works well. It needs to be strong enough to withstand the impact of arrows. Measure and cut your wood pieces carefully to ensure a square and solid structure. This frame will be the backbone of your target, so make it sturdy.
- Carpet Scraps: Layers of carpet are a fantastic way to stop arrows. They absorb the energy of the arrow gradually. You can often get carpet scraps for free or very cheap from carpet stores. Cut the carpet into uniform sizes that fit snugly inside your frame. The more layers you pack in, the better your target will perform.
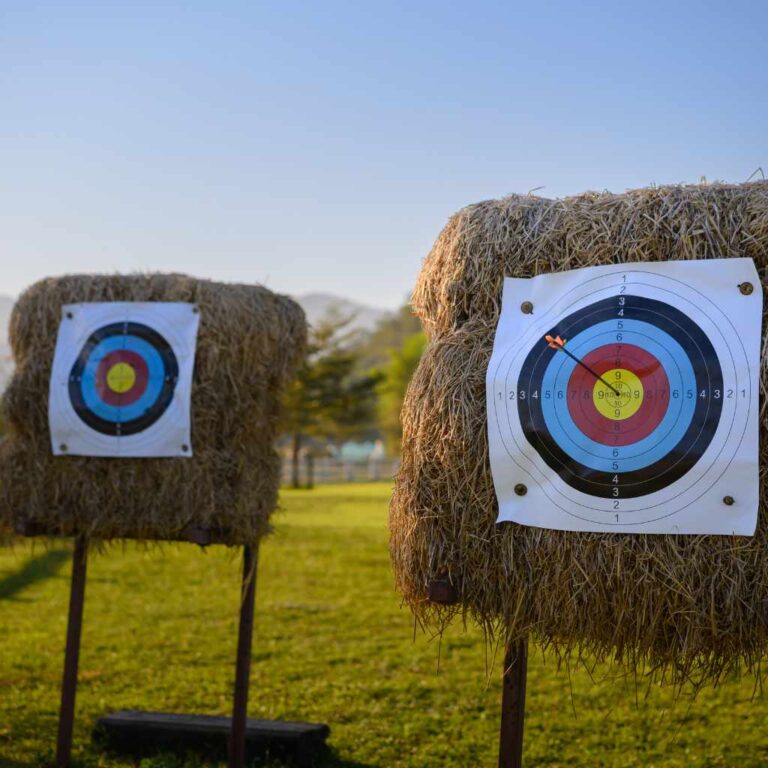
- Hay or Straw Bales: Traditional archery targets often use compressed hay or straw. These materials are excellent for arrow stopping. You can buy large bales from agricultural suppliers. Pack them tightly into your frame to create a dense core. Ensure the bales are dry to prevent rot and mold.
- Foam Mats: Closed-cell foam mats, like those used for yoga or gym flooring, can also be effective. They are lightweight and easy to cut. Layering these mats within your frame can provide good stopping power. However, they might not last as long as carpet or hay against heavier bows.
Essential Tools and Supplies
To build your archery target, you will need a few basic tools. These are common items found in most toolboxes. Having the right tools makes the job quicker and easier.
- Saw For cutting wood or other frame materials. A handsaw is fine, but a power saw like a circular saw or miter saw will speed things up.
- Drill and Screws To assemble the wooden frame. Wood screws are best for a strong hold. Pilot holes can prevent the wood from splitting.
- Staple Gun Useful for securing carpet scraps or fabric. Heavy-duty staples are recommended.
- Measuring Tape For accurate measurements of wood and materials. Precision matters for a well-built target.
- Utility Knife For cutting carpet or foam to size. A sharp blade is key for clean cuts.

How to Build an Archery Target Simple DIY Guide Steps
Now that you have your materials and tools ready, let’s get building. This section details the step-by-step process to construct your target. We aim for clarity and simplicity, making it easy for anyone to follow along.
Step 1 Building the Frame
Begin by constructing a sturdy wooden frame. A common size for a backyard target is about 2 feet by 2 feet and 6 inches deep. This size is large enough to be forgiving for beginners but manageable to build and move.
- Cut four pieces of 2×4 lumber for the sides of your frame. Two pieces should be the desired width, and two pieces should be the desired length minus the thickness of the side pieces. For a 2ft x 2ft target, you would cut two pieces 24 inches long and two pieces 21 inches long.
- Arrange the cut pieces into a rectangular shape. The shorter pieces fit inside the longer ones.
- Pre-drill pilot holes at the ends of the shorter pieces. Then, drive screws through the shorter pieces into the longer pieces to secure the corners. Ensure all corners are square.
- You can add internal bracing if you want an extra-strong frame, but for a simple target, this basic box is often enough.
Step 2 Packing the Target Material
Once your frame is built, it’s time to fill it with your chosen arrow-stopping material. This is where the target gets its effectiveness.
- If using carpet scraps, cut them into strips or squares that fit snugly within the frame. Layer them tightly, alternating the direction of the pile if possible. This helps to “self-heal” after arrows pass through.
- If using hay or straw, compress it as much as possible. You can use a plank of wood and your feet to stomp it down. Fill the frame completely.
- If using foam mats, cut them to fit inside the frame and stack them tightly.
- Fill the frame so that the material is packed firmly. It should be dense enough to stop arrows without them passing all the way through.
Step 3 Adding a Backstop and Finishing Touches
A good archery target needs a few final touches to make it durable and safe.
- Consider adding a backing material to the rear of your frame. A piece of plywood or thick cardboard can prevent arrows from shooting out the back if they somehow penetrate the main material. Staple or screw this backing in place.
- You can paint the frame for protection against the weather and to make it look nicer. Bright colors are good for visibility.
- Attach a handle if you plan to move the target often. Rope or a sturdy strap secured to the sides works well.
Advanced Archery Target Building Techniques
While a simple target is great for getting started, there are ways to build more durable and effective targets. These methods often involve combining materials or using specialized components. Expanding your knowledge can lead to a target that lasts longer and performs better for a wider range of archery equipment.
Layered Target Designs
The most effective archery targets use multiple layers of different materials. This layered approach helps distribute the arrow’s impact force. It reduces wear and tear on any single material and provides excellent stopping power.
- Outer Layer: High-Density Foam. The very front of your target can be a dense, closed-cell foam. This layer helps to blunt the arrow’s tip and begin the stopping process. It also makes it easier to retrieve arrows.
- Middle Layers: Carpet or Fabric. Following the foam, layers of tightly packed carpet scraps, old clothing, or fabric strips are ideal. The friction from these materials absorbs a significant amount of the arrow’s kinetic energy. The tighter they are packed, the better they perform.
- Core: Compressed Hay or Rubber. The deepest part of the target can be a very dense material. Compressed hay or straw is traditional and effective. Alternatively, shredded rubber or industrial rubber mats can be used. These materials provide the final stopping force.
Commercial Target Components
For those seeking the ultimate in performance and longevity, commercial target components are available. These are often made from specialized materials designed for archery. While more expensive, they can significantly extend the life of your target.
- Block Targets: These are pre-made targets consisting of dense foam cubes or blocks. They are designed for easy arrow retrieval and excellent stopping power. You can stack these blocks within a frame for a custom-sized target.
- Target Mats: Similar to block targets, these are large mats made of compressed materials. They can be hung or placed in a frame. Many are self-healing and very durable.
- Arrow Wraps: Some target faces have special wraps that help arrows slide in easily and prevent them from sticking too deeply.
Target Durability and Maintenance
Even the best-made target will eventually show wear. Proper maintenance can significantly extend its lifespan. This is especially important if you are using a DIY target that you built yourself.
- Rotation: As arrows impact the target, they create holes. To ensure even wear, rotate your target regularly. If your target is a simple block, turn it to present a fresh surface. If it’s a framed target, you can sometimes turn it 90 degrees or flip it over.
- Arrow Retrieval: Always pull arrows straight out. Twisting or yanking can damage the target material or even break your arrow. A little bit of wiggling can help loosen a stuck arrow.
- Weather Protection: If your target is kept outdoors, consider covering it when not in use. Rain and direct sunlight can degrade many materials, especially hay and wood. A simple tarp can make a big difference.
Protecting Yourself and Your Property
Safety is paramount when practicing archery. A well-built target is crucial, but it’s only one part of a safe shooting setup. You also need to consider your surroundings.
Establishing a Safe Shooting Zone
Before you even draw your bow, make sure your shooting area is safe. This involves more than just having a target.
- Clear the Area: Ensure no people or animals are behind or to the sides of your target. A general rule is to have at least 10 yards of clear space behind your target. For more powerful bows, this distance should be greater.
- Backstop: Even with a good target, some arrows might go astray. A backstop is a secondary barrier placed behind your target. This could be a sturdy wall, a large mound of earth, or a specialized backstop net. It catches any arrows that miss the target.
- Arrow Passes: Pay attention to where your arrows are going. If you notice a pattern of arrows consistently missing or glancing off, adjust your stance or your target’s position.
Arrow Retrieval Safety
Getting your arrows back safely is as important as shooting them safely.
- Know Your Arrows: Use arrows that are appropriate for your bow. Arrows that are too light or short can be dangerous.
- Check Arrows: Before shooting, inspect your arrows for any damage. Cracked shafts or bent nocks can cause an arrow to break upon release, which is extremely dangerous.
- Stand Behind the Target: When retrieving arrows, always stand behind your target. This way, if another archer accidentally shoots while you are retrieving, you are not in the line of fire.
Practice Location Considerations
Where you set up your archery range matters.
- Distance: Ensure you have enough space for the shooting distances you plan to use. For backyard practice, shorter distances are common. For target archery, you might need much longer ranges.
- Ground Conditions: A level and stable surface is best for setting up your target. Avoid shooting into areas with hidden obstacles or uneven terrain that could cause arrows to fly unpredictably.

Frequently Asked Questions
Question: How thick should an archery target be
Answer: For most common archery setups, a target that is at least 10-12 inches thick is recommended. This thickness ensures arrows are stopped effectively without passing all the way through, especially with modern bows. Thicker targets offer better longevity and arrow retention.
Question: Can I use cardboard for an archery target
Answer: While cardboard can be used as a layer in a target, it’s not ideal as the primary stopping material for most bows. It can work for very low-poundage bows or for practice with very light arrows. For standard archery, you’ll need denser materials like carpet, hay, or foam.
Question: How often should I replace my DIY archery target
Answer: The lifespan of a DIY archery target depends heavily on the materials used, the power of the bows shooting at it, and how well it’s maintained. A well-built target made with dense materials like carpet scraps and hay might last for many months or even years with proper care and rotation.
Question: What is the best material to stop arrows
Answer: The best materials for stopping arrows are those that can absorb energy gradually and are densely packed. Common effective materials include compressed hay or straw, layers of dense carpet, industrial rubber matting, and specialized archery foam blocks. Combining these materials in layers often yields the best results.
Question: Is it cheaper to buy or build an archery target
Answer: Generally, it is cheaper to build your own archery target, especially if you can source materials like carpet scraps or hay affordably or for free. While commercial targets offer convenience and specific performance, the DIY route can save significant money, particularly for beginners or those on a budget.
Wrap Up
Building an archery target is a straightforward and cost-effective project. You’ve learned the essential steps to create a functional target using common materials. With careful construction and a bit of maintenance, your DIY target will provide many hours of safe shooting practice.
Enjoy honing your archery skills with your custom-made target.