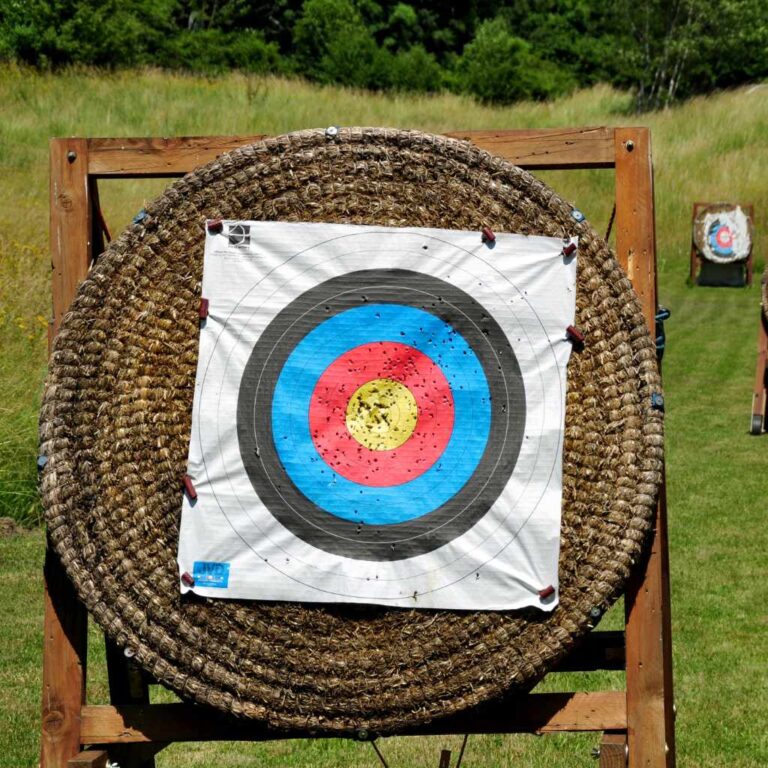
A DIY archery target shield protects your target from wear. It helps your target last much longer. This shield can be made with simple materials and tools. It’s a great way to save money and get more shooting practice.
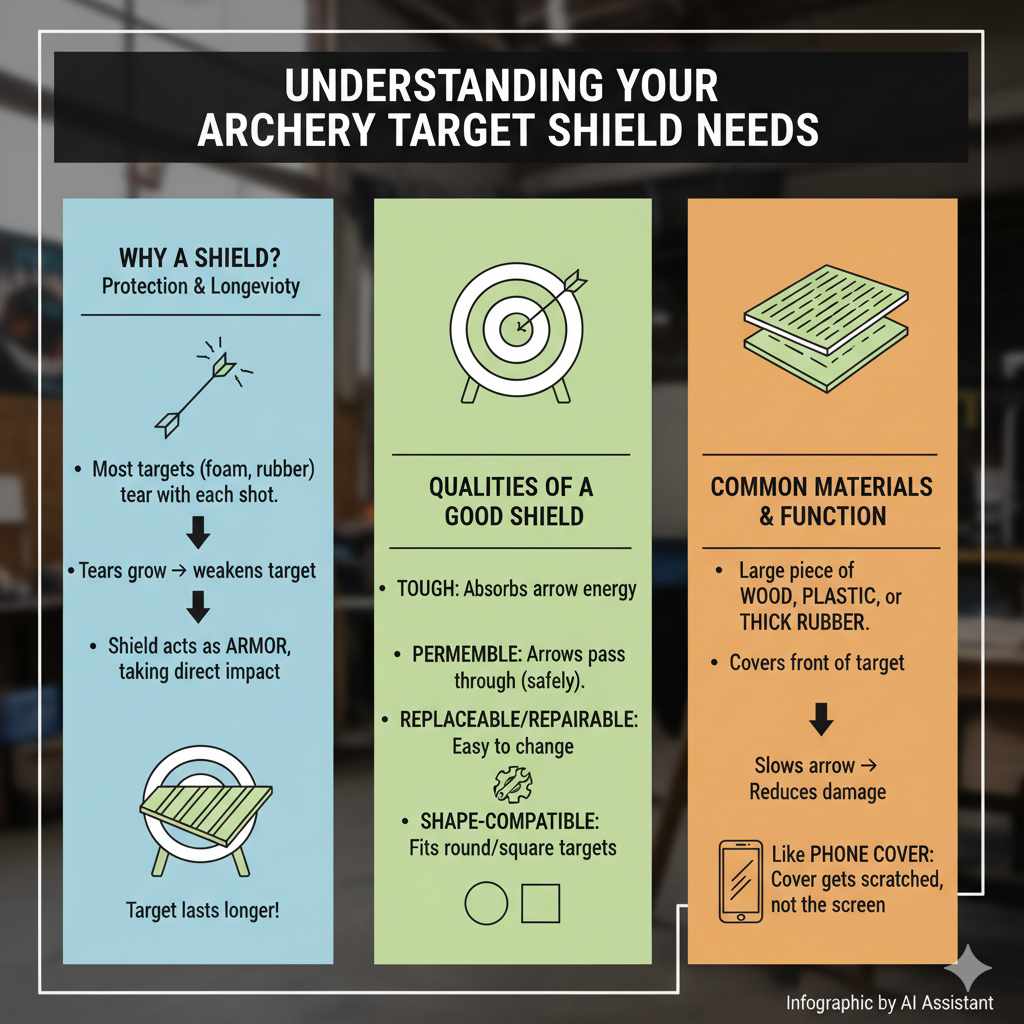
Understanding Your Archery Target Shield Needs
First, why do you even need a shield? Think about your target. Most targets are made of foam, rubber, or layered materials.
Arrows hit them hard. Each shot leaves a small tear. Over time, these tears grow.
They can weaken the whole target. A shield acts like armor for your target. It takes the direct impact.
This way, the target material itself lasts longer.
What makes a good shield? It needs to be tough. It should absorb arrow energy well.
But it also needs to be something arrows can pass through. You don’t want arrows sticking in the shield. That would be unsafe.
It also needs to be easy to replace or repair. Targets are round or square. Your shield should fit its shape.
Maybe it’s a face that goes on the front. Or it could be a wrap-around design.
Many archers use a large piece of material. This covers the front of their target. It might be wood, plastic, or even thick rubber mats.
The goal is to stop the arrow. Or at least slow it down a lot. This reduces the damage to the actual target.
It’s like putting a cover on your phone. The cover gets scratched, not the phone screen.
My First Archery Target Shield Mishap
I remember my first archery target. It was a nice, big foam block. I was so excited to shoot.
I set it up and fired away. After a few weeks, I noticed it. The front was getting shredded.
Small arrow holes were everywhere. Then, bigger tears started. I was shooting pretty hard.
My arrows were fast. The foam just couldn’t take it. I was already looking at buying a new one.
That’s when I thought, “There has to be a better way.”
I looked online. I saw some fancy commercial shields. They looked good but cost a lot.
I’m a DIY guy. I like making things myself. So, I started experimenting.
My first idea was thick cardboard. I layered it up. I glued it all together.
It worked for a little while. But wet weather ruined it. It got soggy and fell apart.
That was a waste of time and glue. I learned that materials matter. Moisture is an enemy.
Durability is key. The quest for the perfect DIY shield had begun.
Choosing the Right Materials for Your Shield
Let’s talk about what makes a good shield. You need materials that are tough. They should resist tearing.
They should also be somewhat flexible. This helps absorb the arrow’s force. Think about layers.
Most great shields aren’t just one thing. They are built up from different parts.
Some popular choices include:
- Wood: Plywood is common. It’s strong and flat. But it can split. Thicker plywood is better. Cedar or pine can work. Make sure it’s smooth. No splinters sticking out.
- Plastic: High-density polyethylene (HDPE) is a good option. It’s used in cutting boards. It’s tough and waterproof. Corrugated plastic signs can also work. But they might not be strong enough alone.
- Rubber: Old rubber mats are great. Think old stall mats from a barn. They are thick and shock-absorbent. They can be heavy, though. Old tires can be cut up, but that’s hard work.
- Fabric/Canvas: Heavy-duty canvas or tarp material can be used. But it’s usually part of a layered system. It might need backing.
Material Pros and Cons
Pros: Easy to cut, readily available, good surface for arrows.
Cons: Can splinter, affected by moisture, heavier than some plastics.
Pros: Very durable, waterproof, smooth surface, resists splitting.
Cons: Can be more expensive, harder to cut than wood, might cause arrows to deflect more.
Pros: Excellent shock absorption, very durable, waterproof.
Cons: Very heavy, can be harder to cut, might have an odor.
Pros: Lightweight, waterproof, easy to cut, affordable.
Cons: Not very durable on its own, arrows can punch through easily.
For a truly durable shield, think about combining materials. A strong backing layer. A tough middle layer.
And a smooth front surface. This layered approach works best. It spreads the arrow’s impact.
It also stops arrows from punching straight through. Let’s build a shield that uses this idea. We’ll use common materials.
Designing Your Shield: What Shape and Size?
The shape and size of your shield depend on your target. Most archery targets are round or square. A shield that matches this shape is ideal.
For a round target, a large circle works well. For a square target, a square shield is best.
How big should it be? It needs to be bigger than your target’s shooting face. This gives you a safety margin.
If you miss the center of your target, the arrow hits the shield. This means it should extend at least a few inches beyond the target’s edge. More is often better.
This gives you more room for error. It also protects the target’s sides.
Consider how you’ll attach it. Will it be a fixed shield? Or something you can remove?
Many DIY shields are attached with screws or bolts. They go through the shield and into the target’s back. Some people use a frame.
Others strap it on. For simplicity, a shield that mounts directly to the target is easiest. Make sure your attachment points are secure.
You don’t want the shield coming loose.
The thickness is also important. A single layer of thin material won’t do much. You need layers to provide protection.
Think about each layer’s job. One layer might be for structure. Another for shock absorption.
Another for a smooth surface.
Building Your Archery Target Shield: Step-by-Step
Let’s build a simple, durable shield. This design uses plywood for structure. And thick rubber for shock absorption.
It’s a classic combo that works. You’ll need a few tools. Most people have these at home.
Or they are easy to borrow. Safety first! Always wear safety glasses.
And gloves when handling sharp objects.
Here’s what you’ll need:
- Materials:
- One sheet of 3/4 inch plywood. Size depends on your target. (e.g., 2ft x 2ft).
- One piece of thick rubber mat. (e.g., 1/2 inch or thicker stall mat). Cut to the same size as plywood.
- Wood screws (about 1.5 inches long).
- Washers for the screws.
- Optional: Exterior wood sealant or paint.
- Tools:
- Measuring tape
- Pencil
- Saw (circular saw or jigsaw)
- Drill with drill bits
- Screwdriver bit for your drill
- Clamps (helpful but not essential)
- Sandpaper
Step 1: Measure and Mark Your Plywood
Measure your target. Decide on the size of your shield. For a round target, you’ll need to trace a circle.
For a square target, measure the length of one side. Then add extra for overlap. Mark your plywood with these dimensions.
Use a pencil. Be precise. Good measurements make for a better fit.
Step 2: Cut the Plywood
Use your saw to cut the plywood. Follow your marked lines carefully. If you’re cutting a circle, a jigsaw is best.
For a square, a circular saw works great. Take your time. Smooth edges are important.
After cutting, use sandpaper to smooth any rough spots. This prevents splinters later.
Step 3: Prepare the Rubber Mat
If your rubber mat is larger than needed, mark it. Cut it to the same size as your plywood shield. This can be tough work.
A sharp utility knife might work for thinner mats. For thicker ones, a jigsaw with a tough blade is better. Or a heavy-duty saw.
Be careful. Rubber can be tricky to cut.
Step 4: Assemble the Layers
Now, place the rubber mat on top of the plywood. You want the rubber to be the front of your shield. The side that faces the arrows.
Align the edges neatly. It helps to clamp them together if you can. This keeps them from shifting.
Step 5: Drill Pilot Holes
This is important. You don’t want the wood to split. Drill pilot holes through both layers.
Space them out evenly. About every 6-8 inches around the edges. Make sure the holes are slightly smaller than your screw diameter.
Drill a few more in the center too.
Step 6: Screw the Layers Together
Use your wood screws and washers. Drive them through the pilot holes. The washers help prevent the screw heads from pulling through the rubber.
Make sure the screws are long enough to go through the plywood and into the rubber. Tighten them until snug. Don’t overtighten, or you could crack the wood.
Step 7: Finishing Touches (Optional)
If you want your shield to last even longer, especially outdoors, seal it. Use an exterior wood sealant or paint. This protects the plywood from moisture.
Apply it to all edges and the back of the shield. Let it dry completely. This step adds a lot of life to your shield.
Step 8: Attach to Your Target
Now, you need to attach your new shield to your archery target. Position it on the front of the target. Make sure it covers the entire shooting face.
Use more screws and washers. Drill pilot holes through the shield and into the target material. Use the holes you already made in the shield as a guide.
Make sure the screws are long enough to hold securely. But not so long that they poke through the back of your target.
Shield Assembly Quick Check
Need: Plywood, Rubber Mat, Screws, Washers.
Tools: Saw, Drill, Screwdriver, Sandpaper.
Steps:
- Measure and cut plywood.
- Cut rubber mat to match.
- Layer rubber on plywood (rubber side out).
- Drill pilot holes.
- Screw layers together with washers.
- Seal/paint (optional).
- Attach to target.
Alternative Shield Ideas and Variations
The plywood and rubber shield is great. But what if you can’t find those materials? Or want something different?
There are other ways to build a good shield. These variations still focus on durability and protection.
Corrugated Plastic Shield
Corrugated plastic signs (like yard signs) are cheap. They are waterproof and easy to cut. You can use multiple layers.
Cut several pieces to the same size. Layer them up. Screw them together.
This makes a decent front shield. It won’t stop very heavy arrows alone. But it’s good for lighter bows.
Or as an outer layer.
For more strength, you could add a thin plywood backer. Or even a layer of heavy canvas. This adds rigidity.
And absorbs some impact. It’s a very lightweight option. Good for portable setups.
Full Rubber Wrap-Around
If you have a large, thin rubber mat, you could wrap it. Cut a long strip. Wrap it around the sides of your target.
Secure it with heavy-duty zip ties or straps. This protects the sides from glancing shots. It also adds a buffer to the front.
This works well for targets that are cylindrical or have rounded edges.
Layered Fabric Shield
For a softer, quieter shield, try heavy canvas. Use several layers. Like 4-6 layers of thick duck canvas.
Sew them together well. You could even add a layer of closed-cell foam between fabric layers. This absorbs shock.
The fabric is good at stopping arrows without excessive penetration. But it will wear out faster than wood or rubber. You’ll need to replace it more often.
What about old blankets or carpets? Some people use these. They can offer some protection.
But they might absorb moisture. And they don’t offer the same clean stop as denser materials. They are better for very low-poundage bows.
The “Stall Mat Sandwich”
This is similar to the plywood and rubber design. But instead of plywood, use two rubber mats. One on top of the other.
Screw them together. This is extremely durable. It’s also very heavy.
This is a good option if portability isn’t a concern. And you have a powerful bow.
When choosing an alternative, always consider:
- Arrow Weight and Speed: More powerful bows need stronger materials.
- Weather: Will it be exposed to rain or sun? Waterproof materials are best.
- Cost: What’s your budget?
- Weight: Will you need to move it often?
Myth vs. Reality: Archery Shields
Reality: Material properties matter. Some thick materials don’t absorb shock well. They can cause more arrow damage.
Myth: A single thick piece is enough.
Fact: Combining materials provides better shock absorption and durability. It protects the core target better.
Reality: Shields slow arrows. They reduce the force hitting the target. But arrows still have momentum.
Myth: Shields don’t really add much life.
Fact: A good shield significantly extends the usable life of your archery target.
Attaching Your Shield Securely
We touched on this, but it’s worth repeating. How you attach your shield matters. A loose shield is dangerous.
It can move when hit. This might cause unexpected arrow behavior. Or the shield could fall off.
Screws and Washers: This is the most common method. Use screws long enough to go through your shield material and get a good bite into the target. Washers are crucial.
They spread the pressure of the screw head. This stops it from tearing through the shield material. Especially important with softer materials like rubber.
Bolts, Nuts, and Washers: For very heavy shields, or if you want extra security, use bolts. Drill holes all the way through your shield and target. Put a bolt through.
Use washers on both sides. Then secure with a nut. Lock nuts are best.
They won’t loosen over time.
Straps or Bungees: This is more for temporary shields. Or shields designed to be removed. Heavy-duty straps can wrap around the target and shield.
Strong bungee cords can work for lighter setups. But they might not be secure enough for powerful bows.
Frames: Some larger targets might have a built-in frame. You could attach your shield to this frame. This can be a very secure method.
It takes the stress off the target material itself.
When attaching, think about the target’s material. Foam targets are softer. Wood or dense rubber targets are harder.
You’ll need different screw lengths and types for each. Always pre-drill pilot holes. This prevents splitting or cracking.
Especially in wood or dense rubber.
Maintaining Your DIY Archery Target Shield
Even the best shield needs some care. Taking care of it means it will protect your target longer. And keep you shooting safely.
Inspect Regularly: Before and after each shooting session, look at your shield. Check for deep cuts or tears. Are the screws still tight?
Is the shield still firmly attached?
Tighten Screws: Wood can expand and contract. Rubber can compress. Screws can loosen over time.
Keep a screwdriver handy. Tighten any loose screws. If a screw hole gets too big, try a slightly larger screw.
Or use a wood filler if it’s in the plywood.
Repair Damage: If you get a deep cut in your shield, don’t ignore it. Small tears can grow into big problems. For plywood, you might be able to fill small cracks with wood filler.
For rubber, some heavy-duty adhesives might work. Or you might need to replace a section. If your shield is heavily damaged, it might be time to make a new one.
Keep it Dry: If you used wood, moisture is its enemy. If you didn’t seal it well, bring it inside when not in use. Especially during wet weather.
Water can warp wood. It can also cause rot. Even rubber can degrade over time if left out in harsh conditions.
Clean the Surface: Arrows can leave fletching glue. Or dirt. Sometimes, cleaning the surface can help.
A stiff brush can remove debris. Avoid harsh chemicals that might damage the material.
Consider Replacement: Shields are not meant to last forever. They are designed to wear out before your target does. If your shield is severely damaged, it’s not protecting your target effectively anymore.
It’s time to consider making a new, improved shield. It’s a sign of a successful shield – it did its job!
Quick Scan: Shield Maintenance
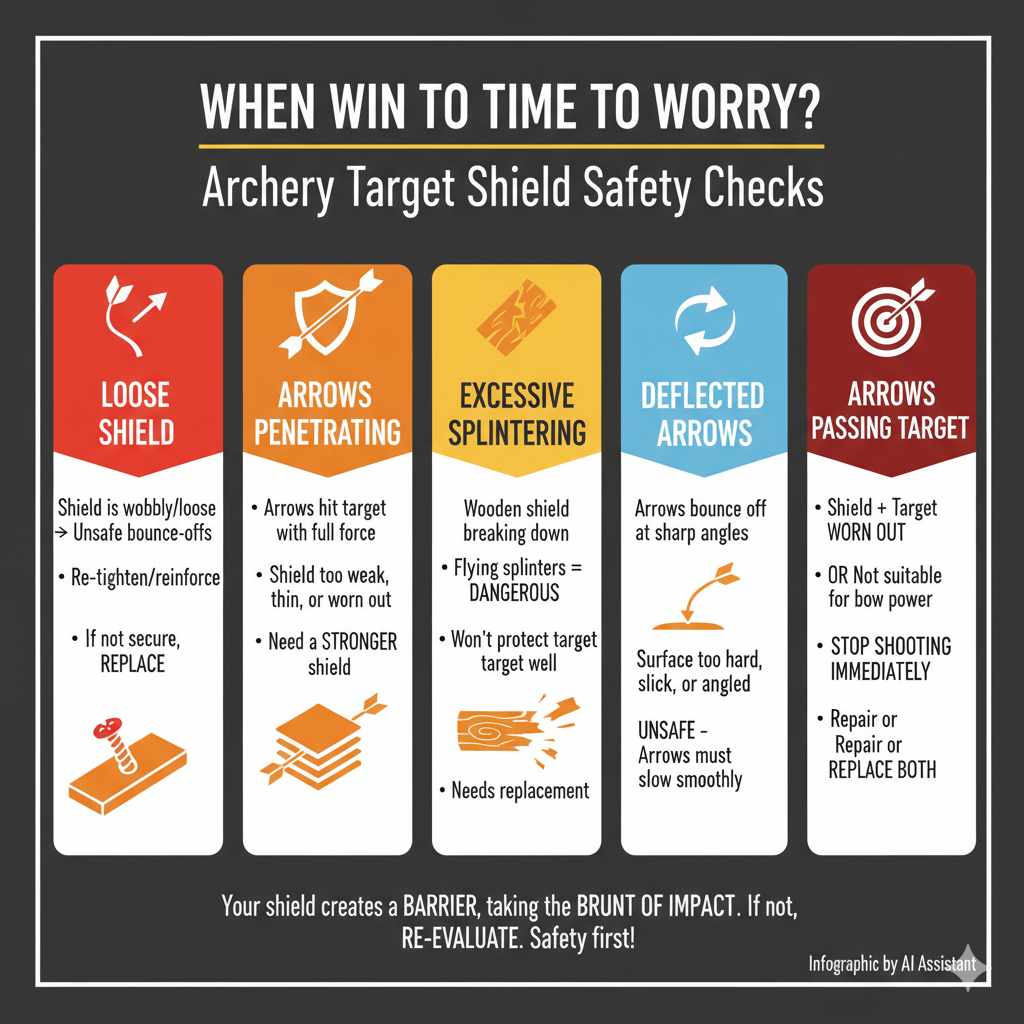
When Is It Time to Worry?
While building a shield is great, it’s important to know when things aren’t right. Your archery setup should always be safe. Here’s what to look out for.
Loose Shield: If your shield is wobbly or loose, it’s a problem. This can cause arrows to bounce off in unexpected directions. It’s unsafe for you and anyone nearby.
Re-tighten or reinforce the attachment. If it can’t be secured, it needs to be replaced.
Arrows Penetrating Shield: Your shield is there to stop or greatly slow arrows. If arrows are going through your shield and hitting the actual target with full force, the shield isn’t doing its job. This means the shield material is too weak.
Or it’s too thin. Or it’s worn out. You need a stronger shield.
Excessive Splintering: If your wooden shield is splintering badly, it’s becoming a hazard. Small splinters flying off can be dangerous. Also, splintering means the wood is breaking down.
It won’t protect your target well anymore.
Deflected Arrows: If arrows are consistently deflecting off your shield at sharp angles, something is wrong. This can happen if the shield surface is too hard or slick. Or if it’s angled incorrectly.
This can also be unsafe. Arrows need to be stopped or slowed smoothly.
Arrows Passing Target: This is the most serious issue. If arrows are passing through your shield AND your target, you have a major problem. This means both your shield and target are worn out.
Or they aren’t suitable for your bow’s power. Stop shooting immediately. Assess your target and shield.
Make repairs or replacements before shooting again.
Your shield should create a barrier. It should take the brunt of the impact. It allows your target to last longer.
If it’s not doing these things, it’s time to re-evaluate. Safety always comes first. Never shoot with a damaged or unsafe setup.
Frequently Asked Questions About Archery Target Shields
What is the best material for an archery target shield?
The best material often involves layers. A combination of tough plywood for structure and thick rubber matting for shock absorption is highly effective. Corrugated plastic and heavy canvas are also good options, often used in layers.
How do I attach a shield to my archery target?
Secure attachment is key. Use screws with washers that go through your shield and into the target. For heavier shields, bolts with nuts and washers provide extra security.
Ensure the screws or bolts are long enough for a strong hold but not so long they damage the target’s back.
How long will a DIY archery target shield last?
The lifespan depends on the materials used, the power of your bow, and how often you shoot. A well-built shield made from durable materials like plywood and rubber can last for many seasons, significantly extending your target’s life.
Can I use an old tire as a target shield?
While old tires are tough, they can be difficult to cut and shape into a shield. They also might cause arrows to deflect more aggressively due to their hardness and shape. If you do use tire material, ensure it’s cut safely and attached securely.
Do I need a shield if I shoot a low-poundage bow?
Even with a low-poundage bow, arrows will cause wear and tear on your target over time. A shield will still help your target last much longer. It’s a good investment for any archer wanting to preserve their target.
What’s the difference between a target face and a target shield?
A target face is the part you aim at, usually with scoring rings. A target shield is a protective layer placed over or around the target face to absorb arrow impacts and prevent damage to the target material itself.
Should my shield be softer or harder than my target?
Your shield should be tough enough to absorb impact, but it needs to allow arrows to penetrate slightly without excessive deflection. It generally acts as a sacrificial layer. A combination of harder backing and a slightly softer, more forgiving front surface works well.
The goal is to slow the arrow before it reaches the main target material.
Conclusion
Building your own archery target shield is a rewarding project. It’s practical and saves you money. You protect your gear.
You get more practice time. By choosing good materials and building it right, you can create a shield that stands up to many shots. Happy shooting, and enjoy your longer-lasting target!