How A Dirt Bike Chest Protector Should Fit
What Makes a Dirt Bike Chest Protector Fit Right?
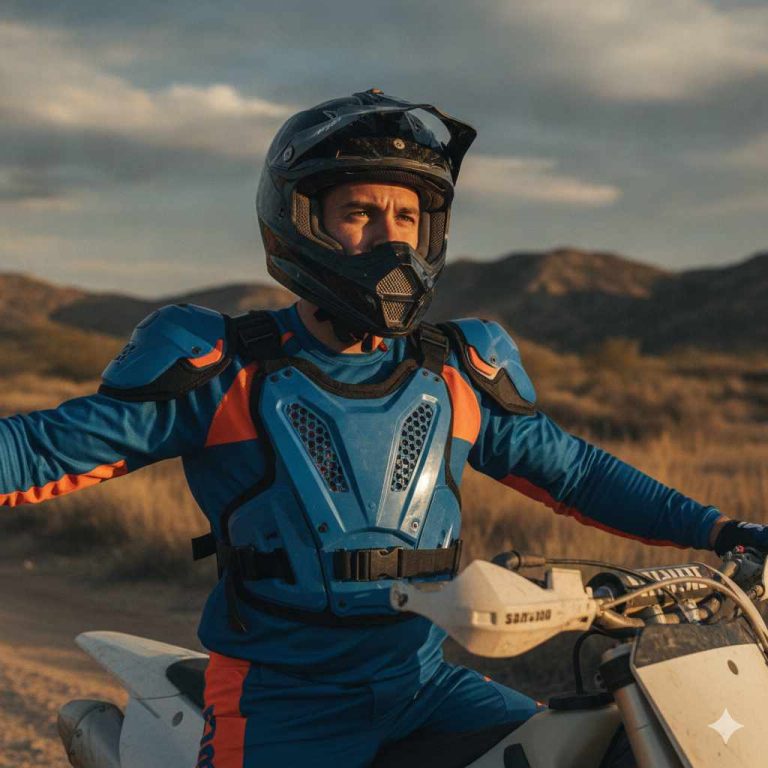
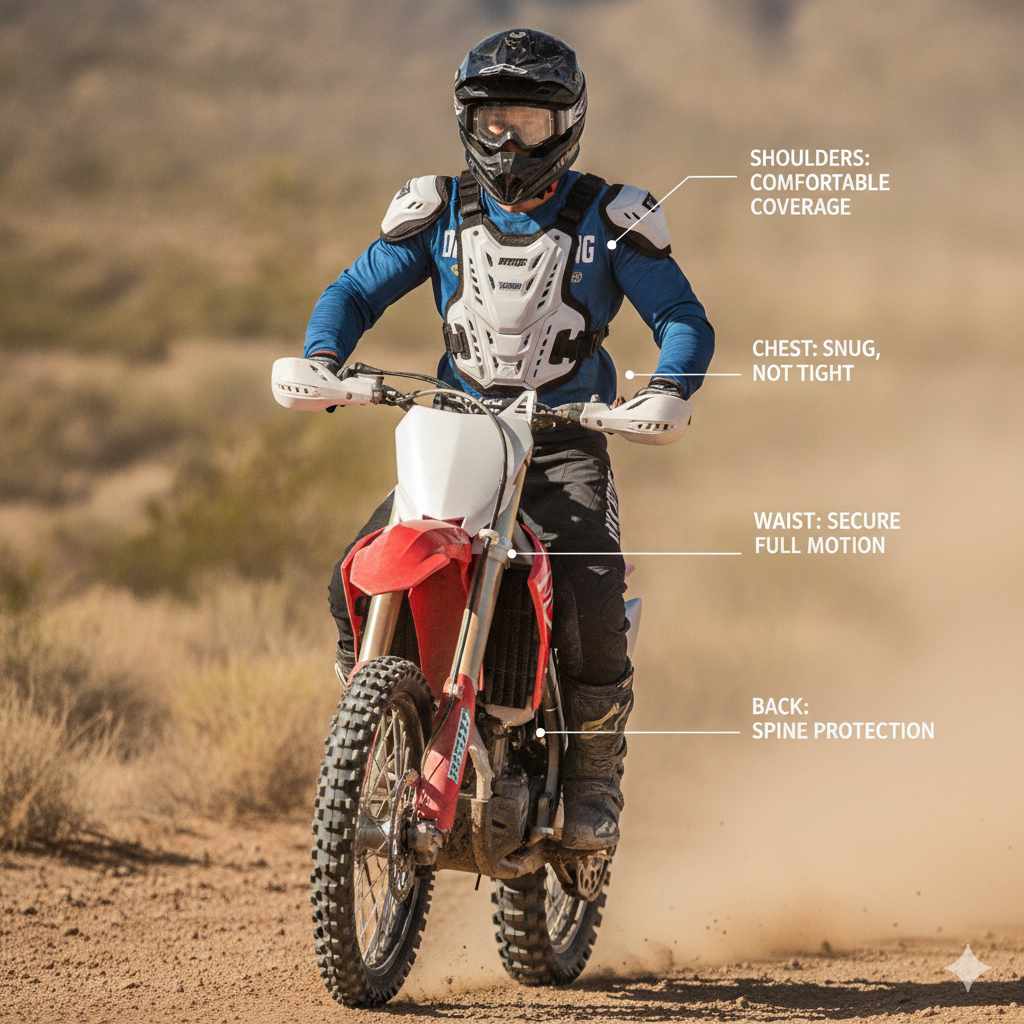
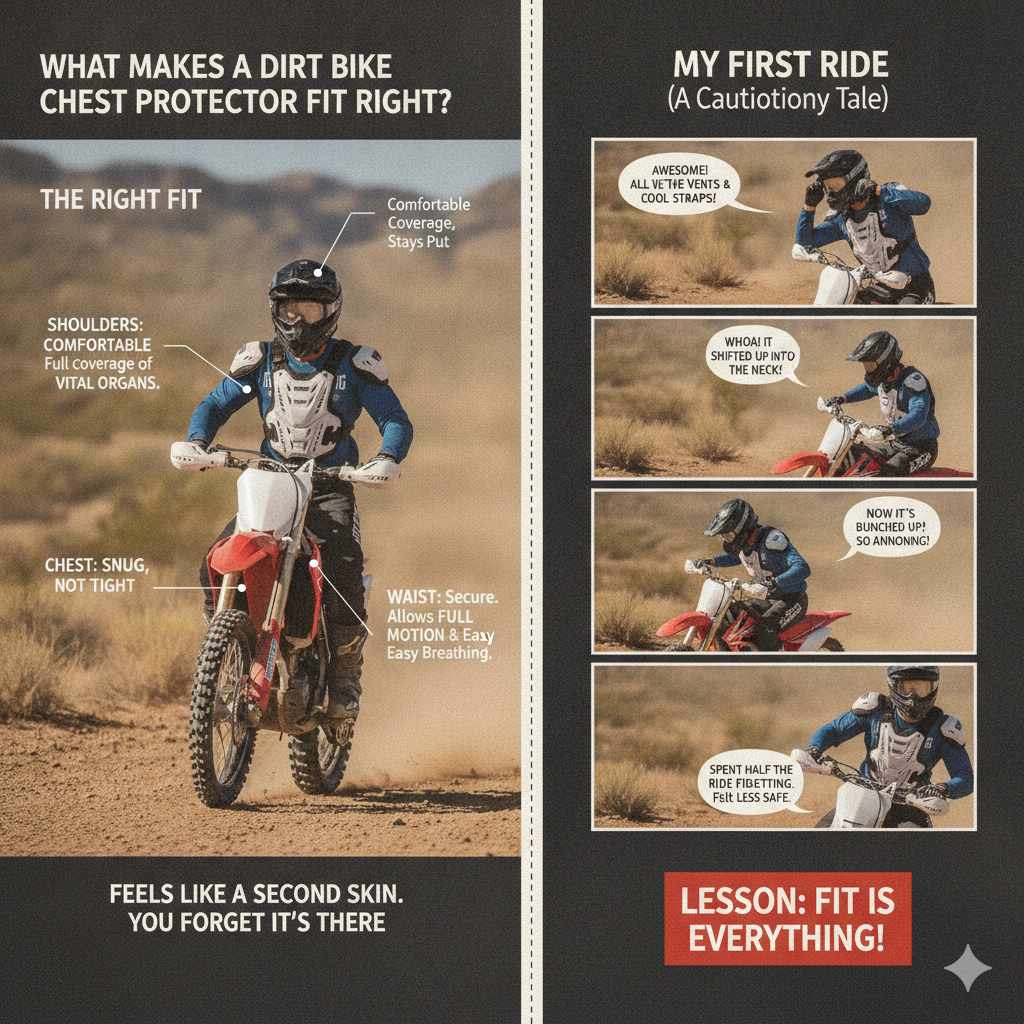
A chest protector is meant to be a second skin when you’re riding. It needs to stay put. It must cover the right spots.
And it should never get in your way. When it fits well, you forget it’s even there. You can focus on the ride.
The main goal is full coverage. This means it protects your vital areas. Your chest, your back, and your sides.
A good fit stops it from sliding around. This is key during a crash. It also means it won’t feel bulky.
You can move freely. You can breathe easily. It feels secure.
It feels like part of you.
My First Ride With a New Protector
I remember getting my first serious dirt bike chest protector. It looked awesome. It had all the vents and cool straps.
I put it on over my jersey, cinched everything down, and felt pretty good. Then I swung my leg over the bike. I started warming up the engine.
As soon as I hit a small bump, I felt it. The whole thing shifted. It rode up into my neck.
Then, when I leaned forward, it bunched up in my stomach.
It was so annoying. I spent half the ride fidgeting with it. I was pulling it down, tightening straps, trying to get it comfortable.
I even stopped a couple of times. It made me feel less safe, too. If it was moving that much, would it even help in a fall?
It took a few more tries and some smart advice before I figured out what I was doing wrong. The lesson was clear: fit is everything.
Key Fit Indicators for Your Protector
Stays in Place: Does it move much when you shift or stand? It shouldn’t.
Full Coverage: Does it cover your sternum, ribs, and upper abdomen? It should reach well down your torso.
Unrestricted Movement: Can you twist, bend, and reach the handlebars easily? No pinching or binding?
Comfortable Straps: Are the shoulder and side straps snug but not digging in? Do they stay put?
Neck Brace Compatibility: If you wear a neck brace, does it fit over or around it without interference?
Understanding the Parts of a Chest Protector
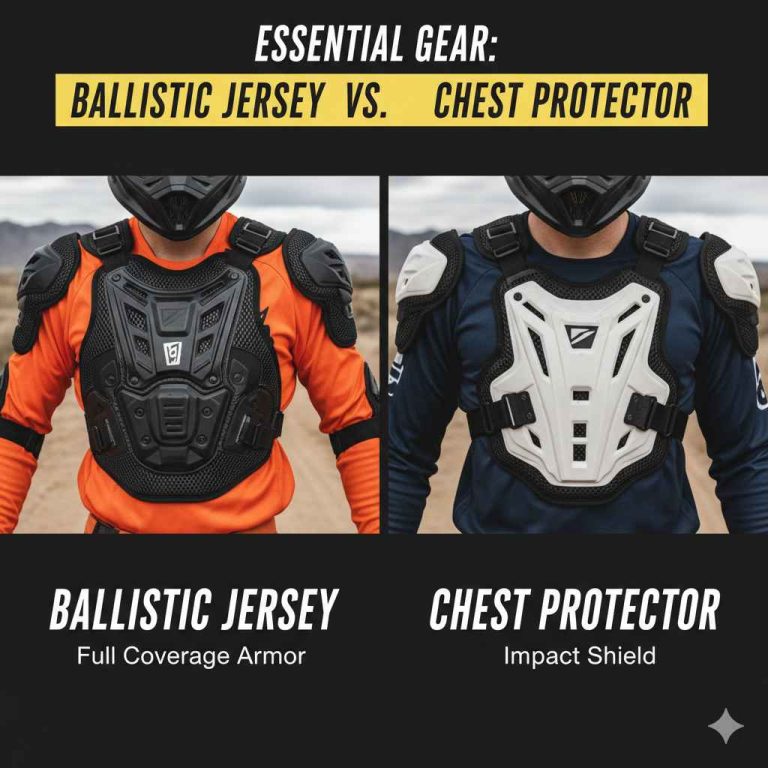
Most dirt bike chest protectors have a few main pieces. You’ll see a hard outer shell. This is for impact.
Underneath, there’s usually some padding. This adds comfort and absorbs shock. Then there are the strapping systems.
These are how you adjust the fit. They connect different parts of the protector.
There are usually shoulder straps. These go over your shoulders. They connect the front and back pieces.
Side straps are also common. These wrap around your waist. They help keep the protector snug against your body.
Some have extra straps. These might help adjust the height or how tightly the chest plate sits.
How to Measure and Find Your Size
Getting the right size starts with a tape measure. You’ll want to measure your chest. Most manufacturers give a size chart.
It’s usually based on chest circumference. Measure around the fullest part of your chest. Keep the tape level.
Don’t pull it too tight.
Also, check the height. Some brands list a recommended rider height. Or they might give a measurement from your shoulders to your waist.
It’s good to have someone help you with these measurements. This way, they’re more accurate. Always check the specific brand’s sizing guide.
Sizes can vary a lot between different makers.
For example, a size Large from one brand might fit like a Medium from another. This is why looking at their chart is so important. Don’t just guess.
You want the protector to be big enough to cover your whole torso. But not so big that it’s floppy or loose.
Sizing Snapshot
Chest Size: Measure around the fullest part of your chest. Compare to the brand’s size chart. This is the most critical measurement.
Torso Length: Some protectors are longer than others. Ensure it covers your ribs and abdomen. Check the product specs.
Shoulder Width: While less common for sizing, ensure shoulder straps don’t dig or feel too short.
Waist Size: The side straps allow some adjustment here. But your waist should not be so large that the straps don’t reach.
Putting It On for the First Time: The Right Way
You usually wear a chest protector over a base layer. Then your jersey goes on over the protector. Start by putting the front and back sections together loosely.
Then slip your arms through the shoulder straps. It should feel a little loose at first.
Now, adjust the shoulder straps. They should be snug. But they shouldn’t pull the front or back pieces up too high.
Or down too low. Then, tighten the side straps. These are key to keeping the protector close to your body.
They stop it from shifting sideways or front-to-back. You want it snug. But you must still be able to breathe.
Step-by-Step Fit Check
1. Loosely Connect: Put on the front and back pieces. Let the straps hang.
2. Shoulder Adjustment: Tighten shoulder straps so they rest comfortably. No pulling.
3. Side Strap Snugness: Cinch the side straps. The protector should hug your torso.
4. The Bend Test: Twist your torso. Bend forward and backward.
Does it stay put?
5. Breathing Test: Take a deep breath. Can you fill your lungs easily?
What to Look For: Coverage Zones
A well-fitting chest protector covers key areas. This includes your sternum. That’s the flat bone in the middle of your chest.
It should also cover your ribs. Especially the lower ribs. These can be very vulnerable.
The back protection is also important. It should extend far enough down. This protects your spine and kidneys.
Some protectors have side panels. These add protection to your obliques. When the protector fits right, these panels are in the correct place.
They don’t dig in or feel exposed.
I noticed on one protector I tried that the side panels felt too short. They didn’t quite cover my ribs when I bent over. Even though the main chest piece fit okay, this specific coverage gap made me hesitant.
It felt like a weak spot. A good fit ensures all these protective zones work together. They cover you completely.
Adjusting for Different Riding Styles
Aggressive riding means more movement. You stand up a lot. You shift your weight.
You might even do jumps. Your gear needs to keep up. If you’re a trail rider, you might be seated more.
You move differently. Your chest protector needs to adapt to your specific style.
For standing riders, ensure the protector doesn’t ride up into your chin. It should stay down. This keeps your lower face clear.
It allows for better head movement. For seated riders, make sure the bottom edge doesn’t dig into your abdomen. Especially when you’re leaning forward.
This can be very uncomfortable on long rides.
I’ve found that some protectors with more flexible back panels work better for me. They allow more movement when I’m standing and shifting. Other riders prefer a very rigid front plate for maximum impact.
The “best” fit often depends on how you ride most often.
Rider Style Fit Notes
Stand-Up Riders: Ensure the bottom edge doesn’t restrict lower body movement. Check that the top doesn’t hit your chin when looking up.
Seated Riders: Make sure the protector’s lower edge doesn’t dig into your stomach when you lean forward.
Aggressive Riders: The protector needs to stay secure during high G-force and impacts. Secure straps are vital.
Long-Distance Riders: Comfort is paramount. Avoid any pinching or rubbing that can become painful over time.
Neck Brace Compatibility: A Crucial Factor
If you wear a neck brace, this is huge. Not all chest protectors work well with all neck braces. Some protectors are designed to go under a neck brace.
Others are designed to go over it. You need to know which you have.
If it’s an over-the-brace type, the protector should fit smoothly around the brace. It shouldn’t push the brace up too high. It shouldn’t create any gaps where the brace should be.
If it’s an under-the-brace type, the protector should sit flat against your chest. The brace should then rest comfortably on top of it.
I saw a friend struggle with this. He had a new protector and a new neck brace. They looked great separately.
But when he put them on together, the neck brace kept slipping forward. The protector was too tall in the front. It lifted the back of the brace.
It was a real safety hazard. He had to swap his protector for one designed for his brace.
Neck Brace Fit Checklist
Over-the-Brace: Does the protector fit around the brace without pushing it up or creating gaps? Is the front smooth?
Under-the-Brace: Does the protector lie flat? Can the brace rest securely on top without wobbling?
Range of Motion: Can you turn your head freely in both directions with the brace and protector on?
No Interference: Do any edges of the protector rub or pinch the brace or your neck?
When is the Fit NOT Right? Signs to Watch For
There are clear signs your chest protector doesn’t fit. One is if it rides up. It might slide up into your neck.
Or it bunches up around your waist. Another is if it shifts sideways when you move. You feel it moving around your torso.
Chafing is a big problem. If straps are digging in, or edges are rubbing, it’s too tight or ill-fitting. You might also notice restricted movement.
If you can’t twist or bend normally, it’s a bad fit. Sometimes, you can’t even take a deep breath. This is a serious issue for comfort and safety.
I once tried a protector that was too wide for me. The side panels stuck out. They caught on my jersey and my handlebars sometimes.
It felt awkward. Even though it covered my chest, the way it sat on my sides was wrong. It felt loose and unsafe.
Common Mistakes People Make
People often buy protectors that are too big. They think a bigger size will offer more protection. But a loose protector doesn’t protect you well.
It just moves around. Another mistake is not adjusting the straps correctly. They might tighten the side straps too much.
This makes it hard to breathe. Or they leave them too loose.
Ignoring brand sizing charts is another big error. Relying on your usual clothing size is risky. Each brand has its own fit.
Many people also forget about neck brace compatibility. They buy a protector that looks good. But it clashes with their existing neck brace.
This can lead to discomfort and reduced safety.
I also see riders who don’t try the protector on with their gear. You need to wear your base layer and jersey. The protector fits differently with these layers on.
What feels okay bare might feel tight or loose with a jersey.
Mistake Avoidance Guide
Size Guessing: Always use the manufacturer’s size chart. Measure yourself.
Strap Neglect: Learn how to adjust each strap type. Don’t overtighten or undertighten.
Gear Mismatch: Try on the protector with your typical riding base layer and jersey.
Brace Blindness: If you use a neck brace, verify compatibility before buying.
Ignoring Comfort: A protector that constantly needs adjusting is not fitting correctly.
The Role of Materials and Design
The materials used affect how a protector fits and feels. Some have flexible plastic panels. These move better with your body.
Others have more rigid, segmented designs. These offer more impact resistance but can sometimes feel stiffer.
Padding is also important. Good padding conforms to your body. It adds a layer of comfort.
It also helps absorb minor impacts. The type of strapping system matters too. Some use Velcro.
Others have buckle systems. Buckles can be more secure. Velcro can loosen over time.
When I look at a protector, I check the articulation points. These are the areas where panels connect. How well do they allow bending and twisting?
If they’re too stiff, the protector won’t conform to your body. It will feel like a plastic shell strapped to you, rather than a part of your protective gear.
Testing Your Protector on the Trail
Once you think you have a good fit, you must test it. Go for a short ride first. Pay attention to how the protector feels.
Does it stay in place? Do you feel any pressure points? Can you move freely?
Ride over some small bumps. Stand up and sit down a few times. Make some sharp turns.
Then, take a break. Feel your skin. Are there any red marks?
Are the straps digging in? Make any necessary adjustments. You might need to tweak the straps a bit.
If it still feels wrong after a short ride and adjustments, it might not be the right protector for you. It’s better to find out on a short loop than on a long, challenging trail. The feedback you get from real riding is invaluable.
When to Consider a Different Protector
If you’ve tried adjusting your protector and it still doesn’t feel right, it’s time for a change. Signs include constant shifting, chafing, restricted movement, or poor coverage. If it doesn’t feel secure during normal riding, it certainly won’t in an accident.
Also, consider your gear evolution. If you get a new neck brace, you might need a new protector. If you change your riding style significantly, a different design might suit you better.
Don’t settle for discomfort or perceived lack of protection.
I once kept a protector for too long because I thought “it’s better than nothing.” But it was constantly riding up. Every time I hit a jump, I had to pull it down. It was distracting and frankly, I wasn’t sure how much it was actually protecting me.
Upgrading to one that fit properly made a huge difference in my confidence and comfort.
Upgrade Triggers
Constant Shifting: If it slides around regardless of strap tightness.
Persistent Discomfort: Pinching, chafing, or pressure points that don’t go away.
Limited Mobility: If it restricts your ability to move naturally on the bike.
Poor Coverage: If it doesn’t cover your intended protection zones. Or if it gaps when you move.
Incompatibility: If it doesn’t work with your neck brace or other essential gear.
Maintaining Your Protector for a Lasting Fit
Keeping your protector clean is vital. Sweat and dirt can break down padding. They can also make straps less effective.
Wash it according to the manufacturer’s instructions. Usually, this involves hand washing with mild soap and water. Always let it air dry.
Never put it in a machine dryer.
Check the straps regularly. Make sure they are not frayed. Ensure Velcro is still sticky.
If you have buckles, check that they are not cracked. A well-maintained protector will keep its fit longer. It will continue to offer reliable protection.
I always rinse mine after a muddy ride. This prevents dried mud from getting into the vents or straps. It’s a small step, but it helps keep the gear in good shape.
And a good shape means a good fit.
What This Means for Your Ride
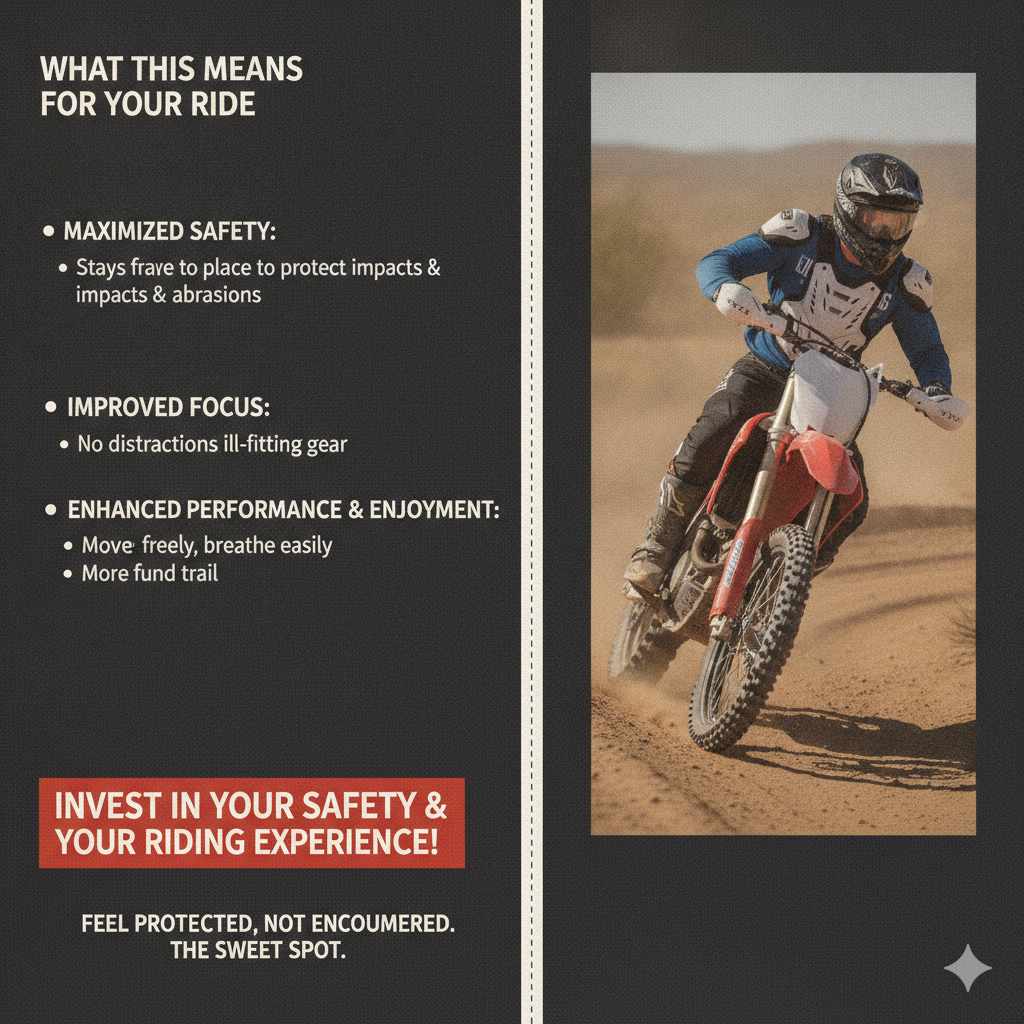
A properly fitting dirt bike chest protector is not just about comfort. It’s a critical piece of safety gear. When it fits right, it stays where it needs to be.
This maximizes its ability to protect you from impacts and abrasions.
It also means you can focus on your riding. You won’t be distracted by gear issues. You can move freely.
You can breathe easily. This leads to better control and more enjoyment on the trail. Think of it as an investment in your safety and your riding experience.
In short, a good fit makes your chest protector disappear. You feel protected but not encumbered. That’s the sweet spot we’re all looking for.
Frequently Asked Questions About Dirt Bike Chest Protector Fit
How do I know if my dirt bike chest protector is too tight?
If you feel pinching or excessive pressure from the straps, it’s too tight. You should also struggle to take a deep breath. Red marks on your skin after a short ride are another sign.
The goal is snug, not restrictive.
Can I wear my jersey over a loose chest protector?
While a jersey can cover a slightly loose protector, it doesn’t fix the fit problem. A protector that’s too loose can shift in a crash, reducing its effectiveness. It’s best to adjust it so it fits your body snugly, then wear your jersey over it.
What if my protector feels fine but my neck brace doesn’t sit right?
This means the protector and neck brace are not compatible. You need a protector that works with your specific neck brace. Check the manufacturer’s recommendations for compatibility.
You might need to switch to an “over-the-brace” or “under-the-brace” style protector.
Should my chest protector cover my entire stomach area?
A well-fitting protector should cover your sternum and upper abdomen. It should extend down over your lower ribs. The exact length can vary by design.
But it should protect the vital organs in that region. If it feels too short and leaves your lower ribs exposed, it may not be the right fit.
How often should I check the fit of my chest protector?
You should check the fit every time you put it on. Make quick adjustments as needed. It’s also wise to re-evaluate the fit periodically.
As your body changes or if you get new gear, the fit might need tweaking. Riding for a few minutes and then checking for pressure points is a good practice.
Are there protectors specifically for smaller riders or women?
Yes, many brands offer specific fits. Some are designed with a narrower profile. Others have different strap configurations.
Always look for sizing charts and product descriptions tailored to your body type. A good fit is personal, regardless of gender.
Final Thoughts on Protector Fit
Getting the fit of your dirt bike chest protector just right is key. It’s about safety, comfort, and performance. Take your time.
Measure carefully. Adjust properly. And always test it out on the trail.
A protector that fits like a glove is one you’ll wear every ride, providing essential peace of mind.