Quick Summary:
Bypass complex tools and expensive jigs! To cut Easton carbon arrows easily and precisely, use a simple, effective trick: meticulously measure, mark with a sharpie, and employ a fine-tooth hacksaw or miter saw with a specific blade. Ensure you reinforce the cut area with tape to prevent splintering.
Hey there, fellow archers! Are you excited to get your Easton carbon arrows perfectly fitted to your draw length? It’s a crucial step for accuracy and a smooth release. But the thought of cutting those expensive arrows might seem a little daunting. You might worry about messing them up, or perhaps you don’t want to invest in specialized equipment right away. Don’t sweat it! My goal is to make archery accessible and enjoyable for everyone, and that includes simple arrow customization. We’re going to walk through an easy, effective method that doesn’t require a degree in engineering or a workshop full of gadgets. Get ready to gain confidence and see how simple it can be to get your arrows just right. Let’s dive in and get those arrows ready for your next shot!
Why Arrow Length Matters: More Than Just a Number
As a beginner archer, you might wonder why getting your arrow length spot-on is so important. It’s not just about aesthetics; it’s fundamentally about how your arrow flies and how consistently you can shoot. Imagine a too-short arrow leaving the bow before it’s fully supported by the arrow rest. This can lead to erratic flight, wobbles, and inconsistent grouping on your target. Conversely, an arrow that’s too long might flex excessively, impacting its trajectory and potentially causing it to interfere with your bow’s accessories. Getting the length right ensures a clean, efficient release, maximizing the energy transfer from your bow to the arrow. This means better accuracy, more predictable shots, and ultimately, a lot more fun down at the shooting range.
Gathering Your Arrow Cutting Arsenal: Simple Tools for Big Results
You don’t need a machine shop to cut your Easton carbon arrows. The beauty of archery often lies in its simplicity when you know how to approach it. For this “genius trick,” we’re sticking to tools that are either readily available or a worthwhile, small investment for any archer. Here’s what you’ll want to have on hand:
Essential Tools and Materials:
- Easton Carbon Arrows: Of course! Make sure they’re from a reputable brand like Easton, known for their quality and consistency.
- Measuring Tape: A good quality, accurate measuring tape is your best friend here.
- Sharpie Marker: A fine-tip permanent marker works best for a clear, precise line.
- Masking Tape or Painter’s Tape: This is crucial for preventing splintering during the cut.
- Fine-Tooth Hacksaw or Miter Saw with a Carbon-Specific Blade: More on this in the next section! This is where precision truly happens.
- Arrow Squaring Tool (Optional but Recommended): This small tool ensures your nock end is perfectly square, which helps with alignment for cutting. Many archery shops have these.
- Sandpaper (Fine Grit): To smooth out any rough edges after cutting.
- Safety Glasses: Always protect your eyes, especially when cutting materials like carbon.
- Work Surface: A sturdy, flat surface to work on.
Having these items ready before you start will make the entire process smooth and stress-free. It’s all about preparation!
The “Genius Trick” Unveiled: Your Step-by-Step Guide
Now for the moment you’ve been waiting for! This method focuses on precision and preventing damage to your arrows. We’re going to use tape strategically and a sharp marking tool to ensure a perfect cut every time. It’s about being deliberate rather than rushing.
Step 1: Determine Your Correct Arrow Length
This is the most critical step, as cutting is irreversible. There are several ways to find your ideal arrow length, but a common and beginner-friendly method involves measuring from the deepest part of your bow’s grip (where your palm rests) to your nocking point on the string, plus an allowance for the arrow’s components. A more refined method is the “paper tear test” or having a coach or experienced archer measure you directly with a bow.
A common measurement guideline:
- String your bow.
- Nock an arrow onto your string.
- Pull the bow back to your natural draw length.
- Have a friend help you place a finger (or a specialized measuring tool) at the point where the arrow shaft touches the riser (the bow’s main body).
- Measure from that point to the deepest part of your bow’s grip.
- Add 1.5 to 2 inches to that measurement. This extra length accounts for the arrow’s point, fletching, and ensures clearance from the riser.
Alternatively, you can use your wingspan. Stand with your arms outstretched. Measure from fingertip to fingertip, then divide by two. Add about 3 inches to this number. This is a rougher estimate but can get you close. Always confirm with a bow shop or experienced archer if possible. They often use specialized tools for this. For example, a reputable archery shop or guide can help you find accurate measurements, often referencing resources like Archery GB’s guidance on arrow length.
Step 2: The Precision Mark
Once you have your exact desired length, it’s time to mark your arrow. Accuracy is key here. You want to mark the exact point where you intend to cut.
- Take your arrow and your measuring tape.
- Align the zero mark of your tape with the very back of the nock throat (where the string will sit).
- Measure to your determined cut length point.
- Use your Sharpie marker to draw a clean, thin, and straight line completely around the arrow shaft at this exact measurement. A steady hand is important here.
Pro Tip: For an even more precise line that’s perfectly perpendicular to the shaft, you can use a piece of straight masking tape as a guide. Wrap it around the arrow at your measurement mark, ensuring the edge of the tape is exactly where you want to cut. Draw your line right along the edge of the tape. This ensures a 90-degree mark.
Step 3: The “Genius” Anti-Splintering Trick: Strategic Taping
This is the part that truly makes the difference between a clean cut and a frayed mess. Carbon arrows can splinter unpredictably when cut without proper preparation. Taping is your superhero move here.
- Carefully wrap a section of high-quality masking tape or painter’s tape directly over your Sharpie line.
- Ensure the tape is wrapped very tightly and smoothly, adhering well to the carbon shaft.
- Overlap the tape slightly past your marked line on both sides. This reinforced area will contain the carbon fibers as you cut through them.
- The tape should be at least 1/2 inch to 1 inch wide, covering the intended cut line generously.
This tight layer of tape essentially acts as a mold, preventing individual carbon fibers from splaying out erratically as the saw blade makes contact. It’s simple, yet incredibly effective.
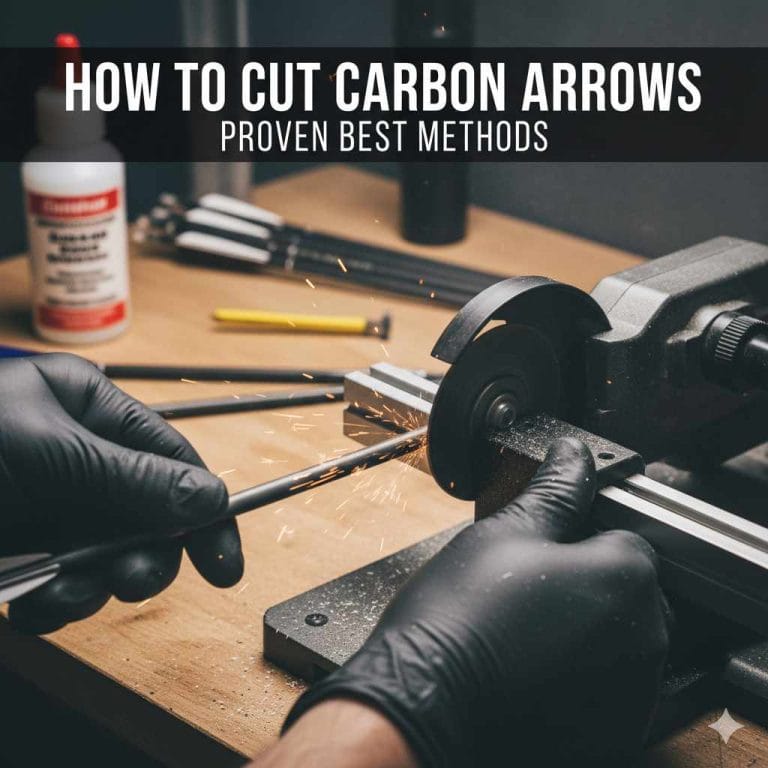
Step 4: The Cut Itself: Precision Tools
Now for the actual cutting. This is where your tool choice and technique are paramount. We want a clean, straight, and burr-free cut.
Option A: The Fine-Tooth Hacksaw Method (Beginner Friendly)
If you’re using a standard hacksaw, ensure it has a fine-tooth blade (think 32 teeth per inch or more). A coarser blade will likely cause splintering, even with the tape.
- Secure the arrow so it doesn’t spin freely. You can hold it gently with your other hand, or better yet, place it in a workbench vise with soft jaws (to avoid crushing). Ensure the taped section is positioned where you intend to cut.
- Start sawing slowly and steadily. Apply light, consistent pressure. Avoid sawing back and forth with excessive force.
- Let the saw do the work. Focus on maintaining a straight, perpendicular angle to the arrow shaft. The tape will help guide you and keep the cut clean.
- Continue cutting until you are through the shaft.
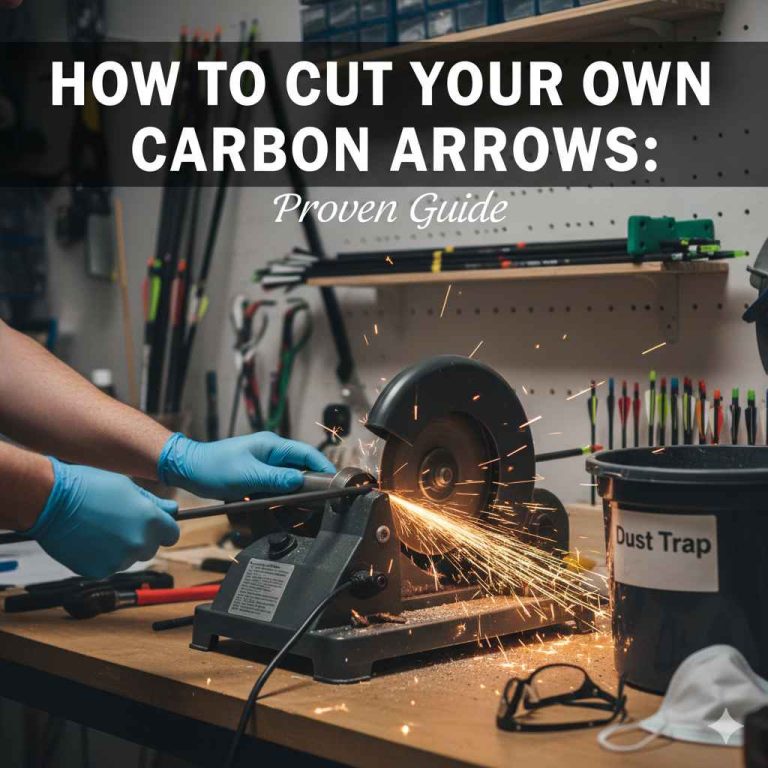
Option B: The Miter Saw Method (For More Regular Archers)
If you plan on cutting arrows regularly or want the most precise cut, a miter saw (chop saw) can be an excellent investment. However, you MUST use a specific blade designed for cutting carbon composites.
- Blade Selection is Crucial: Look for a thin-cut, high-tooth-count abrasive metal-cutting blade, or ideally, a blade specifically designed for cutting carbon fiber or composites. These blades minimize heat and “tear-out.” You can find these at specialized tool suppliers or online. For example, a specific carbide-tipped cut-off wheel for composites might be suitable, but always double-check specifications for arrow shafts.
- Setup: Ensure the saw is properly calibrated and the blade is running true. Adjust the miter angle to 0 degrees for a straight cut.
- Secure the Arrow: Use a reliable clamp or vice system to hold the arrow firmly. Position the taped section directly in the path of the blade, ensuring it will be cut precisely at your marked line.
- The Cut: Lower the blade slowly and steadily through the arrow. Do not force it. Let the saw and the sharp blade do the work. The high RPMs of a miter saw can generate heat, so a quick, clean pass is best.
Safety Note: When using any saw, especially a miter saw, always wear safety glasses and consider a dust mask, as fine carbon dust can be irritating. Ensure the arrow is well-secured to prevent it from kicking back.
Step 5: Clean Up and Smooth the Edges
You’ve made the cut! Now, a little finishing work ensures everything is perfect and safe.
- Carefully remove the tape from around the cut end of the arrow. Do this gently to avoid snagging or tearing any fibers.
- Inspect the cut end. It should be clean and straight. If you see any minor fraying or rough spots, this is where your fine-grit sandpaper comes in.
- Gently sand the cut edge in a circular motion until it is smooth. The goal isn’t to shorten the arrow further, but to create a perfectly flat, smooth surface for your field points or broadheads.
- Wipe away any dust.
Step 6: Reassembly (If Applicable)
If you’re cutting arrows to install new inserts that are a different length, or if you need to reattach a component, do so now. Typically, after cutting, you’ll be ready to add your field points or broadheads to this freshly cut end.
Comparing Arrow Cutting Methods
While the above “genius trick” is excellent for beginners and cost-effective, it’s good to know what other options exist. Each has its pros and cons:
| Method | Pros | Cons | Best For |
|---|---|---|---|
| Fine-Tooth Hacksaw with Tape (Our Trick) | Very affordable, accessible tools, excellent anti-splintering with tape. | Can be slower, requires a steady hand for perfect straightness. | Beginners, occasional arrow cutting, budget-conscious archers. |
| Miter Saw (with Carbon Blade) | Extremely fast and precise, repeatable results, very clean cuts. | Higher initial cost, requires a specific blade, potential for overheating if not used correctly. | Frequent arrow cutters, archers prioritizing speed and absolute precision. |
| Dedicated Arrow Saw/Cutter | Designed specifically for arrows, offers maximum precision and speed, built-in squaring features. | Most expensive option, might be overkill for infrequent use. | Archery shops, competitive archers cutting many arrows, those who want the ultimate tool. |
| Bench Grinder (with Specialized Wheels) | Can be fast. | High risk of overheating and damaging carbon, difficult to get a clean, straight cut, high splintering risk. Not recommended for beginners. | Experienced users with specialized wheels and extreme caution (generally discouraged). |
As you can see, the tape method with a hacksaw or even a standard miter saw is a fantastic sweet spot for most beginners. It balances effectiveness with accessibility.
Maintaining Your Cutting Tools
Just like your bow needs care, your cutting tools will perform better and last longer if maintained. A dull blade on a hacksaw or miter saw is the enemy of a clean carbon cut. Periodically check your saw blades for wear and tear. If you’re using a hacksaw, a new blade is inexpensive and makes a world of difference. For a miter saw, ensure the blade is clean and free of carbon buildup. Proper tool maintenance means smoother cuts, less risk of damaging your arrows, and a safer workflow for you.
Safety First: A Quick Reminder
I can’t stress this enough – always prioritize safety.
- Eye Protection: Carbon fiber dust and small particles can fly. Always wear safety glasses.
- Gloves: While not strictly necessary for cutting, gloves can provide a better grip and protect your hands.
- Secure Your Work: Ensure the arrow is stable and won’t move during cutting.
- Good Ventilation: If you’re cutting a lot of arrows, ensure you’re in a well-ventilated area.
- Read Tool Manuals: If using power tools, always read and understand the manufacturer’s instructions.
Following these simple safety guidelines will ensure your arrow-cutting experience is as risk-free as possible.
Frequently Asked Questions About Cutting Easton Carbon Arrows
Q1: Can I cut my Easton carbon arrows with a regular handsaw?
A: It’s not ideal. A regular handsaw usually has coarse teeth that will likely cause splintering and a rough cut on carbon. If you must use a handsaw, ensure it has a very fine tooth count (32 TPI or higher) and follow the taping method religiously. A fine-tooth hacksaw is much better suited for the job.
Q2: How do I know if my arrow is cut perfectly straight?
A: The best way is to use a specialized arrow squaring tool after cutting. These simple tools sit on your workbench and you spin the arrow against them to check for wobble. Visually, if your tape line was perfectly straight and your sawing motion was steady and perpendicular, the cut should be quite straight. You can also visually inspect if one side looks significantly longer or shorter than the other.
Q3: Will cutting my arrows affect their spine or durability?
A: If cut cleanly and properly, cutting an arrow will not typically affect its spine. The spine (stiffness) of an arrow is determined by its internal construction and diameter. However, a rough or splintered cut can weaken the shaft at that point, making it more susceptible to breakage under stress. This is why the taping and clean cutting process is so vital.
Q4: How much extra length should I add when measuring for my arrows?
A: The standard recommendation is to add 1.5 to 2 inches to the measurement from your bow’s riser to your nocking point anchor point. This extra length provides clearance for the arrow to fly away from the bow’s components and ensures the proper flex for accurate shooting. It’s always best to confirm this with a coach or experienced archer, as draw weight and bow style can influence the ideal addition.
Q5: Can I cut arrows with field points already installed?
A: No, you should never cut an arrow with a field point or broadhead installed on it. The cutting process requires a clean shaft end. You will always cut the nock end of the arrow. If you need to shorten an arrow due to a build or a custom length requirement, you would cut the nock end, and then re-install fletchings and components as needed onto the new, shorter shaft.
Q6: What kind of tape is best for preventing splintering?
A: High-quality masking tape or painter’s tape is generally recommended. It’s designed to adhere well without leaving residue and is flexible enough to wrap tightly around the arrow. Avoid very cheap tapes that might not hold firmly or might leave a sticky mess behind.