How to Draw a Horse Bowing: Step-by-Step Guide for Beginners
Drawing a horse in a bowing pose is one of those creative challenges that excites both new and seasoned artists. Horses are known for their beauty, strength, and graceful movements. Capturing a horse as it bows, an action that shows both power and elegance, can elevate your drawing skills and understanding of animal anatomy.
Whether you want to illustrate a majestic scene, work on realistic sketches, or simply enjoy drawing animals, learning how to draw a horse bowing is a rewarding experience.
Many artists find horses difficult to draw, mostly because of their unique proportions and dynamic poses. The bowing position adds another layer of complexity. But with patience, careful observation, and the right steps, anyone can master this pose, even if you’re still a beginner. In this guide, I’ll walk you through everything you need: understanding horse anatomy, choosing your materials, building your sketch, refining details, and adding life to your drawing. The following insights are derived from practical experience, including tips that many intermediate artists often miss.
Let’s get started and discover how to draw a horse bowing, step by step.
Understanding Horse Anatomy For Drawing
Before you start drawing, it’s important to know the basic anatomy of a horse. Horses have strong, well-defined muscles, long legs, a large chest, and a flexible neck. In the bowing pose, these features become even more pronounced.
A horse’s body can be broken down into simple shapes:
- The head is often a rectangle or oval.
- The neck forms a gentle S-curve.
- The torso looks like a large oval.
- The legs are long cylinders with joints.
- The shoulders and haunches are rounded but muscular.
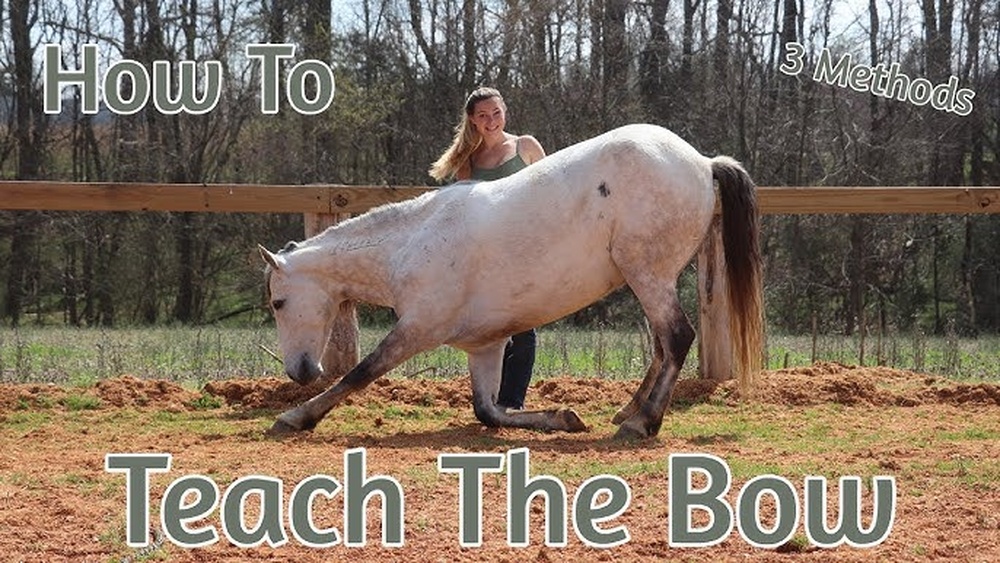
When a horse bows, its front legs stretch forward, and its head dips down. The back arches slightly, and the rear end remains high. Understanding how these parts move helps you draw the pose correctly.
Key Reference Points
- Shoulders: Notice how the shoulders drop and move forward.
- Neck and Head: The neck stretches out, and the head lowers near the ground.
- Front Legs: One or both legs extend forward, bending at the knee.
- Back and Hindquarters: The back curves slightly, but the rear stays up.
Looking at photos or videos of real horses bowing can help. The website Horse Illustrated provides excellent visual examples and explanations.
Common Mistake To Avoid
Many beginners draw the legs too straight or the back too flat. Remember: in a bow, a horse’s body forms a gentle curve, not a stiff line.
Choosing The Right Materials
Your choice of materials can affect the quality and ease of your drawing. While you can use anything, certain tools are more forgiving and help you learn faster.
Essential Drawing Tools
- Pencils: Use a range of pencils, from 2H (hard) for light sketching to 4B (soft) for shading.
- Eraser: A kneaded eraser is useful for gentle corrections.
- Paper: Medium-texture drawing paper (not too smooth, not too rough).
- Blending stump: For softening shadows.
- Reference images: High-quality photos of horses bowing.
Optional Tools
- Colored pencils or markers for adding color.
- Digital tablet for those who prefer digital art.
Pro Tip: If you’re new, start with simple graphite pencils. Digital tools can be tempting, but traditional pencil and paper help you learn form and shading more deeply.
Credit: www.bow-international.com
Observing The Bowing Pose
Careful observation is key. Spend a few minutes just looking at your reference photo. Notice the angle of the horse’s head, how the front legs stretch, and the curve in the back.
What To Look For
- Weight distribution: Most weight stays on the back legs.
- Neck stretch: The curve of the neck is elegant and elongated.
- Leg position: Front legs are not parallel; one may be more forward.
- Facial expression: The horse’s eyes often look relaxed or focused.
Example: In my experience, spending even five minutes studying the pose before drawing leads to much better results. You’ll notice small details, like how the mane falls or the subtle bend in the fetlock.
Step-by-step Guide: Drawing A Horse Bowing
Let’s break down the process into manageable steps. Each step builds on the last, so take your time.
1. Sketching The Basic Shapes
Start with light lines. Don’t worry about details yet.
- Draw a large oval for the torso.
- Add a smaller oval for the chest.
- Sketch a circle for the head, positioned lower than the body.
- Connect the head to the body with a gently curved line (the neck).
- Add lines to mark the spine’s curve and the direction of the legs.
This foundation helps keep your proportions accurate.
2. Mapping Out The Limbs
Now, draw lines and simple shapes for the legs.
- The front legs should stretch out, with one slightly ahead.
- The knees bend gently, not sharply.
- The back legs remain more vertical, supporting the body.
Add circles at the joints (shoulders, knees, fetlocks) to keep track of movement.
3. Refining The Outline
Start fleshing out the body:
- Turn your basic shapes into a more detailed outline.
- Define the neck’s curve, the barrel of the chest, and the slope of the back.
- Draw the head with attention to the jawline and muzzle.
- Shape the ears, which often point forward or sideways.
At this stage, you should see a clear horse silhouette in the bowing pose.
4. Adding Facial Features
Work on the details of the face:
- Sketch the eyes, placed about halfway down the head.
- Add the nostrils and mouth, following the curve of the muzzle.
- Draw the ears, noting their angle and shape.
The expression should look natural, avoid making the horse look tense or cartoonish.
5. Detailing The Legs And Hooves
Focus on the muscles and joints:
- Draw the muscles in the front legs, showing tension as they stretch.
- Add definition to the knees and fetlocks.
- Shape the hooves, making sure they point forward and touch the ground at the right angle.
If you’re unsure, compare your drawing with your reference photo.
6. Drawing The Mane And Tail
A horse’s mane and tail add movement and character.
- The mane may fall along one side of the neck or drape forward.
- Use flowing lines to show the direction of hair.
- The tail can be relaxed or slightly lifted.
Don’t over-detail, suggest the hair’s flow rather than drawing every strand.
7. Refining Body Contours And Muscle Definition
With your outline complete, add muscle definition:
- Use gentle lines to show major muscle groups in the shoulders, neck, and back.
- Shade under the belly and along the legs to add depth.
- Avoid harsh outlines, use soft shading for realism.
8. Finalizing With Shading And Texture
Shading brings your horse to life.
- Identify the light source and shade accordingly.
- Darken areas under the neck, between the legs, and beneath the body.
- Use a blending stump to smooth transitions.
- Add texture with short, controlled pencil strokes for hair.
Pro Tip: Beginners often skip subtle shading on the chest and neck. Adding these details makes your horse look more three-dimensional.

Credit: www.youtube.com
Example Drawing Progression
Seeing how a drawing develops can be very helpful. Here’s a breakdown of typical stages:
| Stage | Description |
|---|---|
| Basic Shapes | Simple ovals and lines to set proportions and pose. |
| Outline | Refined lines showing body, head, and leg positions. |
| Details | Facial features, hooves, mane, and muscle definition. |
| Shading | Highlights, shadows, and texture added for realism. |
Take photos or scan your work at each stage. This helps you see your progress and spot areas to improve.
Tips For Drawing Realistic Horses
Drawing a horse bowing is more than copying a photo. Here are some expert tips to level up your work:
Study Horse Movement
Watch videos of horses in motion, not just still images. This helps you understand how their bodies bend and stretch. The more you observe, the easier it is to capture lifelike poses.
Practice Gesture Drawing
Do quick, one-minute sketches of horses in different poses. This trains your eye and hand to capture movement and proportion fast.
Focus On Negative Space
Sometimes, it’s easier to draw the space around the horse than the horse itself. This technique helps you keep proportions accurate.
Use Multiple References
Don’t rely on just one photo. Compare several images of horses bowing to understand common features and variations.
Compare Your Drawing To Real Measurements
If possible, measure the lengths of body parts in your reference photo and compare them to your drawing. Small errors can make a horse look awkward.
Table Of Common Drawing Errors
| Error | How It Affects the Drawing | How to Fix |
|---|---|---|
| Legs Too Straight | Horse looks stiff and unnatural | Add gentle bends at the knees and ankles |
| Neck Too Short | Loss of elegance; horse looks compact | Lengthen the neck with a smooth S-curve |
| Back Too Flat | Pose appears awkward | Show a slight arch in the spine |
| Small Head | Horse looks out of proportion | Check head-to-body ratio in your reference |

Credit: www.youtube.com
Adding Depth And Dimension
To make your drawing stand out, focus on creating depth:
- Overlapping: Show one leg in front of the other.
- Foreshortening: Shorten lines that point toward the viewer.
- Shadow: Use soft shadows under the body and legs to “ground” the horse.
Example: When I tested foreshortening techniques, my bowing horse drawings became much more dynamic, especially when the front legs reached toward the viewer.
Using Color And Background
Once you’re comfortable with pencil, try adding color. Colored pencils or watercolors can bring your horse to life.
- Use light washes for the base color.
- Layer darker tones for shadows.
- Add white highlights for shine on the mane or coat.
Consider adding a simple background, like grass or a stable, to give context. But don’t let the background distract from the horse itself.
Common Beginner Mistakes (and How To Avoid Them)
Everyone makes mistakes at first. Here are a few to watch out for:
Ignoring The Underlying Structure
Jumping straight to details without building a solid sketch leads to awkward poses. Always start with basic shapes.
Overworking Details
Too much detail in the mane or muscles can make your drawing look busy. Focus on the most important features.
Using Hard Lines Everywhere
Real horses have soft, blended edges. Use hard lines only where necessary, like the outline of the ears or hooves.
Forgetting About Shadows
Flat drawings lack realism. Even a little shading under the belly or behind the legs adds a lot of depth.
Practicing For Improvement
Improvement comes with practice. Here’s how to practice smart:
- Draw horses in different poses, not just bowing.
- Try sketching from life at a stable or farm.
- Challenge yourself with time limits to improve speed and confidence.
- Compare your work after a month, you’ll see progress.
Pro Tip: Keep a sketchbook just for horses. Reviewing old drawings shows you where you’ve improved and what to work on next.
Resources For Further Learning
- The book “Drawing Horses” by Walter T. Foster is a classic for beginners.
- Online courses on sites like Skillshare or Udemy offer step-by-step video lessons.
- Museums and zoos often have live sketching events, great for practicing observation.
If you want to learn more about horse anatomy and movement, the Wikipedia page on horse anatomy is a helpful reference.
Frequently Asked Questions
How Can I Make My Bowing Horse Drawing Look More Dynamic?
Try exaggerating the curve of the neck and the extension of the front legs. Use foreshortening to create a sense of depth, and let the mane flow in the direction of movement. Adding subtle shadows under the legs and along the back also makes the pose more dynamic.
What Is The Best Way To Practice Drawing Horses In Different Poses?
Start with quick gesture drawings of horses in various positions. Use online video references or visit a stable if possible. Focusing on speed and overall shape, rather than details, helps train your eye to capture form and movement efficiently.
Are Digital Tools Better Than Traditional Ones For Drawing Horses?
Both have advantages. Digital tools allow for easy corrections and layers, making experimentation less risky. Traditional pencil and paper build foundational skills in observation and hand control. Many artists find switching between both methods is the most effective way to learn.
How Do I Fix Proportion Mistakes In My Horse Drawing?
Use a grid or guidelines when sketching. Measuring key parts of your reference photo, like the length of the neck compared to the body, helps catch mistakes early. If something looks off, step back from your drawing or view it in a mirror for a fresh perspective.
What Advanced Techniques Can Help My Horse Drawings Stand Out?
Try using colored pencils or watercolor washes for more depth. Experiment with lighting by placing strong highlights on the mane and back. Studying anatomy in detail, especially the muscles and joints, allows you to add realistic tension and relaxation to the pose.
Drawing a horse bowing is a journey of observation, patience, and practice. Each attempt teaches you more about both horses and your own artistic process. Enjoy each step, your unique style will emerge with time and effort.