Make a wreath bow in 8 steps: cut wired ribbon, form the loops, pinch and secure the center with floral wire, then fluff and attach it to the wreath. Skip the wired-ribbon step and the loops go flat within a day instead of holding their shape through the season. This guide covers ribbon selection, all 8 steps, and fixes for uneven loops or a messy center knot.
Why a Traditional Bow for Your Wreath?
When it comes to decorating wreaths, the bow is often the star of the show. A traditional bow, with its classic loops and flowing tails, offers a timeless appeal that complements almost any theme. It adds a touch of elegance, a splash of color, and a handmade charm that store-bought decorations can’t quite match. Whether you’re decorating for holidays, seasons, or just for fun, a well-made traditional bow elevates your wreath from simply nice to absolutely captivating.
Think about it: a cozy autumn wreath topped with a burlap bow, or a festive Christmas wreath with a rich velvet bow. These details make a big difference. Making your own traditional bow means you have complete control over the size, color, and material, ensuring it perfectly suits your wreath and your personal style. Plus, the process itself can be incredibly satisfying!

Materials You’ll Need
Gathering your supplies is the first step in creating your beautiful bow. You don’t need anything too fancy; in fact, most of these items are probably already around your home or easy to find at a craft store. Choosing your ribbon is key to the overall look and feel of your bow. Consider the texture, width, and pattern. For a rustic wreath, burlap or a natural linen ribbon works wonderfully. For something more festive, perhaps a velvet, satin, or a ribbon with a festive print.
- Ribbon: The star of the show! Choose a ribbon that complements your wreath. Common choices for traditional bows include burlap, satin, velvet, grosgrain, or even fabric strips.
- Scissors: Sharp scissors are essential for clean cuts that prevent fraying. Fabric scissors work best.
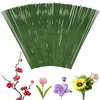
- Wire or Pipe Cleaners: To secure the center of the bow. Floral wire (18-26 gauge) is ideal, but pipe cleaners are a great beginner-friendly alternative.
- Measuring Tool: A ruler or tape measure to ensure your loops and tails are the desired size.
- Optional: Bow Maker/Dowel Rod: While not strictly necessary, a bow maker or even a sturdy dowel rod (like a wooden skewer or a pencil) can help create consistent loops.
- Optional: Hot Glue Gun: For extra security or to attach embellishments.
Making bows for gifts instead of a wreath? See our 10 gift-wrap bow styles for smaller-scale versions of this same technique.
Choosing the Right Ribbon
The ribbon you choose will set the tone for your bow and your wreath. Here’s a quick look at popular choices and what they bring to the table:
| Ribbon Type | Characteristics | Best For |
|---|---|---|
| Burlap | Textured, natural, rustic | Fall wreaths, farmhouse style, natural themes |
| Satin | Smooth, shiny, elegant | Holiday wreaths (Christmas, Valentine’s), formal styles |
| Velvet | Soft, luxurious, rich | Winter holiday wreaths, elegant and cozy themes |
| Grosgrain | Ribbed texture, sturdy, matte finish | Classic everyday wreaths, easily holds shape |
| Wired Edge Ribbon | Has a wire embedded in the edge, making it easy to shape and hold form | All types of bows and wreaths, especially when you want perfectly formed loops |
When selecting your ribbon width, consider the scale of your wreath. A wider ribbon (4-6 inches) makes a bolder statement on a larger wreath, while a narrower ribbon (1-2.5 inches) is better suited for smaller wreaths or for layering.
Step-by-Step Guide: How to Make a Traditional Bow
Let’s get crafting! This method focuses on creating a classic, layered-looking bow with beautiful tails. It’s quite straightforward and forgiving for beginners.
Step 1: Cut Your Ribbon
Start by cutting two pieces of ribbon. One will be for the main loops and tails, and the second, slightly shorter piece, will be for the center knot and inner loops (optional, but adds depth). For a medium-sized wreath, try these lengths:
- Main Ribbon Piece: Approximately 24-36 inches. This length gives you room for a few good-sized loops and two long tails.
- Center Knot Ribbon Piece: Approximately 8-12 inches.
Remember, you can always trim more off later, so it’s better to start with a little extra ribbon. Use your sharp scissors for a clean cut to prevent fraying.
Step 2: Create the First Loops
Take your main, longer ribbon piece. Lay it flat with the ‘pretty’ side facing down. Fold it in half lengthwise to find the center, then unfold. This center mark will be your guide.
Now, create your first loop: Bring the right end of the ribbon towards the center mark, creating a loop. The length of this loop will determine the size of your bow’s main loops. Imagine how big you want the finished loops to be – that’s the length you’ll measure from the center mark to the fold.
Repeat this on the left side, bringing the left end of the ribbon to the center mark to form a matching loop. You should now have two loops with the center section of the ribbon connecting them. Carefully pinch the ribbon together at the center mark.
Step 3: Add More Loops (Optional, for Dimension)
For a fuller, more traditional bow, you can add more layers of loops. You can do this in two ways:
- Using the same ribbon: Simply continue folding and pinching smaller loops on either side of your initial center pinch.
- Using a second ribbon (if you cut two equally sized main pieces): Place your second ribbon piece on top of the first one, aligning the center marks. Then, create loops and pinch them together with the first set. This creates a beautiful layered effect.
If you are using a wired edge ribbon, this is where you can really shape your loops to be full and round.
Step 4: Form the Tails
With the loops held securely in the center, you’ll see two ribbon ends hanging down – these are your tails. Decide how long you want the tails to be. A good rule of thumb is that the tails should be roughly as long as the width of your loops.
You can leave them as is, or you can cut them into a more decorative shape. The most common decorative cut is a chevron or V-shape. To do this, take one tail, fold it in half lengthwise, and cut at an angle from the folded edge to the open edge. Repeat for the other tail.
If you’re going for a very simple look, a straight cut across the ends of the tails is perfectly fine too!
Step 5: Secure the Center
This is where your wire or pipe cleaner comes in handy. Take your wire or pipe cleaner and wrap it tightly around the pinched center of the bow, where all the loops and tails are gathered. Twist the ends securely at the back of the bow. This is crucial for holding everything in place.
If you are using floral wire, trim any excess wire that might poke out. If using a pipe cleaner, you can trim it or just twist it tightly. This wire/pipe cleaner will also be used to attach the bow to your wreath.
Step 6: Add the Center Knot (Optional but Recommended)
To give your bow a more finished, professional look, add a center knot. Take your shorter ribbon piece (or the second piece if you cut two main pieces identical in length). Wrap this piece around the center of the bow, covering the wire or twisted pipe cleaner. Secure it at the back with a dab of hot glue or by twisting its ends together.
Some people prefer to skip the extra piece and just use the tails to tie a knot around the center. This can work, but using a specific center knot piece usually looks cleaner. Pinch this center piece tightly as you wrap it to ensure it stands out.
Step 7: Fluff and Adjust
Now for the fun part – shaping your bow! Gently spread out the loops, making sure they are even. If you used wired ribbon, twist the wires to encourage the loops to stand up and hold their shape. Adjust the tails so they hang nicely. Tuck and fold until you’re happy with the overall appearance. This step is key to making your bow look full and inviting.
Take your time here. A few minutes of fluffing can make a world of difference in how polished your bow looks.
Step 8: Attach to Your Wreath
Once your bow looks perfect, it’s time to attach it to your wreath. Use the wire or pipe cleaner you secured in Step 5. Thread it through the base of your wreath (e.g., the twigs of a grapevine wreath, or around the form of a foam wreath base). Twist the wire securely on the back of the wreath.
If you don’t have a suitable place to thread the wire, you can use a hot glue gun to adhere the back of the bow to the wreath. Make sure to press firmly and hold until the glue sets.
Tips for Making Perfect Bows Every Time
Practice makes perfect, and a few insider tricks can help you achieve beautiful results faster.
- Wired Ribbon is Your Friend: If you’re new to bow making, wired ribbon is incredibly forgiving. It holds its shape beautifully, making it easy to create those perfect, poofy loops.
- Consistency is Key: Try to make your loops the same size. A bow maker or a simple jig (like an I-shaped piece of cardboard or wood) can help ensure uniformity. You can even wrap your ribbon around a block of wood or a sturdy book to get consistent loop sizes.
- Don’t Over-Tighten the Center (Initially): While you want the center secure, overtightening before you’ve shaped the loops can make it hard to adjust later. Secure it firmly, but save the final shaping for after the center is tied.
- Consider Ribbon Width for Scale: A very wide, elaborate bow might overwhelm a delicate wreath, while a tiny bow can get lost on a large one. Match your bow’s scale to your wreath’s size.
- Layering for Depth: Using two different ribbons – perhaps a patterned one for the base and a solid complementary color for the top layer – adds a wonderful richness and dimension to your bow.
- Store Your Handmade Bows Carefully: If you make your bows ahead of time, store them in a box or bag where they won’t get crushed. You can often refresh a slightly flattened bow by carefully reshaping the loops.
Best Wreath Bow Ribbon Pick

Wired Edge Wreath Ribbon (20 Yards) – $11.88
This guide notes that wired ribbon holds loop shape far better than unwired ribbon — this roll gives you enough for several full 8-loop bows with tails to spare.
- Best for: loops that hold their shape through Step 2-3 without collapsing
- Why we picked it: wired edges are exactly what this guide recommends over floppy unwired ribbon
- Main drawback: wire edges can bend permanently if pinched too hard while fluffing
Compare more wreath bow supplies
 Option 1 18 Gauge Floral Wire (100 pcs) – $8.99
| 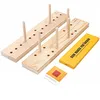 Option 2 Wooden Ribbon Bow Maker – $9.99
| 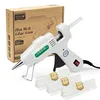 Option 3 Mini Hot Glue Gun – $8.54
|
As an Amazon Associate we earn from qualifying purchases.
Common Issues and How to Solve Them
Even with the best intentions, you might run into a snag. Here are some common bow-making challenges and how to tackle them:
Issue: Ribbon Fraying
Solution: Use sharp scissors! For natural fibers like burlap or cotton, you can also lightly singe the cut edges with a lighter or a cauterizing tool. Be very careful when doing this. A dab of fray-stop liquid is another option for fabric ribbons.
Issue: Bow Looks Flat and Lifeless
Solution: This often happens when using non-wired ribbon or not fluffing enough. Gently pull and shape each loop outwards. For wired ribbon, twist the wires in the center to encourage the loops to stand tall. You might need to revisit Step 7 and spend a bit more time fluffing.
Issue: Loops Aren’t Even
Solution: Ensure you’re measuring and folding consistently in Step 2. If you already have the bow tied, you can try to gently adjust the loops’ positions. If they’re drastically different, you might need to untie the center, adjust the folds, and re-secure. Using a bow maker can significantly help prevent this.
Issue: The Center Knot Looks Messy
Solution: Make sure the center knot ribbon (Step 6) is wrapped tightly and symmetrically. A dab of hot glue on the back of the knot where it meets the bow can help it stay put and look neater. Ensure you’re using a sufficient length of ribbon for the knot so you have enough to wrap cleanly.

FAQ: Your Beginner Bow-Making Questions Answered
Have more questions? Here are some common ones beginners ask:
Q1: What’s the easiest way to make a bow for a wreath?
A1: Using wired ribbon and a simple loop-and-tail method is often easiest for beginners. The wire helps hold the shape, and the method described in this guide is very straightforward.
Q2: How big should the bow be for my wreath?
A2: The size of your bow heavily depends on the size of your wreath. As a general rule, the bow’s width (from one outer edge of a loop to the other) should be about one-third to one-half of the wreath’s diameter. You can also use the bow’s tails to gauge scale. For a 12-inch wreath, a bow that’s about 6-8 inches wide is a good starting point.
Q3: Can I use any ribbon?
A3: While you can use almost any ribbon, some are much easier to work with than others. Wired-edge ribbons are highly recommended for beginners. Heavy, stiff fabrics can also make great bows but might require more effort to shape. Very flimsy or stretchy ribbons can be challenging.
Q4: How do I make the tails longer or shorter?
A4: The tails are simply the leftover ends of the ribbon after you’ve formed the loops and secured the center. To make them longer, start with a longer main ribbon piece in Step 1. To make them shorter, either start with a shorter piece or trim them down after securing the bow.
Q5: What if my bow doesn’t look symmetrical?
A5: Symmetry is achieved by making your loops the same size and ensuring the tails are positioned evenly. If your bow is already tied and uneven, you can often adjust pulled loops if using wired ribbon. If it’s very uneven, untying the center and re-pinching can fix it.
Q6: How do I attach the bow securely so it doesn’t fall off?
A6: The most secure method is using the floral wire or pipe cleaner that’s twisted around the bow’s center (as per Step 5). Thread this through the wreath’s structure and twist it tightly on the back. Heavy-duty floral tape or a hot glue gun can also be used for extra security, especially on wreaths with solid bases.
For more on wreath safety and attachment, resources like Gardening Know How offer practical advice on securing decorations to various wreath bases.
Conclusion
There you have it! You’ve learned how to create a beautiful, traditional bow that will add that perfect handmade touch to any wreath. From selecting the right ribbon to fluffing the final loops, each step is designed to be simple and effective. Don’t be discouraged if your first bow isn’t absolutely perfect – every crafter has a learning curve. The satisfaction of seeing your finished, decorated wreath, with a bow that you made yourself, is truly rewarding. So, gather your supplies, put on some music, and enjoy the process of bringing a little extra beauty and charm into your home, one bow at a time!