Is Fletching Your Own Arrows Worth It? Pros, Cons, and Tips
If you are passionate about archery, you may have wondered: is fletching your own arrows worth it? The idea of building your own arrows feels exciting and personal. Some archers see it as a way to improve their shooting, while others worry about the time, cost, or learning curve. The truth is, fletching is more than just gluing feathers or vanes onto shafts. It’s about control, customization, and connection to your gear.
But is it right for you? In this article, you’ll get clear, honest guidance on what fletching your own arrows really involves. You’ll learn about the benefits, the challenges, the costs, and the skills required. Real examples, practical advice, and comparison tables will help you decide if this step is a smart move for your archery journey.
What Is Arrow Fletching?
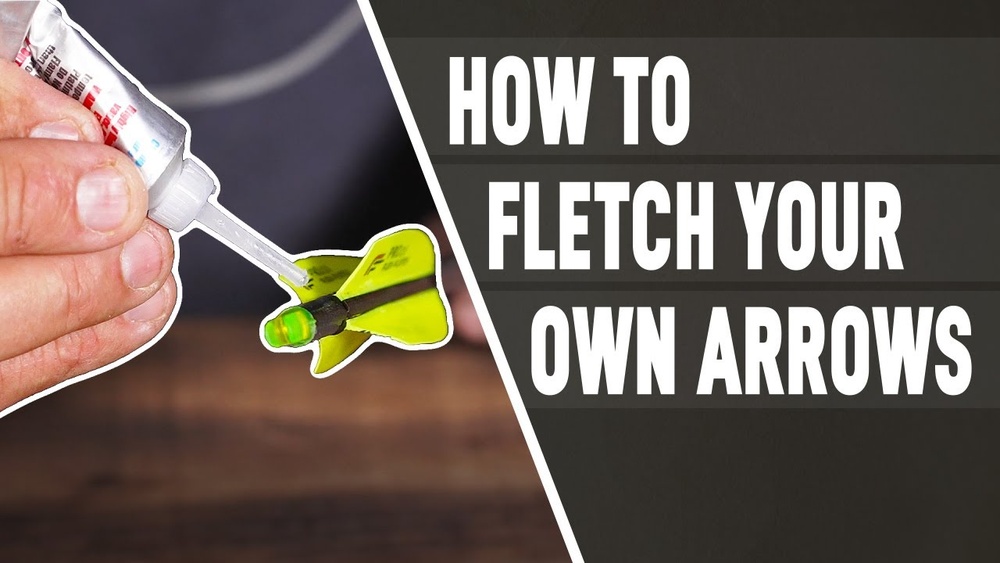
Fletching is the process of attaching feathers or plastic vanes to the back end of an arrow shaft. These small pieces help stabilize the arrow during flight, so it flies straight and accurately. Most modern arrows use three vanes, but some traditional arrows use feathers.
When you buy arrows from a store, they usually come pre-fletched (already assembled). Fletching your own means you choose the materials, colors, shape, and placement, and do the work yourself.
The Core Benefits Of Fletching Your Own Arrows
Customization For Your Needs
One of the biggest reasons to fletch your own arrows is customization. You can pick vane length, height, material, and even the angle at which they are attached (called “helical” or “straight” fletching). This lets you:
- Match your arrows to your shooting style
- Adjust for different bow types (recurve, compound, traditional)
- Experiment with vane color for visibility or style
For example, if you shoot in windy conditions, you may want a lower profile vane. If you hunt, you might choose bright colors for easy arrow recovery.
Cost Savings Over Time
At first, it might seem cheaper to buy ready-made arrows. But fletching your own can save money in the long run. Here’s why:
- Damaged vanes are easy to replace, so you don’t have to buy a whole new arrow.
- Bulk packs of vanes and shafts are often cheaper per arrow than buying pre-fletched.
- You can fix arrows quickly after practice or hunting, instead of waiting for replacements.
Here’s a quick look at cost differences:
| Arrow Option | Initial Cost (per dozen) | Repair Cost (per vane) | Customization |
|---|---|---|---|
| Pre-Fletched | $80-120 | $0 (must buy new arrow or pay for repair) | Low |
| DIY Fletching | $70-110 (plus tools) | $0.30-0.50 | High |
Better Arrow Performance
Fletching your own arrows can improve accuracy and consistency. When you control the process, you can make sure every arrow is the same. This reduces the small differences that can hurt your shooting.
Some archers report tighter groups and more predictable arrow flight after switching to self-fletched arrows. You can also experiment with different fletching setups to see what works best with your bow and form.
Learning And Satisfaction
Many archers enjoy the process of making their own arrows. It builds skills, patience, and a stronger connection to the sport. There’s a sense of pride when you shoot arrows you built yourself.
Pro Tip: Fletching is a valuable skill if you plan to compete, hunt, or shoot regularly. Being able to repair or adjust your arrows on your own gives you independence and confidence.

Credit: www.youtube.com
What You Need To Start Fletching Arrows
Fletching arrows does require some basic tools and materials. Here’s what you’ll need:
- Arrow shafts (carbon, aluminum, or wood)
- Vanes or feathers (various lengths and shapes)
- Fletching jig (holds the shaft steady and sets vane angle)
- Fletching glue (cyanoacrylate or special archery glue)
- Nocks (plastic ends that hold the string)
- Optional: Wraps or cresting tape (for decoration or better adhesion)
The most important item is the fletching jig. It ensures your vanes are placed at the correct angle and spacing. A good jig costs $20, $50, but lasts for years.
Here’s a comparison of common starter kits:
| Kit Name | Included Tools | Average Cost | Best For |
|---|---|---|---|
| Basic Fletching Kit | Jig, glue, vanes | $40 | Beginners |
| Deluxe Fletching Kit | Jig, glue, vanes, wraps, nocks | $80 | Frequent archers |
| Custom Build | Pieces bought separately | $60-$120 | Experienced users |
Skill Level Required
Fletching is not difficult, but it does require patience and attention to detail. Most people can learn the basics in an afternoon. The main challenges are:
- Setting the vanes evenly
- Using the right amount of glue
- Allowing time for each vane to dry
In my experience, the first few arrows might look a bit messy, but you’ll improve quickly with practice.
The Time Commitment: How Long Does Fletching Take?
One of the biggest concerns is time. How much effort does it really take to fletch your own arrows?
- First time: Plan about 20, 30 minutes per arrow as you learn.
- Once practiced: 5, 10 minutes per arrow.
The drying time for glue is the main factor. Some glues set in 1, 2 minutes, but others need longer. Working with a jig that holds multiple arrows can speed things up.
If you only shoot occasionally, the time investment is small. For frequent shooters or club members, self-fletching lets you repair and build arrows in batches, saving trips to the store.

Credit: www.bowhunter.com
Common Challenges And How To Overcome Them
Mistakes When Starting
Most beginners make a few common errors:
- Crooked vanes: Caused by poor jig alignment. Double-check the jig before gluing.
- Excess glue: Use a toothpick or small brush for control.
- Vane adhesion problems: Clean shafts with alcohol before applying glue.
Material Choices
Choosing the wrong vane or feather type can affect your results. For example, large feathers may slow your arrow, while very small vanes may not stabilize it enough. Try different sizes to match your bow’s speed and your shooting distance.
Consistency
Getting every arrow to match takes practice. Keep notes on which materials, angles, and glues work best for you. This helps you repeat successful setups.
Pro Tip: If you are serious about target shooting, invest in a high-quality jig. The better your tools, the more consistent your arrows will be.
Comparing Diy Fletching To Buying Pre-fletched Arrows
Understanding the pros and cons of each approach can help you make the right choice.
| Aspect | DIY Fletching | Pre-Fletched |
|---|---|---|
| Customization | High | Low |
| Cost Over Time | Lower (after tools) | Higher |
| Repair Speed | Fast (at home) | Slow (requires shop or buying new) |
| Skill Required | Moderate | None |
| Initial Investment | Higher (tools) | Lower |
| Learning Curve | Yes | No |
| Time Needed | More | Less |
When Pre-fletched Is A Better Choice
If you are a total beginner or shoot only a few times a year, pre-fletched arrows may be more practical. You can still learn to fletch later, once you’re ready to invest in tools and time.
Hidden Insights Most Beginners Miss
Arrow Recovery In The Field
When hunting or shooting outdoors, arrows often get lost or damaged. If you fletch your own, you can use bright colors or reflective wraps to make recovery easier. Many archers overlook this simple trick, but it saves money and time.
Matching Fletching To Arrow Spine And Bow Power
Many beginners focus only on color or shape, but matching fletching size to arrow spine (stiffness) and bow draw weight is important. Too large or too small vanes can cause erratic flight. Testing a few combinations will reveal what works best for your setup.
Is Fletching Your Own Arrows Worth It For Different Archers?
For Target Shooters
If you shoot at targets regularly, especially in competitions, fletching your own arrows gives you control over every detail. You can fine-tune your arrows for maximum consistency, and fix any problems immediately.
For Bowhunters
Hunters often damage vanes in the field. DIY fletching means you can repair arrows at camp or home, and choose high-visibility vanes for easier tracking. You can also use waterproof glues and tougher vanes for rough conditions.
For Beginners
If you’re just starting out, buying pre-fletched arrows is easier. But learning to fletch as you progress is a good investment. It’s a practical skill that saves money and helps you understand your gear.
For Traditional Archers
Those who shoot wooden arrows or use natural feathers often need to fletch their own, since many traditional arrows are sold bare. It’s also part of the tradition and craft of this style.
Real-world Experiences: What Do Archers Say?
Many experienced archers find fletching to be a relaxing, rewarding part of the sport. In my experience, the first few arrows take patience, but the satisfaction of seeing tight groups with self-made arrows is worth it. Some clubs even offer group fletching nights, turning it into a social activity.
However, some archers don’t enjoy the process or feel their time is better spent shooting. For them, buying pre-fletched arrows makes sense. The key is to try it once, many are surprised by how quickly they improve.
Practical Tips For Success
- Start with a simple jig. Complicated setups are not needed for beginners.
- Use bright vane colors for your first arrows. It makes mistakes easier to see and arrows easier to find.
- Clean arrow shafts thoroughly before gluing.
- Allow plenty of drying time for each vane.
- Keep a notebook of what materials and methods work best.
- Practice on old or cheap shafts before working on your best arrows.
Pro Tip: If you shoot in wet or cold conditions, choose glues that are rated for those environments. Some standard glues lose strength in moisture.
Cost Breakdown: Is It Cheaper To Fletch Your Own?
Let’s do a quick cost analysis for a set of 12 arrows:
- Pre-fletched, ready to shoot: $100, $120
- DIY:
- Bare shafts: $60, $80
- Vanes: $8, $12
- Glue: $6, $10 (lasts for many arrows)
- Jig (one-time): $30, $50
First Set: $104, $152 (including Jig)
Future Sets: $68, $92 (excluding Jig)
So, after your first dozen arrows, you start saving money. And if you need to replace just one or two vanes, the cost is only a few cents per repair.
Potential Downsides And Limitations
Upfront Investment
The initial purchase of a jig and glue adds to your cost. If you only shoot a few arrows a year, it may take a while to “break even” compared to buying pre-fletched.
Mistakes Can Be Frustrating
Early errors can mean wasted vanes or arrows. But each mistake is a learning opportunity, and most can be fixed.
Time And Space Needed
Fletching takes up table space and requires patience. If you have a busy schedule or limited room, this can be a barrier.
No Guarantee Of Perfection
Even with good tools, your first arrows may not look professional. But the performance is often just as good, and you’ll improve quickly.

Credit: www.youtube.com
Choosing The Right Fletching Materials
There are many types of vanes and feathers available. Here’s how to choose:
- Feathers: Best for traditional bows, quiet flight, but less durable in rain.
- Plastic vanes: More durable, good for compound and recurve bows.
- Length and height: Longer vanes stabilize arrows faster, but slow them slightly. Short vanes are faster, but may not correct errors as quickly.
Experiment with a few types to find your best match.
Where To Learn More
If you want to learn detailed fletching techniques, many archery clubs offer workshops, and there are excellent guides online. For an in-depth overview, check out the official Fletching Wikipedia page.
Frequently Asked Questions
How Do I Remove Damaged Vanes From An Arrow?
Use a sharp knife or razor blade to carefully slice off the old vane. Scrape away any remaining glue, then clean the shaft with rubbing alcohol. This prepares the surface for a new vane. Avoid using too much force to prevent damaging carbon or aluminum