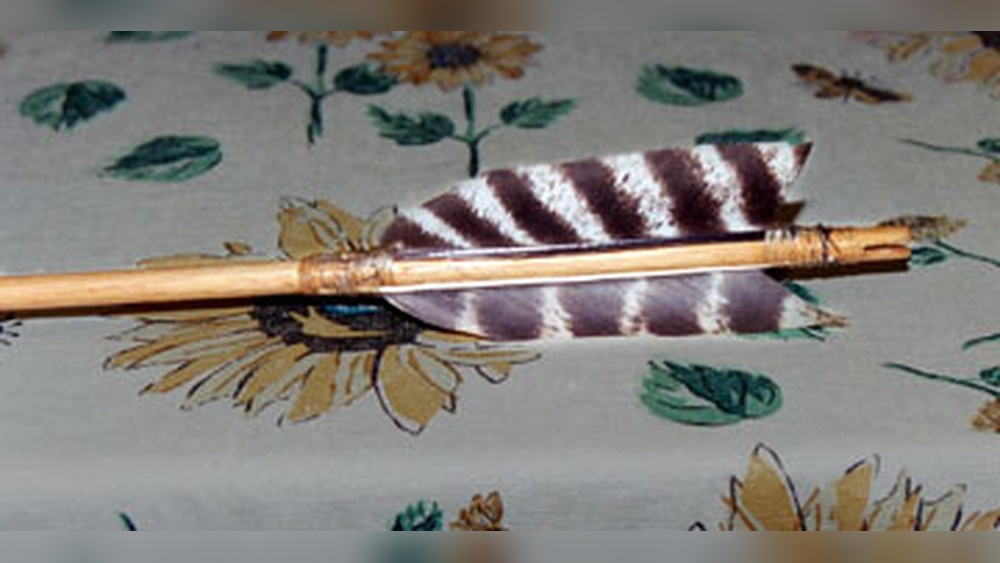
How to Fletch Traditional Arrows: Expert Tips for Perfect Flights
Fletching traditional arrows is a craft that connects you with archers from centuries past. There’s something satisfying about making your own arrows, tuning each detail by hand, and seeing them fly true. Whether you’re a traditional bowhunter, a reenactor, or a hobbyist, learning how to fletch your own arrows gives you a deeper understanding of archery and more control over your equipment.
This guide walks you through every step, from choosing the right feathers to attaching them with care, and covers tips, mistakes to avoid, and answers to common questions. If you want arrows that perform well and look beautiful, read on.
What Is Fletching And Why Does It Matter?
Fletching is the process of attaching feathers or vanes to the back of an arrow shaft. These feathers stabilize the arrow in flight, making it spin like a football and fly straighter. Without fletching, arrows wobble and lose accuracy fast. Traditional arrows use natural feathers, usually from turkeys, because they’re lightweight and grip the air well.
Good fletching can mean the difference between a tight group and missed shots. It affects arrow speed, stability, and how the arrow reacts to wind. Even small mistakes in fletching can reduce your accuracy. That’s why traditional archers spend time learning this skill.
It gives you arrows that fit your needs and style.
Tools And Materials Needed For Fletching
To fletch traditional arrows, you need some basic tools and materials. Some people use simple hand tools, while others use specialty jigs for speed and precision. Here’s a breakdown:
| Tool/Material | Purpose | Tips |
|---|---|---|
| Feathers (usually turkey) | Main fletching material | Choose right or left wing for spin |
| Arrow shafts (wood, bamboo, or carbon) | Main body of the arrow | Wood is most traditional |
| Fletching jig | Holds feathers for even spacing | Start with a basic model |
| Glue (fletching cement or cyanoacrylate) | Attaches feathers to shaft | Traditionalists use hide glue |
| Knife or razor blade | Trims feathers and shafts | Keep blades sharp for clean cuts |
| Sandpaper | Smooths shaft and feather base | Fine grit is best |
| Measuring tape or ruler | Measures feather length and placement | Consistency is key |
| Pen or marker | Marks shaft for feather alignment | Use a fine tip |
| Alcohol wipes | Cleans shaft for better glue bond | Don’t skip this step |
Most beginners start with a simple fletching jig, which can be found for under $30. Some advanced archers fletch by hand, but that takes practice.
Choosing Feathers For Traditional Arrows
Not all feathers are the same. The type, length, and cut of your feathers will change how your arrow flies. Most traditional archers use turkey feathers because they are large, strong, and have the right texture.
Types Of Feathers
- Right wing vs. left wing: Feathers curve naturally. Right wing feathers make the arrow spin clockwise, left wing counterclockwise. Pick one and use it consistently for all arrows in a set.
- Full length vs. pre-cut: Some feathers are sold as full-length and must be cut and shaped, while pre-cut feathers come ready to glue. Beginners should start with pre-cut.
Feather Length And Shape
- Length: Most traditional arrows use feathers between 4 and 5 inches. Longer feathers stabilize better but slow the arrow slightly.
- Shape: Shield cut (rounded back) and parabolic (smooth curve) are most popular. Shield cuts look more traditional and steer the arrow well.
Here’s a quick comparison:
| Feather Shape | Stability | Speed | Look |
|---|---|---|---|
| Shield Cut | High | Medium | Classic/Traditional |
| Parabolic Cut | Medium | High | Smooth/Modern |
Pro Tip: Try both shapes and see what works best with your bow and shooting style.
Prepping The Arrow Shaft
Preparation is essential for strong, straight fletching. Even small bits of dust or oil can cause feathers to peel off later.
- Clean the shaft: Wipe each shaft with an alcohol wipe to remove any dirt or grease. This helps the glue stick better.
- Smooth the surface: Use fine sandpaper to gently roughen the area where the feathers will go. This gives the glue something to grip.
- Mark feather positions: Most traditional arrows use three feathers (called three-fletch). Use a ruler to mark three equally spaced lines around the shaft, each about 120 degrees apart. For four-fletch, use 90 degrees.
- Check nock alignment: The nock (the notch at the end) should be set so that one feather, the “cock feather,” is perpendicular to the string when nocked.
Pro Tip: If you want your arrows to look uniform, make a simple jig or use a template to help with feather spacing.
Setting Up Your Fletching Jig
A fletching jig is a simple tool that holds your shaft and feathers in place while you glue them. This gives you evenly spaced, well-aligned fletching every time.
- Adjust the jig: Set the clamp to match the angle you want. Most traditional archers use a slight helical (curved) or offset angle, which makes the arrow spin better.
- Place the shaft: Insert the arrow shaft into the jig, lining up your marks with the clamp.
- Test with a dry run: Before gluing, practice attaching a feather to make sure everything lines up.
Some jigs allow you to adjust the angle for more or less spin. More spin means more stability but slightly less speed.
Gluing On Feathers: Step-by-step
This is the heart of fletching. Take your time and don’t rush.
- Apply glue: Use a thin line of fletching glue along the base of the feather. Too much glue can make a mess and weaken the bond.
- Set the feather: Place the feather in the clamp and press it gently onto the shaft along your marked line.
- Hold steady: Most glues need about 1, 3 minutes to set. Don’t move the clamp or shaft while drying.
- Repeat for each feather: Rotate the shaft to the next marked line, and repeat the process for each feather.
- Let cure: After all feathers are attached, let the arrow sit for at least 30 minutes (check your glue for specific times). Full curing may take several hours.
Pro Tip: For outdoor arrows, use waterproof glue to prevent the feathers from coming off in rain or humidity.

Credit: www.bowhunter.com
Trimming And Finishing Feathers
Once the feathers are glued, you may need to trim them for a clean look and better flight.
- Trim the ends: Use a sharp knife or razor blade to cut the front and back of each feather so they’re even and don’t stick out past the nock or shaft.
- Sand the bases: If there are any rough spots or glue blobs, sand them gently.
- Seal the edges (optional): Some archers use a tiny bit of glue along the feather edges to keep them from fraying.
For a classic look, you can dye the feathers or add cresting (decorative paint) to the shaft. This is optional but adds a personal touch.
Helical Vs. Straight Fletching
One major decision is whether to attach the feathers straight or at a helical (twisted) angle.
| Fletching Type | Spin | Stability | Best For |
|---|---|---|---|
| Straight | Low | Moderate | Speed, target shooting |
| Offset | Medium | Good | General use |
| Helical | High | Excellent | Hunting, broadheads |
Helical fletching makes the arrow spin more, which stabilizes heavy points and broadheads. Straight is faster but less stable in the wind.

Credit: www.youtube.com
Common Mistakes And How To Avoid Them
Even experienced fletchers make errors. Here are the most common problems and how to fix them:
- Feathers not evenly spaced: Use a jig or template. Double-check your marks before gluing.
- Feathers coming off: Make sure shafts are clean and roughened. Use the right glue for your material.
- Feathers not aligned with nock: Check nock orientation before gluing the first feather.
- Too much glue: Less is more. Excess glue makes a mess and weakens the bond.
- Uneven feather height: Clamp the feather firmly so it sits flat against the shaft.
Pro Tip: Don’t skip the prep work. Most failures come from dirty shafts or poor alignment, not the gluing step.
Advanced Techniques: Four-fletch, Cresting, And Customizations
Once you’re comfortable with basic fletching, you can try more advanced techniques.
Four-fletch Arrows
Instead of three feathers, you can use four smaller ones. This gives more stability and can help arrows clear the bow for certain shooting styles.
- Space each feather 90 degrees apart.
- Use slightly shorter feathers (3, 4 inches).
- Four-fletch arrows look unique and perform well in crosswinds.
Cresting
Cresting is adding painted bands or designs near the nock. Historically, it helped archers identify their arrows.
- Use enamel or acrylic paint and thin brushes.
- Mask off areas to keep lines straight.
- Let paint dry fully before fletching.
Flu-flu Arrows
For short-range hunting or bird shooting, some arrows have “flu-flu” fletching, extra-long, fluffy feathers that slow the arrow quickly.
- Use 6, 8 spiral-wrapped feathers.
- Great for fun shots or aerial targets.
Customizing your arrows isn’t just about looks. It helps you spot your arrows in the grass, and can even tweak flight for your style.
Caring For Fletched Arrows
Traditional arrows need a little maintenance. Feathers can get wet, dirty, or damaged.
- Keep arrows dry: Wet feathers flatten and lose lift. Dry them gently with a towel if needed.
- Store properly: Use a quiver or tube to prevent crushing.
- Repair as needed: Carry spare feathers and glue for field repairs. If a feather comes off, clean the area and re-glue.
- Check before shooting: Make sure no feathers are loose or broken.
With care, a set of arrows can last for dozens of shooting sessions.
How Fletching Affects Arrow Performance
Fletching isn’t just decoration. It’s crucial to how your arrow flies.
- Stabilization: Feathers make the arrow spin, which corrects small errors in release or aim.
- Accuracy: Well-fletched arrows group tighter and fly more consistently.
- Noise: Longer or rough feathers can make a “hissing” noise in flight. Hunters often trim or smooth feathers for stealth.
Pro Tip: In my experience, even slight changes in feather angle or length can change how your arrows behave. Test different setups to find what works with your bow and form.
Comparing Traditional And Modern Fletching
Modern arrows often use plastic vanes and carbon shafts. Traditional arrows use natural feathers and wood. Here’s how they compare:
| Feature | Traditional (Feather) | Modern (Vane) |
|---|---|---|
| Material | Turkey or goose feather | Plastic or rubber |
| Grip on air | Excellent | Good |
| Performance when wet | Poor | Excellent |
| Look | Classic, colorful | Modern, sleek |
| Tradition | High | Low |
Many traditional archers say real feathers give a more forgiving flight, especially with older bows or off-the-hand shooting.
Where To Learn More
There’s a deep world of traditional archery. Clubs, online forums, and books can help you advance. For historical background, check out the Wikipedia entry on fletching.
Pro Tip: Visit a local archery club. Watching experienced fletchers in person often teaches more than any guide.

Credit: www.youtube.com