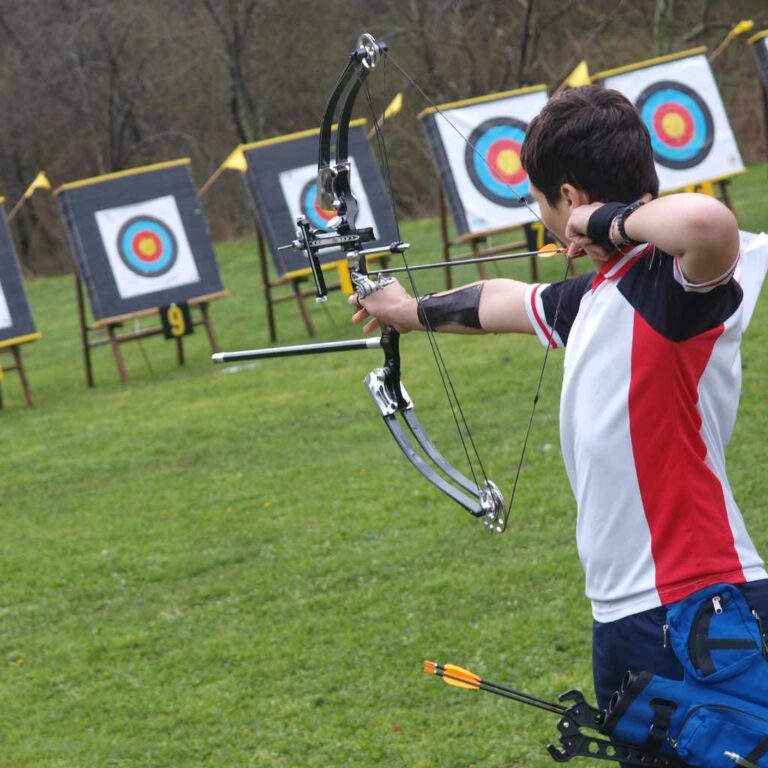
Does getting a lens help with clearing up Target Archery? Yes, consistently! For newer target archers, using a peep sight with a proper lens (scope) dramatically improves sight alignment and target focus, making consistency much easier to achieve than shooting “instinctively.”
Hello there! I’m Salman Arfeen, and I know exactly how you feel staring at that blurry target face when you’re just starting out. You spend hours practicing your form, but the dot still seems to wander. Many new target archers wonder if adding special equipment, like a lens, is necessary or just an expensive trick. It can feel overwhelming! But take a breath. We can simplify this gear decision.
Getting the right lens for your bow acts like giving your eyes a superpower. It brings the target into sharp focus right where you need it. Let’s explore exactly what these lenses do and how they can quickly boost your accuracy without confusing your shooting process one bit.
Understanding Target Archery Sights: The Basics for Beginners
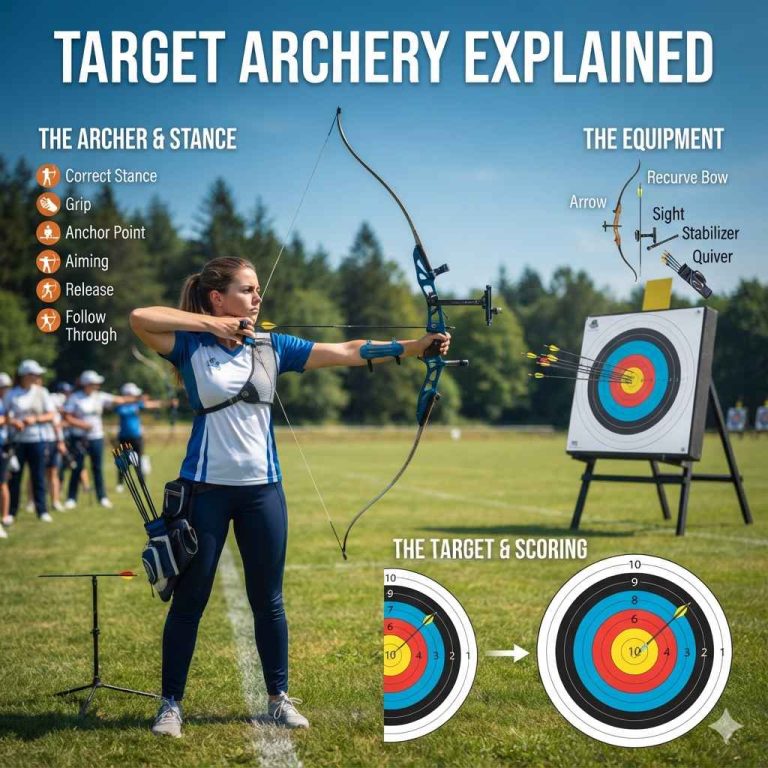
Before we talk about lenses, we have to quickly cover what we are putting them on: the sight. Target archery, especially competitive target shooting, relies on precise measurement. You aren’t just pointing and hoping; you are aligning small, visible points.
What is a Target Sight Assembly?
A modern target bow setup usually has three main parts that help aim:
- The Sight Bar: This is the main mounting structure that attaches to the riser (the middle part of the bow).
- The Sight Pin/Housing: This part holds the actual aiming point directly in front of your eye. In modern sights, this housing is often large and circular.
- The Lens (Scope): This is the magnifying or clarifying glass that sits inside that housing.
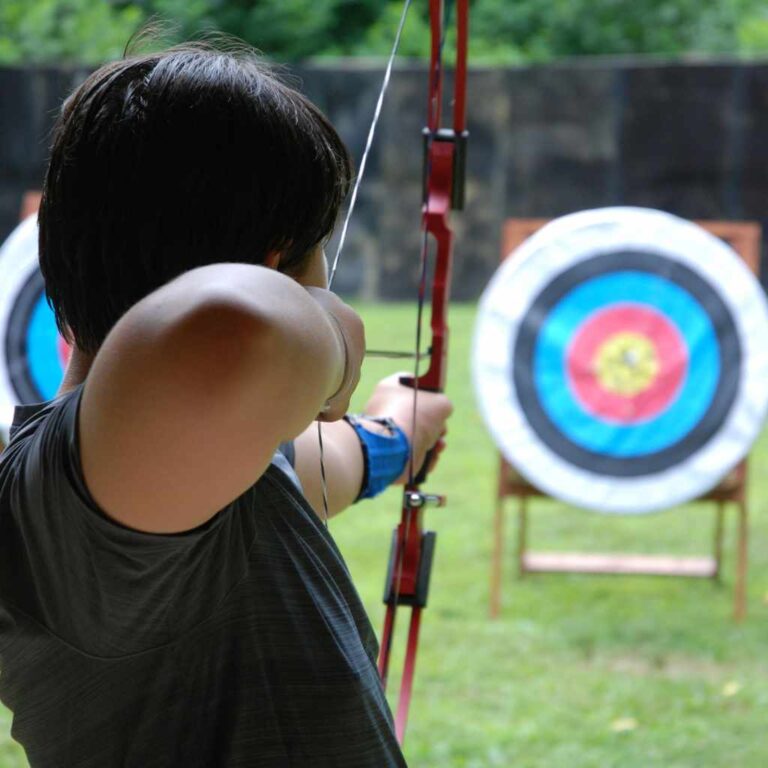
For beginners, aiming can be a massive hurdle. Why? Because the arrow tip (where you want the sight pin to land) is close to your eye, but the target is far away. Your eye struggles to focus sharply on both at the same time, leading to an image we call “fuzzy.”
The Problem of Dual Focal Points
This is the core issue does getting a lens help with clearing up Target Archery:
When you focus on the sight pin, the target becomes blurry.
When you focus on the target, the sight pin becomes blurry.
This forces you to guess which image is “clear enough.” The lens solves this guessing game completely.

The Role of the Lens in Target Archery
A lens in an archery sight is not just a piece of fancy glass; it’s a precision tool designed to manage how light enters your eye during the shot process.
Magnification vs. Clarity (The Key Difference)
When most beginners hear “lens,” they immediately think of a magnifying glass that makes things look bigger. This is only partially true for target archery lenses.
Clarity First, Magnification Second
The primary job of a target scope lens is to provide a clear focal plane.
A properly selected lens allows you to focus perfectly on the sharp edges of the sight pin and the sharp edges of the target ring simultaneously. This is achieved through specific optical power (measured in diopters).
A lens with a power of 0.0 (no power) offers pure clarity. A lens with a power of +0.75 or +1.50 adds magnification, making the target appear closer.
How Lenses Improve Consistency and Grouping
Consistency in archery comes from doing the exact same thing every single time. When your eyesight is the variable, consistency vanishes.
- Eliminates Aiming Doubt: If the target is crisp, you stop doubting if your pin is truly centered on the gold.
- Better Head and Eye Placement: When you can see clearly, you naturally settle into the same anchor point and head position because your focus is locked.
- Accommodates Vision Needs: As we age, our eyes struggle to focus up close (presbyopia). A lens compensates for this, allowing older archers (or archers with mild astigmatism) to shoot clearly.
Choosing Your First Target Archery Lens: A Step-by-Step Guide
So, you’re ready to buy a lens. Don’t just grab the most expensive one! The right lens depends entirely on your eyesight and your shooting distance.
Step 1: Know Your Shooting Distances
Are you shooting 18 meters indoors, or 70 meters outdoors?
Shorter Distances (Indoor/Field): Less magnification is usually needed. Clarity is king. A 0.0 or milder lens (like +0.50) is often perfect.
Longer Distances (Outdoor Target): As the target gets farther away, the physical gap between your target pin and the bullseye increases visually. Stronger magnification (like +1.00 to +2.00) helps “close that gap” visually, making sight picture management much simpler.
Step 2: Determine Your Diopter Requirement (The Power Number)
This is the most technical part, but we keep it simple. The goal is to match the lens power to how far your eye naturally focuses comfortably.
How to Test Your Natural Focus (Simple Test)
You can perform a rough at-home test to see what kind of lens might help you:
- Take a page of text you can barely read comfortably.
- Hold it out at arm’s length (about 25–30 inches). This is roughly where your sight housing will be.
- If the text is blurry and you can’t read it, you likely need a positive (+) diopter lens to bring the reading distance closer to your natural focus.
Most beginner and intermediate archers often find success in the +0.75 to +1.25 range, especially for 50+ meter shooting.
Step 3: Consider the Lens Housing Features
The lens sits inside a housing attached to your sight. These housings come with important extras:
- A Sun Shade: This sticks out the front like a short tube. It reduces glare on sunny days, which is crucial for clear vision.
- A Level: This small bubble lets you ensure your bow is perfectly vertical. If your bow tilts (“torques”), your arrows will go left or right. A level is non-negotiable for serious target work.
- A Protective Screen (or “Screen Material”): This is a fine mesh or tinted layer placed behind the lens. This protects the expensive lens from errant arrows, especially when practicing up close, and can also help reduce glare slightly.
Step 4: Choosing a Fiber Optic Pin (Aiding Visibility)
While not part of the lens itself, the pin inside the housing works with the lens. A fiber optic pin catches ambient light and glows brightly, making the aiming dot highly visible against the target. When paired with a crisp lens, the glowing pin against a sharp target background is the ideal aiming solution.
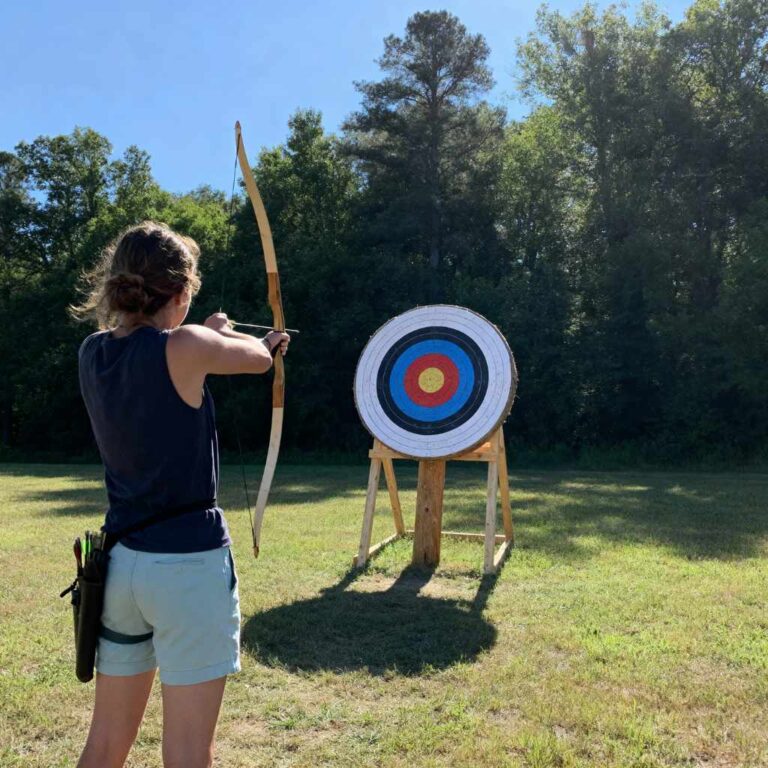
Comparing Sight Types: Lens vs. Pin-Only
Many recurve archers start with just a simple sight pin mounted on the bow—no housing, no lens. This is often called “gap shooting” or “point-tip aiming.” This method relies heavily on feel and consistent distance estimation.
Here is a quick comparison to show why adding a lens system is considered the standard for precision target shooting:
| Feature | Pin-Only Sight (No Lens) | Sight with Lens Housing |
|---|---|---|
| Clarity at Distance | Poor; sight pin and target are usually both slightly fuzzy. | Excellent; lens sharpens both the pin and the target rings. |
| Gapping Consistency | Requires frequent adjustments based on light/fatigue. | Significantly reduces aiming guesswork, promotes repeatable focus. |
| Setup Complexity | Very simple; usually just one screw adjustment. | More complex; involves micro-adjustments for vertical/horizontal travel. |
| Cost for Upgrade | Low initial cost. | Higher initial cost for the housing and lens assembly. |
| Beginner Learning Curve | Steep if precision is the goal immediately. | Steeper setup, but easier long-term aiming once set. |
As you can see, while starting simple is fine, if your goal is competitive accuracy, the lens system offers far superior visual feedback.
Installation and Tuning: Getting Your Lens Set Up Right
Buying the lens is step one. Installing it correctly is step two. Poor installation will negate the benefits of the best lens available! Always refer to your specific sight manual, but here are the general steps.
Required Tools (Usually Simple)
You often don’t need a huge toolbox for this task.
- Precision screwdriver set (often a small flathead or jeweler’s size).
- Allen wrenches (Hex keys) provided with your sight.
- A cloth or soft surface (to prevent losing small parts).
- Magnifying glass (optional, but helpful for tiny screws).
The Installation Process (Focusing on the Housing)
1. Remove the Old Housing or Pin Mount: Carefully unscrew the existing sight pin holder from the main sight extension bar. Keep all screws in a safe spot.
2. Assemble the Lens Housing: If your lens came as an assembly, great. If it’s separate, fit the lens into the circular housing ring. You might need a small retaining ring or specific mounting screws to hold the lens firmly in place without cracking the glass.
3. Install the Anti-Glare Shield (If Applicable): If you purchased a front sun shield or a rear aperture, install these components onto the housing assembly according to the manufacturer’s directions.
4. Attach to the Sight Bar: Mount the complete housing assembly back onto the main sight bar. Do not tighten everything down fully yet; you need it slightly loose for initial aiming adjustments.
5. Install the Level: Mount the bubble level onto the housing. This must be perfectly level (the bubble centered) before you even start shooting for distance adjustments.
Tuning Based on Light Conditions
If you notice severe glare, you might need to adjust the sun shade depth or try a specialized anti-glare lens coating. Archery manufacturers, like those referenced by organizations such as the World Archery Federation (which sets standards for equipment), stress repeatable sight pictures. Glare breaks that repeatability.
For more on safe equipment setup and tuning principles, especially regarding safety standards, consult resources like those provided by organizations focused on safe shooting practices, such as the USA Archery Association website, for official safety guidelines regarding equipment modernization.
Troubleshooting Common Lens Issues Beginners Face
Even with a lens, archers sometimes struggle. Here are the most common sights that a lens might be the solution for:
Problem 1: Ghost Images or Double Pins
If you see two or three copies of your sight pin or the target—especially if you are squinting—this usually means one of two things:
Incorrect Centering: The lens is mounted slightly crooked, causing light to refract incorrectly. (Fix: Re-level the entire housing and check the lens seating.)
Wrong Lens Power: The magnification is too strong for your eye at that distance, causing aberrations. (Fix: Try dropping to a lower diopter power.)
Problem 2: Pin Appears Too Small
If you are using a high-power lens (+1.50 or more) and the fiber optic pin looks like a tiny speck, you might need a different type of aiming dot inside the housing. Some lenses work better with a small drilled hole (aperture) rather than a thick fiber optic bundle. This often requires consulting a specialized archery pro shop.
Problem 3: Need for Color Filters
Sometimes, especially on overcast days or against brightly colored snow, the background can wash out the sight pin. Many sight housings allow you to place thin colored filters (like yellow, orange, or blue) directly in front of the lens.
Yellow Filters: Excellent for low light or foggy conditions; they brighten the view.
Orange Filters: Great for cutting intense blue sky glare while enhancing the gold center of the target.
These filters work with the lens to optimize contrast, which is another way does getting a lens help with clearing up Target Archery—by managing color information, not just focus.
Moving Beyond the Lens: Practice & Form
It is vital to remember that a lens is an aid, not a cure-all. It makes aiming precise, but it cannot fix poor form.
The Lens Only Halts When Shooting Stops
Many beginners rely too heavily on the lens during the aiming process and stop actively engaging their muscles. Your form must be solid:
- Anchor Firmly: Your anchor point must be the same every time.
- Maintain Back Tension: Use your back muscles to hold the string steady, not just your fingers.
- Smooth Release: Tension creates a jerky shot. The lens will clearly show you the result of a jerky shot (a bad grouping), forcing you to clean up your release.
The lens simply gives your brain the accurate visual feedback required to correlate your physical movements with the point of impact. If you shoot well with a lens, and then take it off, you’ll immediately see where your visual precision was lacking before.
The Transition: When to Remove the Lens (If Ever)
For pure target archery (recurve or compound set up for distance), you will likely never remove the lens. It is part of the competitive setup.
However, if you decide to try different disciplines, like 3D archery (shooting foam animal targets) or traditional barebow:
- 3D Shooting: Distances change constantly. A fixed magnification lens can make judging variable distances very difficult. Many 3D archers shoot with a simple, fixed aperture (no lens) so they can rely more on the “size” progression of the target animal.
- Barebow: This is the closest to instinctive shooting. Barebow rules strictly forbid magnification aids.
For your goal of mastering essential target archery, however, the lens is your crucial ally in achieving repeatable, confident aiming.

Frequently Asked Questions (FAQ) for Beginner Archers
Q1: Can I use my reading glasses instead of buying a specific archery lens?
A: Not ideally. Reading glasses focus light at a fixed distance (usually 14–16 inches). An archery scope lens is designed to work at the distance between your eye and the sight housing (usually 25–30 inches). Using reading glasses can sometimes over-correct or introduce distortion, making the sight picture worse.
Q2: Do compound archers use the same lenses as recurve archers?
A: Yes, the principle is the same. Both disciplines use magnifying lenses (scopes) to clarify the field of view. Compound sights typically have longer extension bars, meaning the lens setup might be physically larger, but the optical requirement (diopter strength) is based on the archer’s eye, not the bow type.
Q3: Will a lens make my bow heavier or harder to hold still?
A: A lens itself adds negligible weight. However, the entire sight housing assembly that holds the lens, level, and sun shade is larger and heavier than a basic pin mount. This extra weight, placed far out on the bow, actually acts as a stabilizer, often helping dampen minor movements once you’ve settled into your shot.
Q4: What is the biggest mistake beginners make when first installing a lens?
A: The biggest mistake is failing to level the sight housing correctly. If the horizontal axis is skewed, even the best lens will cause the shot to drift left or right because the sight picture is tilted relative to the ground.
Q5: Is there a legal limit to magnification in competitions?
A: Yes. Standard World Archery Target competitions (for recurve and compound) prohibit magnifying lenses over a certain power, usually defined by the diameter of the lens housing aperture. Always check the specific rules for the class you intend to enter, as rules vary slightly between organizations (e.g., World Archery vs. a local club)
Q6: How long does it take to get used to shooting with a lens?
A: Most shooters notice a significant improvement in clarity within the first 10 minutes of shooting. However, adopting the new, extremely crisp sight picture might take a week or two of consistent practice to feel completely natural and trust where the pin is pointing.
Conclusion: Clarity is Confidence in Target Archery
We started by asking, does getting a lens help with clearing up Target Archery? The answer is a resounding yes, especially when you are building the foundation of precision shooting. For the beginner or the dedicated hobbyist trying to move beyond basic grouping and into tight consistency, the lens removes visual ambiguity.
It allows your brain to focus purely on form execution, knowing that the visual feedback you are getting—the sight picture—is as sharp and accurate as modern optics allow.
Think of it this way: you wouldn’t try building a precise wooden joint by only looking at it through foggy glass. The lens clears that glass for you.