How A Hockey Chest Protector Should Fit
You’ve just shelled out for a new hockey chest protector. It looks great, feels sturdy, and promises top-notch protection. But then you put it on, and something feels…off. Maybe it’s too bulky, too tight, or just doesn’t sit right. This is a common frustration for hockey players at all levels. Getting the right fit is crucial not just for comfort, but for actual safety on the ice. A poorly fitting chest protector can shift, leave gaps, or restrict your movement, defeating its whole purpose. Let’s dive into how your chest protector should feel and what to look for.
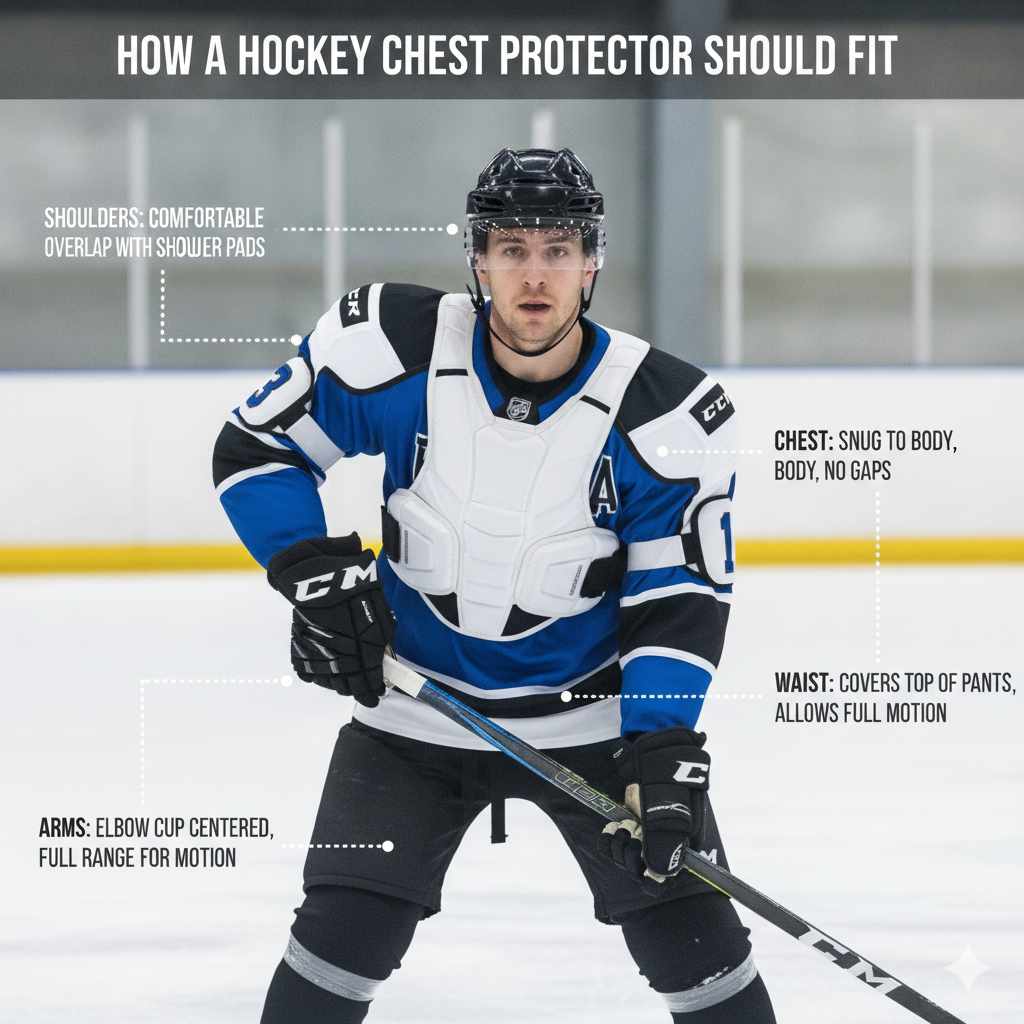
A hockey chest protector should fit snugly but comfortably, allowing full range of motion. Key areas include shoulder coverage, bicep protection, and chest panel alignment. It should not shift during play or restrict breathing and arm movement.
Understanding the Layers of Protection
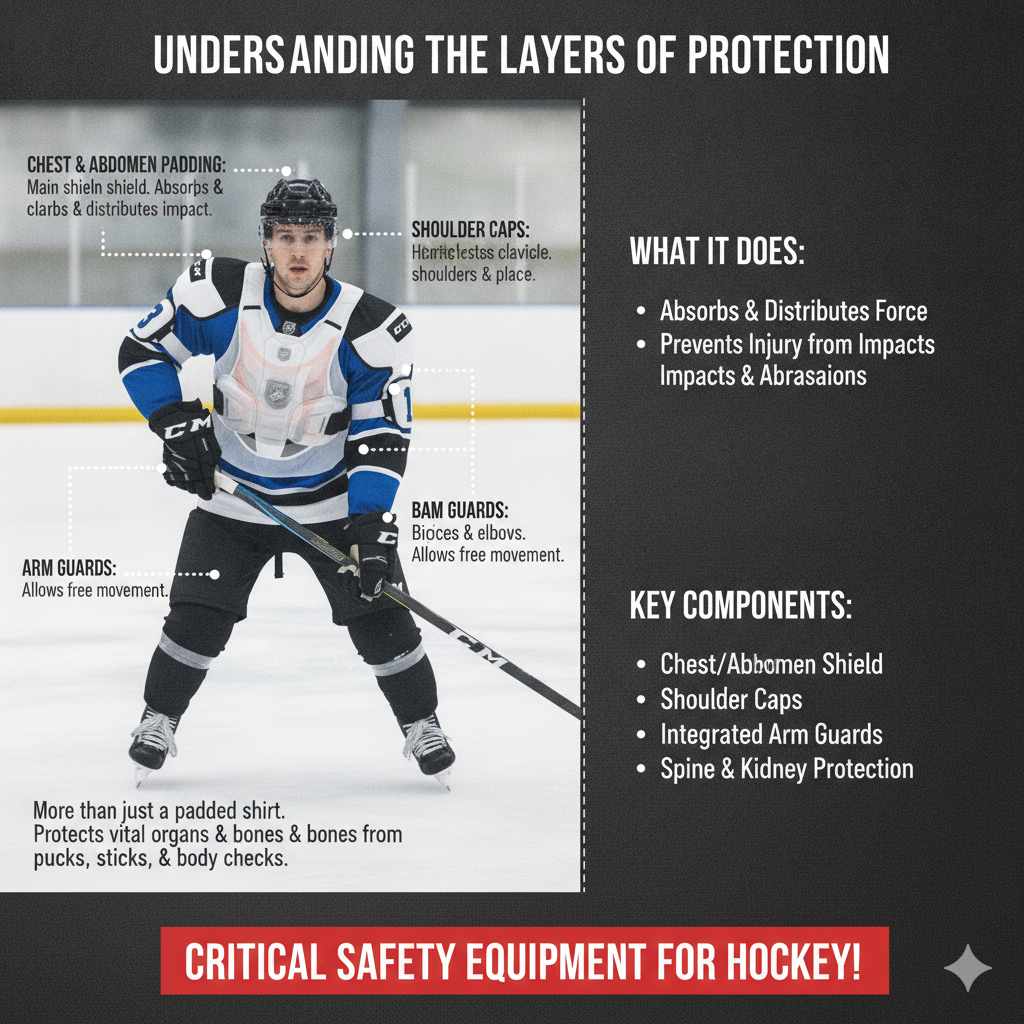
A hockey chest protector is more than just a padded shirt. It’s a complex piece of equipment designed to protect your vital organs and bones from pucks, sticks, and body checks. Think of it in a few main parts.
First, you have the chest and abdomen padding. This is the main shield. It’s usually made of various foams and plastic inserts. These work together to absorb and distribute impact. The goal is to spread the force of a hit over a larger area. This stops a single hard impact from causing serious injury.
Next are the shoulder caps. These are often hard plastic pieces. They protect your clavicle and the tops of your shoulders. Good shoulder caps will cover the bone well without being too bulky. They need to stay in place when you move.
Then come the arm guards. These protect your biceps and elbows. They are often connected or integrated into the main chest piece. They need to allow you to move your arms freely. They should also offer solid protection for your upper arms.
Finally, there’s the back padding. This protects your spine and kidneys. It should offer good coverage without being too stiff. You need to be able to bend and twist.
My Own Chest Protector Saga
I remember my first year playing goalie. I was maybe 10 years old. My dad bought me a chest protector. It looked like something a medieval knight would wear. It was enormous. When I put it on, it felt like wearing a cardboard box. The shoulders were way too high. The arms flopped around. I couldn’t even reach my catcher mitt properly.
During practice, every time I moved, it shifted. A slapshot hit my chest, and I barely felt it. That seemed good! But then a weak wrist shot hit my side, right where the chest piece didn’t quite cover. Ouch. It was a bruised rib that kept me off the ice for a week. That’s when I realized fit wasn’t just about looking cool. It was about being truly protected. My dad and I spent the next hour adjusting straps, trying to make it work. It never quite did. That lesson stuck with me.
Key Fit Points for Your Chest Protector
Let’s break down exactly where your chest protector needs to feel just right.
Shoulder Coverage is King
The shoulder caps are super important. They need to sit right on top of your shoulders. When you raise your arms, they shouldn’t ride up too much. They should also extend down enough to cover your collarbone. This bone is very easy to break. If the cap is too small, it leaves a gap. If it’s too big, it can get in the way.
A good fit means the edge of the shoulder pad aligns roughly with the top of your shoulder joint. When you look in the mirror, it should look balanced. Not one side higher than the other.
Chest and Abdomen Alignment
This is the main area. The chest protector should cover your sternum completely. It should also protect your ribs down to your waist. When you bend over, it should still cover your stomach. It shouldn’t expose your belly button.
The padding should feel secure. It shouldn’t feel like it’s squeezing you too hard. But it also shouldn’t have loose spots where you can pinch it away from your body. Imagine a puck hitting you. You want that impact to be spread out by the padding, not felt directly on your bone.
Arm Guard Connection and Length
The arm guards protect your biceps and elbows. They usually attach to the chest piece. This connection needs to be secure. The elbow caps should sit right over your elbow joint. They should not slide down your forearm.
The length of the bicep pad is also key. It should cover the entire bicep area. It should extend down towards your elbow pad. When your arm is bent, the padding should stay in place. It shouldn’t bunch up or leave skin exposed.
Think about how you hold your stick. Your arms move a lot. The arm guards need to move with you. They shouldn’t feel like they are fighting your natural arm motion.
Back Protection Balance
The back piece protects your spine. It should cover your back from your upper shoulders down to your lower back. Like the chest piece, it shouldn’t feel too tight. But it must also offer good coverage.
When you twist your torso, the back padding should move with you. It should not restrict your movement. A good back protector will have flex points. These allow you to bend and turn more easily.
When Is It Too Tight or Too Loose?
This is where many people get confused. Too tight is bad. Too loose is also bad.
Fit Check: Too Tight Symptoms
Feeling Restricted: You can’t move your arms or torso freely.
Breathing Issues: It feels hard to take a deep breath.
Pressure Points: You feel sharp digs or pinching.
Visible Gaps: The padding pulls away from your body in places.
Too tight means the padding is compressing too much. This reduces its ability to absorb impact. It also restricts blood flow and movement. You might feel like you can’t breathe deeply. This is a sign it’s too small or the straps are too tight.
Fit Check: Too Loose Symptoms
Shifting During Play: The protector moves around when you skate or check.
Bells or Gaps: There are loose areas where you can pinch the padding away from your body.
Padding Slides Down: Arm guards or chest pieces slide out of place.
Feeling Exposed: Despite wearing it, you feel like you could still get hit directly.
Too loose means there’s too much space between you and the padding. When you get hit, the padding can slide. This leaves parts of your body unprotected. It might feel heavy and floppy. It can also get in the way of your movements.
Common Mistakes People Make
We’ve all seen them. Players wearing gear that’s clearly not the right size. Here are some common pitfalls.
Mistake number one: Buying too big to “grow into.” Kids grow fast. But buying a chest protector that’s two sizes too big means it won’t protect them properly now. This is a real safety risk. It’s better to buy the correct size for today. Then, when they outgrow it, get the next size up.
Mistake number two: Not trying it on with your other gear. Your shoulder pads might be part of your chest protector, or they might be separate. You need to try on the chest protector with your skates, socks, pants, and maybe even your jersey. This helps you see how everything fits together. Does the jersey fit over it? Do the shoulder pads feel right when worn over or under the chest protector?
Mistake number three: Relying only on the size chart. Size charts are a starting point. They use your height and weight. But everyone’s body is different. You might be tall and thin, or short and stocky. These body types wear sizes differently. Always try it on if you can.
Mistake number four: Forgetting about mobility. You need to be able to skate, shoot, pass, and stickhandle. A chest protector that restricts your movement is almost as bad as one that doesn’t protect you. You should be able to do all these things without feeling held back.
My Own Experience with a Bad Fit
I’ll never forget watching a young player, maybe 12, during a game. He was wearing a chest protector that was way too small. The shoulder caps barely covered his shoulders. The chest piece looked like a bib. He kept adjusting it. During a scramble in front of the net, he got bumped. His jersey rode up, exposing his entire abdomen. The puck went right there. He went down, clearly in pain. It was a tough moment to watch. It wasn’t just a bruise. It was a lesson for everyone in the stands about proper gear.
What Does “Snug but Comfortable” Really Mean?
This is the golden phrase for gear fitting. Let’s unpack it.
“Snug” means it hugs your body. It doesn’t have huge gaps. It feels like it’s part of you, not something you’re wearing on top of you. It stays in place when you move.
“Comfortable” means it doesn’t hurt. You don’t feel pinching or sharp edges. You can breathe deeply. You can move your arms freely. It doesn’t chafe or rub in a way that will cause blisters or sores during a game.
Imagine a firm handshake. It’s firm, but not crushing. That’s the kind of snug you want.
How to Measure for the Right Size
Most manufacturers have sizing charts. These are usually based on:
Height: Your total height from head to toe.
Weight: Your body weight.
Chest Measurement: Measure around the fullest part of your chest, right under your arms.
When you look at a chart, find your measurements. See which size range you fall into. For example, a chest protector might be listed for:
Small: 5’0” – 5’4” and 100 – 120 lbs.
Medium: 5’4” – 5’8” and 120 – 140 lbs.
Large: 5’8” – 6’0” and 140 – 160 lbs.
But remember, these are just guides.
Quick Fit Check Steps
1. Put it on: Zip or strap it up.
2. Check Shoulders: Caps sit on top, not too high or low.
3. Assess Chest: Full sternum and rib coverage. No gaps.
4. Arm Mobility: Bend and raise arms. Padding stays in place.
5. Twist and Turn: Rotate your torso. It shouldn’t feel restricted.
## Trying it On in Person
If you can, go to a hockey shop. This is the best way.
1. Wear a light shirt: Put on a t-shirt. This is what you’d wear under the protector.
2. Put it on: Secure all the straps and closures. Make sure it feels snug all around.
3. Move around: Skate in place if they have a spot. Reach up. Bend over. Twist. Pretend to shoot.
4. Check for gaps: Look in the mirror. Have someone else check your back and sides. Any skin showing where there shouldn’t be?
5. Feel for discomfort: Are there any parts that dig in? Does it feel too tight anywhere?
Don’t be afraid to ask the store staff for help. They usually know a lot about fitting gear. They can spot problems you might miss.
Goalie vs. Player Chest Protectors: What’s Different?
This is a crucial point. Goalie chest protectors are very different from player ones.
Player chest protectors are designed for agility and quick movements. They offer good protection but aim to be less bulky. They allow for a wider range of motion needed for skating and shooting.
Goalie chest protectors are much larger and offer more padding. They are built to stop incredibly fast shots directly. They often have extended arms and belly pads. Mobility is still important, but the priority is maximum impact absorption. The fit for a goalie protector needs to be secure so it doesn’t shift when they drop into a butterfly stance.
If you’re a player, buy a player chest protector. If you’re a goalie, buy a goalie chest protector. Trying to use one for the wrong position is a recipe for disaster.
What Does “Modern Fit” Mean?
Hockey gear evolves. Modern chest protectors are designed with player feedback.
They use lighter materials. This makes them feel less heavy. They are often more streamlined. This means less bulk. They aim for better articulation. This means the different pieces move together more easily.
The padding might be shaped differently. It can contour to your body better. This improves comfort and protection. Straps might be easier to adjust. They might use better closures that stay secured.
A modern fit will feel less like a rigid shell and more like a well-designed piece of athletic wear. It should enhance your performance, not hinder it.
Infographic-Style Section: Chest Protector Fit Checklist
Your Chest Protector Fit Checklist
Shoulders
Perfect Fit: Caps sit right on top. No gaps when arms are raised.
Too Loose: Caps slide down or off. Big gap between shoulder and pad.
Too Tight: Pads dig into shoulders. Limits arm movement upwards.
Chest & Abdomen
Perfect Fit: Covers sternum and ribs fully. No pinching. Stays put.
Too Loose: Padding shifts. Can pinch it away from body. Gaps appear.
Too Tight: Restricts breathing. Feels like it’s squeezing your chest.
Arms
Perfect Fit: Elbows covered. Bicep pad covers arm. Stays put when bending.
Too Loose: Padding slides down. Elbows exposed. Bicep feels unprotected.
Too Tight: Limits arm bend. Feels restrictive. Padding bunches up.
Back
Perfect Fit: Covers spine from top to bottom. Flexes with you.
Too Loose: Padding feels floppy. Doesn’t feel secure against back.
Too Tight: Restricts torso twists. Feels stiff.
Real-World Scenarios: When Fit Matters Most
Think about the situations on the ice where fit is critical.
Taking a Slapshot: A direct shot to the chest needs maximum padding. If your chest protector is too loose, the padding might shift right before impact. This can lead to a direct hit on bone. A snug fit keeps the padding where it needs to be. It acts as a solid shield.
Taking a Body Check: When you get hit, your body absorbs the force. Your chest protector is part of that system. If it’s too big, it can get pushed out of the way. This can cause strain on your ribs or back. A well-fitting protector moves with you, distributing the impact more evenly.
Scrambles in Front of the Net: This is chaos. You’re bumping into players, goalies, and the boards. Your gear gets tested. If your chest protector is loose, it can get caught or twisted. This can expose you to injury. A properly fitted protector stays put, offering continuous protection.
Long Shifts: Comfort matters over a long game. A chest protector that’s too tight will feel worse as you get tired. It can restrict blood flow, making muscles ache. A comfortable fit allows you to focus on your game, not on gear that’s bothering you.
When to Consider an Upgrade
Gear doesn’t last forever. If your chest protector is old, it might not offer the same protection.
Cracked or Broken Plastic: If any of the hard plastic pieces are cracked, they are compromised. They won’t absorb impact as well.
Worn-Out Padding: If the foam padding is compressed or torn, it’s lost its cushioning ability. It might feel thin.
Stretched-Out Straps: If the Velcro straps no longer hold securely, the protector will shift.
Poor Fit Develops: Sometimes, gear just wears out in a way that makes it fit poorly.
If you’ve had your chest protector for many years, or if it shows signs of wear, it might be time for a new one. A new, properly fitted protector can make a huge difference in how safe and confident you feel on the ice.
Simple Checks You Can Do At Home
Before you head to the rink, or even after you’ve bought a new one, do these checks.
1. The Arm Raise Test: Put on the protector. Raise your arms straight up. Does the chest piece slide up your torso significantly? Do the shoulder caps lift so high that your collarbone is exposed? They should lift only a little.
2. The Twist Test: Stand with your feet shoulder-width apart. Twist your torso as far as you can to the left and right. Does the chest protector feel like it’s fighting your movement? Does it bunch up uncomfortably?
3. The Bend Test: Bend over as if you’re picking up a puck. Does the front of the protector stay down over your abdomen? Does it expose your stomach or lower back?
4. The “Pinch Test”: With the protector on, gently try to pinch the padding away from your body in different areas. Is there a lot of slack? This means it’s too loose in that spot.
These simple tests can reveal hidden fit issues that might not be obvious when you’re just standing still.
Quick Tips for a Better Fit
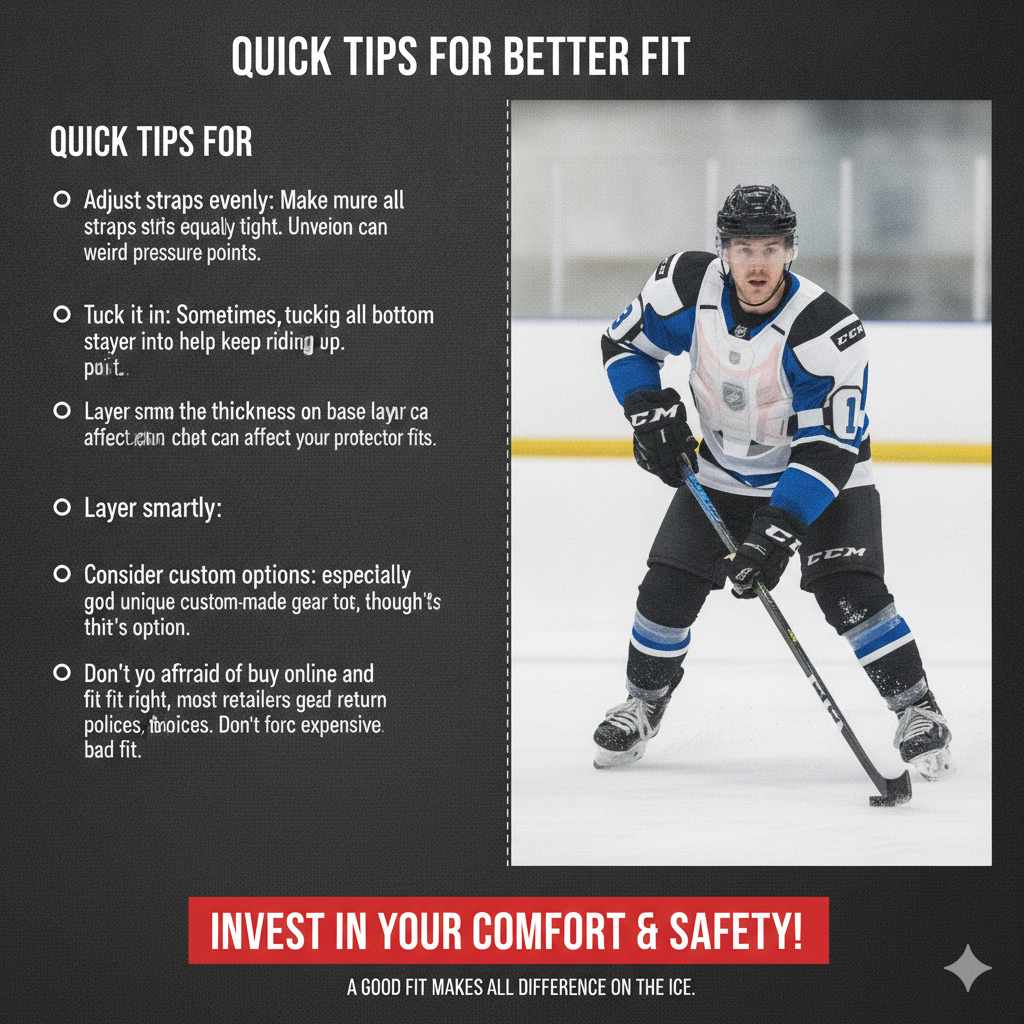
Adjust straps evenly: Make sure all straps are equally tight. Uneven tension can cause weird pressure points.
Tuck it in: Sometimes, tucking the bottom of the chest protector into your hockey pants can help keep it from riding up.
Layer smartly: The thickness of your base layer shirt can affect how the protector fits.
Consider custom options: For some players, especially those with very unique body shapes, custom-made gear might be an option, though it’s expensive.
Don’t be afraid to return: If you buy online and it doesn’t fit right, most retailers have good return policies. Don’t force a bad fit.
Frequently Asked Questions
How do I know if my chest protector is too small?
If it feels very tight, restricts your breathing or arm movement, or if you notice skin showing in key areas when you move, it’s likely too small. It might also feel like it’s constantly pulling or pinching.
Can a chest protector be too big?
Yes, absolutely. If it’s too big, it will shift during play, leaving you exposed to impacts. It can also be bulky and get in the way of your movements.
There will be noticeable gaps where you can pinch the padding away from your body.
Should there be a gap between my shoulder pads and chest protector?
This depends on the design. Many modern chest protectors have integrated shoulder caps. If you have separate shoulder pads, they should ideally work together.
The chest protector’s shoulder cap should sit on top of your shoulder, and your separate shoulder pad should fit snugly underneath it, not causing overlap or awkward bulk.
How tight should the arm guards be on a chest protector?
The arm guards should be snug enough to stay in place but not so tight that they restrict your ability to bend your arm. The elbow cap should cover your elbow joint properly and not slide down your forearm when you move.
Do I need to wear a jersey over my chest protector?
Yes, a jersey is typically worn over your chest protector. The jersey helps keep everything in place and is part of the standard hockey uniform. Ensure your jersey fits comfortably over your chest protector without being too tight or restrictive.
How often should I replace my hockey chest protector?
There’s no set time frame. Inspect your chest protector regularly for signs of wear and tear like cracks, tears, or compressed padding. If you’re playing frequently, consider replacing it every 2-4 years, or sooner if it shows significant damage or no longer fits well.
The Takeaway on Fit
Getting the fit of your hockey chest protector right is one of the most important steps you can take for your safety and performance. It’s not just about comfort; it’s about making sure that expensive piece of gear actually does its job when you need it most. Pay close attention to the shoulder coverage, chest and abdomen alignment, and arm mobility. Move around in it. Check for gaps. And never, ever buy gear that’s too big just so you can “grow into it.” Your health on the ice depends on it.