How Do You Make Bows For Christmas Trees
Decorating a Christmas tree is one of the season’s most cherished traditions, and nothing elevates a tree’s elegance quite like beautifully crafted bows. The art of making Christmas tree bows combines creativity with craftsmanship, offering a simple way to personalize your holiday décor.
Whether you prefer classic red velvet or shimmering metallics, bows add texture, color, and a sense of celebration that’s hard to match with store-bought ornaments alone.
Many people believe making professional-looking bows is a skill reserved for seasoned crafters, but with the right guidance, anyone can create show-stopping accents for their Christmas tree. This article delivers a comprehensive, step-by-step guide, featuring real-world examples, data-driven comparisons of ribbon types, and practical tips tested by experts and enthusiasts alike.
By the end, you’ll be equipped with the knowledge and confidence to craft bows that become the centerpiece of your holiday decorations.
Key Takeaways
- Bow making is accessible to beginners with the right tools and techniques.
- Choosing the best ribbon material significantly impacts bow appearance and durability.
- Step-by-step instructions ensure consistently beautiful bows for any tree style.
- Custom bows enhance personalization and can be adapted to various holiday themes.
- Proper placement and sizing are crucial for balanced, professional-looking décor.
- Real-world examples and data tables help in selecting materials and methods.

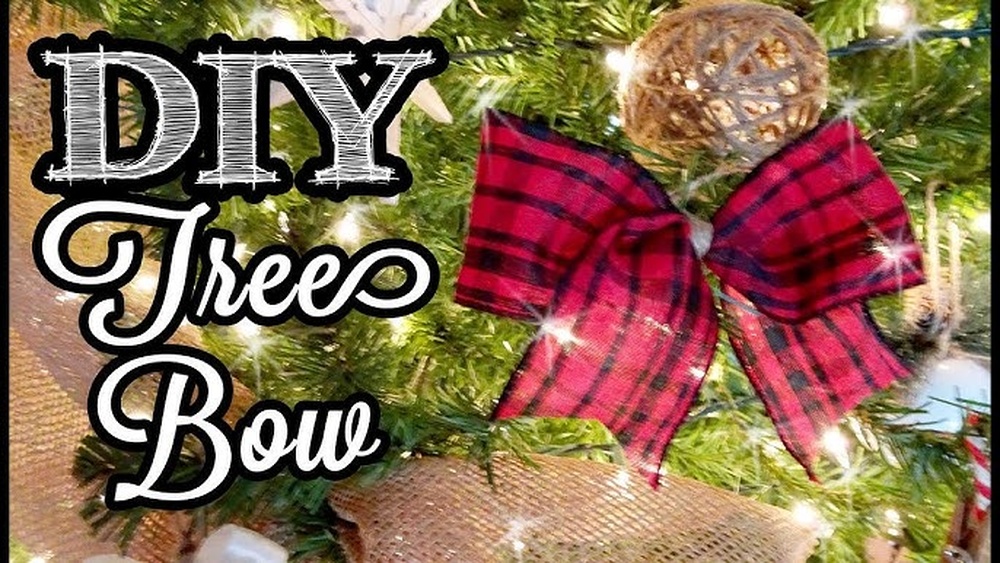
Credit: www.youtube.com
Understanding Christmas Tree Bow Styles
The first step in making bows for Christmas trees is understanding the variety of bow styles available. Each style creates a distinct visual effect, allowing decorators to match bows to their preferred theme, whether it’s traditional, modern, rustic, or whimsical.
Classic Single-loop Bow
The single-loop bow is the simplest design, often used for small branches or as subtle accents. It consists of one loop on each side and a central knot, making it quick and easy to assemble. This style is perfect for minimalist or Scandinavian-inspired trees.
Multi-loop Traditional Bow
The multi-loop bow is the most popular style for Christmas trees. It features several loops on each side, creating a fuller, more dramatic effect. Multi-loop bows are ideal for tree toppers and larger branches, where a statement piece is desired.
Tails Down Bow
A tails down bow incorporates long, trailing ribbon ends that cascade down the tree. This style is favored for its elegant appearance and ability to add vertical lines to the overall décor. It works especially well with wired ribbon, which holds its shape.
Layered And Stacked Bows
The layered bow involves stacking ribbons of different colors, patterns, or widths. This approach adds depth and visual interest, making each bow a unique work of art. Layered bows are perfect for themed trees where specific color palettes are used.
Rustic Burlap Bow
Burlap bows offer a rustic, farmhouse-inspired look. The natural texture of burlap pairs beautifully with pine and wooden ornaments, making it a popular choice for those who prefer a cozy, homespun style.
Bow Ties And Specialty Shapes
Beyond traditional bows, some decorators opt for bow tie shapes or even star-shaped designs. These specialty bows require more advanced techniques but can be rewarding for experienced crafters seeking something unique.
| Bow Style | Difficulty Level | Best For |
|---|---|---|
| Single-Loop | Easy | Minimalist décor, small branches |
| Multi-Loop | Moderate | Tree toppers, large accents |
| Tails Down | Moderate | Elegant, cascading looks |
| Layered | Advanced | Themed or color-rich trees |
| Burlap | Easy | Rustic/farmhouse themes |

Credit: bebraveandbloom.com
Choosing The Right Ribbon And Materials
Selecting the appropriate materials is essential for creating bows that look stunning and last throughout the holiday season. The ribbon’s width, material, and wire structure all affect the final result.
Wired Vs. Non-wired Ribbon
Wired ribbon is strongly recommended for Christmas tree bows. The embedded wire edges allow you to shape loops and tails precisely, helping the bow maintain its fullness. Non-wired ribbon can be used for smaller or more delicate bows, but it tends to droop over time.
Ribbon Width And Length
- 2.5-inch wired ribbon is the most versatile for tree bows.
- Wider ribbons (3, 4 inches) are best for tree toppers or very large trees.
- Narrower ribbons (1, 2 inches) are suitable for small bows or detailed accents.
A typical bow for a standard 6, 7 ft tree requires about 2, 3 yards of ribbon per large bow or 1 yard for smaller bows.
Material Comparison
- Velvet: Luxurious, traditional, and rich in color, but can be heavy.
- Satin: Smooth and shiny, ideal for glamorous themes.
- Organza: Sheer and lightweight, adds a delicate touch.
- Burlap: Rustic and sturdy, perfect for farmhouse aesthetics.
- Metallic: Reflects light beautifully, ideal for modern or opulent trees.
| Ribbon Material | Appearance | Durability | Ease of Shaping |
|---|---|---|---|
| Velvet | Rich, matte | High | Moderate |
| Satin | Glossy, sleek | Moderate | High |
| Organza | Sheer, light | Low | High |
| Burlap | Textured, rustic | High | Moderate |
| Metallic | Shiny, reflective | Moderate | High |
Essential Tools And Supplies
- Sharp scissors (for clean cuts)
- Floral wire or pipe cleaners (to secure bows)
- Measuring tape or ruler
- Hot glue gun (optional, for securing ribbon ends)
- Ribbon storage container (keeps spools untangled)
Where To Buy Quality Ribbon
High-quality ribbon can be sourced from craft stores, online retailers, or specialty shops. For unique patterns, consider supporting small businesses on platforms like Etsy or visiting local holiday markets.

Credit: fancybloom.net
Step-by-step Guide: Making Perfect Christmas Tree Bows
Creating beautiful bows is a skill that improves with practice. Below is a detailed guide to crafting a professional-looking, multi-loop bow suitable for most Christmas trees.
Preparing Your Materials
- Cut the ribbon: Measure and cut 2.5 to 3 yards of wired ribbon for a large bow.
- Gather supplies: Have floral wire, scissors, and any embellishments (like berries or pine sprigs) ready.
Creating The Loops
- Form the center loop: Pinch the ribbon end between your thumb and forefinger, forming a small loop. This will be the bow’s center.
- Make the side loops: Twist the ribbon so the front side always faces outward. Create a loop on one side, pinch at the center, and repeat on the other side, keeping loops even.
- Continue layering: Add 2, 3 loops on each side for a full, traditional bow. For a larger bow, increase the number of loops.
Securing The Bow
- Pinch the center tightly: Hold all loops together in the middle.
- Wrap with wire: Secure the center with floral wire, twisting tightly at the back.
- Fluff the loops: Spread loops evenly for a balanced, full appearance.
Adding Tails
- Attach ribbon tails: Cut two lengths of ribbon, each 12, 18 inches long.
- Wire or glue to the back: Attach tails behind the bow’s center.
- Dovetail ends: Fold ribbon tail in half and cut at an angle to create a decorative v-shape.
Attaching Embellishments
For a custom look, add berries, pinecones, or bells by securing them with floral wire before attaching the bow to the tree.
Securing The Bow To The Tree
- Wrap wire around branch: Position the bow where desired and twist wire around a sturdy branch.
- Adjust and fluff: After placement, adjust loops and tails for optimal display.
Pro Tip:
When working with large or wired bows, always fluff the loops after placing on the tree. Wired ribbon can become compressed during storage or handling, so reshaping ensures a polished look.
Decorating Techniques: Placement And Design Strategies
The arrangement of bows on your tree impacts the overall aesthetic. Thoughtful placement and sizing create a harmonious, professional look.
Topper Bows
A large, multi-loop bow makes a striking alternative to a star or angel. For added drama, let extra-long tails cascade down the tree.
Even Distribution
To avoid a cluttered appearance:
- Place large bows at the middle and bottom for balance.
- Use smaller bows toward the top or on outer branches.
- Space bows evenly around the tree.
Themed Decorating
Coordinate bow colors and styles with your ornaments and garland. For example:
- Classic red velvet bows pair with gold ornaments.
- Burlap bows match wooden or natural decorations.
- Metallic bows complement glass or mirrored ornaments.
Layering With Ribbon
For added depth, weave ribbon through the tree in a spiral, then accent with bows at intervals. This integrates the bows into the overall design rather than having them appear as separate elements.
Case Study: Family Tree Transformation
In my experience, switching from store-bought ornaments to homemade bows dramatically improved our family tree’s appearance. By choosing coordinated ribbons and spacing bows thoughtfully, the tree looked more cohesive and personalized, impressing guests and creating a new family tradition.
Real-world Examples And Inspiration
A variety of real-world approaches can inspire your own bow designs. Here are a few notable examples:
Example: Elegant Gold And White Theme
A Virginia-based decorator used white organza ribbon with gold edges for all bows, paired with white lights and gold ornaments. Bows were placed at the tips of branches, creating a luminous, ethereal effect. This approach demonstrates how consistent color choices and material selection yield a unified look.
Example: Rustic Woodland Tree
A family in Oregon decorated their tree with burlap bows, pinecone ornaments, and strings of cranberries. The bows were intentionally placed near clusters of pinecones for a rustic, cohesive theme. The use of natural materials made the tree feel inviting and warm.
Example: Modern Metallic Statement
A New York apartment dweller used wide, silver metallic ribbon for oversized bows, placing them strategically along the outer branches of a slim artificial tree. The reflective quality of the ribbon enhanced the effect of LED lights, creating a modern, dazzling centerpiece for a small space.
Comparison Table: Bow Placement Strategies
| Placement Strategy | Visual Effect | Best For |
|---|---|---|
| Tree Topper Only | Focuses attention upward | Minimalist, tall trees |
| Evenly Spaced Bows | Balanced, classic look | Traditional décor |
| Clustered Bows | Creates focal points | Themed or statement trees |
| Ribbon Garland with Bows | Integrated, layered design | Full, lush trees |
Troubleshooting Common Bow-making Challenges
Even experienced crafters encounter obstacles when making bows. Here’s how to address the most common issues.
Uneven Loops
If your bow loops are inconsistent in size, use a measuring tape to ensure each loop is the same length before pinching and wiring. Practice makes perfect; don’t hesitate to remake loops until they’re uniform.
Drooping Bows
Bows that sag on the tree are often made from non-wired ribbon or are too large for their branch. Always select wired ribbon and match bow size to branch strength.
Fraying Ribbon Ends
To prevent fraying, always dovetail or angle-cut ribbon ends. For extra durability, lightly singe the cut edges with a flame (for synthetic ribbons) or use a small dab of clear nail polish.
Slipping Or Twisting
If your bow doesn’t stay in place, secure it with floral wire twisted tightly around the branch. For heavy bows, consider anchoring to the trunk or a thicker branch.
Ribbon Shortages
If you run out of ribbon mid-project, layer different ribbons or create smaller bows as accents. Mixing patterns and textures can result in unexpectedly beautiful designs.
Customization And Advanced Bow Techniques
Once you’re comfortable with basic bow-making, explore advanced techniques to create one-of-a-kind decorations.
Double Or Triple Bows
Layer multiple ribbons of varying widths and colors to create double or triple bows. Assemble each bow separately, then stack and wire together at the center. This technique adds complexity and dimension.
Incorporating Ornaments
Thread small ornaments or bells onto the floral wire before securing the bow. This method attaches embellishments securely and integrates them into the bow design.
Personalized Monogram Bows
For a personalized touch, add a monogram letter ornament to the center of select bows, especially for family trees or as gifts.
Themed Bows
- Winter Wonderland: Silver and white ribbons with snowflake picks.
- Candy Cane Lane: Red and white striped ribbons with peppermint embellishments.
- Vintage Christmas: Velvet and lace ribbons with antique-style brooches.
Experimentation: Diy Dyeing And Painting
For truly custom colors, dye plain ribbon or paint simple designs onto natural-fiber ribbons. This technique is especially useful for matching non-standard color schemes.
Sustainable And Budget-friendly Bow Ideas
Creating bows doesn’t have to be expensive or wasteful. Many crafters are opting for sustainable and budget-conscious solutions.
Reusing And Recycling Ribbon
Save ribbon from gift packaging throughout the year. Many ribbons can be ironed flat and reused for Christmas bows.
Making Ribbon From Fabric Scraps
Cut strips from old tablecloths, shirts, or curtains to create unique, eco-friendly bows. Hem or finish the edges to prevent fraying.
Paper And Natural Material Bows
Use kraft paper, twine, or raffia to create rustic bows. These materials are biodegradable and add a charming, homespun feel.
Cost Comparison: Diy Vs. Store-bought Bows
| Bow Type | Approx. Cost Each | Pros | Cons |
|---|---|---|---|
| DIY (wired ribbon) | $1, $2 | Customizable, high quality | Requires time and effort |
| Store-bought (basic) | $3, $5 | Convenient | Limited styles, less durable |
| Store-bought (designer) | $7, $15 | High-end look | Expensive, less personalization |
Sourcing Ribbon Sustainably
Look for recycled or biodegradable ribbons, available from eco-conscious retailers. Also, consider donating leftover ribbon to local schools or craft groups.
For more on sustainable ribbon choices, see this resource from the Treehugger.
Storing And Reusing Christmas Tree Bows
Proper storage ensures your bows remain beautiful and ready for use year after year.
Removing Bows After The Holidays
Carefully untwist the wire or pipe cleaner holding each bow to the tree. Avoid pulling, which can stretch or damage ribbon.
Flattening And Shaping
Gently flatten loops and tails to minimize creasing. For wired bows, reshape the loops before storing.
Storage Solutions
- Plastic bins with lids: Keep bows dust-free and protected from moisture.
- Hanging garment bags: Suspend bows to maintain shape and avoid crushing.
- Tissue paper: Layer between bows to prevent color transfer and snags.
Refreshing Stored Bows
Before the next holiday season, steam or iron ribbons on a low setting to remove wrinkles. Fluff loops as needed for a fresh look.
Pro Tip:
Label storage containers with the color and style of bows inside. This makes next year’s decorating process faster and more organized.
Frequently Asked Questions
How Do I Prevent My Bows From Losing Shape Over Time?
To keep bows looking full and neat, always use wired ribbon for your Christmas tree bows. Wired edges can be reshaped each year, unlike non-wired ribbons that tend to go limp. Store bows gently in plastic bins or hang them inside garment bags. If loops become crushed, reshape by hand or use a low-heat iron to remove wrinkles.
What Is The Best Way To Coordinate Bows With Other Christmas Decorations?
Choose a main color or pattern for your ribbon that complements your ornaments, garlands, and lights. For a cohesive look, use one or two ribbon styles throughout the tree. Alternatively, select ribbons that echo accent colors from your décor. Create a mood board or test combinations before committing to a full set of bows.
Can I Make Bows For Outdoor Christmas Trees?
Yes, but it’s important to use weather-resistant ribbon such as outdoor-safe polyester or plastic-based options. These ribbons can withstand moisture and cold. Secure bows tightly with strong wire or zip ties to prevent them from blowing away. Store outdoor bows separately to avoid transferring any dirt or moisture to indoor decorations.
What Is A Quick Method For Making Multiple Bows?
Use a bow-making tool or jig, which holds ribbon in place while you create uniform loops. This speeds up the process and ensures consistency, especially when crafting a large number of bows. Pre-cut all ribbon lengths and set up a production line to maximize efficiency.
Where Can I Find Inspiration For Unique Christmas Tree Bows?
Look for inspiration in holiday magazines, social media platforms like Pinterest, and craft websites. Many decorators share tutorials and photos of their creations. Local craft fairs and holiday markets are also excellent places to discover new ribbon types and bow styles. For professional tips, refer to resources like Martha Stewart.
Bringing your own bows to life adds a personal touch to your Christmas celebrations. With the techniques and tips in this guide, you can create stunning decorations that reflect your unique style year after year. Making bows by hand not only beautifies your tree but also becomes a memorable holiday activity for family and friends, making the season all the more special.