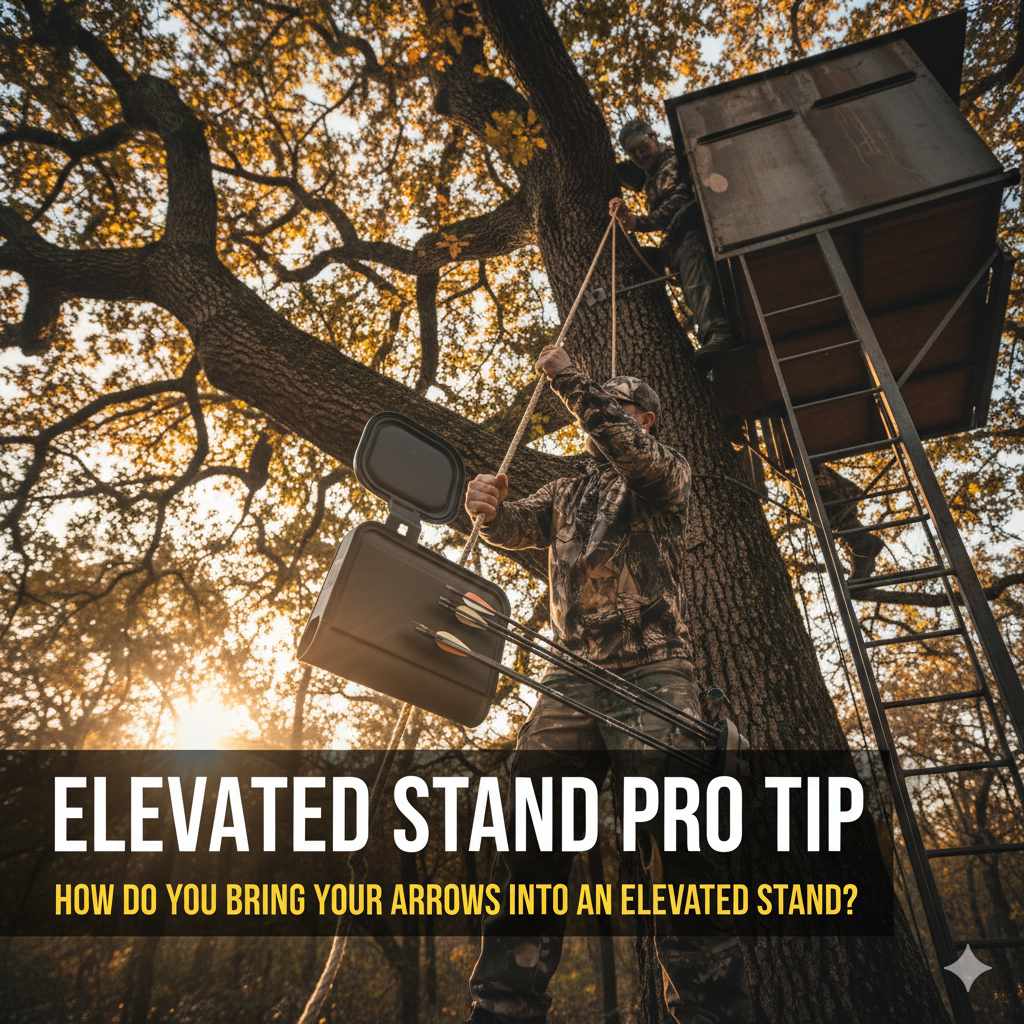
The safest and best way to bring your arrows into an elevated stand is by using a haul line. After you are securely in the stand and attached to the tree, use the line to pull up your bow and your arrows, which should be inside a covered quiver. Never climb with your gear in your hands or on your back.
Hello, fellow archers! Salman Arfeen here. Getting into your elevated stand is a moment filled with excitement and anticipation. You’ve practiced, you’ve prepared, and you’re ready. But one question often trips up new hunters: how do you get your bow and arrows up there safely? It might seem simple, but doing it wrong can be dangerous.
Climbing with sharp arrows and a bulky bow is a recipe for disaster. A small slip could lead to a big problem. Don’t worry, though. There is a simple, safe, and professional way to handle your gear. In this guide, I’ll walk you through the exact steps to bring your equipment into your stand without any risk. Let’s make sure every part of your hunt is safe and successful.
Why You Should Never Climb With Your Gear
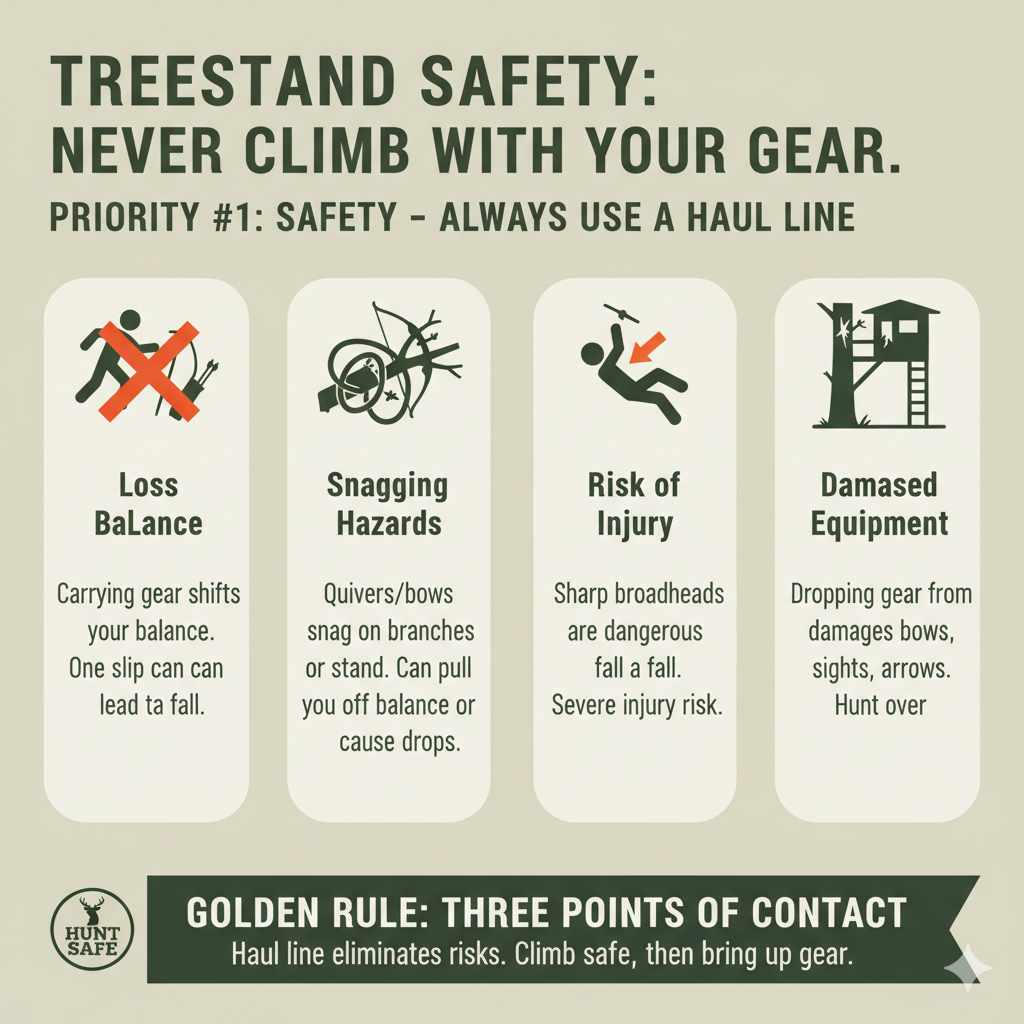
Before we get into the “how,” let’s talk about the “why.” Your number one priority is always safety. Climbing a ladder or steps into a treestand requires your full attention and the use of both hands. This is where the golden rule of treestand safety comes in: maintain three points of contact at all times. This means two hands and one foot, or two feet and one hand, are always touching the ladder or steps.
Trying to carry your bow or wear a quiver full of arrows breaks this rule immediately. Here’s what can go wrong:
- Loss of Balance: Carrying a bow, even a light one, shifts your center of gravity. A sudden gust of wind or a slippery step could easily cause you to lose your balance.
- Snagging Hazards: A quiver on your back or a bow slung over your shoulder can snag on branches, the stand itself, or the ladder rungs. This can pull you off balance or cause you to drop your valuable equipment.
- Risk of Injury: This is the most serious risk. If you fall, having sharp broadheads attached to your body is incredibly dangerous. An arrow could cause a severe injury during a fall.
- Damaged Equipment: Dropping your bow from 20 feet up can damage the sight, cams, or limbs, ending your hunt before it even begins. Arrows can also break or get lost.
Using a haul line eliminates all these risks. It allows you to focus completely on climbing safely. Once you are secure in your stand, you can then bring your gear up to you. It’s a simple change in routine that makes a world of difference.
The Essential Tool: Your Haul Line
The hero of this story is a simple piece of equipment called a haul line or a hoist rope. A haul line is just a durable rope that you use to pull your gear up into the stand after you’ve climbed up and to lower it down before you climb down. It’s an inexpensive, lightweight, and absolutely essential piece of safety gear.
What to Look For in a Haul Line
Not just any old rope will do. You want something reliable. Here’s what to look for:
- Length: Your haul line should be at least twice the height of your stand. If your stand is 20 feet high, you need a rope that is at least 40 feet long. This gives you enough length to lower your gear all the way to the ground while still holding the other end.
- Material: Look for ropes made from weather-resistant materials like nylon or polyester. These materials don’t rot or degrade in the sun and won’t absorb much water. Avoid natural fiber ropes like cotton.
- Features: Many modern haul lines come with convenient features. Some have a soft, tangle-free winder that makes storage easy. Others have heavy-duty clips or carabiners on the ends, which makes attaching your gear quick and secure.
Table: Comparing Common Haul Line Materials
| Material | Pros | Cons |
|---|---|---|
| Nylon | Very strong, durable, has some stretch to absorb shock. | Can stretch when wet, slightly heavier than other options. |
| Polyester | Strong, low stretch, excellent resistance to UV rays and moisture. | Can be a bit stiffer than nylon. |
| Polypropylene | Very lightweight, floats on water, inexpensive. | Not as strong as nylon or polyester, can degrade in sunlight over time. |
Step-by-Step Guide: How to Bring Your Arrows and Bow Into an Elevated Stand
Alright, let’s get to the practical steps. This process is easy to learn and will quickly become second nature. Practice it a few times at ground level until you feel comfortable.
Step 1: Prepare Your Gear on the Ground
Before you even think about climbing, get everything ready at the base of your tree.
- Unload Your Firearm or Unnock Your Arrow: This is a critical safety step. If you are hunting with a bow, your arrow should NOT be nocked.
- Attach Haul Line to Your Gear: Securely tie one end of your haul line to your bow. A good place to attach it is around the riser or upper limb. Do NOT attach it to the string, cables, or cams. Then, attach the line to your quiver. It’s best to use a quiver with a protective hood covering the broadheads. If your quiver doesn’t have a good attachment point, you can loop the rope around it securely.
- Position Your Gear: Lay your bow and quiver on the ground a few feet away from the base of the tree. This ensures they won’t get tangled in your feet as you start to climb.
Step 2: Climb Into Your Stand Safely
Now it’s time to climb. Remember the safety rules we discussed.
- Secure the Other End of the Haul Line: Tuck the other end of the haul line into your pocket or clip it to your belt or safety harness. Make sure it’s not dangling where you could trip on it.
- Wear Your Safety Harness: Put on your full-body safety harness and make sure it is properly adjusted. Attach your harness tether to the safety line on the tree.
- Maintain Three Points of Contact: As you climb, always keep two hands and one foot, or one hand and two feet, on the ladder. Take your time. There is no rush. According to safety experts at the Treestand Manufacturer’s Association (TMA), this is the single most important rule for preventing falls.
Step 3: Hoist Your Gear
You’ve made it! You are now in your stand and securely attached to the tree.
- Get Comfortable and Secure: Sit down and make sure you are stable. Your safety harness should remain attached from the moment you leave the ground until you are back down.
- Pull Up the Haul Line: Gently pull up the haul line. Do it slowly and carefully to prevent your gear from banging against the tree or ladder.
- Lift Your Gear Into the Stand: Once your bow and quiver reach the stand, lift them in. Be mindful of your movements. Avoid making loud noises that could spook nearby game.
Step 4: Secure Your Gear in the Stand
Don’t just leave your equipment lying on the platform.
- Use a Gear Hanger: The best way to store your bow is on a gear hook or bow hanger that screws into the tree. This keeps it within easy reach but out of your way.
- Place Your Quiver: Find a safe spot for your quiver where you can easily access your arrows but won’t knock it over. Some hunters hang the quiver as well.
- Nock an Arrow: Only once you are settled and your gear is secure should you nock an arrow and prepare for your hunt.
Step 5: The Reverse Process for Getting Down
When your hunt is over, just reverse the steps. Safety is just as important on the way down.
- Unnock Your Arrow: Always unnock your arrow before preparing to descend.
- Attach Gear to the Haul Line: Securely attach your bow and quiver to the haul line.
- Lower Your Gear: Slowly lower your equipment to the ground. Don’t just drop it!
- Descend Safely: With your gear safely on the ground, climb down using the three-points-of-contact rule. Stay attached to your safety line until your feet are firmly on the ground.
Alternative Quiver Setups and Why a Haul Line is Still Best
Some hunters prefer different quiver styles, but the haul line method remains the safest for all of them.
Bow-Mounted Quivers
These are convenient because your arrows are always with your bow. When using a haul line, you simply hoist the bow and quiver together as one unit. However, trying to climb with a bow that has a quiver full of arrows attached is extremely dangerous. It’s bulky, easy to snag, and puts sharp broadheads in a hazardous position if you fall.
Back or Hip Quivers
These quivers are separate from the bow. While some hunters might be tempted to climb while wearing one, it is not recommended. A back quiver can easily snag on a branch. Arrows can fall out, especially if you have to maneuver in an awkward way. The safest method is to attach the hip or back quiver to your haul line and hoist it up separately or with your bow.
Table: Safety Comparison of Gear Handling Methods
| Method | Safety Rating | Convenience | Gear Protection |
|---|---|---|---|
| Using a Haul Line | Excellent | Good (takes an extra minute) | Excellent |
| Climbing with Bow in Hand | Very Poor | Poor (breaks 3-points-of-contact rule) | Poor (high risk of dropping) |
| Climbing with Back/Hip Quiver | Poor | Fair | Fair (risk of snagging/losing arrows) |
| Climbing with Bow-Mounted Quiver | Very Poor | Fair | Poor (high risk of damage and injury) |
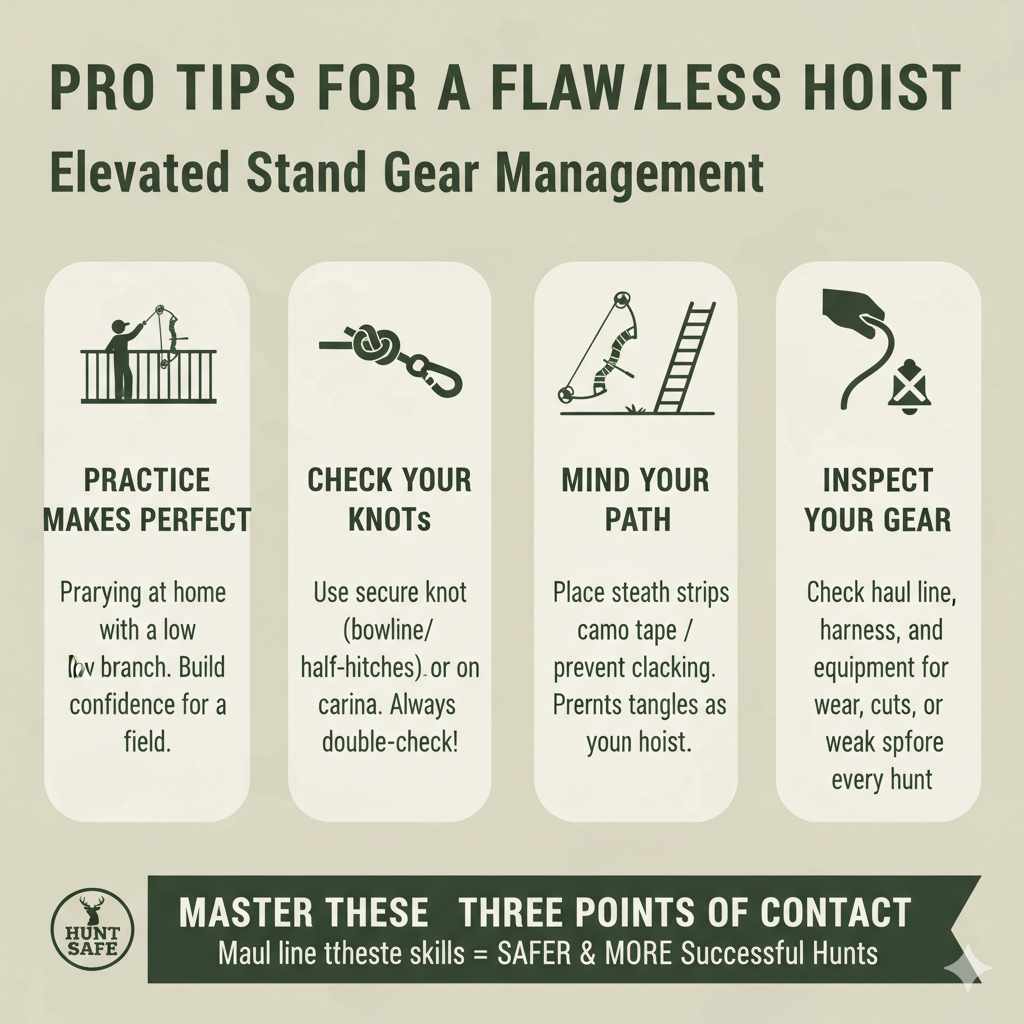
Pro Tips for a Flawless Hoist
Here are a few extra tips to make the process even smoother and safer:
- Practice Makes Perfect: Before your first hunt, practice using your haul line at home. Attach it to your gear and hoist it up to a deck or a low branch. Getting the feel for it on the ground builds confidence for when you’re high in a tree.
- Check Your Knots: If your haul line requires you to tie a knot, learn a simple, secure one like a bowline or two half-hitches. Always double-check your knot before you climb. A clip or carabiner can make this much simpler.
- Mind the Path: When you lay your gear on the ground, place it to the side of your climbing path. This prevents the haul line from getting tangled around your feet or the ladder as you hoist.
- Silence is Golden: To prevent your gear from clanking against a metal ladder or stand, you can use stealth strips or camo tape on potential contact points. Hoisting slowly also minimizes noise.
- Inspect Your Gear Regularly: Before each hunt, give your haul line a quick inspection. Look for any frays, cuts, or weak spots. Do the same for your safety harness and any other climbing equipment.
Frequently Asked Questions (FAQ)
1. What is a haul line?
A haul line (also called a hoist rope) is a rope used to lift your gear, like your bow and arrows, up to your elevated stand after you have safely climbed up. It is a critical piece of safety equipment that allows you to maintain three points of contact while climbing.
2. How long should my haul line be?
A good rule of thumb is to have a haul line that is at least twice the height of your highest stand. For a 20-foot stand, a 40-foot rope is ideal. This ensures you have enough rope to lower your gear all the way to the ground while still holding the end.
3. Can I use the same rope for my bow and my arrows?
Yes, absolutely. You can attach both your bow and your quiver to the same haul line. Just be sure they are attached securely and spaced a little bit apart to prevent them from banging into each other as you hoist them up.
4. Is it ever safe to climb with arrows on my back?
No, it is not considered safe. Climbing with a quiver on your back poses a snagging hazard and increases your risk of serious injury in a fall. The arrows could also fall out. The safest method is always to hoist your gear with a haul line.
5. What’s the best knot for a haul line?
If your line doesn’t have a pre-attached clip, a bowline knot is an excellent choice. It creates a secure loop that will not slip or tighten under load, and it’s relatively easy to untie afterward. Two half-hitches is another simple and secure option for beginners.
6. How do I keep my arrows quiet while hoisting them?
First, use a quiver with a hood that covers your broadheads and fits the arrows snugly. This prevents rattling. Second, hoist your gear slowly and steadily. If you pull too fast, it’s more likely to swing and hit the stand or ladder, creating noise.
7. Where do I attach the haul line to my quiver?
Most quivers have a sturdy loop or frame section near the top. This is the ideal place to attach the line. Avoid attaching it to flimsy plastic parts or straps that could break. You want to attach it in a way that the quiver hangs vertically and securely.
Conclusion: Safety First, Always
Getting your bow and arrows safely into your elevated stand isn’t complicated, but it does require the right technique. By now, you can see that using a haul line is not just a “pro tip”—it’s a fundamental rule of safe hunting. It protects you, protects your expensive gear, and sets you up for a calm, focused, and enjoyable hunt.
Remember the simple routine: prepare your gear on the ground, climb with your hands free, secure yourself in the stand, and then hoist your equipment. It adds only a minute or two to your setup time, but it eliminates the biggest risks associated with hunting from an elevated position.
So, before your next trip out, make sure a quality haul line is in your pack. Practice the steps, make them a habit, and you can climb with the confidence of knowing you’re doing it the right way. Stay safe out there, and happy hunting!