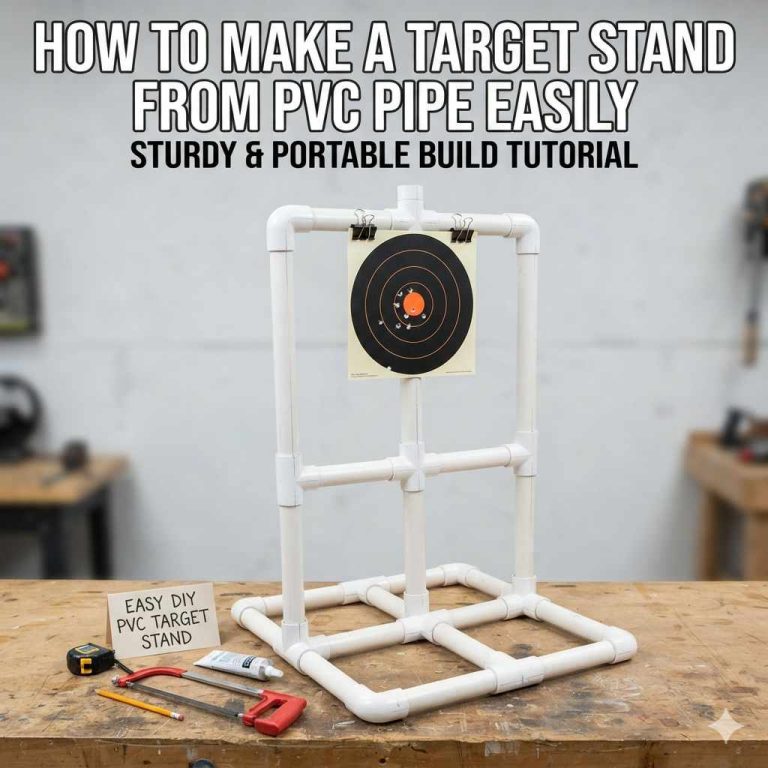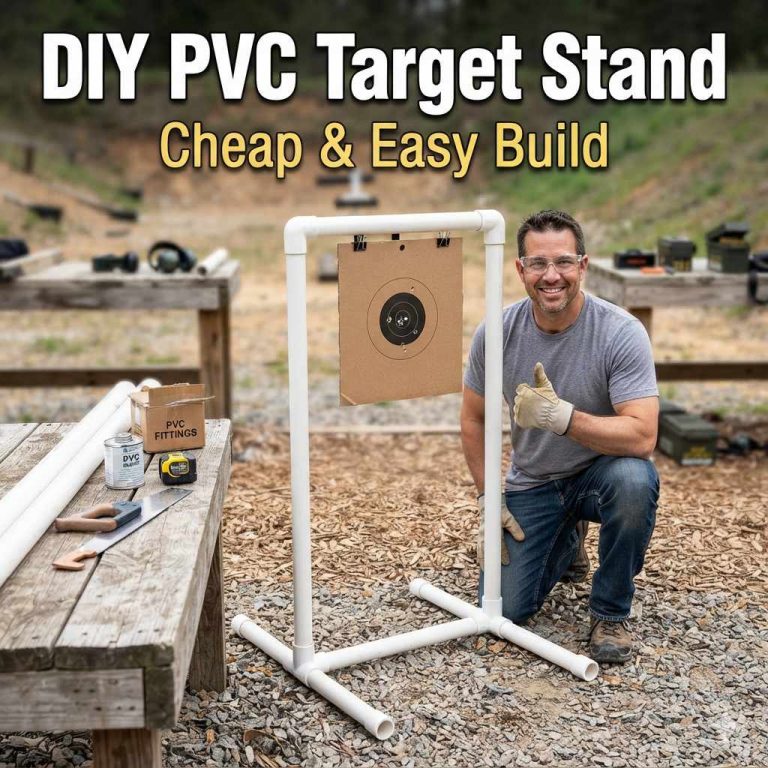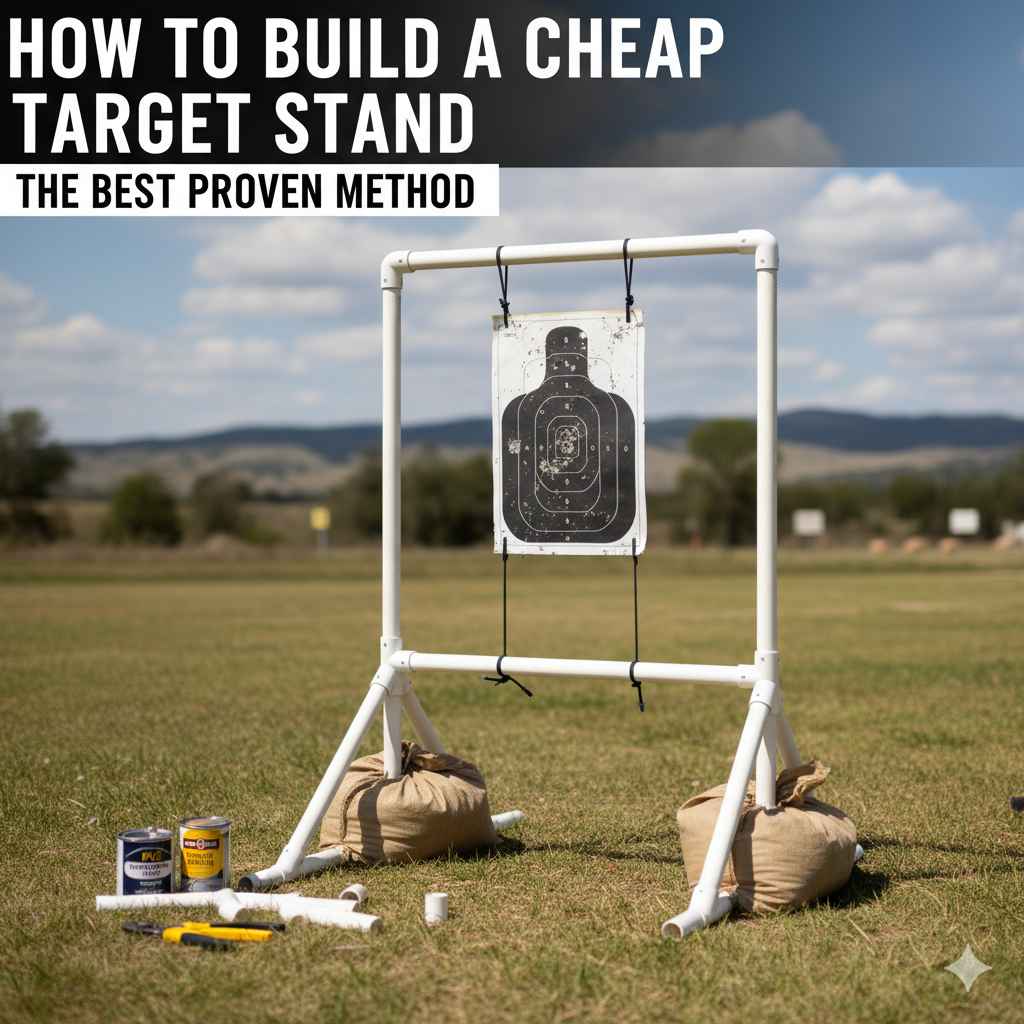
To build a cheap target stand, use PVC pipe for a lightweight and durable frame. Cut four short pieces for the feet, two longer pieces for the legs, two medium pieces for the base, and one for the top crossbar. Assemble them with T-fittings and elbows. This simple, no-glue design costs under $25 and can be built in under an hour.
Hi there, Salman here! If you love archery, you know that practice is everything. But finding a good place to set up your target can be tough. Store-bought stands are often expensive or wobbly. It can feel frustrating when all you want to do is shoot a few arrows. Don’t worry, because there’s a simple, cheap, and sturdy solution you can make yourself.
I’m going to show you exactly how to build a fantastic target stand with basic materials. This guide is perfect for beginners. We’ll walk through every step together, and soon you’ll have a reliable stand that will make your practice sessions much more enjoyable. Let’s get started!
Why a DIY Target Stand is Your Best Bet
You might be wondering if it’s worth the effort to build your own stand. The answer is a resounding yes! A commercial target stand can set you back anywhere from $50 to over $150. For a beginner, that’s a significant investment that could be better spent on arrows or other essential gear. By building your own, you get a high-quality stand for a fraction of the price.
Here are a few more reasons why going the DIY route is a great idea:
- Incredibly Cost-Effective: The design we’re building today often costs less than $25 in materials. It’s one of the most budget-friendly projects in archery.
- Customizable to Your Needs: Is your target bag extra large? Do you want a stand that’s taller or wider? When you build it yourself, you control the dimensions. You can tailor it perfectly to your specific target and shooting style.
- Lightweight and Portable: Our chosen material, PVC, is both strong and light. This means your finished stand will be easy to carry to your practice spot, whether it’s your backyard or a local range. It also breaks down for easy storage.
- Simple to Build: You don’t need to be an expert woodworker or have a garage full of fancy tools. If you can measure and cut a straight line, you can build this stand. It’s a rewarding project that gives you a real sense of accomplishment.
- Surprisingly Durable: Don’t let the low cost and light weight fool you. A well-built PVC stand can withstand the elements and hold up heavy target bags for years. It’s a reliable piece of equipment you can count on.

Tools and Materials: What You’ll Need
Before we start building, let’s gather our supplies. The beauty of this project is its simplicity. You likely have some of these tools already, and the materials are readily available at any home improvement store.
Must-Have Tools
- Tape Measure: Accuracy is key! A simple tape measure will ensure all your pieces are the correct length.
- Marker or Pencil: To mark your cutting lines on the PVC pipe.
- PVC Cutter or Saw: A ratcheting PVC cutter is the easiest and cleanest way to cut pipe. However, a simple handsaw like a hacksaw or miter saw will also work perfectly fine.
- Drill with a 1/4″ Bit: This will be used to create holes for hanging your target.
Essential Materials
We’ll be using 1.5-inch Schedule 40 PVC pipe for this build. It offers the best balance of strength, low cost, and availability. You can buy it in 10-foot lengths.
- Two (2) 10-foot lengths of 1.5″ Schedule 40 PVC Pipe: This will be more than enough for the entire stand.
- Two (2) 1.5″ PVC “T” Fittings: These will form the core of the base.
- Four (4) 1.5″ PVC 90-Degree Elbow Fittings: These are for the corners of the base.
- Two (2) 1.5″ PVC End Caps: These go on the front feet for a clean, stable finish.
- Two (2) Small Bolts with Nuts or Metal Clips: To hang your target from the crossbar.
A great benefit of this design is that it doesn’t require any glue. The pieces fit together snugly, allowing you to easily disassemble the stand for transport or storage.
Choosing Your Material: PVC vs. Wood
While this guide focuses on PVC for its simplicity and cost, you might consider using wood. Both materials have their pros and cons. For a beginner looking for the easiest and cheapest option, PVC is the clear winner. However, let’s compare them so you can make the best choice for you.
| Feature | PVC (Polyvinyl Chloride) | Wood (e.g., Pine 2x4s) |
|---|---|---|
| Cost | Very low (typically under $25 for the project). | Low to moderate (can be more expensive than PVC, especially with fluctuating lumber prices). |
| Ease of Build | Extremely easy. Just cut and assemble. No screws, glue, or complex joints needed. | More complex. Requires screws or nails, more precise cuts, and potentially more tools. |
| Weight & Portability | Very lightweight and easy to carry. Can be disassembled quickly. | Heavier and more cumbersome. Not easily disassembled for transport. |
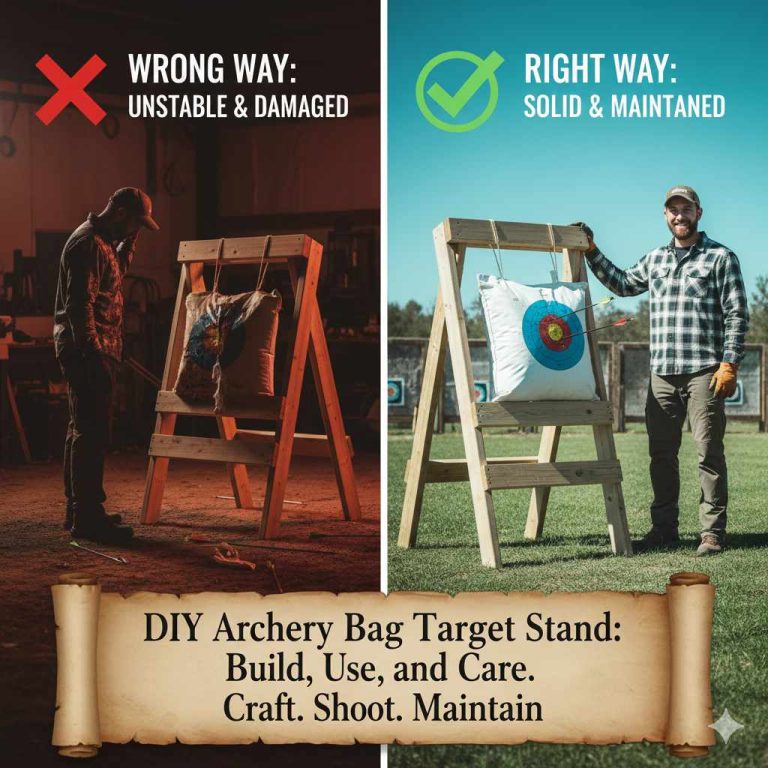
| Durability | Weather-resistant and will not rot. Can become brittle in extreme cold. | Strong, but can rot or warp if left outdoors untreated. Susceptible to stray arrow damage. |
| Tools Required | Basic hand tools (PVC cutter or hacksaw). | Requires a saw, drill, screws, and potentially clamps and wood glue. |
For your first stand, I highly recommend sticking with PVC. It’s forgiving, fast, and delivers a fantastic result with minimal effort. You can always build a heavier-duty wood stand later if you find you need one. For more information on different wood types and their properties, the U.S. Forest Service Wood Handbook is an excellent resource.
The Step-by-Step Guide to Building Your PVC Target Stand
Alright, it’s time to build! This process should take less than an hour. We’ll cut all our pieces first, then assemble the stand like building with LEGOs. It’s that easy. Here is the list of cuts you’ll need to make from your 1.5″ PVC pipes.
PVC Cutting List
| Part Name | Quantity | Length | Purpose |
|---|---|---|---|
| Uprights | 2 | 48 inches (4 feet) | The main vertical supports. |
| Crossbar | 1 | 30 inches | The top piece that holds the target. |
| Base Connectors | 2 | 24 inches | Connects the front and back feet. |
| Feet | 4 | 12 inches | Provides a stable base. |
Note: These dimensions create a stand roughly 4 feet tall and 2.5 feet wide, perfect for most standard bag or foam targets. Feel free to adjust these measurements to better suit your target.
Step 1: Measure and Cut Your PVC Pipes
Using your tape measure and marker, carefully measure and mark all the lengths from the cutting list onto your PVC pipes. Double-check your measurements before cutting. A good rule is to measure twice and cut once.
Once marked, it’s time to cut. If you’re using a PVC cutter, simply clamp it onto your mark and squeeze the handles until it cuts through. If you’re using a saw, place the pipe on a stable surface and make a slow, steady cut. Try to keep your cuts as straight as possible for a snug fit. Safety is crucial here; always follow safe practices for your tools. The CDC provides excellent guidelines on power tool safety that are helpful even for hand tools.
After cutting, you should have nine pieces of PVC pipe in total.
Step 2: Assemble the Base Frame
The base provides the stability for your entire stand. It will form two “H”-shaped legs connected at the top. Let’s build each side first.
- Take one of the 24-inch “Base Connector” pieces.
- Push a “T” fitting onto each end. Make sure the open ends of the “T” fittings are facing up, perpendicular to the pipe. This will be where your uprights go.
- Now, take two of your 12-inch “Feet” pieces. Push one into each side of the “T” fitting.
- Finally, attach a 90-degree elbow to the end of the front foot and an end cap to the end of the back foot. The elbow should face inward, ready to connect to the other side.
- Repeat this process to build the second identical base frame.
You should now have two identical base sections. Lay them on the ground parallel to each other.
Step 3: Attach the Vertical Uprights
This step brings the height to your stand. It’s very straightforward.
- Take your two 48-inch “Upright” pieces.
- Firmly push one upright into the upward-facing opening of a “T” fitting on one of the base frames.
- Push the second upright into the “T” fitting on the other base frame.
Your stand should now be starting to take shape, with two tall poles rising from the base frames.
Step 4: Add the Top Crossbar
The crossbar connects the two uprights and is what your target will hang from.
- Take your remaining two 90-degree elbow fittings. Push one onto the top of each of the 48-inch uprights. Make sure the open ends of the elbows are facing each other.
- Take your 30-inch “Crossbar” piece.
- Fit one end of the crossbar into one of the elbow fittings, and then connect the other end to the second elbow fitting. You may need to gently pull the uprights apart slightly to get it to fit.
That’s it! Your target stand is now fully assembled. Stand it up and admire your work. It should be sturdy and stand on its own.
Step 5: Prepare for Target Hanging
The last step is to create a way to hang your target bag or foam block.
- Lay the stand down so the crossbar is accessible.
- Using your tape measure, find two points on the 30-inch crossbar where you want to hang your target. A good starting point is about 6 inches in from each elbow fitting. Mark these spots.
- With your drill and a 1/4″ bit, carefully drill a hole through the top of the crossbar at each mark. Be sure to drill straight through one side of the pipe.
- Insert your bolts through the holes from the top, so the threaded end hangs down. You can secure them with nuts or simply use them as hooks for the grommets on your target bag.
Safety First: A Non-Negotiable Step
Building something yourself is fun, but safety should always be your top priority, both during the build and while you’re practicing archery.
During the Build
- Wear Safety Glasses: When cutting or drilling, always protect your eyes from small pieces of PVC or debris.
- Be Mindful of Tools: Whether using a simple handsaw or a power tool, always be aware of where your hands are. Cut away from your body.
- Work in a Clear Space: Give yourself plenty of room to work without tripping over materials or tools.
During Use
- Stable Ground: Always place your stand on flat, level ground. If the ground is soft or uneven, the stand could tip over.
- Use a Proper Backstop: Your target stand holds the target, but it doesn’t stop arrows that miss. Always be sure of what is behind your target. A hill, a thick forest, or a purpose-built backstop is essential.
- Check for Stability: Before you start shooting, give the stand a little shake to make sure all the connections are firm and it doesn’t wobble. In windy conditions, you can place sandbags or weights on the feet of the base for extra stability.
Setting Up and Using Your New Stand
One of the best features of this PVC stand is how easy it is to set up. Because it’s a “press-fit” design with no glue, you can break it down into a few pieces for easy transport. When you get to your shooting spot, reassembly takes less than a minute.
When hanging your target, make sure it hangs freely. A heavy bag target should rest slightly on the ground to take some weight off the crossbar, which will prolong the life of your stand. For lighter foam targets, hanging them so they can swing freely helps absorb the arrow’s energy and makes them last longer.
Position the stand at your desired practice distance, ensure your backstop is secure, and you’re ready to start shooting. Enjoy the satisfaction of sending arrows into a target held up by something you built with your own two hands!
Pro Tips and Customization Ideas
Your basic stand is fantastic as is, but here are a few simple ideas to take it to the next level:
- Add a Stabilizer Bar: For very heavy targets or windy days, you can add another crossbar near the bottom of the uprights for extra rigidity.
- Paint It: A can of spray paint made for plastic can give your stand a more finished look. Black or dark green are popular choices that blend in well outdoors.
- Add Sandbag Trays: You can add short sections of PVC to the feet to create a small “tray” where you can place sandbags for ultimate stability.
- Tool-Free Hanging: Instead of bolts, you can use large S-hooks or carabiners through the drilled holes for even quicker target changes.
- Wheels for Mobility: If you primarily use your stand on a patio or driveway, you could modify the base to include small caster wheels for easy rolling.
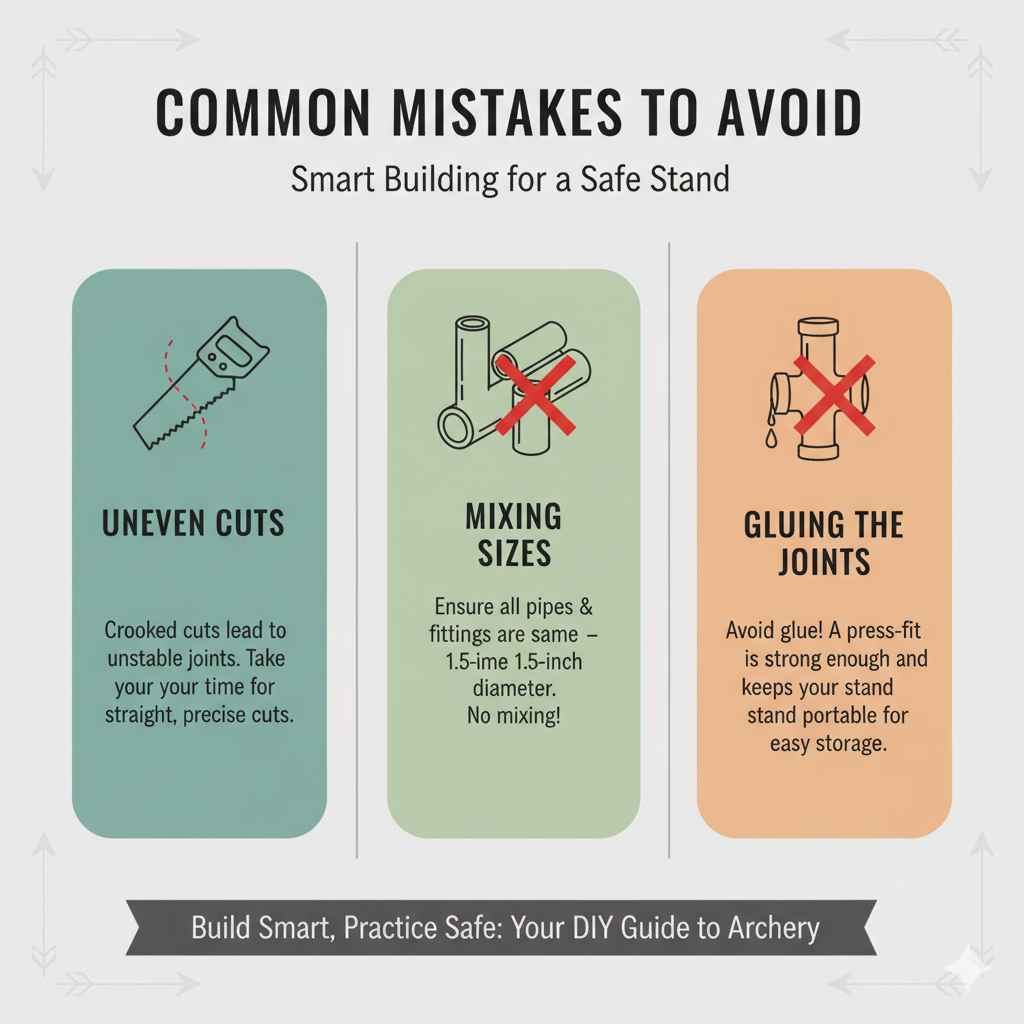
Common Mistakes to Avoid
This is a very forgiving project, but here are a few common pitfalls to watch out for:
- Uneven Cuts: Crooked cuts can make the joints less stable. Take your time to ensure your cuts are as straight as possible.
- Using the Wrong PVC Size: Make sure all your pipes and fittings are the same diameter (1.5″ in this guide). Mixing sizes won’t work.
- Forgetting to De-burr: After cutting, the inside of the pipe might have small plastic burrs. Wiping them away with your finger or a small cloth will ensure the fittings slide on smoothly.
- Placing it on a Slope: Never set up your stand on a hill where it could tip over. Always find the flattest spot available.
- Gluing the Joints: It might be tempting to glue the joints for “extra strength,” but this removes the stand’s best feature: portability. A proper press-fit is more than strong enough and allows you to break it down for storage.
Frequently Asked Questions (FAQ)
1. How much will this project cost in total?
You can typically buy all the necessary PVC pipes and fittings for under $25. Prices may vary slightly depending on your location and store, but it remains one of the most affordable archery projects you can do.
2. Can I use a different size of PVC pipe, like 1-inch or 2-inch?
Yes, you can. However, 1-inch pipe may not be strong enough for heavier targets and could sag over time. 2-inch pipe is very strong but will be heavier and more expensive. For most archers, 1.5-inch pipe is the perfect sweet spot for strength, weight, and cost.
3. How long will it take to build this target stand?
For a first-time builder, this project should take less than an hour from start to finish. Once you’re familiar with the process, you could likely build another one in about 20-30 minutes.
4. What kind of target is best for this stand?
This stand is incredibly versatile. It works perfectly for heavy archery bag targets, which can rest on the ground, as well as lighter, hanging foam block targets like those from brands like Rinehart or Morrell.
5. How do I make the stand more stable in the wind?
The easiest way to add stability is to place sandbags or other heavy objects (like cinder blocks or workout weights) across the feet of the stand. This will anchor it firmly to the ground and prevent it from tipping in windy conditions.
6. Can I leave my PVC stand outside?
Yes, PVC is weather-resistant and won’t rot like wood. However, over long periods of intense sun exposure, it can become slightly more brittle. For the longest life, it’s best to store it in a shed or garage when not in use, which is easy to do since it can be quickly disassembled.
7. The fittings are a little tight. Is there an easy way to put them together?
A little twist as you push the pipe into the fitting can help. If it’s still very tight, you can use a rubber mallet to gently tap the pieces together. A snug fit is good—it means your stand will be sturdy!
Your Next Arrow is Waiting
Congratulations! You now have all the knowledge you need to build a cheap, reliable, and portable target stand. This simple project not only saves you money but also gives you a piece of gear that is perfectly suited to your needs. There’s a special kind of pride that comes from using equipment you made yourself.
Building this stand removes one more barrier between you and your practice. It gives you the freedom to set up a safe and effective archery range in your own backyard or to easily take your target to a friend’s house. Now, you can focus on what truly matters: improving your form, building your confidence, and enjoying the simple, timeless pleasure of sending an arrow right where you want it to go.
So gather your materials, follow the steps, and get ready to enjoy countless hours of practice with your new stand. Happy shooting!