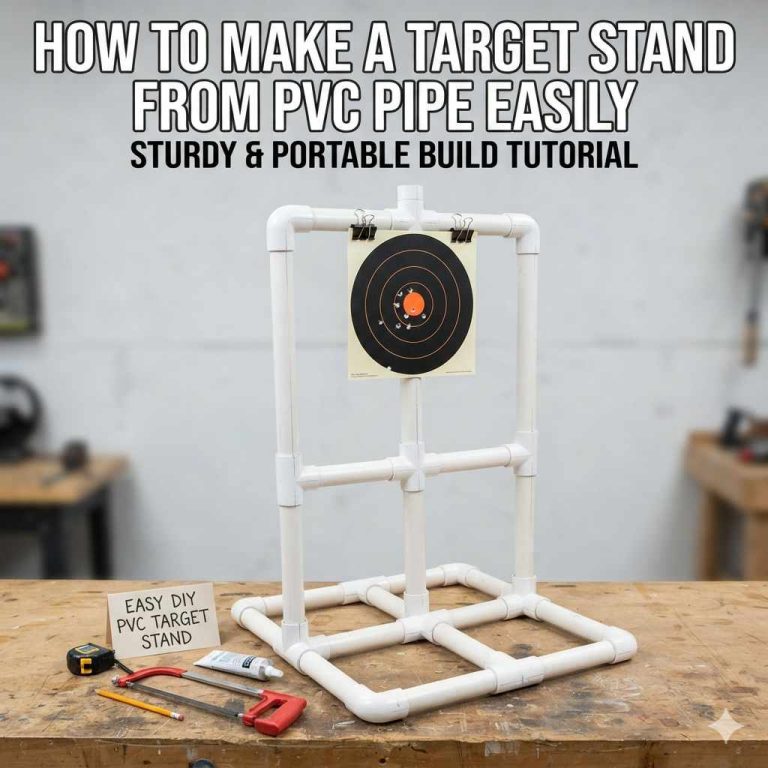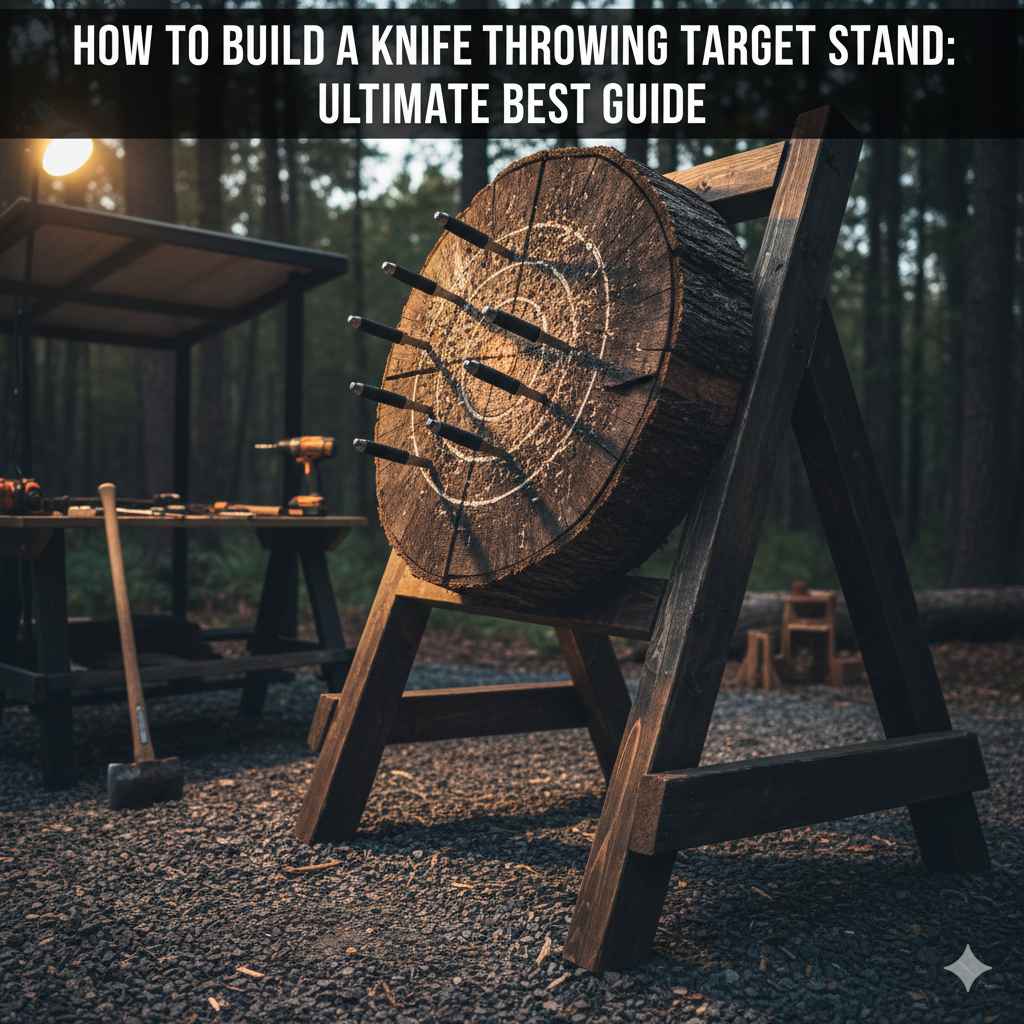
Building a knife throwing target stand is simple. You’ll need 2x4s and 4x4s of softwood like pine or cedar, screws, and basic tools. Construct an A-frame base for stability, then assemble an end-grain wood block as the target face. This DIY stand provides a safe, durable, and customized practice station for honing your skills.
Hello, fellow throwers! I’m Salman Arfeen. There’s a special thrill that comes from the clean thud of a knife sticking perfectly into a wooden target. But finding a good, safe place to practice can be a challenge. Your backyard fence or a favorite tree isn’t the answer! They get damaged, and it’s just not safe. That’s why building your own target stand is the perfect solution.
It might sound like a big project, but I promise it’s easier than you think. With the right materials and a clear plan, you can create a sturdy, reliable stand in just one afternoon. In this guide, I’ll walk you through every single step, from picking the wood to tightening the last screw. Let’s get started!
Why Build Your Own Target Stand?
Before we grab our tools, let’s talk about why a DIY stand is such a great idea. Sure, you could buy one, but making your own comes with some fantastic benefits, especially for beginners and dedicated hobbyists.
- Save Money: Pre-made stands can be expensive. Building your own often cuts the cost in half, leaving you with more money for a new set of throwing knives!
- Perfect Customization: Is the standard target height uncomfortable for you? No problem. You can build your stand to the exact height and width that suits your throwing style. You can also design it to be easily portable or extra heavy-duty.
- Learn a New Skill: There’s immense satisfaction in building something with your own hands. This project is a great way to get comfortable with basic woodworking, and the result is something you’ll use for years.
- Durability and Repair: You control the quality of the materials. When your target face eventually wears out, you won’t need to replace the whole stand. You can simply build a new target block and swap it out, making maintenance cheap and easy.

Safety First: Your Most Important Tool
At the range or in the backyard, safety is always our number one priority. This applies to building your stand just as much as it does to throwing your knives. Please read these safety rules before you begin. Your well-being is not negotiable.
Workshop Safety
- Wear Protective Gear: Always wear safety glasses to protect your eyes from sawdust and wood chips. Gloves can also prevent splinters, but take them off when using power saws where they could get caught.
- Work in a Clear Space: Make sure your work area is clean and free of clutter. A tidy space is a safe space, reducing the risk of tripping over tools or materials.
- Understand Your Tools: Read the manuals for your power tools. Know how they work and what their safety features are. Never disable safety guards. For more guidance, check out the Occupational Safety and Health Administration (OSHA) guidelines on woodworking safety.
- Secure Your Wood: When cutting or drilling, make sure your wood is clamped down securely. This prevents it from slipping, which can cause inaccurate cuts and serious injuries.
Throwing Safety
- Choose a Safe Location: Set up your target stand in an area with a clear, wide-open background. Ensure there are no people, pets, or fragile objects anywhere behind or near the target.
- Create a “No-Go Zone”: Establish a rule that no one walks in front of the throwing line while someone is practicing. Keep spectators and friends safely behind you at all times.
- Inspect Your Knives: Before each session, check your knives for any damage, like a loose handle or a chipped tip. A damaged knife can behave unpredictably when thrown.
Choosing the Best Wood for Your Target
The heart of your stand is the target block itself. The type of wood you choose will make a huge difference in how well your knives stick and how long your target lasts. The secret is using the “end grain” as your target face.
Imagine a log. The “face grain” is the long side of the log. The “end grain” is the circular end where you can see the rings. When a knife hits the end grain, its fibers part to let the blade in and then close back up when it’s removed. This “self-healing” property makes your target last much, much longer.
You want a softwood. Hardwoods like oak or maple are too dense; your knives will likely bounce off, which is dangerous and damaging to the blade.
Best Wood Types for a Knife Target
| Wood Type | Pros | Cons |
|---|---|---|
| Pine | Inexpensive, widely available, soft enough for easy sticking. | Can wear out faster than other options. |
| Spruce | Very similar to pine, often sold interchangeably as “SPF” (Spruce-Pine-Fir). | Also wears out at a similar rate to pine. |
| Cedar | Naturally resistant to rot and insects, making it great for outdoor stands. | Slightly more expensive than pine. |
| Cottonwood | Often considered the “gold standard” for knife throwing targets due to its soft, fibrous nature. | Can be harder to find and more expensive. |
Tools and Materials You’ll Need
This project uses common materials and basic tools you might already have in your garage. Here’s everything you’ll need to gather before you start.
Materials List:
- For the Target Block: One (1) 4×4 lumber post, 8 feet long (pine, cedar, or spruce)
- For the Frame: Four (4) 2×4 lumber boards, 8 feet long (pine is perfect for the frame)
- For Assembly:
- One (1) box of 3-inch exterior wood screws (deck screws are great)
- Two (2) 3/8-inch x 4-inch hex bolts with nuts and four washers
- Optional: Two (2) heavy-duty hinges if you want a folding design for storage
Tools List:
- Tape Measure
- Pencil
- Safety Glasses
- Power Drill with a Philips head bit and a 3/8-inch drill bit
- Miter Saw or Circular Saw (a hand saw will work but requires more effort)
- Speed Square or Combination Square (for making straight, accurate cuts)
- Clamps (to hold wood steady while cutting or screwing)
For a project like this, having the right lumber is key. You can learn more about different types of softwood from educational resources like the Penn State Extension, which offers great insights into wood properties.
Step-by-Step Guide: Building Your Knife Throwing Stand
Alright, let’s get building! I’ve broken this down into simple, manageable steps. Take your time, measure twice, and cut once. Let’s build a stand that you can be proud of.
Here is a sample cutting list to get you started. This will create a stand that is roughly 5 feet tall with a 15×15 inch target face.
| Part Name | Wood Size | Length | Quantity |
|---|---|---|---|
| Target Block Pieces | 4×4 | 15 inches | 4 |
| Frame Legs (Front & Back) | 2×4 | 60 inches (5 feet) | 4 |
| Bottom Brace | 2×4 | 36 inches | 1 |
| Top Hinge Brace | 2×4 | 18 inches | 2 |
| Target Backing Boards | 2×4 | 15 inches | 2 |
Step 1: Cut Your Lumber
Using your saw, carefully cut all your pieces of wood according to the cutting list above. Use your speed square to ensure every cut is perfectly straight at a 90-degree angle. Smooth any rough edges with sandpaper for a cleaner finish.
Step 2: Assemble the End-Grain Target Block
This is the most important part of the build. You are creating the surface your knives will stick into.
- Take your four 15-inch pieces of 4×4 lumber.
- Stand them up on their ends, side-by-side, on a flat surface. You should now be looking at the end grain of all four pieces. This forms your 15×15 inch target face (it will actually be 14×14 inches since a 4×4 is 3.5″ x 3.5″).
- Take your two 15-inch 2×4 backing boards. Place one across the top of the 4x4s and one across the bottom. These boards will hold your target block together.
- Use your drill and 3-inch wood screws to attach the backing boards to the 4x4s. Drive at least two screws through the backing board into each 4×4 post. This will create a single, solid target block.
When you’re done, you should have a heavy square block with the smooth end grain facing forward.
Step 3: Build the A-Frame Legs
Your stand needs a stable base. An A-frame design is strong, simple, and resists tipping over.
- Take two of your 60-inch 2×4 legs. Lay them on the ground to form an “A” shape. The tops should overlap slightly.
- Take one of your 18-inch 2x4s. This will be the top brace. Position it across the two legs, about 4-5 inches down from the top point where they cross.
- Screw the top brace securely into both legs. This creates one side of your A-frame.
- Repeat this process with the other two 60-inch legs and the remaining 18-inch brace to build the second A-frame.
Step 4: Connect the A-Frames
Now it’s time to join your two A-frames to create the stand’s structure.
- Stand your two A-frames up, facing each other.
- At the top where the legs cross, overlap them. Use a clamp to hold them together temporarily.
- Drill a 3/8-inch hole all the way through the overlapping legs on one side.
- Push one of your 4-inch hex bolts through the hole. Add a washer and a nut on the other side and tighten it. Don’t tighten it completely if you want the frame to fold.
- Repeat on the other side. Now your stand can open and close.
- For extra stability, attach the 36-inch bottom brace between the two front legs of the stand, about one foot from the ground. This will prevent the legs from spreading too far apart.
Alternatively, if you are using hinges, attach one hinge to the top of each A-frame brace, allowing the stand to fold up neatly for storage.
Step 5: Mount the Target Block
The final construction step is to attach your amazing end-grain target to the stand.
- Set your A-frame stand up and open the legs to a stable position.
- Lift your target block and rest it on the front legs of the frame. The ideal height for the center of the target is about shoulder height, but you can adjust it to your preference.
- Have a friend hold the target block in place, or use clamps to secure it.
- From behind the frame, drive several 3-inch screws through the front legs of the A-frame and into the sides of the 4x4s of your target block. Use at least four screws (two on each side) to ensure it’s rock solid.
Step 6: Final Touches and Safety Check
Your stand is built! Before you start throwing, do one last check.
- Wiggle the stand. Does it feel sturdy? Are all the screws tight?
- Place it on level ground. An uneven surface can cause it to wobble.
- Optional: Use a paintbrush or spray paint to draw a bullseye or target rings on the face. This gives you a clear point of aim.
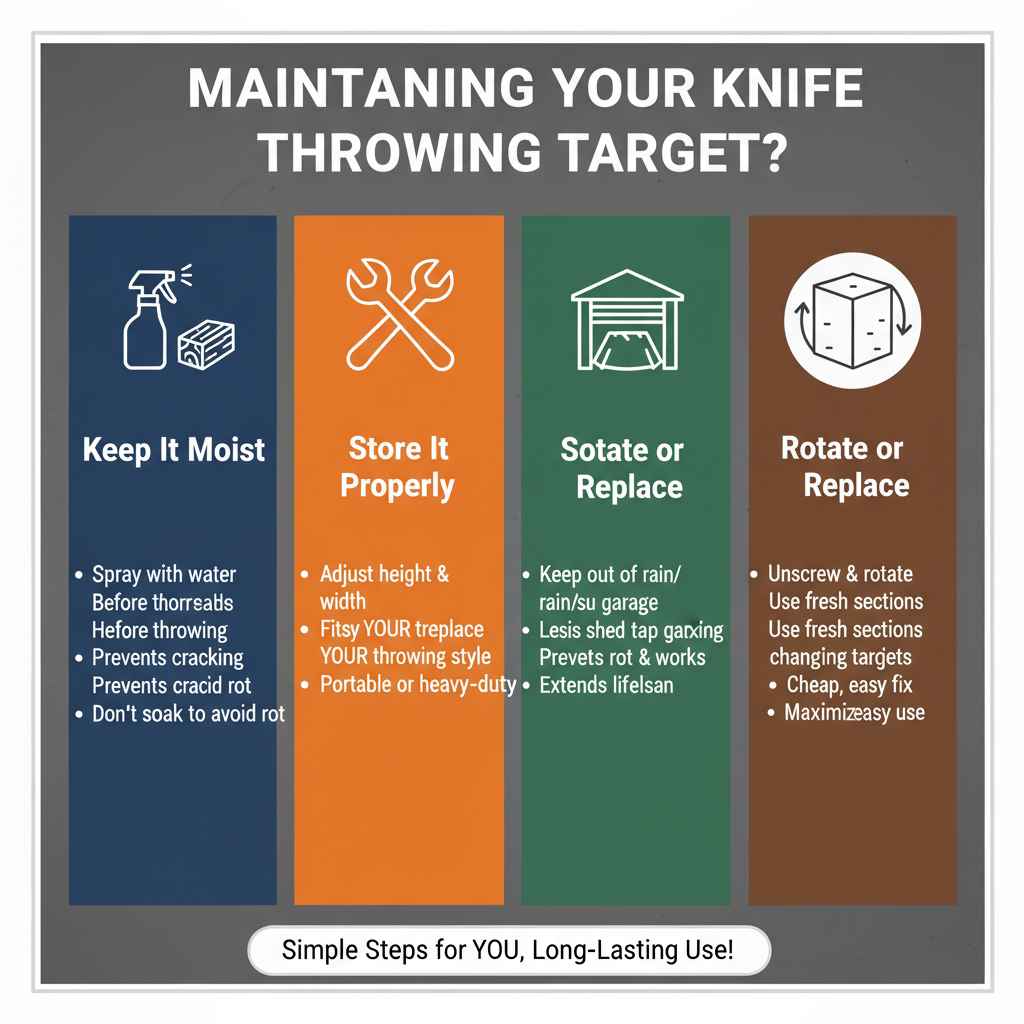
Maintaining Your Knife Throwing Target
Your new target stand is built to last, but a little care will extend its life even further. The wood target face will take a beating, which is its job! Here’s how to keep it in prime condition.
- Keep It Moist: Wood fibers heal better when they are slightly damp. Lightly spraying the target face with water before a throwing session can help the wood swell and close up the holes left by your knives. Don’t soak it, as this can lead to rot.
- Store It Properly: If possible, store your stand in a shed or garage when not in use. Protecting it from constant rain and direct sun will prevent the wood from cracking or rotting prematurely. If it must stay outside, a simple tarp can make a big difference.
- Rotate or Replace the Block: Over time, the center of your target will get worn out. You can unscrew the target block, rotate it 180 degrees, and re-mount it to use a fresh section. When the entire block is too chewed up, you can simply build a new target block and mount it on your existing frame.
Frequently Asked Questions (FAQ)
What is the best wood for a knife throwing target?
The best wood is a softwood that allows knives to stick easily and “self-heals.” Cottonwood is often considered the best, but pine, cedar, and spruce are excellent, affordable, and widely available alternatives. Always use the end grain as the target face.
How tall should a knife throwing target stand be?
A good rule of thumb is to place the center of the bullseye at your shoulder height. For a general-purpose stand, a total height of around 5 to 5.5 feet is common, which places the target at a comfortable level for most adults.
Can I use plywood for a target?
No, you should avoid using plywood. Plywood is made of thin layers of wood glued together. A knife will shred the layers and get stuck between them, making it difficult to remove. It will destroy the target quickly and can damage your knives.
How do I make my target last longer?
To make your target last longer, use an end-grain design, keep the wood slightly moist by spraying it with water before use, and store the stand out of harsh weather. Rotating the target block to distribute wear also helps significantly.
Is it safe to practice knife throwing indoors?
It is strongly discouraged for beginners. Knife throwing should be practiced outdoors in a wide, open space with a safe backstop. Even experts require a dedicated indoor range with extensive safety measures, including floor-to-ceiling backstops and controlled access.
What if my knives bounce off the target?
If your knives are bouncing off, it could be for a few reasons. The wood might be too hard (like oak or maple), or you might be hitting the face grain instead of the end grain. It could also be related to your throwing technique, such as the knife not having enough rotation or power. Ensure you are using a softwood end-grain target first.
How far away should I stand from the target?
For beginners throwing from the handle, a good starting distance for a one-spin throw is about 10-12 feet. You can adjust your distance by moving forward or backward in small increments until your knife sticks consistently. Always start close and move back as you get more comfortable.
Conclusion: Your Journey Starts Now
Congratulations! You now have all the knowledge you need to build a fantastic, durable, and safe knife throwing target stand. This simple weekend project will not only save you money but also give you the perfect platform to practice and perfect your skills. Remember, the goal is to have fun and improve safely.
By building your own stand, you’ve taken a huge step in your knife throwing journey. You’ve created a dedicated space for your hobby, and there’s nothing more satisfying than landing a perfect throw on a target you built with your own two hands. So gather your materials, follow the steps, and get ready to hear that wonderful thud of success. Happy throwing!