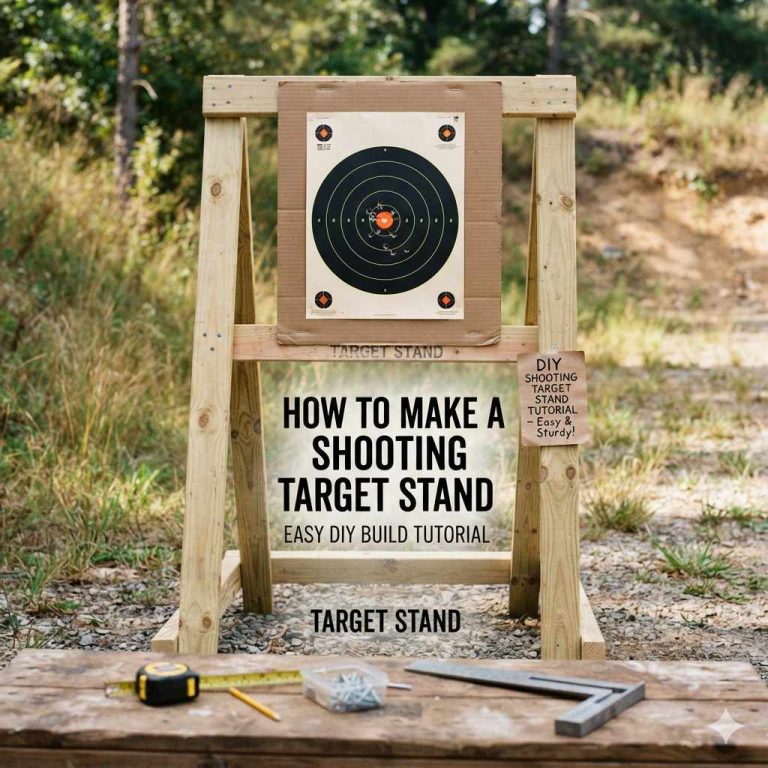
Building a cheap target stand is simple with PVC pipes and basic tools. Cut 1.5-inch PVC pipes to create a stable H-frame with feet. Assemble the pieces using tee and elbow fittings—no glue needed for easy disassembly. This creates a lightweight, durable, and portable stand for your archery practice in under an hour.
Ready to practice your archery skills but don’t want to spend a fortune on gear? A good target stand can be surprisingly expensive. Many archers end up propping their targets against trees or hay bales, which isn’t always safe or effective. It can be a frustrating problem that gets in the way of consistent practice.
But what if I told you that you could build a sturdy, reliable, and portable target stand for less than the cost of a few arrows? You can! With a quick trip to the hardware store and an hour of your time, you can have the perfect stand. In this guide, I’ll walk you through every simple step, so let’s get building!
Why Bother Building Your Own Target Stand?
Before we grab our tools, you might be wondering if it’s worth the effort. Store-bought stands are convenient, after all. But building your own comes with some amazing benefits, especially for a beginner or hobbyist archer. It’s about more than just saving money; it’s about creating gear that works perfectly for you.
The Top 4 Advantages of a DIY Stand
- It’s Incredibly Cost-Effective: This is the biggest win. A commercial target stand can easily cost $70, $100, or even more. You can build a high-quality PVC stand for a fraction of that cost, often for around $20-$30. That’s more money left over for arrows and other fun gear!
- You Can Customize It Perfectly: Is your target an odd size? Do you want your stand to be a specific height? No problem! When you build it yourself, you control the dimensions. You can make it wider for a large block target or taller for a different shooting angle.
- It’s Lightweight and Portable: The PVC design we’re building is extremely light. You can easily take it apart and toss it in the trunk of your car to take to the park, a friend’s house, or your favorite shooting spot. It’s far more portable than most heavy, welded metal stands.
- The Pride of Building Your Own Gear: There’s a special satisfaction that comes from using something you built with your own hands. It connects you more deeply to the sport and gives you a sense of accomplishment every time you set up for practice.

Gathering Your Materials and Tools
The best part about this project is its simplicity. You don’t need a fancy workshop or expensive power tools. A few basic items from any local hardware store are all it takes. Let’s break down exactly what you’ll need.
Materials List
We will be using 1.5-inch Schedule 40 PVC pipe. This size is the perfect balance of strength, stability, and low cost. It’s strong enough to hold heavy targets but light enough to carry easily.
- (1) 10-foot length of 1.5-inch Schedule 40 PVC Pipe: This will be more than enough for one stand, with a little extra just in case.
- (2) 1.5-inch PVC 90-Degree Elbows: These will form the top corners of your stand.
- (4) 1.5-inch PVC “Tee” Fittings: These are crucial for building the base and connecting the uprights.
- (4) 1.5-inch PVC End Caps: These will go on the feet to provide stability and a finished look.
- Optional: PVC Primer and Cement: You only need this if you want a permanent, non-portable stand. For most people, a snug “friction fit” is perfect and allows for easy breakdown.
- Optional: Target Hangers: You can use (2) 1/4-inch x 4-inch eye bolts with nuts and washers to hang your target. Simple string or bungee cords also work well.
Tools List
No power tools required! This keeps the project safe, quiet, and accessible to everyone.
- PVC Pipe Cutter or a Hacksaw: A ratcheting PVC cutter is the easiest and cleanest way to cut pipe. You can find them for around $15. A simple hacksaw also works perfectly well.
- Tape Measure: Accuracy matters! Measure twice, cut once.
- Marker or Pencil: To mark your cuts on the PVC pipe.
- Optional: Safety Glasses: It’s always a good idea to protect your eyes, especially when cutting materials. You can learn more about appropriate personal protective equipment from government resources like the Occupational Safety and Health Administration (OSHA).
Choosing Your Material: PVC vs. Wood vs. Metal
While we are focusing on PVC for its amazing benefits, it’s helpful to see how it compares to other common materials for DIY projects. This table breaks it down:
| Material | Cost | Ease of Building | Durability | Portability |
|---|---|---|---|---|
| PVC Pipe | Low ($20-$30) | Very Easy | Good (Flexible, Weatherproof) | Excellent (Lightweight) |
| Wood (2x4s) | Low-Medium ($30-$50) | Easy | Good (But can rot if untreated) | Fair (Heavy) |
| Metal (Steel/EMT) | Medium-High ($50+) | Difficult (Requires special tools) | Excellent | Poor (Very Heavy) |
As you can see, PVC is the clear winner for a cheap, easy, and portable archery target stand. It’s the perfect starting point.
Step-by-Step Guide to Building Your PVC Target Stand
Alright, it’s time for the fun part! Let’s turn that pile of pipes and fittings into a functional piece of archery equipment. Follow these steps carefully, and you’ll have a finished stand in no time. The measurements provided are for a stand that can comfortably hold a standard 36×36 inch target, but you can adjust them as needed.
Step 1: Measure and Cut Your PVC Pipes
First, lay your 10-foot PVC pipe on a flat surface. Using your tape measure and marker, carefully measure and mark the lengths you need to cut. A straight, accurate cut will make assembly much easier. If you’re using a hacksaw, try to keep the cut as square as possible.
Here is your cut list for a standard-sized stand:
| Part Name | Length | Quantity | Purpose |
|---|---|---|---|
| Uprights | 48 inches (4 ft) | 2 | The main vertical supports |
| Feet | 12 inches (1 ft) | 4 | The stable base pieces |
| Base Crossbar | 24 inches (2 ft) | 1 | Connects the feet for stability |
Once you have all your pieces cut, lay them out on the floor to make sure you have everything. You should have two long pieces, one medium piece, and four short pieces.
Step 2: Assemble the Base (The Feet)
The base is the foundation of your stand, so we’ll build it first. It will look like a capital letter ‘H’ lying on its side.
- Take two of your 12-inch “Feet” pieces and one “Tee” fitting.
- Push one foot piece firmly into each of the straight-through openings on the tee. The third opening of the tee (the one on the side) should be pointing up.
- Press an End Cap onto the open end of each foot piece. This creates one complete side of the base.
- Repeat this process with the other two 12-inch feet and another tee fitting.
- Now you should have two identical H-shaped base sections.
Step 3: Connect the Base
Now, let’s connect those two base sections to create the full, stable foundation.
- Take your 24-inch “Base Crossbar” piece.
- Grab your remaining two “Tee” fittings. Slide one tee onto each end of the 24-inch pipe. Don’t push them on all the way just yet.
- Stand your two completed foot assemblies up, with the open tee sockets pointing inward at each other.
- Connect the crossbar assembly to the feet. The open sockets on the crossbar’s tees should connect to the upward-facing sockets of the foot assemblies. Make sure all the tee openings are aligned.
When you’re done, you should have a solid, wide ‘H’ structure that sits flat on the ground. The two tees on the crossbar should be pointing straight up to the sky. These are where your uprights will go.
Step 4: Add the Uprights and Top Bar
This is the final assembly step. It’s where your stand really takes shape!
- Take your two long 48-inch “Upright” pipes.
- Insert one upright into each of the upward-facing tees on the base you just built. Push them down firmly until they feel secure.
- Now, take your two 90-degree “Elbow” fittings. Place one on top of each upright pipe. Make sure the open ends of the elbows are facing each other.
- You’ll need a top crossbar to connect them. Wait, we didn’t cut one! This is the genius part. Instead of cutting another piece, you will create the final piece using the remaining pipe. Push the elbows onto the pipe, measure the desired width (e.g., 36 inches for a standard target), and then cut the pipe. This ensures a perfect fit.
- Push the ends of this new top crossbar into the open elbows.
Step 5: Dry Fit and Final Touches
Your stand is now fully assembled! Give it a little shake to make sure everything is snug. This “friction fit” is usually strong enough to hold a target and has the huge advantage of being portable. You can break it down in seconds for transport or storage.
If you need a permanent stand that will never be moved, you can apply PVC primer and cement to each joint before connecting them. Follow the instructions on the cans, work in a well-ventilated area, and let it cure completely. For 99% of archers, though, skipping the glue is the better choice.
Step 6: Adding Your Target Hangers
Now you need a way to hang your target. The easiest method is to use two eye bolts.
- Drill a 1/4-inch hole through the top crossbar, about 6 inches in from each elbow.
- Insert a 1/4-inch eye bolt into each hole from the top.
- Secure them from underneath with a washer and a nut.
- You can now use clips, string, or small bungee cords to hang your foam or bag target from the eye bolts.
For a simpler, no-drill option, you can just tie a sturdy string from one upright to the other and hang your target from that.
Safety First: Using Your New Stand Responsibly
Congratulations, you’ve built your own target stand! Now, let’s make sure you use it safely. A great stand is only useful if your practice environment is secure.
- Always Use a Safe Backstop: Never rely on the stand alone to stop an arrow. Your stand should always be placed in front of a solid, reliable backstop, like a large dirt hill, a thick stack of hay bales, or a purpose-built arrow curtain.
- Place on Level Ground: Ensure your stand is on a flat, stable surface. A wobbly stand can tip over, especially in the wind or when hit by an arrow.
- Check for Stability: Before you start shooting, give the stand a gentle push to make sure it’s secure. If you skipped the glue, ensure all the pipes are pushed firmly into their fittings.
- Know What’s Beyond Your Target: This is the most important rule in archery. Always be 100% sure of your target and what lies beyond it. Never shoot in the direction of houses, roads, or areas where people might be. For more great safety guidelines, USA Archery provides excellent resources for archers of all levels.

Frequently Asked Questions (FAQ)
How much does this PVC stand cost to build?
The total cost is typically between $20 and $30. The 10-foot PVC pipe is the most expensive part, usually costing around $10-$15. The fittings (tees, elbows, caps) are generally less than a dollar each. This makes it significantly cheaper than almost any store-bought stand.
What size target can this stand hold?
The design in this guide is perfect for standard bag targets or foam blocks up to 36 inches wide. If your target is larger or smaller, you can easily adjust the length of the crossbars and the height of the uprights to create a custom fit.
Do I need to use PVC glue or cement?
No, you do not need to use glue. In fact, it’s better if you don’t! A tight “friction fit” is strong enough for normal use and allows you to easily disassemble the stand for storage or transport. Only use PVC cement if you want a permanent, one-piece stand that will never be moved.
Can I use wood instead of PVC?
You can, but it has drawbacks. A wooden stand made from 2x4s would also be strong, but it will be much heavier, less portable, and more susceptible to rotting if left outside. For beginners who value portability and ease of building, PVC is the superior choice.
How do I make the stand more stable in the wind?
If you’re shooting in a windy area, you can easily add stability. The simplest way is to place sandbags or other heavy objects over the feet. You can also drill a small hole in the base crossbar and fill the base pipes with sand before capping them for a semi-permanent weighted solution.
How long will a PVC target stand last?
A stand made from Schedule 40 PVC will last for many years. PVC is resistant to water, rot, and insects. The only thing to be mindful of is long-term UV exposure from the sun, which can make the plastic brittle over time. If you store it indoors or in a shed when not in use, it will last even longer.
What is the best way to hang my target from the stand?
The eye bolt method described in the guide is very secure and reliable. However, a simple and effective alternative is to use two small C-clamps. Just clamp them onto the top crossbar and hang your target from them with string. This requires no drilling and is easily adjustable.
Your Own Stand, Your Best Practice
There you have it! You’ve not only learned how to build a cheap target stand, but you’ve also created a piece of custom equipment that will serve you well for years to come. You saved money, built something with your own hands, and now have a reliable tool to help you become a better archer.
Every time you set up this stand, you’ll feel a sense of pride. It represents a smart, practical approach to the sport. Now, all that’s left to do is set it up, take a few steps back, and let those arrows fly. Practice safely, have fun, and enjoy the wonderful journey of archery.