Yes, a pipe cutter can work on carbon arrows, but it’s often not the best or safest method for beginners. Specialized tools designed for archery are usually recommended for a cleaner, more precise cut and to avoid damaging the arrow shaft. This guide will explain why and how to approach cutting carbon arrows correctly.
Picking archer your first carbon arrows feels like a milestone, doesn’t it? You’re ready to hit the target with more consistency and power. But then comes a common question: how do you get them to the perfect length? Many beginners wonder if everyday tools, like a simple pipe cutter, can do the job. It’s a fair question, especially when you’re just starting out and want to use what you have. Sometimes, a pipe cutter might seem like a quick fix. However, cutting carbon arrows requires a bit more finesse to ensure they fly true and safely. Don’t worry, we’ll walk through exactly how to get your arrows to the ideal length, the best tools to use, and why some methods are better than others. By the end, you’ll feel confident about this crucial step in your archery journey!
Why Arrow Length Matters for Performance and Safety
Getting your arrows to the right length isn’t just about making them look neat. It’s a critical factor for both how your bow performs and your safety as a shooter. An arrow that’s too long can flex improperly during the shot, leading to erratic flight and poor accuracy. More importantly, an arrow that’s too short for your draw length can be dangerous. If the nock (the end that attaches to the bowstring) comes off the string before the arrow has fully cleared the riser (the grip part of the bow), the arrow can twist and potentially break apart in a way that sends fragments back towards you or your bow. That’s a serious safety hazard we definitely want to avoid!
Think of it like this: your bow and arrow are a system. For that system to work efficiently and safely, every part needs to be just right. The length of your arrow is a key piece of that puzzle. It should extend just far enough past your bow’s rest to allow for a clean release, but no more. This ensures the arrow is fully supported by the arrow rest and the bowstring until the last possible moment, resulting in a straight, powerful launch.
Understanding Carbon Arrows: What Makes Them Different?
Carbon arrows are popular in archery today because they offer a great combination of strength, lightness, and durability. Unlike older aluminum or wooden arrows, carbon is a composite material. It’s made of microscopic carbon fibers held together by a resin or epoxy. This construction gives carbon arrows their impressive stiffness and resistance to bending, which translates to excellent flight stability and accuracy.
However, this same composite nature is also what makes them unique to cut. When you cut a carbon arrow, you’re severing those tightly packed carbon fibers. The way this is done significantly impacts the integrity of the shaft’s end. A rough or jagged cut can leave splintered fibers, create stress points, or even lead to delamination (where the layers of carbon start to separate). These issues can compromise the arrow’s strength and its aerodynamic properties, which is why precision is key.
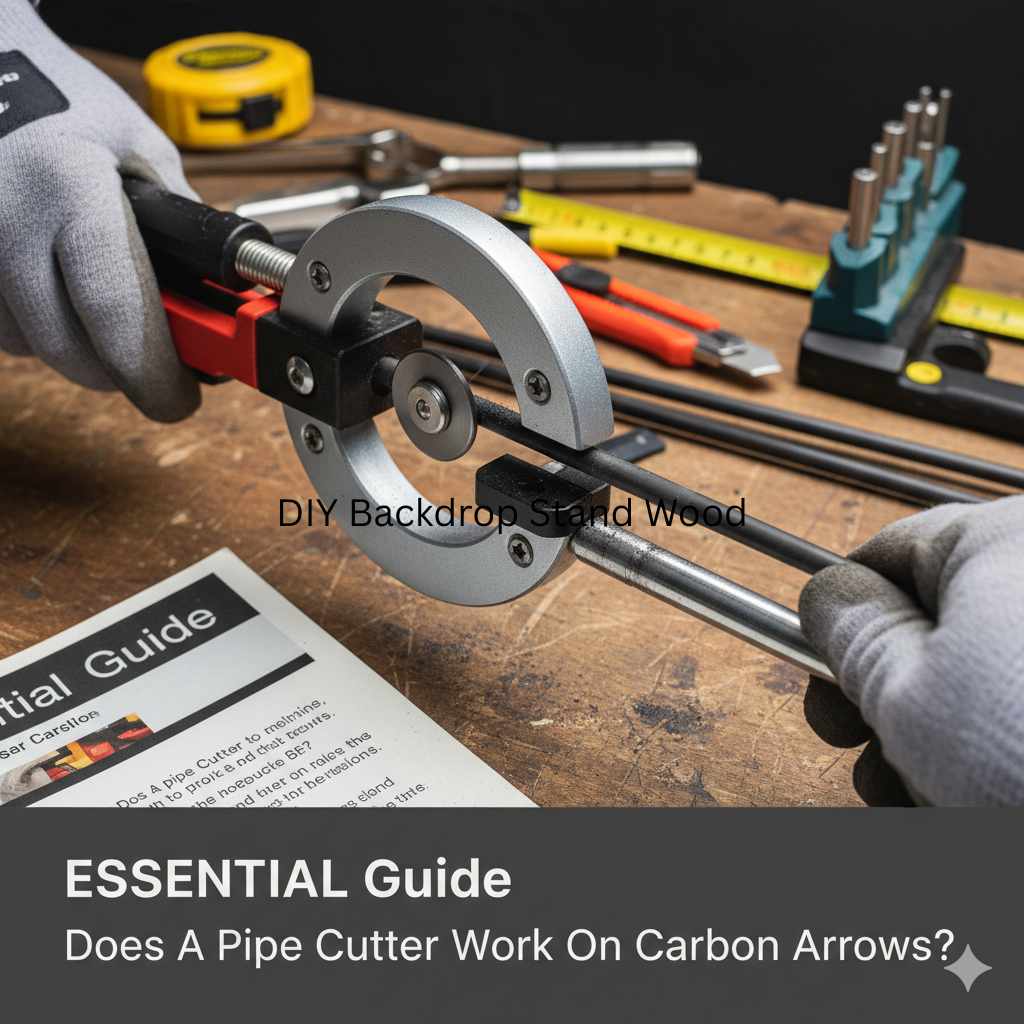
This is where the question of using a standard pipe cutter often comes up. While a pipe cutter is designed to slice through rigid materials like metal or plastic pipes, its cutting wheel and pressure mechanism might not be ideally suited for the layered, fibrous structure of a carbon arrow shaft.
Can You Use a Pipe Cutter on Carbon Arrows? The Pros and Cons
Let’s get straight to the heart of it: can a pipe cutter do the job? The short answer is: sometimes, with significant caveats.
Potential Pros of Using a Pipe Cutter:
- Accessibility: Many people might already have a pipe cutter lying around their garage or workshop. This makes it seem like a readily available, no-cost solution.
- Familiarity: If you’ve used a pipe cutter before on other materials, you might feel comfortable with the general concept of how it works.
Significant Cons of Using a Pipe Cutter:
- Fiber Separation and Fraying: The rolling pressure and cutting wheel of a typical pipe cutter can easily crush or shred the carbon fibers at the cut point. This leads to a rough, frayed edge that is detrimental to arrow performance and safety.
- Compromised Shaft Integrity: The crushing action can create micro-fractures or weak spots within the carbon shaft. This makes the arrow more prone to failure, especially upon impact, which is a serious safety risk.
- Imprecise Cut: It can be difficult to achieve a perfectly square (90-degree) cut with a standard pipe cutter on a round arrow shaft. Even a slight angle can affect how the arrow flies.
- Risk of Splinters: A poorly cut carbon arrow can produce sharp carbon splinters, posing a risk to your hands during cutting and to your bow and yourself during shooting.
- Residue and Debris: The cutting process can create a lot of carbon dust and debris. This needs to be meticulously cleaned to prevent interference with fletching glue or other arrow components.
Given these drawbacks, while a pipe cutter might technically sever a carbon arrow, it’s generally not the recommended tool for achieving a clean, safe, and precise cut required for optimal arrow performance. The risks of damaging the arrow shaft and compromising its integrity are quite high.
The Best Tools for Cutting Carbon Arrows
When you’re looking to get that perfect arrow length, using tools specifically designed for the job will give you the best results. These tools are built to handle the unique properties of carbon shafts, ensuring a clean cut and maintaining the arrow’s structural integrity. Here are the top recommendations:
- Archery Arrow Saw (Fletching Jig & Saw Combo): This is the gold standard for anyone serious about building their own arrows. These specialized saws are designed to hold the arrow securely and cut through the carbon cleanly and squarely. They often integrate with fletching jigs, allowing you to measure and cut in a precise location, often right next to the fletching if you’re shortening an existing arrow. Brands like Bitzenburger and GTC (Gleam Technologies) are well-regarded. You can find these at most reputable archery pro shops or online retailers specializing in archery equipment.
- Rotary Saw with a Thin, High-Tooth Count Blade: A small, handheld rotary tool (like a Dremel) equipped with a thin cutting wheel designed for fine materials (look for blades specified for cutting plastics or composites) can also work. The key is to use a blade with a high number of teeth and to spin it at a moderate speed. Always use a guide to ensure a square cut. This method requires a steady hand and careful control to avoid overheating or damaging the carbon. A specialized arrow-cutting jig works best with this too.
- Manual Arrow Cutters: Similar in principle to a pipe cutter, but designed specifically for arrows. These tools often have a guide mechanism to ensure a square cut and a sharper blade or scoring wheel system meant for carbon. They might require rotating the arrow multiple times to achieve the cut. While better than a generic pipe cutter, they might still exert some pressure that could slightly compress the fibers compared to a saw.
Regardless of the tool, the general principle is to cut cleanly and squarely without excessive pressure that could crush the carbon fibers or heat that could damage the resin. For detailed information on fine-tuning archery equipment, resources like the World Archery Federation website offer excellent technical details and rules that indirectly inform best practices in equipment preparation.
Step-by-Step Guide: Cutting Carbon Arrows Safely and Effectively
Before you start cutting, remember: precision is key! It’s always better to cut a little long and then shorten it further if needed, than to cut too short. Measure twice, cut once!
Tools You’ll Need:
- Your carbon arrow(s)
- Measuring tape or arrow noodle/measuring shaft
- Arrow squaring tool (or a very good eye for a 90-degree angle)
- Your chosen cutting tool (archery arrow saw, rotary tool with composite blade, or specialized arrow cutter)
- Pen or marker for marking the cut line
- Sandpaper or a deburring tool (fine grit, like 220 or higher)
- Safety glasses (essential for protecting your eyes from carbon dust and debris)
- Dust mask (optional but recommended for extended cutting)
- A stable work surface
Step 1: Determine Your Correct Arrow Length
This is the most crucial part. There are a few ways to do this, but the most common and reliable method involves using your bow.
- Assemble your bow: Make sure your bow is safely strung (using a bowstringer is essential for safety).
- Position the arrow: Place an arrow on your arrow rest.
- Hold the bow at full draw (DO NOT RELEASE): Carefully draw the bow back to your typical anchor point. Have a helper gently hold the nock of the arrow on the string and against the rest while you hold the bow at full draw.
- Mark the arrow: With the bow at full draw, your helper should mark the arrow shaft with a pen or marker exactly where it exits the arrow rest. This is your approximate cutting line.
- Alternatively, use a draw board: If you have access to a draw board (often found at pro shops), you can dry-fire the bow onto the board to measure the shaft length.
- Consider bracing height: Remember to factor in your bow’s brace height. The arrow should clear the riser and the front of your grip. Most archers aim for the arrow to extend about 1/2 to 1 inch past the riser at full draw.
Confused about draw length? A good rule of thumb for beginners is to measure from the deepest part of your bow grip to your anchor point at full draw, then add about 1.5 inches. However, physically drawing the bow with an arrow is the most accurate way.
Step 2: Mark the Cut Line
Once you have your desired length determined, transfer that measurement to the arrow. Lay the arrow flat on a stable surface. Use your measuring tape or an arrow noodle (a specialized measuring tool) to mark the precise spot where you need to cut. Use a fine-tip marker or pen. Ensure the mark goes all the way around the shaft for an accurate guide.
Step 3: Secure the Arrow and Prepare for Cutting
This is where having the right jig or vise becomes invaluable. If using a specialized arrow saw, it will have a holder. If using a rotary tool, you’ll need an arrow squaring jig or a very steady hand. For manual arrow cutters, follow their specific instructions.
Safety First: Put on your safety glasses! Carbon dust is incredibly fine and can be irritating to your lungs and eyes. A dust mask is also a good idea.
Step 4: Make the Cut
Using an Arrow Saw: If you have a dedicated archery arrow saw, follow its operating instructions. These are designed for a clean, precise cut. Ensure the arrow is straight and the blade is sharp for the cleanest possible result. Slowly feed the arrow into the blade while letting the saw do the work.
Using a Rotary Tool: Secure the arrow in a squaring jig or a vise meant for arrows. Attach a thin, high-tooth count cutting wheel suitable for composites to your rotary tool. Set the tool to a moderate speed – too fast can generate heat, too slow can cause tearing. Align the blade with your marked line. Slowly turn the arrow while the rotary tool is stationary, or slowly move the rotary tool along the marked line if you have a jig. Let the blade cut; don’t force it. Make shallow passes if necessary.
Using a Manual Arrow Cutter: Follow the manufacturer’s instructions. Typically, you’ll place the arrow in the device, align the cutting wheel with your mark, and squeeze handles or turn a knob to score and cut. You will likely need to rotate the arrow multiple times to fully cut through the shaft.
Crucially, avoid excessive pressure. The goal is to slice through the carbon fibers, not crush them.
Step 5: Square and Deburr the Cut End
After cutting, the end of the arrow shaft might have a slightly rough edge or be slightly out of square. This is where an arrow squaring tool is invaluable. Even a simple sanding block can help.
- Check for squareness: Use your squaring tool or hold the arrow against a known-straight surface to check the angle of the cut.
- Sand gently: If it’s not perfectly square, or if there are any rough edges or burrs, use fine-grit sandpaper (220 or higher). Sand gently and evenly to true up the end. Keep the arrow rotating and sand flat against the surface. For a perfectly square cut, you can lightly sand the end on a flat surface with sandpaper taped down.
- Remove burrs: A small deburring tool or even the edge of a utility knife can be used very carefully to remove any remaining tiny burrs. Then, lightly sand again.
The goal is a smooth, clean, and perfectly perpendicular end to the shaft. Any imperfections here can affect how your arrow interfaces with your string, rest, and nock.
Step 6: Clean the Arrow Shaft
Use a clean cloth to wipe away all carbon dust from the cut end and anywhere else on the shaft. This is important for when you install new nocks or tips later. Ensure the interior of the shaft is also free of dust if you’re installing inserts.
Step 7: Install Nocks and Inserts (If Applicable)
If you cut your arrows shorter, you’ll likely need to install new nocks and potentially new inserts (the component where the field point or broadhead screws in). Ensure you use appropriate glues like AAE arrow glue or specialized hot melt inserts, and follow the manufacturer’s instructions for proper installation. A damaged or uneven shaft end can make nock and insert installation difficult and less secure.
Arrow Length vs. Draw Length: A Crucial Relationship
Understanding your draw length is more than just a number; it’s fundamental to accurate and safe archery. Your draw length is the distance from the deepest part of your bow’s grip to the anchor point where you draw the string to your face. How this relates to your arrow length is critical.
As we discussed, an arrow’s length is determined by where it needs to exit the riser at full draw to ensure a clean release. If your arrow is consistently too short for your draw length, it creates a dangerous situation where the nock can fall off the string prematurely. Conversely, an arrow that’s too long might not flex correctly under the string’s force, leading to less consistent arrow flight and potentially impacting the arrow rest. This phenomenon is known as “arrow paradox,” and proper arrow length is key to managing it effectively.
For a deeper dive into personal archery measurements, resources at educational institutions like Purdue University Extension often provide guides on archery technique and equipment selection that touch upon these precise measurements for optimal performance and safety.
Arrow Spine Selection and Length
When you’re cutting arrows to length, it’s also worth noting how length affects arrow spine. Spine refers to the stiffness of an arrow shaft. For any given arrow model, cutting it shorter makes it stiffer. This is because you’re removing length, and a shorter shaft has less opportunity to flex.
For example, if you have a dozen arrows that are all the same model and spine rating but you need to cut them to different lengths for different shooters, the shorter arrows will effectively have a stiffer spine than the longer ones. This is a crucial consideration for archers who tune their equipment very precisely. If you’re cutting arrows for yourself, ensure the spine is appropriate for your bow’s draw weight and your draw length after cutting.
If you’re unsure about spine selection, your local pro shop is an invaluable resource. They can help you choose arrows that are correctly spined for your bow before you cut them, ensuring they’ll remain within the optimal spine range after you trim them down.
FAQ: Your Questions Answered About Cutting Carbon Arrows
Q1: Will cutting a carbon arrow weaken it?
A: A clean, square cut made with the proper tool will not significantly weaken a carbon arrow. However, a rough cut, a cut that crushes fibers, or heat damage can create weak spots, making the arrow more prone to breaking. This is why using specialized archery tools is highly recommended.
Q2: How do I know if my carbon arrow is cut too short?
A: The most dangerous sign is if the nock (the part that clips onto the bowstring) comes off the string before the arrow has cleared the riser or arrow rest. This can cause the arrow to flex improperly and potentially break apart. Other signs include erratic arrow flight and poor accuracy.