Carbon arrow shafts are made through a precise layering process where carbon fibers are rolled onto a heated mandrel, then cured under pressure and heat. Advanced techniques ensure straightness, strength, and consistent spine for maximum accuracy in archery.
Ever wondered what makes those sleek carbon arrows fly so true? As a beginner, you might look at a carbon arrow and just see a straight tube. But there’s a fascinating, high-tech journey behind every single shaft. Understanding how they’re made can really boost your appreciation for your gear and even help you choose the right arrows. It’s not magic; it’s science and careful craftsmanship! We’ll take a peek behind the curtain to uncover the secrets of carbon arrow shaft manufacturing, breaking it down in a way that’s easy to follow. Get ready to discover what goes into building your archery partners!
The Magic Behind the Carbon Shaft: A Beginner’s Guide
As an archer, you know that your arrows are just as important as your bow. For many of us, especially those getting serious about accuracy and consistency, carbon arrows are the go-to choice. But have you ever stopped to think about how these lightweight, super-strong shafts are actually manufactured? It’s a process that combines cutting-edge technology with meticulous attention to detail. Think of it like baking a cake, but with carbon fiber instead of flour and a curing oven instead of a regular oven!
For beginners, it’s easy to feel a bit intimidated by all the technical talk. But rest assured, learning about how carbon arrows are made doesn’t require an engineering degree. My goal is to break down the “proven secrets” of this process into simple, understandable steps. We’ll explore the materials, the machinery, and the critical stages that transform raw carbon fibers into the accurate projectiles you’ll be shooting. By the end, you’ll have a clear picture of the incredible engineering that goes into each and every carbon arrow shaft.
Why Carbon Arrows Rule the Archery World
Before we dive into the manufacturing process, let’s quickly touch on why carbon has become so popular for arrow shafts. For beginners, this means an arrow that is:
- Lightweight: Easier to handle for new archers and allows for faster arrow speeds.
- Strong and Durable: They can withstand more impact than traditional materials like wood or aluminum, meaning fewer broken arrows.
- Straightness and Consistency: This is key for accuracy. Carbon shafts are typically manufactured to be very straight and have consistent stiffness (spine) from shaft to shaft.
- Resistant to Bending: Unlike aluminum, carbon fibers don’t permanently bend. If they take an impact and don’t fracture, they usually return to their original shape.
These benefits translate directly to a better shooting experience, especially when you’re just starting out and developing your form. A consistent, accurate arrow is crucial for building confidence and improving your skills.
The Core Ingredients: What Goes Into a Carbon Arrow?
It all starts with the main ingredient: carbon fiber. But it’s not just any carbon fiber; it’s specially engineered for archery. Let’s look at the key components:
1. Carbon Fiber Filaments
These are the incredibly thin threads that give carbon its strength. They are made from materials like polyacrylonitrile (PAN). These filaments are woven or laid out in specific directions to create sheets or “tows” (bundles of fiber).
2. Resin (The “Glue”)
Carbon fibers need to be held together. This is where resin comes in. Typically, an epoxy resin is used. The resin impregnates the carbon fibers, acting as a binder and giving the shaft its shape and rigidity after curing. Think of it as the sticky stuff that holds all the fibers in place and makes them act as one solid piece.
3. Mandrel (The Mold’s Backbone)
This is a critical tool in the manufacturing process. A mandrel is essentially a long, smooth rod (often steel or aluminum) around which the carbon fibers are wrapped. It dictates the internal diameter and, importantly, the straightness of the final arrow shaft. The quality of the mandrel directly impacts the quality of the arrow.
4. Unidirectional Carbon Cloth/Tape
This is the primary material used. It’s essentially sheets of carbon fiber filaments that are all aligned in the same direction. By layering these sheets with fibers oriented in different directions, manufacturers can control the shaft’s stiffness (spine) and strength precisely. This controlled orientation is one of the “proven secrets” to their performance.
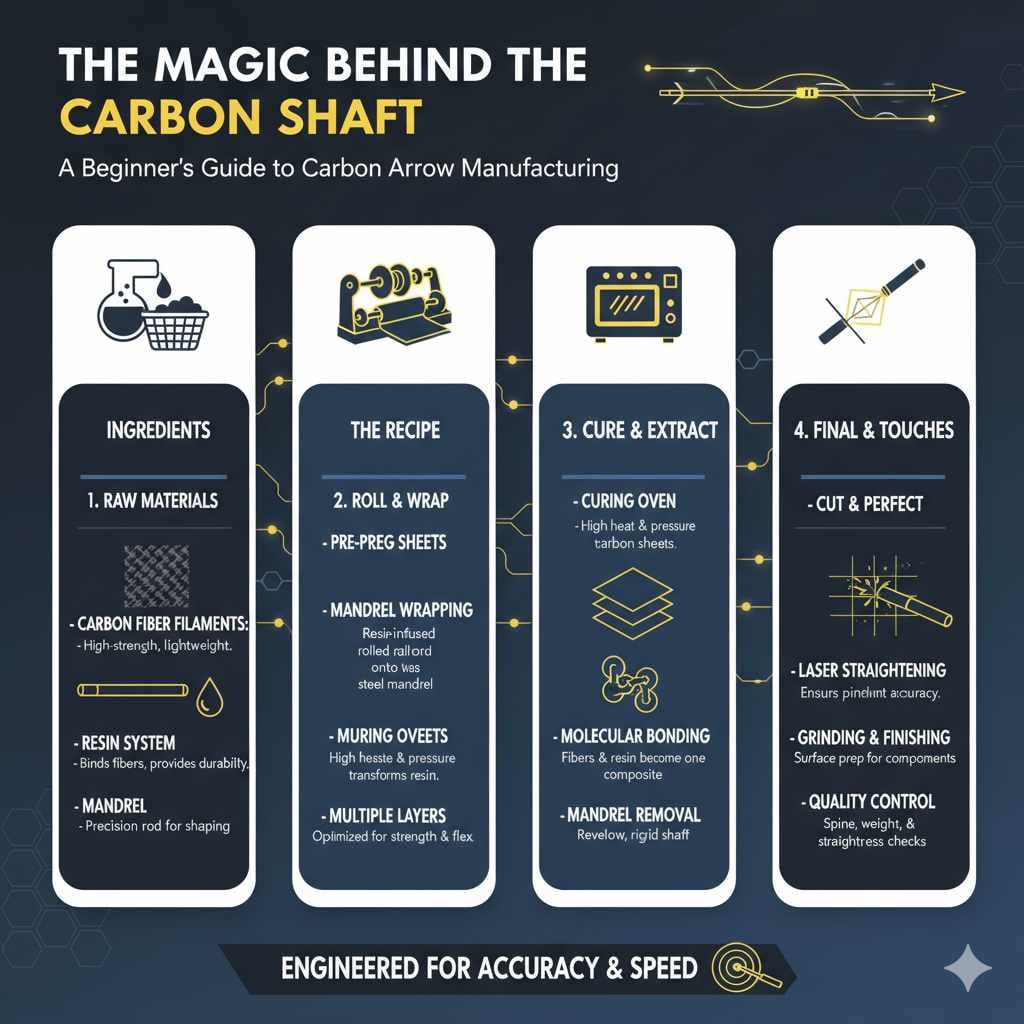
The Manufacturing Process: Step-by-Step
Now, let’s get into the nitty-gritty of how these shafts are brought to life. It’s a multi-stage process, and each step is vital for the final product’s quality.
Step 1: Preparing the Carbon Fibers
The process begins with specially prepared carbon fiber materials. Unidirectional carbon fiber cloth or tape is cut into precise strips. These strips are often pre-impregnated with a specific amount of resin, a process called “pre-preg.” This ensures an even distribution of resin throughout the shaft, which is crucial for strength and consistency.
The orientation of the carbon fibers is meticulously planned. Manufacturers use different angles for different layers. Typically, some layers have fibers running lengthwise along the shaft for stiffness and strength, while others have fibers running at an angle (like 45 degrees) to provide torsional rigidity and resist crushing. This “lay-up schedule” is a carefully guarded secret for each manufacturer, determining the arrow’s spine and durability.
Step 2: Rolling onto the Mandrel
This is where the arrow starts to take shape. The pre-preg carbon fiber strips are carefully rolled onto the heated mandrel. This is often done by automated machines or skilled technicians. The carbon strips are layered around the mandrel, following the pre-determined lay-up schedule. Each layer is pressed down firmly to ensure good contact and eliminate any air bubbles. The heat from the mandrel might be slightly elevated to make the resin more pliable, aiding in the wrapping process.
Imagine wrapping a delicate, sticky tape around a rod, but with hundreds of incredibly strong threads, each placed at a specific angle. The goal here is to ensure that the carbon fibers are tightly packed and oriented precisely as designed. Any misalignment at this stage could compromise the arrow’s performance.
Step 3: The Curing Process – Making it Permanent
Once the carbon fibers are fully wrapped around the mandrel, the assembly is ready for curing. This is the critical step where the resin hardens and locks the carbon fibers into their final, rigid shape. The wrapped mandrels are placed into special ovens or curing presses.
There are a couple of common methods for curing:
- Pultrusion (less common for shafts): While more common for solid profiles, some simpler tubes might involve pulling impregnated fibers through a heated die.
- Filament Winding and Autoclave/Oven Curing (most common for high-end shafts): This is the dominant method for quality carbon arrow shafts. The wrapped mandrels are sealed within a high-strength bladder or placed in a special bag. They are then subjected to precise heat and pressure. The pressure is applied externally (autoclave) or internally via the bladder swelling under heat, squeezing the carbon layers tightly together and forcing out any excess resin or air. This high-pressure, high-temperature environment (often over 200°F / 93°C) allows the epoxy resin to fully cure, creating a very dense, strong, and straight shaft. The exact temperature, pressure, and time are critical and proprietary to each manufacturer.
This curing process is where the shaft gains its incredible strength and straightness. The “proven secrets” often lie in the precise control of these curing parameters and the composite lay-up schedule.
Step 4: Extraction and Finishing
After curing, the mandrels need to be removed. This can be tricky! The mandrels are typically made of materials that allow them to be collapsed or dissolved, or they are simply pulled out if the shaft is slightly larger than the mandrel. For smaller diameter shafts, the mandrels might be specially treated so they can be pulled out smoothly without damaging the newly formed carbon tube. This is a crucial step to ensure no residual material or imperfections are left inside the shaft.
Once the mandrel is out, the raw shafts are inspected for any defects. Then comes the finishing process:
- Cutting to Length: The shafts are precisely cut to the desired lengths.
- Straightening: Even with careful curing, minor deviations can occur. Advanced machines use lasers and gentle pressure to ensure each shaft is perfectly straight to within very tight tolerances. This is a key characteristic of high-quality carbon arrows.
- Adding Inserts and Nocks: While these are often separate components added later by the user or a pro shop, some manufacturers might bond a basic insert or allow for a specific type of nock to be a factory-applied feature.
- Finishing the Exterior: The exterior might be sanded smooth, coated with a protective clear coat, or have a specific finish applied (like a matte or slick finish) to aid in arrow retrieval from targets.
- Painting and Graphics: Finally, the shafts are often painted and decorated with branding and graphics.
Step 5: Spine and Weight Matching
This is one of the most important quality control steps for serious archers. Once the shafts are cut, finished, and inspected, they undergo rigorous testing:
- Spine Testing: A spine tester measures how much a shaft deflects under a specific weight. Arrows within a batch are tested to ensure they all have the same spine rating (stiffness). For consistent arrow flight, especially important for accuracy, all arrows in a quiver should have nearly identical spine values. Manufacturers group arrows into tight spine tolerances.
- Weight Matching: Each shaft is weighed. Arrows are then sorted and grouped into sets that are very close in weight. Having arrows with similar weight distribution also contributes to consistent flight.
These matching processes transform individual shafts into a cohesive set of arrows that will behave identically out of your bow. This attention to detail is what separates mass-produced basic shafts from premium, performance-oriented ones.
The “Proven Secrets” Revealed (for Beginners!)
While most manufacturers keep their exact formulas and processes proprietary, we can identify the key elements that contribute to high-quality carbon arrow shafts. These are the “proven secrets” that allow them to perform so well:
Secret 1: The Fiber Lay-Up Schedule
This is the blueprint for building the shaft. How many layers are used? What is the orientation of the fibers in each layer? Using unidirectional fibers and staggering their orientation across layers is critical. For example, lengthwise fibers provide stiffness in the direction of flight, while +/- 45-degree fibers provide torsional (twisting) stability and resistance to crushing. Manufacturers carefully engineer this recipe to achieve the desired spine, straightness, and durability for different arrow models. Higher-end arrows often use more complex lay-ups with more layers and varied orientations.
Secret 2: Heat and Pressure During Curing
The proper application of heat and pressure is non-negotiable for creating a dense, strong, and void-free composite. Autoclave curing (using high heat and external pressure) or internal bladder curing provides consistent, uniform pressure around the entire shaft. This squeezes out air and excess resin, creating a stronger bond between fibers and a more uniform structure. The precise temperature profile and cure time are crucial for the resin to fully cross-link and achieve its maximum strength properties. This process is vital for preventing micro-fractures and ensuring longevity.
Secret 3: Mandrel Quality and Extraction
A perfectly straight and smooth mandrel is fundamental. Any imperfection in the mandrel will transfer to the inside of the shaft. Advanced manufacturers use high-precision mandrels. Equally important is efficient and clean mandrel extraction. If the mandrel is removed improperly, it can cause internal damage or leave residue, affecting the shaft’s integrity and straightness.
Secret 4: Rigorous Quality Control and Matching
The “secret” isn’t just in manufacturing but in post-manufacturing. Truly high-performance arrows are not just made; they are sorted! The meticulous spine and weight matching are what give archers the confidence that every shot will fly the same. Groups of arrows with extremely tight tolerances for spine and weight are the hallmark of premium hunting and target arrows. This ensures consistency, which is the bedrock of accuracy.
Secret 5: Material Science and Innovation
Manufacturers are constantly working with material scientists to improve the carbon fibers and resins used. This includes developing stronger, lighter fibers, resins that cure faster or with better properties, and even incorporating new materials or techniques like nanotechnology into the composite. This ongoing research and development is a continuous “secret” drive for better performance.
Table: Typical Carbon Arrow Shaft Specifications Explained
When manufacturers talk about carbon arrows, they use terms like “spine” and “tolerance.” Here’s a quick breakdown of what those mean for you as a beginner:
| Specification | What it Means | Why it Matters to You |
|---|---|---|
| Spine | Measures the stiffness of the arrow shaft. It’s typically given as a number (e.g., 400, 500) indicating how much the shaft deflects when a weight is applied. Lower number = stiffer arrow. | Matching the correct spine to your bow’s draw weight and length is crucial for consistent arrow flight. An improperly spined arrow will fly erratically. |
| Weight | The mass of the arrow shaft, usually measured in grains per inch (GPI) or total grains. | Heavier arrows have more kinetic energy and momentum (good for hunting), while lighter arrows fly faster (often preferred in target archery). Consistent weight is key for predictable flight. |
| Straightness Tolerance | How much deviation from a perfectly straight line the shaft is allowed to have. Often measured in thousandths of an inch (e.g., +/- 0.001″, +/- 0.003″). Lower number = straighter arrow. | A straighter arrow will fly truer and more consistently. For beginners, a good tolerance (like +/- 0.003″) is usually sufficient, while competitive archers opt for tighter tolerances. |
| Outer Diameter (OD) Inner Diameter (ID) | The dimensions of the shaft’s exterior and interior. | Affects arrow weight, fletching placement, and compatibility with components like inserts and nocks. Standardized diameters simplify component selection. |
| Weight Tolerance | How much variation is allowed in the weight of shafts within a dozen. Typically specified in grains. | Tight weight tolerance ensures that all your arrows behave similarly in flight, contributing to better group sizes. |
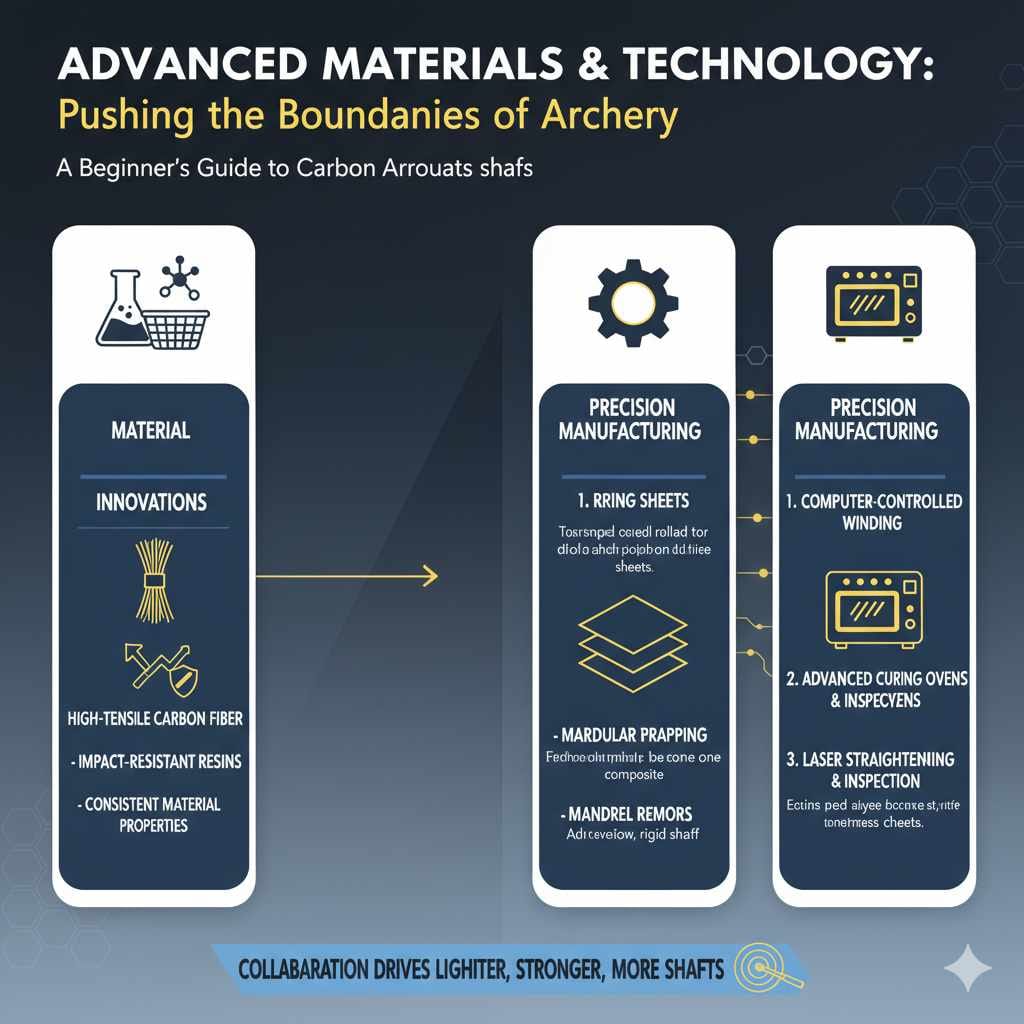
The Role of Material Suppliers and Technology
It’s not just the arrow manufacturers themselves who hold secrets. The companies that produce the raw carbon fiber and resins are also at the forefront of innovation. They develop new types of carbon fibers with higher tensile strength, improved resins with better impact resistance, and more consistent material properties. These advancements are then passed on to arrow manufacturers, enabling them to create lighter, stronger, and more accurate shafts.
The technology used in manufacturing has also evolved dramatically. Precision computer-controlled winding machines, advanced curing ovens with precise temperature and pressure controls, and sophisticated laser straightening and inspection equipment all contribute to the high quality of modern carbon arrows. For an in-depth look at some of the technologies involved in advanced composite manufacturing, you can explore resources like the CompositesWorld’s guide to manufacturing methods.
Common Misconceptions About Carbon Arrow Manufacturing
As a beginner, it’s easy to fall for some myths. Let’s clear them up:
- “All carbon arrows are the same”: This is far from true! The complexity of the lay-up, the quality of the materials, the precision of curing, and the strictness of quality control vary greatly between brands and price points.
- “Carbon arrows are indestructible”: While very durable, carbon arrows can still break. Severe impacts, hitting hard objects like rocks or metal, or shooting an arrow that is spined incorrectly for your bow can lead to failure.
- “Manufacturing is completely automated and perfect”: While machines do a lot of the work, skilled technicians often oversee the process, and quality control is crucial. Even with automation, there are tolerances and potential for human error or material variations.
- “More carbon layers always mean better”: It’s not just about the number of layers; it’s about the type of carbon, the resin used, and critically, the orientation of those layers. A smart, engineered lay-up is more important than just piling on more layers.
FAQ: Your Carbon Arrow Questions Answered
Q1: Are carbon arrows safe for beginners?
Absolutely! Carbon arrows are generally very safe. Their durability means they are less likely to break catastrophically compared to some other materials, and their consistent performance aids in learning accurate shooting. Always inspect them for damage before each shot, though!