Diy Steel Gong Target Stand: Strong & Simple Build
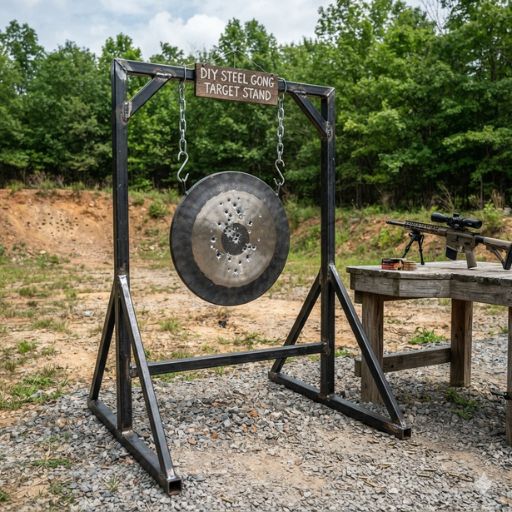
A strong and simple DIY steel gong target stand can be built using common steel pipe and fittings. This design prioritizes stability and ease of construction, ensuring a reliable target holder for various shooting disciplines without complex welding or specialized tools.
Understanding Your Steel Gong Target Stand Needs
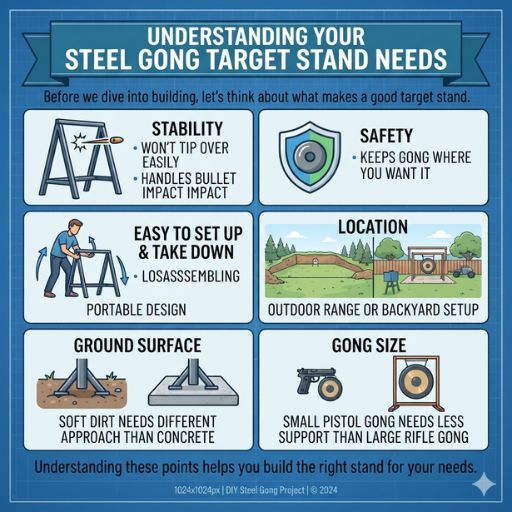
Before we dive into building, let’s think about what makes a good target stand. It’s not just about holding up the gong. It needs to be stable.
This means it won’t tip over easily when you shoot. It also needs to handle the impact of bullets. A well-built stand is safe.
It keeps the gong where you want it. It should also be easy to set up and take down.
Think about where you’ll use it. Are you shooting at an outdoor range? Is it a backyard setup?
The ground surface matters. Soft dirt needs a different approach than concrete. The size of your gong also plays a role.
A small pistol gong needs less support than a large rifle gong. Understanding these points helps you build the right stand for your needs.
Choosing the Right Materials for a Sturdy Build
The heart of a strong stand is its materials. For a DIY steel gong target stand, steel is the best choice. It’s durable and strong.
We’ll focus on common, easy-to-find steel parts. These are often called pipe fittings. They screw together, so you don’t need fancy welding skills.
You’ll want to use galvanized steel pipe and fittings. Galvanized means it has a zinc coating. This helps stop rust.
This is important for outdoor use. The main parts you’ll need are:
- Pipe: Standard black iron or galvanized steel pipe. Sizes like 3/4 inch or 1 inch are good.
Longer pipes make a taller stand.
- Fittings: These are elbows, tees, and caps. They connect the pipes.
- Base pieces: These spread out the legs to make the stand stable.
- Top pieces: These hold the gong.
The gauge of the steel pipe is also important. Thicker pipe is stronger. For most pistol and .22 caliber rifle use, standard schedule 40 pipe is fine.
If you plan to shoot larger rifle calibers, consider schedule 80 pipe. It’s much thicker and can take more abuse. Always check the strength rating of the fittings too.
Most standard threaded fittings are made to match the pipe strength.
Designing Your Simple Steel Gong Target Stand
Let’s sketch out a basic design. The goal is simplicity and stability. A common design uses an ‘A’ frame or tripod base.
This spreads the weight and keeps it steady. We can build a simple rectangular base with legs that extend outwards.
Imagine a base frame made of pipes and ‘T’ fittings. From the sides of this frame, four legs will extend downwards. These legs will have elbows at the bottom.
They will point outwards to form a wide base. This wide stance is key to preventing tipping. The height of the stand will depend on how tall you make the vertical pipes coming up from the base.
On top, we need a way to hang the gong. A simple crossbar works well. This crossbar can be made from shorter pieces of pipe.
It connects to the top of the vertical pipes. You can then use S-hooks or chain to hang your gong from this crossbar. This allows the gong to swing freely when hit, which is ideal.
We can also add a top brace. This connects the tops of the legs. It adds extra strength.
It stops the legs from spreading too far. This design is modular. You can adjust the length of pipes to make the stand taller or wider.
My Own Stumbling Block: The Wobbly Stand Fiasco
I remember the first target stand I tried to build. It was supposed to be easy. I found some plans online.
They looked simple enough. I bought the pipes and fittings. I screwed everything together.
It looked okay in my garage. Then I took it to the range.
I hung my new steel gong on it. I took a shot with my .22 rifle. The gong moved.
The stand wobbled. I thought, “No big deal.” I took another shot. This time, a stray bullet hit the stand itself.
It wasn’t a direct hit, but it was close. The whole thing tilted precariously. I felt a surge of panic.
What if it fell over? What if it hit someone?
That day, I realized how important a truly stable design is. My first attempt was too narrow at the base. The connections weren’t as strong as they needed to be.
I learned that “simple” shouldn’t mean “weak.” I spent the rest of the day reconfiguring my stand. I added more bracing. I spread the legs wider.
It took more time, but the peace of mind was worth it. That experience taught me to prioritize stability above all else.
Essential Tools You’ll Need
You don’t need a full workshop for this project. Most of these tools are common for basic DIY tasks.
- Pipe Wrench: At least two. One to hold a fitting, one to turn it.
- Tape Measure: To make sure your pipe lengths are correct.
- Level: To ensure your stand sits evenly on the ground.
- Safety Glasses: Always protect your eyes.
- Gloves: To protect your hands from grease and sharp edges.
- Metal File: To smooth any rough edges on the pipe cuts.
- Marker: To mark pipes for cutting if you choose to cut your own. (Or you can have them cut at the store.)
Step-by-Step: Building Your Simple Steel Gong Stand
Let’s get building. We’ll aim for a stand with an ‘A’ frame base. This offers great stability.
Step 1: Gather Your Parts
This is where your shopping list comes in. For a medium-sized gong stand (around 3-4 feet tall), consider these parts. All are typically 3/4 inch galvanized steel pipe and fittings.
- Base:
- Four 18-inch pipes (for the base frame)
- Two 12-inch pipes (for the front base)
- Two 18-inch pipes (for the rear base)
- Four 3/4-inch ‘T’ fittings
- Two 3/4-inch 90-degree elbows (for the front feet)
- Two 3/4-inch 90-degree elbows (for the rear feet)
- Uprights:
- Two 36-inch pipes (for the main vertical legs)
- Two 3/4-inch 90-degree elbows
- Top Crossbar:
- One 24-inch pipe
- Two 3/4-inch ‘T’ fittings
- Gong Hanger:
- Two S-hooks or carabiners
- A short length of chain (optional, depending on your gong mount)
Remember, these are suggestions. You can adjust lengths based on your gong size and desired height.
Step 2: Assemble the Base Frame
This forms the stable foundation. Take two of your 18-inch pipes. Connect them using one ‘T’ fitting.
This makes a ‘T’ shape. Do this again for the other two 18-inch pipes. You now have two ‘T’s.
Next, take your two 12-inch pipes. Screw one into each side of one ‘T’ fitting. Attach the two 3/4-inch 90-degree elbows to the ends of these 12-inch pipes.
These will point outwards and down. This forms the front part of your base.
Now, take your two 18-inch pipes. Screw one into each side of the second ‘T’ fitting. Attach the two 3/4-inch 90-degree elbows to the ends of these 18-inch pipes.
These will also point outwards and down. This forms the rear part of your base.
Finally, connect the two ‘T’ fittings using one of your remaining 18-inch pipes. This creates the main rectangular frame of your base. The legs with elbows will extend from the sides.
Make sure all connections are snug. Do not overtighten yet; you might need to adjust.
Step 3: Attach the Uprights
Take your two 36-inch pipes. Screw one into the top opening of each ‘T’ fitting on your base frame. These are your main upright supports.
They should stand straight up.
Now, take your two 3/4-inch 90-degree elbows. Screw one onto the top of each 36-inch upright pipe. These elbows should be oriented so they point outwards, away from each other.
This is where your crossbar will attach.
Step 4: Add the Top Crossbar
Take your 24-inch pipe. Screw one of your remaining ‘T’ fittings onto one end. Then screw the other ‘T’ fitting onto the other end.
You should have a pipe with a ‘T’ on each side.
Now, take the open ends of the ‘T’ fittings. Screw them into the 90-degree elbows you attached to your uprights. You should now have a stable frame with a horizontal bar at the top.
This bar is where you will hang your gong.
Step 5: Final Tightening and Gong Hanger
Go back and tighten all the fittings firmly. Use your pipe wrenches. Make sure the stand is level.
Adjust the legs if needed so it sits flat on the ground. A wobbly stand is a dangerous stand.
Now, attach your S-hooks or carabiners to the sides of the top crossbar ‘T’ fittings. If your gong has a mounting bracket, you can loop chain through it and then attach the chain to the S-hooks. If your gong has holes, you can run a bolt through the hole and then attach a carabiner to the bolt.
Gong Hanging Options
How you hang your gong is important for its longevity and your shooting experience.
- Chain: Using chain allows the gong to swing freely when hit. This absorbs some of the impact energy. It also gives a satisfying clang and movement.
- Direct Mount: Some gongs have a welded bracket. This is usually designed to be bolted to a stand. Ensure the bracket is robust.
- Carabiners/Hooks: These make it easy to swap gongs or take them down for transport. Make sure they are rated for the forces involved.
Avoid rigid mounting that doesn’t allow any movement. This can put immense stress on the gong and the stand.
Real-World Scenarios and Adjustments
The beauty of this design is its adaptability. Think about common situations you might face.
Ground Conditions
If you shoot on soft ground, like a dirt field, your stand might sink. The outward-angled legs help, but they can still shift. You can add wider feet to the bottom of the leg elbows.
These could be small metal plates or even larger, flat washers. This spreads the weight further.
On hard surfaces like concrete, the stand is already quite stable. You might want to use some weight or sandbags on the base frame. This adds extra security, especially if you’re shooting heavier calibers.
It prevents any slight movement from vibration.
Gong Size and Caliber
For heavier calibers, like .308 or .223, the impact force is much greater. While schedule 40 pipe is okay for many uses, consider schedule 80. It’s thicker and significantly stronger.
This applies to both the pipes and the fittings.
If you’re shooting very large rifle calibers or magnum rounds, you might need an even more robust design. This could involve thicker pipe, a wider base, or even a welded steel frame for ultimate strength. However, for most common shooting activities, this threaded pipe design is perfectly adequate and very strong.
Caliber Considerations for Steel Targets
Pistol Calibers (.22LR, 9mm, .45 ACP): Standard steel targets (AR500 or similar) and this stand design are excellent. Little concern about stand integrity from bullet impact.
Rifle Calibers (.223/5.56, .308/7.62, 6.5 Creedmoor): AR500 steel targets are essential here. Ensure your stand is robust. Schedule 40 pipe is generally good.
Schedule 80 offers extra peace of mind.
Magnum Rifle Calibers (.300 Win Mag, .338 Lapua, etc.): These require heavy-duty steel targets (often 3/8″ or 1/2″ thick AR500 or harder). A very robust stand is needed, possibly welded steel. For this threaded pipe design, heavy bracing and potentially schedule 80 pipe throughout is advised.
ALWAYS check the manufacturer’s recommendations for your specific steel target.
Portability
This threaded pipe design is naturally somewhat portable. You can unscrew the sections for easier transport. However, if you plan to move it often, consider making the base section easily detachable from the uprights.
You could use larger ‘T’ fittings at the base connections. This allows you to break it down into smaller, manageable pieces.
For truly rapid setup and takedown, some people opt for quick-release clamps or bolts. However, for a simple, strong stand, threaded connections are reliable and cost-effective. Just be prepared to spend a few minutes assembling it at the range.
What This Means for Your Shooting Practice
Having a reliable steel gong target stand changes your shooting experience. You spend less time worrying about your equipment and more time focusing on your shots.
When It’s Normal
It’s normal for the stand to vibrate slightly after a hit. It’s normal for the gong to swing. It’s normal if you need to make small adjustments to the legs to get it perfectly level on uneven ground.
It’s also normal to need to tighten connections now and then, especially after many uses.
Minor scuffs or dents on the stand from stray impacts are also normal, especially if you’re not perfect with your aim. The galvanized coating might show some wear over time, but the steel itself will remain strong.
When to Worry
You should worry if the stand wobbles significantly or feels like it might tip over, even with no wind or vibration. If any of the fittings seem loose and won’t tighten properly, that’s a concern. Cracks in the pipe or fittings are a serious issue, though rare with standard pipe.
Any visible bending in the pipes, especially the uprights or crossbar, means it’s under too much stress. If a bullet directly hits a structural part of the stand and causes significant damage, inspect it very carefully before using it again. Safety is always the priority.
Quick Tips for Your DIY Stand
Here are some easy ways to make your stand even better.
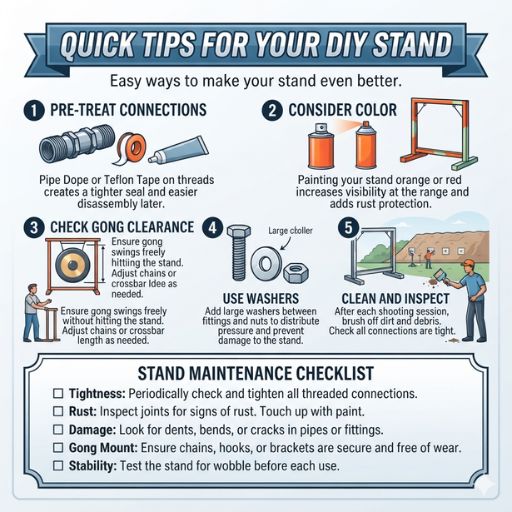
- Pre-treat connections: Before screwing parts together, apply a small amount of pipe dope or Teflon tape to the threads. This helps create a tighter seal and makes disassembly easier later.
- Consider color: Painting your stand a bright color like orange or red can make it easier to see at the range. This also adds another layer of protection against rust.
- Check gong clearance: Ensure your gong can swing freely without hitting the stand itself. Adjust the crossbar length or hanging chains as needed.
- Use washers: Add large washers between fittings and nuts (if your gong uses them) to distribute pressure and prevent damage.
- Clean and inspect: After each shooting session, give your stand a quick once-over. Brush off any dirt or debris. Check that all connections are still tight.
Stand Maintenance Checklist
- Tightness: Periodically check and tighten all threaded connections.
- Rust: Inspect for any signs of rust, especially at joints. Touch up with paint if needed.
- Damage: Look for any dents, bends, or cracks in the pipes or fittings.
- Gong Mount: Ensure chains, hooks, or brackets are secure and free of wear.
- Stability: Test the stand for wobble before each use.
Frequently Asked Questions
How tall should a steel gong target stand be?
The ideal height depends on your target and shooting position. For most rifle and pistol shooting, a height of 3 to 4 feet is common. This allows the gong to be at a comfortable eye level or slightly lower when standing or kneeling.
Can I use PVC pipe instead of steel?
No, absolutely not. PVC pipe is not strong enough to withstand the impact of bullets or the recoil of firearms. It would break and could cause serious injury.
Always use steel for your target stands.
What is AR500 steel and do I need it for my gong?
AR500 steel is a special type of hardened steel alloy designed to withstand repeated bullet impacts. For rifle calibers and even some high-powered pistol rounds, AR500 is highly recommended for your gong to prevent damage and spalling (fragments flying off).
How do I prevent the stand from tipping over?
A wide base is crucial. The ‘A’ frame or tripod design with outward-angled legs is very stable. Adding weight to the base with sandbags or rocks also helps immensely, especially on uneven or soft ground.
Is welding required for this type of stand?
No, this design uses standard threaded steel pipes and fittings. This means you can assemble it with basic tools like pipe wrenches. Welding is optional for those who want an even stronger or more custom design.
How do I clean my steel gong target stand?
For general cleaning, a stiff brush and soapy water work well. If you have rust spots, you can use a wire brush or steel wool to remove them. After cleaning, make sure to dry it thoroughly and consider applying a rust inhibitor or paint to protect the metal.
Conclusion: Your Reliable Shooting Companion
Building your own steel gong target stand is a rewarding project. You’ve learned how to choose materials, design a stable frame, and assemble it with simple tools. This guide provides the foundation for a strong, reliable stand.
It will serve you well on the range for years to come. Happy shooting!