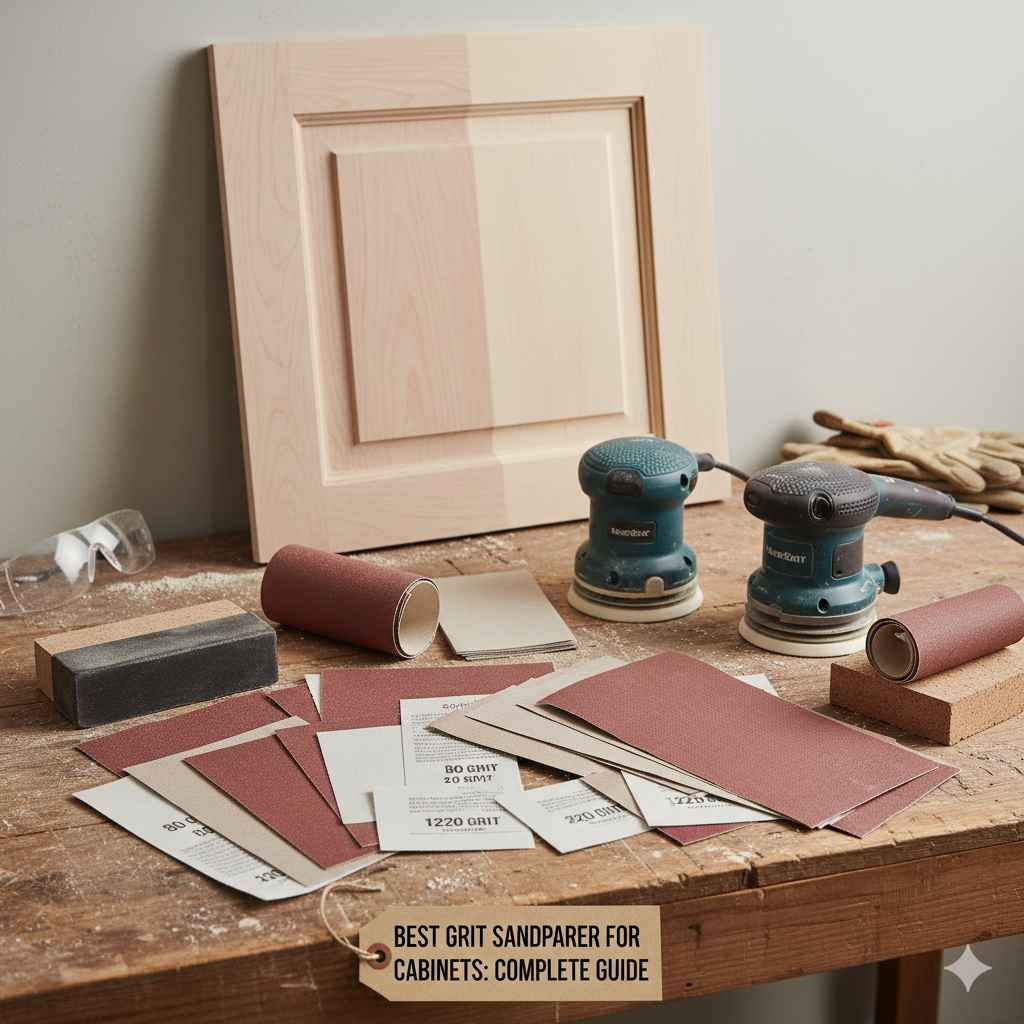
Choosing the right sandpaper grit for cabinets involves understanding different coarseness levels. Generally, you’ll start with a coarser grit (like 80-120) to remove old finishes or smooth rough spots, then move to medium grits (150-180) for general smoothing, and finally finish with fine grits (220+) for a super smooth surface ready for paint or stain. The exact grits depend on the cabinet’s current condition and desired final look.
What is Sandpaper Grit?
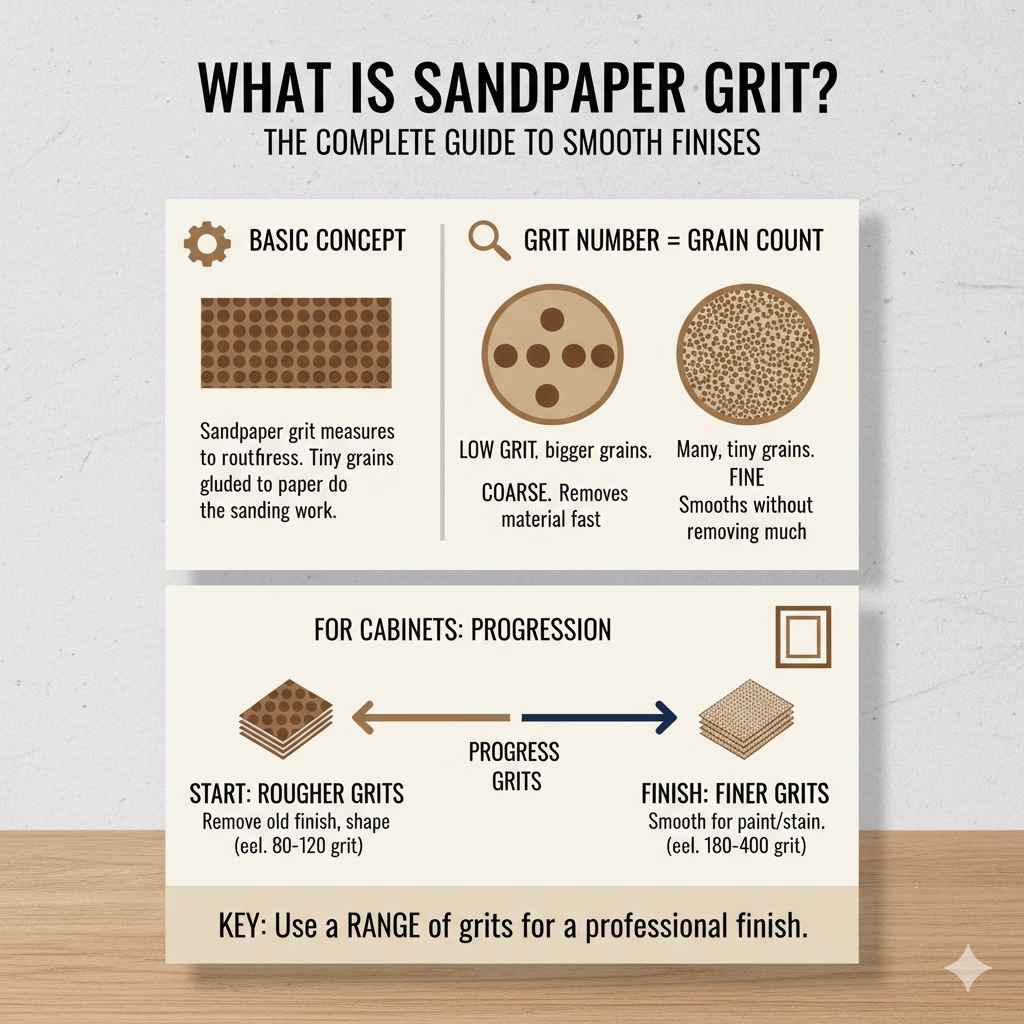
Sandpaper grit is basically how rough or smooth the paper is. Think of it like tiny grains stuck to the paper. These grains do the actual sanding.
The number of the grit tells you how many grains there are in one square inch. More grains packed in means the paper is smoother. Fewer grains packed in means the paper is rougher.
So, a low grit number, like 60, means fewer, bigger grains. This makes the sandpaper very coarse. It can take off a lot of material fast.
A high grit number, like 400, means many, tiny grains. This makes the sandpaper very fine. It smooths things out without removing much material.
For cabinets, you usually need a range of grits. You don’t just use one. You start with something rougher to get the job done.
Then you switch to finer grits to make it smooth. This is called “progressing through the grits.” It’s a key part of getting a nice finish.
Why Sanding Cabinets is Important
Sanding cabinets isn’t just about making them feel smooth. It’s a crucial step for a great final look. If you’re painting, sanding creates a surface that paint can stick to.
Without it, paint can peel or chip off later. It’s like trying to glue wet paint to a slick surface. It won’t hold.
If you’re staining, sanding makes the wood look even. It helps the stain soak in evenly. Without sanding, some spots might get too dark, and others might stay too light.
It can look splotchy. The grain of the wood might also stand up if you don’t sand it well. This feels rough.
Even if your cabinets are already finished and you just want to refresh them, sanding is helpful. It can dull down an old, glossy finish. This lets new paint or stain adhere better.
It also helps remove minor scratches or imperfections that mar the surface.
My Own Cabinet Sanding Mishap
I remember one time, I was so eager to give my old kitchen cabinets a facelift. I’d seen all these beautiful transformations online. I bought some new paint and thought, “How hard can sanding be?” I grabbed a medium-grit sandpaper, maybe around 150, figuring that would be good enough.
I didn’t think much about it. I just started rubbing. The dust flew everywhere.
I worked for a few hours, feeling pretty good about getting through it. Then I applied the primer, and that’s when I saw it. Little rough patches.
Uneven spots. It wasn’t the smooth surface I’d imagined. I felt a wave of disappointment wash over me.
I had to go back, buy finer grit paper, and do it all over again. It was a clear lesson: don’t skip steps, and understand your tools.
Understanding Grit Numbers: A Quick Guide
Grit Range: Coarse (20-80)
What it does: Removes old paint, varnish, heavy damage, or reshapes wood.
Use on cabinets: Sparingly. Only for removing thick finishes or fixing major flaws.
Grit Range: Medium (100-180)
What it does: Smooths out rough surfaces, removes minor imperfections, preps for finer grits.
Use on cabinets: Good for initial sanding after heavy removal or for general smoothing.
Grit Range: Fine (200-400)
What it does: Creates a very smooth surface, prepares for stain or paint, polishes.
Use on cabinets: Essential for a professional, smooth finish.
Grit Range: Very Fine (400+)
What it does: Buffing, polishing, between coats of finish.
Use on cabinets: For the final polish or between coats of clear finish.
Choosing the Right Grit for Different Cabinet Conditions
The best sandpaper grit for your cabinets really depends on what you’re starting with. Are your cabinets bare wood? Do they have old paint?
Are they already stained but need a refresh? Each situation calls for a different approach.
If you have bare wood cabinets that are a bit rough or have saw marks, you might start with a 80 to 100 grit sandpaper. This will quickly smooth out those imperfections. Then, you’ll move to a 150 grit to refine the surface.
Finally, you’ll use a 220 grit to get it ready for finishing. You’ll want to progress smoothly through these grits.
If your cabinets have an old, flaky paint job, you’ll need to strip that first. For stripping, a 60 or 80 grit sandpaper might be necessary. This is aggressive.
It takes off that old paint quickly. After you get the bulk of the paint off, you’ll need to smooth what’s left. That’s when you’d move to a 100 grit, then 150 grit, and finish with 220 grit.
For cabinets that are already finished, maybe stained or painted, and you just want to scuff them up for a new coat, you can start with a finer grit. A 150 grit might be enough to just lightly abrade the surface. If the existing finish is in pretty good shape, you might even start with a 180 or 220 grit.
The goal here isn’t to remove material, but to create a bit of “tooth” for the new finish to grab onto.
Think of it like this: you need to start rough enough to do the job, but not so rough that you create deep scratches you can’t sand out later. Each step should remove the scratches left by the previous, coarser grit.
Common Sandpaper Grits for Cabinet Refinishing
When Starting From Scratch (Bare Wood):
- 80-100 Grit: For initial smoothing of rough wood.
- 150 Grit: To remove scratches from the coarser grit.
- 220 Grit: For a final smooth surface before primer or stain.
When Refinishing (Over Existing Finish):
- 120-150 Grit: To scuff up the old finish for adhesion.
- 180-220 Grit: For a smoother finish, especially before painting.
Types of Sandpaper
It’s not just the grit that matters. The type of sandpaper can also affect your results. Different materials are used for the abrasive grains, and the backing can vary.
Aluminum Oxide is the most common abrasive. It’s durable and works well on wood. It’s a good all-around choice for cabinets.
It keeps cutting for a good long while.
Silicon Carbide is sharper and more brittle. It’s good for hard surfaces and works well with water or oil for wet sanding. Wet sanding can create a very smooth finish and reduces dust.
It’s great for that final polish.
Garnet is a natural abrasive. It’s softer than aluminum oxide. It works well for fine sanding and gives a smooth finish.
However, it wears out faster.
The backing of the sandpaper can be paper or cloth. Paper-backed sandpaper is common and affordable. It’s good for most tasks.
Cloth-backed sandpaper is more durable and flexible. It’s better for sanding curves or edges. It also tends to last longer.
For cabinets, especially if you have some detailed areas, cloth-backed might be a good investment.
You’ll also see sandpapers labeled as “open coat” or “closed coat.” Open coat sandpaper has grains spaced farther apart. This helps prevent clogging, which is great when sanding soft woods or materials that produce a lot of dust. Closed coat sandpaper has grains packed more tightly.
This provides a more aggressive cut and a smoother finish on harder materials.
Progressing Through the Grits: The Key to Smoothness
This is where many DIYers stumble. They think one grit will do. But for cabinets, this step-by-step approach is crucial.
You start with a coarser grit to do the heavy lifting. Then you use a slightly finer grit to remove the scratches left by the first one. You keep doing this until you reach your desired smoothness.
Let’s say you start with 80 grit to remove old paint. The surface will feel rough, and you’ll see visible scratches. If you then went straight to stain or paint, those scratches would show.
So, you move to 120 grit. You sand in the same direction as the wood grain. This 120 grit paper is designed to remove the deeper scratches left by the 80 grit.
The surface feels a bit smoother.
Next, you’d use 180 grit. This paper removes the finer scratches left by the 120 grit. The wood starts to feel really smooth.
You can barely feel the grain anymore. For a painted finish, 180 grit might be enough to prep. But for a stained finish, you usually want it even smoother.
Finally, you’d use 220 grit. This paper creates a very fine, almost silky surface. It’s perfect for most paints and stains.
It ensures the finish goes on evenly and looks professional. Some people even go up to 320 or 400 grit for an ultra-smooth finish, especially for high-gloss applications or between coats of clear finish.
The golden rule here is: Never skip a grit. Each new grit must completely remove the scratches from the previous one. If you can still see or feel the old scratches, you need to go back. It might seem like extra work, but it saves you from having to fix a bad finish later.
The Grit Progression Chart for Cabinets
Step 1: Initial Removal / Heavy Sanding
- Grit: 60-80
- Purpose: Stripping old paint, varnish, or smoothing very rough wood.
- Look for: Signs of deep scratches.
Step 2: General Smoothing
- Grit: 100-120
- Purpose: Removing scratches from Step 1.
- Look for: Finer scratches, surface feels smoother.
Step 3: Prepping for Finish
- Grit: 150-180
- Purpose: Removing scratches from Step 2. Preparing for painting.
- Look for: Very fine scratches, surface feels almost slick.
Step 4: Final Surface Prep
- Grit: 220
- Purpose: Creating a perfectly smooth surface for stain or paint.
- Look for: No visible scratches, feels like silk.
Step 5 (Optional): Between Coats / Extra Smoothness
- Grit: 320-400+
- Purpose: Smoothing between coats of finish, polishing.
- Look for: Satin sheen, no dust.
Sanding Techniques for Cabinets
How you sand is just as important as the grit you use. For cabinets, consistency is key. You want to avoid creating uneven spots or rounding over edges too much.
Always sand with the grain of the wood. If you sand across the grain, you’ll leave noticeable scratch marks. These are hard to get rid of later.
Imagine drawing lines against the natural flow of the wood. They stand out.
Use a sanding block or an orbital sander. For flat cabinet doors and drawers, an electric orbital sander can save a lot of time and effort. Make sure it’s set to a low speed or oscillating setting if possible.
Don’t press down too hard. Let the tool do the work. Move it in steady, overlapping strokes.
For detailed areas, like the edges or routed designs on cabinet doors, you might need to use smaller sanding blocks, folded sandpaper, or even sanding sponges. Sanding sponges are great because they conform to curves and edges.
When you’re done sanding with a grit, it’s important to clean off the dust thoroughly before moving to the next grit. Use a vacuum with a brush attachment, then a tack cloth. Dust left behind can get caught in the next sandpaper grit, causing it to clog faster.
It can also get into your finish, making it look fuzzy.
Pay attention to the edges of your cabinet doors and drawer fronts. If you sand these too aggressively, you can wear them down, leaving a rounded or “beveled” edge. This can look unprofessional.
Try to keep your sanding pressure more even across the entire surface. For delicate areas, you might need to use your hand or a folded piece of sandpaper.
Essential Sanding Tools for Cabinets
1. Sandpaper:
Stock up on a variety of grits (80, 120, 150, 220). Get both sheets and possibly some discs if using an orbital sander.
2. Sanding Block:
A simple block of wood or rubber helps you apply even pressure. Great for flat surfaces and edges.
3. Orbital Sander:
A powerful tool for large, flat cabinet surfaces. Saves time and effort. Use with care.
4. Sanding Sponges:
Flexible and great for detailed work, corners, and curved surfaces. Available in different grits.
5. Tack Cloth:
Sticky cloth used to pick up fine dust particles after sanding. Crucial for a clean finish.
6. Vacuum with Brush Attachment:
To remove bulk dust before using a tack cloth.
What Happens If You Use the Wrong Grit?
Using the wrong grit sandpaper can lead to a few common problems. It’s usually either too coarse or not fine enough.
If you use sandpaper that’s too coarse for the job, you’ll remove material too quickly. You’ll also create deep scratches. These are much harder to sand out with finer grits.
You might find yourself needing to start over with a finer grit than you planned. Or worse, you might not be able to fully remove the scratches, and they’ll show up in your final paint or stain. This makes the finish look uneven and unprofessional.
It can also damage the wood itself, especially softer woods.
On the flip side, if you use sandpaper that’s not fine enough before applying your finish, your cabinets won’t be smooth. If you’re painting, the paint might not adhere well. It can look textured or bumpy.
If you’re staining, the stain won’t soak in evenly. You’ll end up with blotchy patches. The wood grain might even feel raised and rough to the touch.
This is because the finer sanding steps weren’t done.
I once saw a friend try to skip the 220 grit step before painting. He thought 150 grit was enough. His cabinets looked okay in the dim light of his garage.
But once they were installed and the kitchen lights were on, you could clearly see a faint grain texture under the paint. It wasn’t the smooth, flawless finish he wanted. It was a mistake that could have been avoided by just using that final, finer grit.
Consequences of Incorrect Grit Selection
Using Sandpaper Too Coarse:
- Issue: Deep scratches, material removal too fast.
- Result: Visible scratches under finish, wood damage, extra work to correct.
Not Sanding Fine Enough:
- Issue: Surface not smooth, poor finish adhesion.
- Result: Uneven stain absorption, bumpy paint texture, rough-to-touch finish.
Skipping Grits:
- Issue: Previous grit scratches remain.
- Result: Finish highlights imperfections, uneven look, requires re-sanding.
When is It Okay to Use Fewer Grits?
There are a few rare cases where you might not need to go through every single grit. These situations involve minimal surface work.
If your cabinets are already in beautiful condition, and you’re just planning to apply a clear coat or a very thin protective layer, you might be able to use fewer grits. For example, if you’re refreshing an existing, smooth varnish. You might just need to lightly scuff the surface with a 220 or 320 grit sandpaper.
The goal is only to create a slight dulling of the old finish so the new coat can adhere. You’re not trying to remove anything significant.
Another scenario is when dealing with very soft woods. Some woods are so soft that using aggressive grits can easily damage them. In these cases, you might start with a slightly higher grit than usual.
You’d still progress through grits, but perhaps from 120 to 180 to 220. You’d avoid the 60 or 80 grits unless absolutely necessary.
However, for most cabinet refinishing projects, especially when painting or staining, the full progression of grits is recommended. It ensures the best possible outcome. It’s better to be safe and go through the steps than to risk a finish that looks subpar.
When in doubt, always lean towards using a finer grit.
How to Prepare for Sanding
Before you even touch a piece of sandpaper, there are steps you need to take. Proper preparation makes the sanding process smoother and the results better.
First, remove the cabinet doors and drawers from their frames. This makes them easier to work with. Lay them flat on a protected surface.
Use old sheets, drop cloths, or cardboard. Sanding creates a lot of fine dust, and you don’t want that dust settling into the hinges or the cabinet boxes themselves.
If your cabinets have hardware like knobs or handles, remove them too. This prevents you from sanding over them or getting dust trapped in the screw holes. It also makes sure you can sand the entire surface of the door or drawer front evenly.
Clean the cabinets thoroughly. Use a good degreaser or a solution of warm water and mild dish soap. Kitchen cabinets can get greasy and grimy over time.
Any grease or dirt left on the surface will clog your sandpaper very quickly. It will also get ground into the wood, making it hard to remove later. Wipe them down with a damp cloth afterward to remove any soap residue.
Let them dry completely.
Ventilation is key. Sanding creates a lot of dust. Make sure the area where you are sanding is well-ventilated.
Open windows and doors if possible. Consider wearing a dust mask or a respirator, especially if you have allergies or are sensitive to dust. Fine dust can be harmful to breathe.
Inspect your cabinets closely. Look for any damage, loose veneer, or deep gouges. Address these issues before you start sanding.
You might need wood filler or glue for minor repairs. Sanding will not fix these problems; it will just highlight them.
Pre-Sanding Checklist for Cabinets
- Remove Doors & Drawers: Take them off the cabinet boxes.
- Remove Hardware: Unscrew knobs, handles, and hinges.
- Clean Thoroughly: Use degreaser or soap and water.
- Protect Work Area: Lay down drop cloths or cardboard.
- Ensure Ventilation: Open windows, use fans.
- Wear Protection: Dust mask or respirator recommended.
- Inspect for Damage: Plan for any necessary repairs (fill holes, glue veneer).
- Check for Gaps: Ensure doors and drawers are easy to work with.
When to Worry About Cabinet Sanding Results
Most of the time, issues with cabinet sanding are about getting a less-than-perfect finish. But sometimes, there are signs that something more serious might be wrong with the cabinet itself or the sanding process.
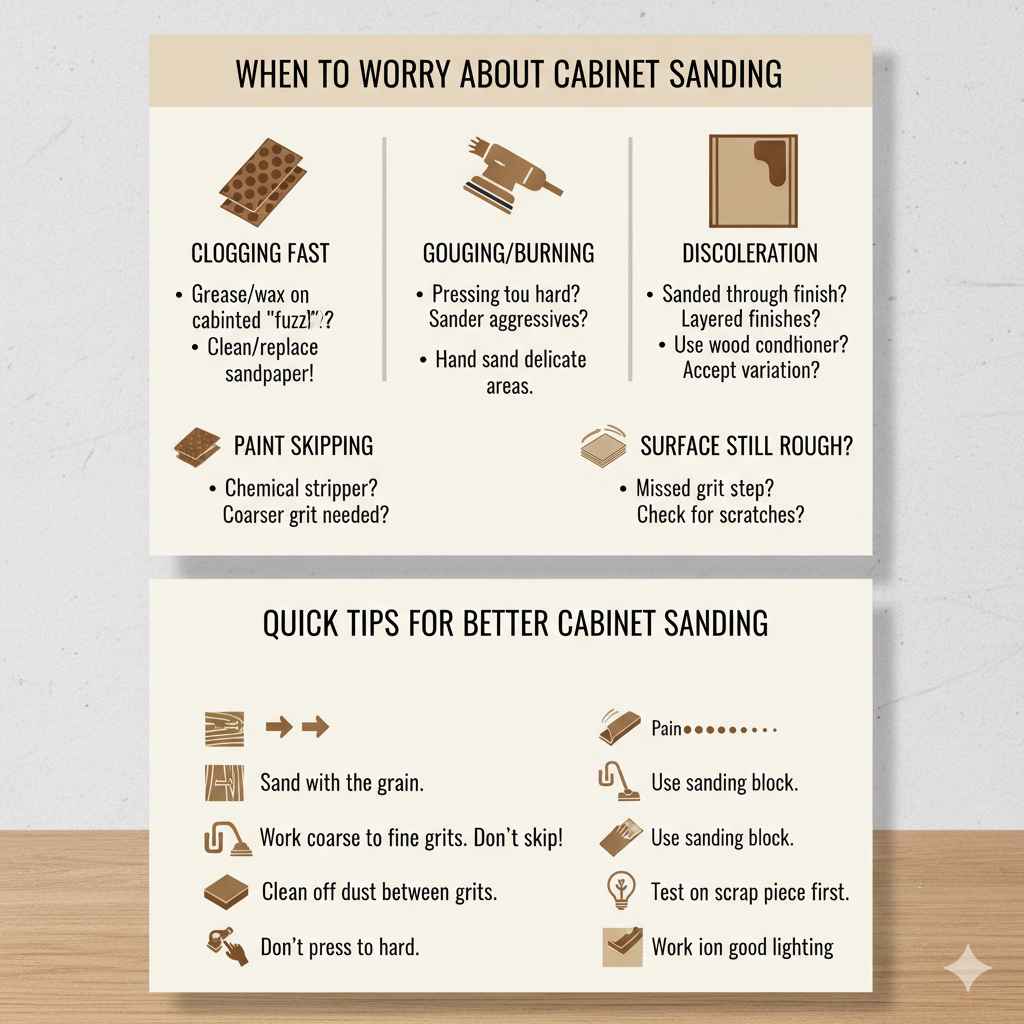
If you notice that your sandpaper is clogging very quickly, even with a new sheet, it could mean there’s still grease or wax on the cabinets. Or, you might be sanding a very soft wood that produces a lot of “fuzz.” Make sure you’re cleaning your sandpaper frequently (or replacing it). A clogged sandpaper won’t sand effectively.
If you’re using a power sander and it’s gouging or burning the wood, you’re pressing too hard, or the sander is too aggressive. Back off the pressure. Ensure the sander is moving constantly.
If it happens repeatedly, the tool might be faulty or too powerful for the delicate cabinet surface. Switch to hand sanding in that area.
Another red flag is when you sand a specific spot, and the wood looks significantly darker or discolored. This could mean you’ve sanded through the existing finish and into the wood in a way that exposes a different layer or reacts with the air. This is more common on older, layered finishes.
It might require a different approach, like using a wood conditioner before staining, or you might need to accept a bit of variation.
If you’re trying to remove old paint, and the sandpaper is just skipping over the surface without taking anything off, the paint might be too hard or too thin. You might need a chemical stripper first to loosen it. Or, you might need a much coarser grit to get it started.
It’s important to assess why the sanding isn’t working.
Finally, if after sanding with your finest grit (say, 220), the surface still feels rough or catches your fingernail, there might be an issue with the wood grain itself, or you might have missed a step in your grit progression. It’s worth checking if you’ve truly removed all the scratches from the previous grit.
Quick Tips for Better Cabinet Sanding
Here are a few easy tips to keep in mind:
- Always sand with the grain. This is the most important rule for a smooth finish.
- Work from coarse to fine grits. Don’t skip steps!
- Use a sanding block. It helps keep your sanding flat and even.
- Clean off dust between grits. A vacuum and tack cloth are your friends.
- Don’t press too hard. Let the sandpaper do the work.
- Test on a scrap piece first. If you’re unsure, try your sandpaper on a piece of scrap wood or the back of a door.
- Work in good lighting. You need to see what you’re doing clearly.
Frequently Asked Questions About Sandpaper for Cabinets
What is the best grit of sandpaper for priming cabinets?
For priming cabinets, a 150-220 grit sandpaper is usually best. This creates a surface that the primer can adhere to well. If you are priming over a fresh, smooth sanding job with 220 grit, you might even use 180 grit for the final prep before priming.
The goal is to create a smooth, slightly roughened surface without deep scratches.
Can I use sandpaper on painted cabinets?
Yes, you can use sandpaper on painted cabinets. If you are repainting, you’ll want to use a medium grit (like 120-150) to lightly scuff the existing paint. This helps the new paint stick.
If you are trying to remove old paint, you’ll need a coarser grit (like 60-80) to get the bulk of it off, then move to finer grits.
Do I need to sand between coats of paint on cabinets?
Yes, it’s generally a good idea to sand lightly between coats of paint on cabinets. Use a very fine grit sandpaper, like 320 or 400 grit. This smooths out any small imperfections or dust nibs that may have settled on the previous coat.
It also ensures a super smooth finish. Just be sure to wipe away all dust with a tack cloth before applying the next coat.
How often should I change my sandpaper grit for cabinets?
You should change your sandpaper grit when it stops cutting effectively. You’ll notice it starts to clog up with wood dust or the old finish. If you’re sanding a large area, you might need to switch to a new sheet every 15-30 minutes.
For smaller tasks, a sheet might last much longer. It’s better to use fresh sandpaper than to force a dull sheet, which can lead to an uneven finish.
Is it okay to use steel wool on cabinets instead of sandpaper?
Steel wool can be used for some light sanding or buffing, especially between coats of finish. However, for preparing raw wood or removing old finishes, sandpaper is generally more effective and gives you better control over grit levels. Fine grades of steel wool (like #0000) are good for final polishing, but they can leave behind fine metal particles that might rust if not cleaned properly.
For most cabinet refinishing, sandpaper is the primary tool.
What grit sandpaper should I use for oak cabinets?
Oak cabinets are quite hard. For oak, you can often start with a slightly coarser grit if needed, like 80 grit for heavy removal. Then progress to 120, 150, and finish with 220 grit.
Because oak has a prominent grain, ensuring you sand with the grain and use progressive grits is crucial to avoid a blotchy finish when staining.
Final Thoughts on Cabinet Sanding
Choosing the best grit sandpaper for your cabinets is about understanding the goal. You want a smooth surface for your finish to adhere to. This means starting with a grit appropriate for the current condition of your cabinets and steadily moving to finer grits.
Take your time, clean thoroughly between steps, and always sand with the grain. A little patience now will lead to beautiful, long-lasting cabinet finishes you’ll be proud of for years to come.