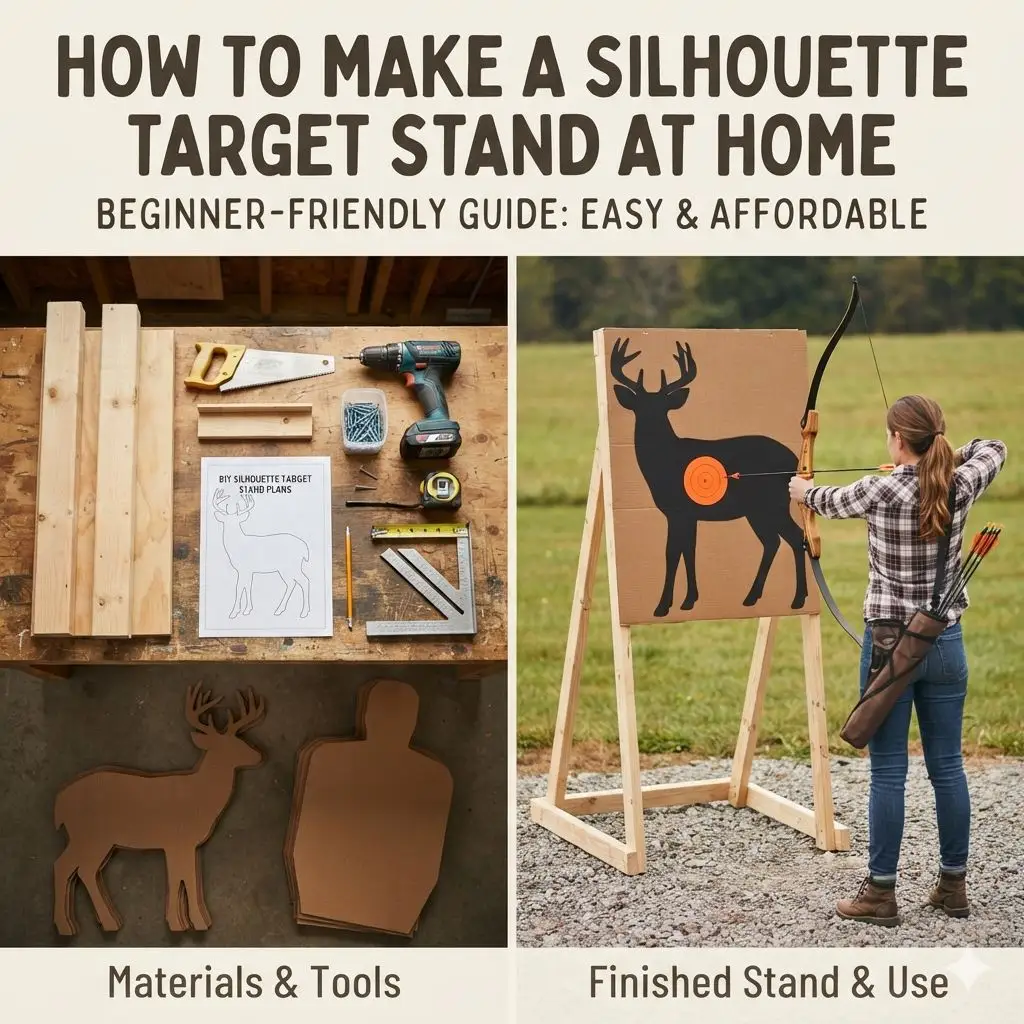
How To Make A Silhouette Target Stand At Home
Building your own target stand can feel like a puzzle. You want something sturdy. It needs to hold targets well.
And it should be safe to use. Many people struggle with getting this balance just right. It can be frustrating when your setup isn’t reliable.
This guide is here to help. We will walk through making a great target stand at home. We will use easy-to-find items.
You will learn about different designs. We’ll also talk about keeping things safe. By the end, you’ll know exactly how to build one.
The best homemade silhouette target stand is one that is stable, easy to set up, and made from readily available materials like wood or PVC pipe. It should securely hold your target size and withstand common weather conditions, providing a reliable practice setup for your shooting needs.
Understanding Silhouette Target Stands
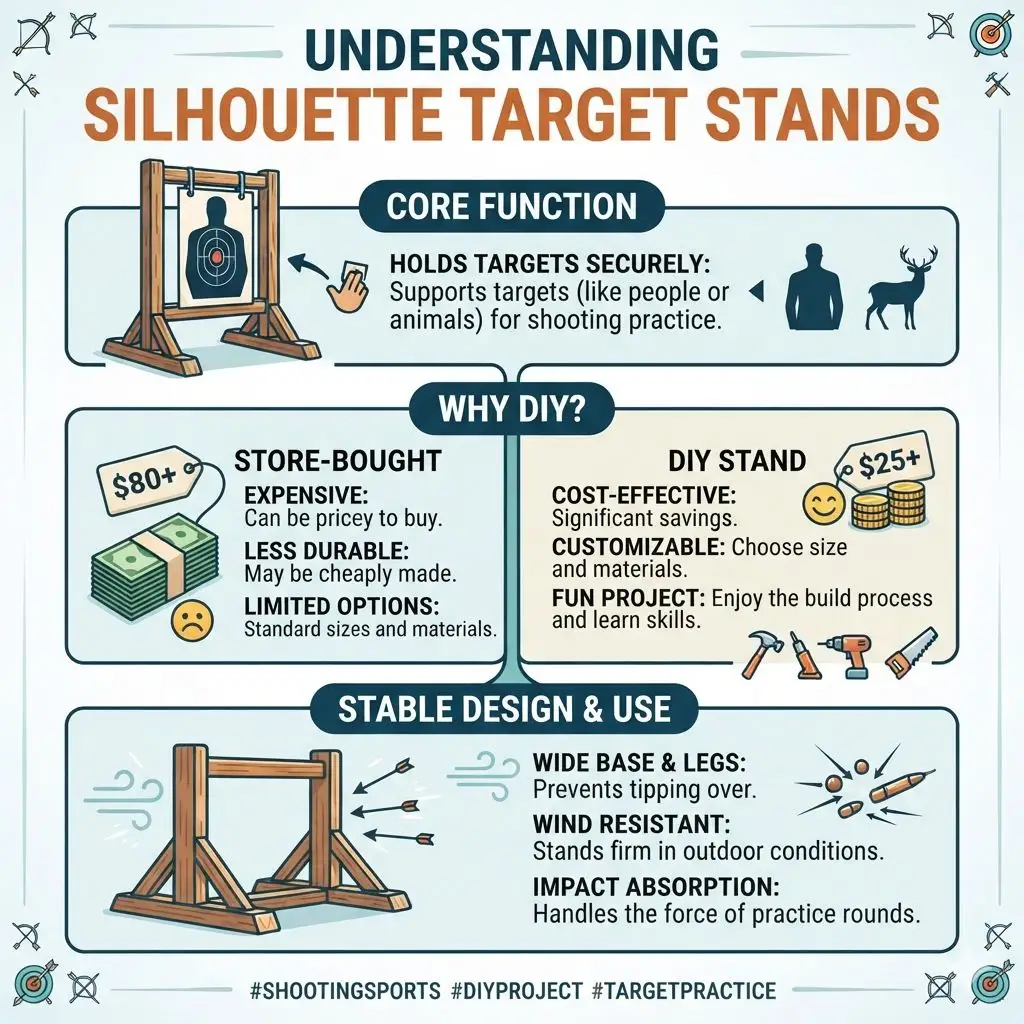
A silhouette target stand is basically a frame. Its main job is to hold your targets up. These targets are often shaped like people or animals.
You use them for shooting practice. A good stand keeps the target steady. It should not wobble or fall over.
This helps you get better aim. It also makes practice safer.
Why do people make their own? Store-bought stands can be pricey. Sometimes they aren’t built tough.
Making your own lets you control the size. You can pick the materials. You can make it fit your needs.
It’s a way to save money too. Plus, it’s a fun project.
These stands work by providing a stable base. Think of it like a mini easel for your target. The frame supports the target.
It often has legs or a wide base. This keeps it from tipping. The setup needs to be firm.
It should stand up to wind. It must also handle the impact of practice rounds.
My First Target Stand Fiasco
I remember my first attempt at building a target stand. It was years ago. I had just bought my first rifle.
I was eager to practice. I wanted to make a stand that was super cheap. I used some old scrap wood I found in the garage.
It looked okay at first. I even painted it bright orange so I wouldn’t lose it.
The first time I took it out, the wind picked up a bit. My carefully placed target started to lean. Then it just fell over.
I was shooting at a berm, so it wasn’t a huge danger. But it was so annoying! Every few shots, I had to go reset it.
It took away from my practice time. That cheap, flimsy stand taught me a big lesson. You need a solid base.
You need strong joints. Never skimp on stability.
That experience stuck with me. Now, I always overbuild a little. It’s better to have something too strong.
It is much safer that way. And it saves you frustration in the long run. My current stands are still simple.
But they are built to last. They don’t budge. That makes practice much more enjoyable.
And way more effective.
Essential Stand Features
Stability: The stand must not tip easily. Wide bases or heavy materials help.
Durability: It should hold up to weather. Use treated wood or strong PVC.
Target Support: It needs a way to attach your target securely. Hooks, clips, or staples work.
Portability: If you move it often, make it light enough to carry.
Safety: No sharp edges. Ensure it won’t collapse unexpectedly.
Design Options: Wood vs. PVC
When you think about making a target stand, two main materials come to mind. These are wood and PVC pipe. Both are great choices.
Each has its own pros and cons. Your choice might depend on what tools you have. It also depends on what materials you can find easily.
Wood stands are very common. You can find lumber at any hardware store. Wood is strong.
It is also easy to work with. You can cut it with basic tools. You can screw or nail pieces together.
A simple A-frame design works well with wood. Or you can make a simple rectangle. You can even paint wood.
This helps protect it from rain.
PVC pipe is another excellent option. It is lightweight. It is also very strong for its weight.
PVC is resistant to rot and water. This makes it great for outdoor use. You connect PVC pieces with glue or screws.
It’s a very clean build. You can make many shapes. A common PVC stand looks like an H.
Or it can be a simple frame.
For beginners, PVC might be a bit easier. You don’t need to cut wood precisely. You just cut pipes to length.
The connectors (fittings) do most of the work. Wood requires more carpentry skills. But if you have wood tools, it’s also very straightforward.
Wood vs. PVC Quick Scan
Wood:
- Pros: Strong, easy to cut, readily available, can be painted.
- Cons: Can rot if not treated, heavier than PVC, requires more tools.
PVC Pipe:
- Pros: Lightweight, water-resistant, strong, easy to assemble, affordable.
- Cons: Can degrade in direct sunlight over time, might need special glue.
Building a Simple Wood Target Stand
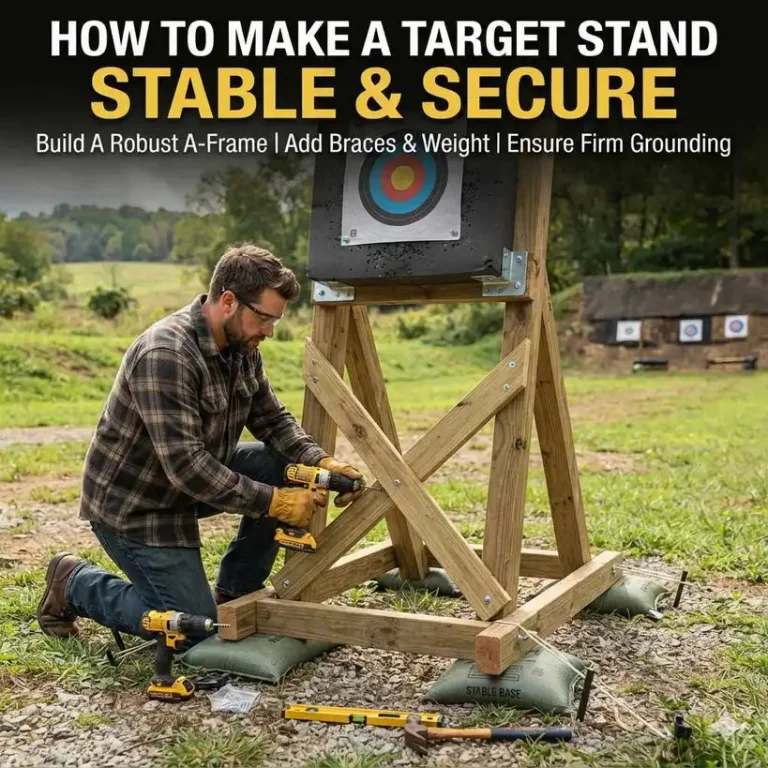
Let’s start with a simple wood design. This is a basic A-frame stand. It’s one of the most stable designs.
You can make it in an afternoon. You will need some basic tools and lumber.
Here’s what you’ll need. About six feet of 1×3 or 2×3 lumber is good. You will also need some screws.
Wood screws about 1.5 inches long are perfect. For tools, you need a saw. A hand saw works fine.
A drill with a screwdriver bit is helpful. You might also want a measuring tape and a pencil.
First, cut your lumber. You will need two pieces for the legs. Make them about 3 feet long.
Then, cut two more pieces for the legs. Make them about 2.5 feet long. These shorter pieces will be the back legs.
This difference in length creates the angle for the A-frame. It helps it stand up nicely.
Now, take your two 3-foot pieces. Lay them flat on the ground. They should form an upside-down V.
The top ends should touch or be very close. The bottom ends should be spread apart. This is the front of your stand.
Measure about 6 inches from the top of each leg. Mark these spots. Then, take your two 2.5-foot pieces.
These will be the back legs. Attach them to the top of the front legs. Use screws.
Make sure the legs angle backward. This creates the stable A-shape.
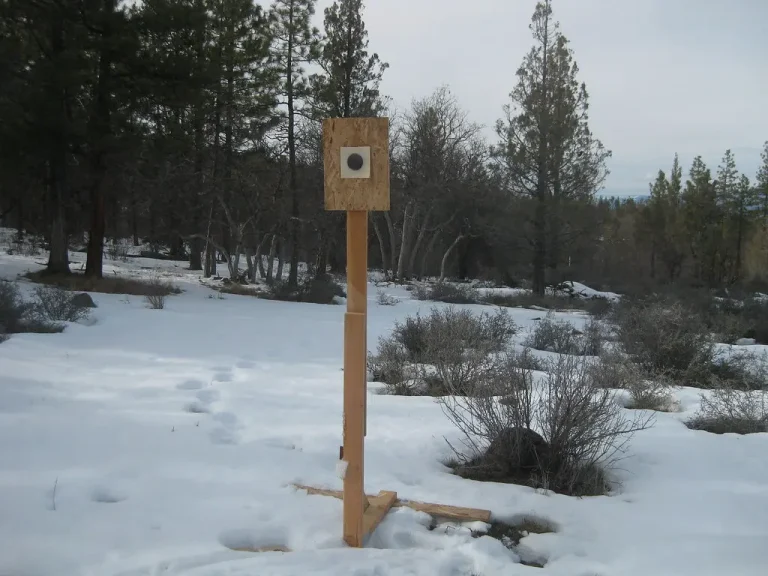
You need a crossbar. This will hold your target. Cut a piece of lumber about 18 to 24 inches long.
Attach this crossbar. Place it about halfway down the front legs. Screw it in well.
Make sure it is level. You can add more screws for extra strength. This crossbar is where you will staple or clip your targets.
To make it even sturdier, you can add a brace. Cut another piece of wood. Attach it diagonally between the two front legs.
Do this near the bottom. This helps prevent the legs from spreading apart. It adds a lot of stability.
Check that everything feels solid. If any parts feel loose, add more screws. You want it to be very firm.
This stand is now ready for your targets.
Wood A-Frame Stand – Quick Steps
- Cut two 3-foot boards for front legs.
- Cut two 2.5-foot boards for back legs.
- Attach back legs to front legs near the top, angling backward.
- Add an 18-24 inch crossbar midway down the front legs.
- Optional: Add a diagonal brace at the bottom of front legs.
- Screw all connections securely.
Crafting a PVC Pipe Target Stand
PVC pipe stands are often simpler to build. They don’t require as much cutting. The fittings do a lot of the work.
This design is very popular. It’s lightweight and easy to move. We’ll make a simple H-frame style stand.
It’s quite stable.
You’ll need a few feet of PVC pipe. 1-inch or 1.5-inch diameter pipe is good. You’ll also need some PVC fittings.
Specifically, you will need four 90-degree elbows and two T-connectors. You’ll also need two end caps. You can get these at any hardware or plumbing supply store.
You’ll also need a PVC pipe cutter or a small saw. And some PVC cement if you want a permanent bond.
Let’s break down the pieces. First, cut four equal lengths of pipe. These will be the legs.
About 3 feet each is a good starting height. Then, cut two shorter pieces. These will connect the legs.
About 18 inches each works well. Finally, cut two even shorter pieces. These will be the top crossbars.
Maybe 12 inches each.
Now, let’s assemble. Take one T-connector. Attach one 3-foot leg to the bottom of it.
Then, attach one 18-inch pipe to one side of the T. This will be a side arm. Attach one 90-degree elbow to the end of that 18-inch pipe.
Attach another 3-foot leg to the elbow. Repeat this for the other side.
So now you have two leg sections. Each has a T-connector at the top. And each has a leg coming off one side.
You connect these two sections. Use your two 12-inch crossbar pieces. Attach one end of a 12-inch pipe to the T-connector on one side.
Attach the other end to the T-connector on the other side. This forms the top part of your H. You can use PVC cement here.
It makes it permanent and strong.
Now you have the main frame. You have two upright legs. And a top bar connecting them.
To make it an H, you need the second crossbar. Attach the two end caps to the bottoms of your two 3-foot legs. This finishes the bottom of the H.
It adds stability. It also stops the pipe from sinking into soft ground.
The top crossbar is where you’ll attach your target. You can drill holes in it. You can then use zip ties or bungee cords.
These will hold your target. Or you can wrap tape around it. Then staple targets to the tape.
This PVC stand is very durable. It won’t rust or rot. It’s also easy to take apart if you need to transport it.
PVC H-Frame Stand – Assembly
- Legs: Four 3-foot pipes.
- Side Arms: Two 18-inch pipes.
- Top Bars: Two 12-inch pipes.
- Fittings: Two T-connectors, four 90-degree elbows, two end caps.
- Assembly: Connect legs, arms, and top bars using fittings. Use PVC cement for permanence. Add end caps to the bottom of legs.
Making the Stand More Versatile
Once you have a basic stand, you can make it better. You might want to hold different types of targets. Or you might need to adjust the height.
Small changes can make a big difference.
For wood stands, you can add eye bolts. Screw these into the crossbar. Then use carabiners or clips to hang targets.
This makes changing targets very fast. You can also add small hooks on the side. These are good for hanging cleaning supplies or tools.
For PVC stands, you can use zip ties. Drill small holes in the top bar. Thread zip ties through the holes.
You can then attach targets using these ties. You can also wrap the top bar with duct tape. This gives you a surface to staple targets to.
Or you can use bungee cords. They are great for holding paper targets.
What about height? For wood stands, you can make the legs longer. Or you can create a second set of shorter legs.
For PVC, you can simply use longer or shorter pipe pieces. Many PVC fittings allow you to create adjustable heights. You could build a frame that slides up and down.
Consider stability. If you shoot in windy areas, you might need to weigh down your stand. You can place heavy rocks on the base.
Or you can add sandbags. Some people attach sandbag loops to their stands. This is an easy way to add weight where you need it.
Versatility Upgrades
Adjustable Height: Use longer pipes or telescoping sections for different target sizes.
Target Attachment: Add eye bolts, clips, or hooks for easy target changes.
Stability Boost: Design in points to attach weights like sandbags.
Tool Storage: Small hooks can hold ear protection or a staple gun.
Real-World Considerations and Safety
Where will you use your target stand? This is important. If you shoot in a field, soft ground might be an issue.
The stand could sink. This can make it unstable. If you shoot on a hard surface, like concrete, you need to make sure the stand won’t slide.
Your shooting habits matter too. Are you shooting small caliber rounds? Or larger ones?
Larger rounds can cause more vibration. They might even damage the stand over time. Choose materials that can handle the impact.
Design and materials play a big role. If you use wood, make sure it’s treated. This stops it from rotting.
If you use PVC, keep it out of direct sun for long periods. UV rays can make it brittle. Consider painting PVC with special paint.
This can protect it.
User behavior is key for safety. Always check your backstop. Make sure there’s a safe area behind your target.
Never shoot at a target that is angled towards you. Ensure your stand is placed on level ground. Always wear eye and ear protection.
Know what is behind and around your target area.
When is a stand “safe”? It’s safe when it’s stable. It’s safe when it’s built well.
It’s safe when you use it correctly. Always inspect your stand before each use. Look for any loose screws.
Check for cracks in wood or PVC. Make sure the target is securely attached.
Safety Checklist
- Backstop: Always have a safe backstop behind your target.
- Level Ground: Place stand on flat, stable ground.
- Inspect Stand: Check for loose parts or damage before every use.
- Secure Target: Ensure your target is firmly attached.
- Clear Zone: Know what is around your target area. No stray shots!
- Protective Gear: Always wear eye and ear protection.
When Your Target Stand is “Good Enough”
How do you know when your homemade stand is ready? It’s ready when it meets a few basic tests. First, try to wiggle it.
Push it from different sides. It should feel solid. It shouldn’t sway or lean easily.
If it wobbles a lot, it needs more support.
Next, consider the target. Can it hold your target securely? Whether you use staples, clips, or ties, make sure the target doesn’t sag or fall.
A loose target can be a safety hazard. It can also ruin your practice. You want it to stay put.
Think about the environment you’ll use it in. If it’s often windy, your stand needs to be heavier or have a wider base. If you shoot from a distance, the target needs to be visible.
A stand that is too short might not work well. You might need to adjust the height.
A good stand doesn’t have to be fancy. It just needs to work. It needs to be reliable.
For most paper targets, a simple wood A-frame or PVC H-frame is perfect. They are easy to build. They are stable.
And they serve the purpose well.
Don’t overthink it. If your stand holds the target steady. If it doesn’t tip over in a light breeze.
And if it’s safe to use. Then it’s a good stand. You’ve built something useful.
You can start practicing. And you can do it with confidence.
Quick Fixes for Wobbly Stands
So, your stand feels a bit wobbly. What can you do? Don’t worry, most issues are fixable.
It usually comes down to two things: stability and reinforcement.
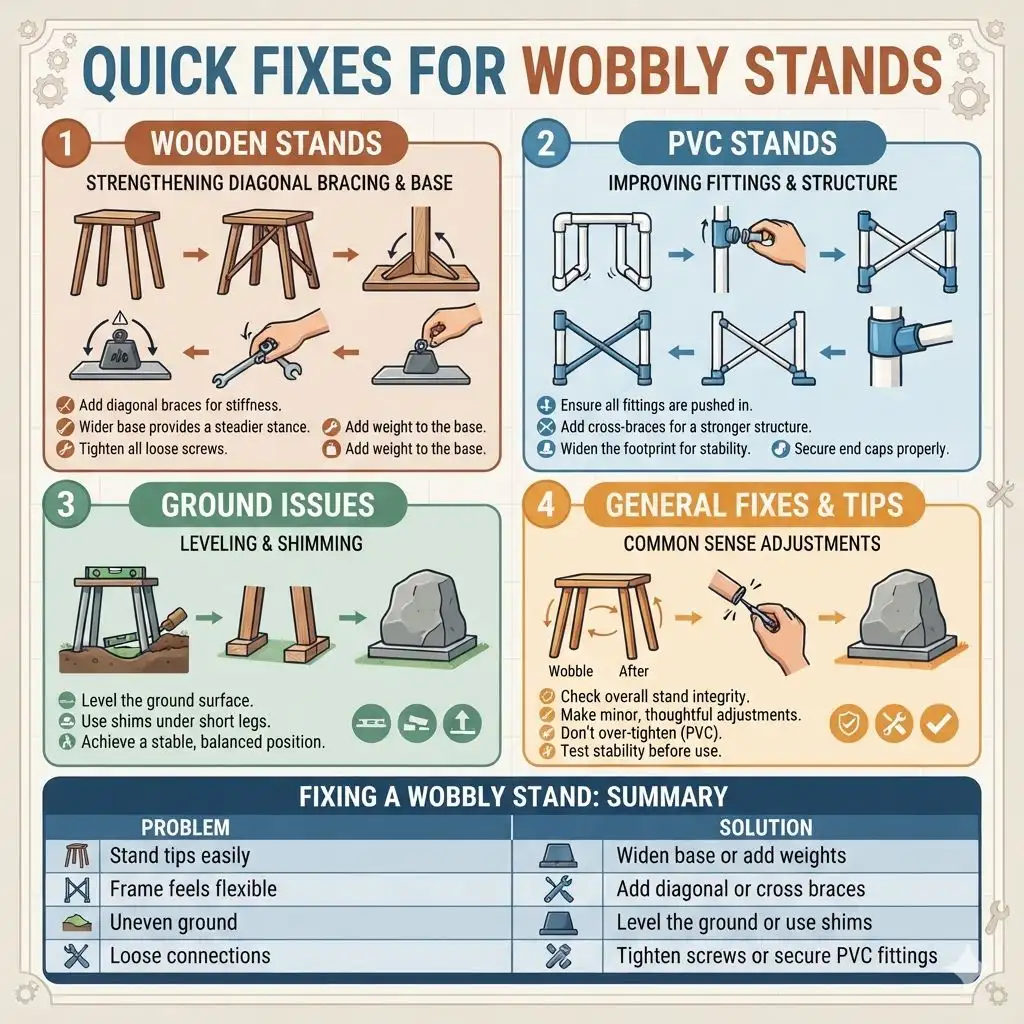
For wood stands:
- Add Bracing: This is the most common fix. Add diagonal braces. Connect legs that are far apart. Use screws to secure them. This makes the frame much stiffer.
- Wider Base: Spread the legs out more. A wider stance is always more stable.
- Check Screws: Are all screws tight? Sometimes a loose screw is the culprit. Re-tighten them.
- Add Weight: If the stand is light, it will move easily. You can add weight to the base. Small blocks of wood or metal plates can help.
For PVC stands:
- Secure Fittings: Make sure all fittings are pushed in all the way. If you used glue, ensure it’s dry and solid.
- Add Cross Braces: Just like wood, you can add more pipes. Connect the legs horizontally partway down. This creates a stronger structure.
- Wider Footprint: Design the base to be wider. Use longer pipes for the legs.
- End Caps: Make sure the end caps are secure. They help keep the legs from sinking.
Sometimes, the ground itself is the problem. If the ground is uneven, the stand will wobble. Try to level the ground first.
Or use shims under the legs. Small pieces of wood can make a big difference. A little adjustment can make your stand rock-solid.
Fixing a Wobbly Stand
Problem: Stand tips easily. Solution: Widen the base or add weights.
Problem: Frame feels flexible.
Solution: Add diagonal or cross braces.
Problem: Uneven ground. Solution: Level the ground or use shims.
Problem: Loose connections. Solution: Tighten screws or ensure PVC fittings are secure.
Frequently Asked Questions
What is the best material for a homemade target stand?
Wood and PVC pipe are both excellent choices.
Wood is strong and easy to work with. PVC is lightweight, water-resistant, and simple to assemble with fittings. Your choice might depend on tools available and personal preference.
How tall should a target stand be?
The height depends on your target size and shooting distance. For most paper targets and general practice, a stand around 3 to 5 feet tall is common. You want the target at a comfortable aiming height.
Can I use metal for a target stand?
Yes, metal can be very durable. However, it requires more specialized tools for cutting and welding. For a simple DIY project, wood or PVC is usually more accessible.
How do I attach targets to a stand?
Methods vary. For wood, staples, clips, or eye bolts work well. For PVC, zip ties, bungee cords, or duct tape can be used to attach targets.
Ensure the attachment method is secure.
How do I make my target stand more stable in wind?
Increase the base width of your stand. Add weight to the base using sandbags or rocks. Ensure all connections are tight and the frame is rigid.
A sturdy, well-braced stand will handle wind better.
Do I need to paint my wooden target stand?
Painting or sealing a wooden stand is highly recommended. It protects the wood from moisture, preventing rot and extending the stand’s life. Outdoor paints or stains work best.
Can a PVC stand break in the sun?
Prolonged exposure to direct sunlight can make PVC brittle over time. Using UV-resistant PVC or painting it with a special outdoor paint can help protect it from sun damage.
Bringing It All Together
Creating your own silhouette target stand is a rewarding project. It doesn’t require a lot of fancy skills. You can use common materials like wood or PVC pipe.
You can build something that is strong. It will hold your targets well. And it will be safe to use.
Remember to focus on stability. Make sure the stand won’t tip. Think about how you’ll attach your targets.
And always put safety first. Check your stand often. And be aware of your surroundings when you practice.