How To Make A Shooting Target Stand: Diy Tutorial
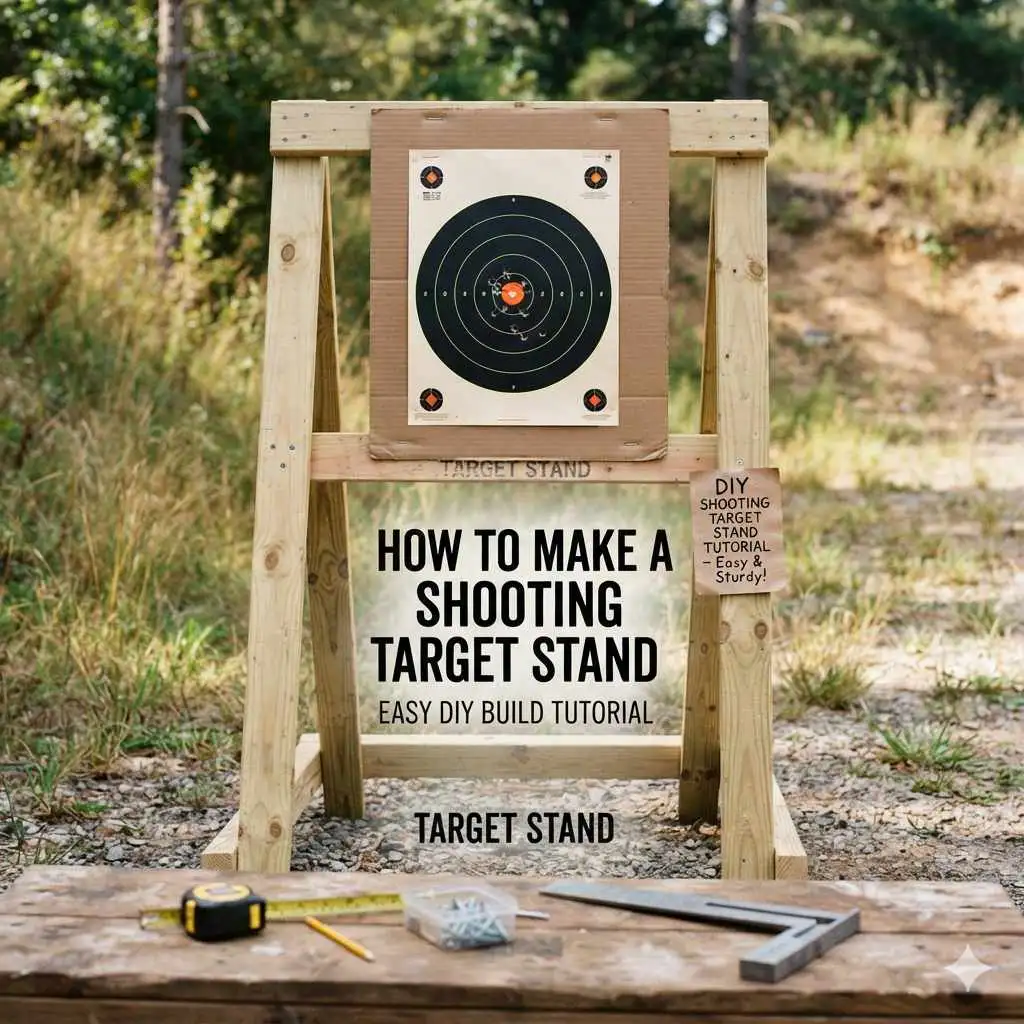
Making a reliable shooting target stand at home is a straightforward DIY project. You can create a durable and stable holder for your targets using basic materials and tools. This guide provides step-by-step instructions for a simple design that is both functional and cost-effective.
What Is a Shooting Target Stand?
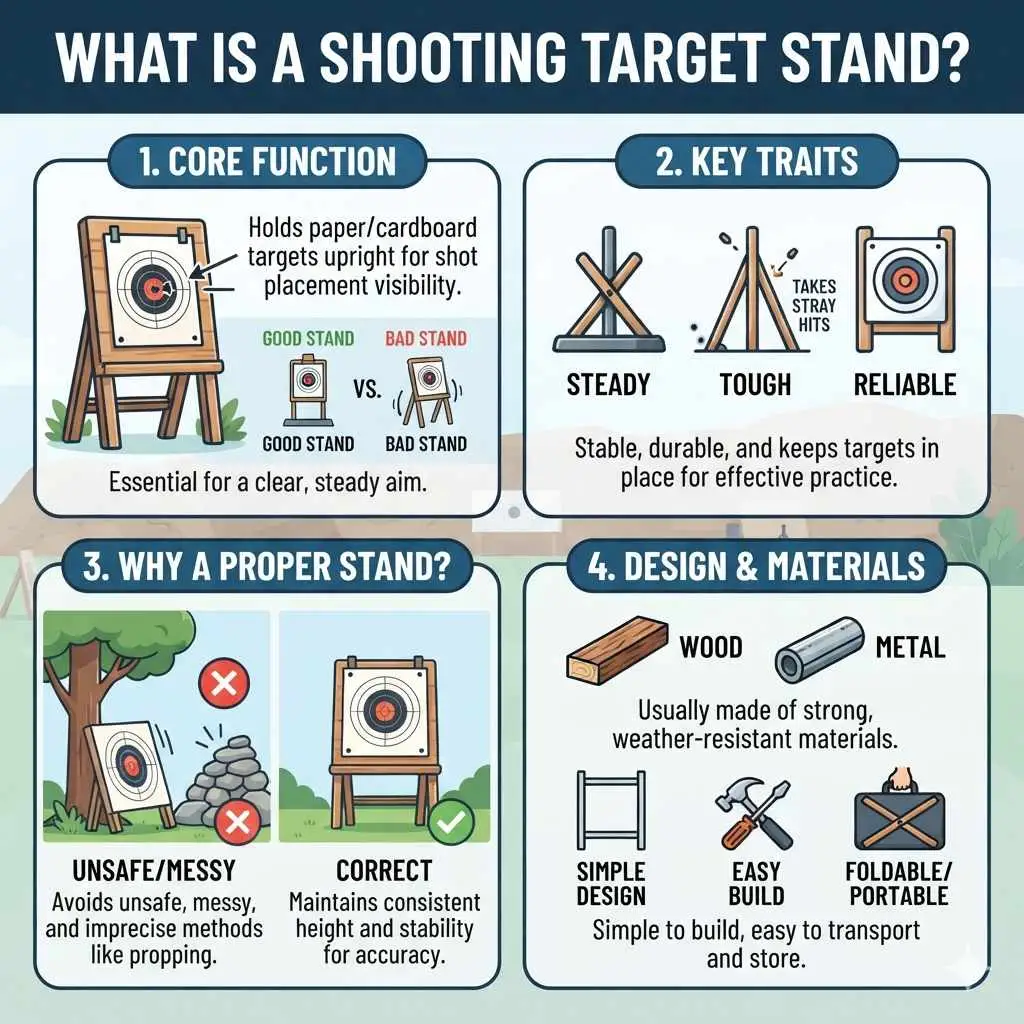
A shooting target stand is a frame. It holds your paper or cardboard targets upright. This lets you see where your shots are hitting.
It needs to be steady. It should not wobble when you shoot. It also needs to be tough.
Bullets could hit it by accident. Good stands keep your target in place. This means your practice is more useful.
They are key for any shooting range trip.
The main job of a target stand is simple. It gives you a clear spot to aim at. Without one, you’d have to prop your target up.
This could be against a tree or on a makeshift stand. Those methods are often messy. They can also be unsafe.
A proper stand keeps the target at a good height. It also keeps it still. This is important for accuracy practice.
Why is it made a certain way? It’s usually made of wood or metal. These materials are strong.
They can stand up to weather. They can also take a few stray hits. The design is often simple.
This makes it easy to build. It also makes it easy to move. Many designs let you fold them up.
This makes them good for travel.
My Own Target Stand Story
I remember the first time I went to a new outdoor range. I brought my trusty old targets. But I forgot to check my target holder.
It was a flimsy metal thing I’d bought cheap. The wind was blowing a bit that day. Every time I shot, the target would sway.
It was so frustrating. I couldn’t get a good sight picture at all. My shots looked bad.
But I knew I was better than that.
I felt a wave of annoyance. All my planning for the day felt wasted. I watched other shooters with their sturdy wooden stands.
They looked so stable. It made me realize I needed something better. I decided then and there I would build my own.
I wanted something that felt solid. Something I could trust, no matter the weather. That day taught me a big lesson about good gear.
I spent a few weeks looking at different designs online. Some were super fancy and complicated. Others looked too weak.
I wanted something in between. Simple to build, but built to last. I wanted to use wood.
It’s easy to work with. And it feels warm and natural. I sketched out a few ideas on paper.
Then I went to the lumber yard with my list.
Essential Target Stand Parts
Legs: These hold the stand up. They need to be strong. Wood like 2x4s or 4x4s works well.
Frame: This part holds the target. It’s often an ‘H’ shape or a triangle.
Braces: These add extra support. They stop the stand from tipping.
Fasteners: Screws or nails hold it all together. Use outdoor-rated ones.
Designing Your DIY Target Stand
Let’s talk about how to design this. We want something simple. It needs to be stable.
A very common and strong design uses two main pieces of wood. These look like legs. They form an ‘A’ shape when put together.
You’ll need two of these ‘A’ frames. Then you connect them with a crossbar. This crossbar holds your target.
For the ‘A’ frame, you can use 1×2 or 2×2 lumber. Let’s say each leg of the ‘A’ is about 3 feet long. You’ll cut two pieces like this for each frame.
Then you join them at the top. You can use a screw or a bolt. Make sure it’s strong.
This joint is key. It needs to swivel a bit. This lets you fold the stand.
The base of the ‘A’ frame should spread out. This makes it wider at the bottom. A wider base means more stability.
Think about the angle. About a 60-degree angle is good. It should stand up on its own.
You can add a small brace. This runs from one leg to the other, lower down. It stops the legs from spreading too far apart.
You will need two of these ‘A’ frames. They should be the same size. The distance between them will be how wide your target is.
Let’s say you want to hold a 12-inch wide target. Then the distance between your two ‘A’ frames should be about 12 inches. You connect them with a cross piece of wood.
This piece goes across the front of the ‘A’ frames.
Material List for a Simple Stand
Wood:
- Two pieces of 1×2 or 2×2 lumber, each 6 feet long (for the ‘A’ frames)
- One piece of 1×2 lumber, about 12 inches long (for the crossbar)
- Two small scrap pieces of wood (for braces, optional)
Hardware:
- Eight 1.5-inch wood screws (or outdoor-rated screws)
- One 2.5-inch bolt with two nuts and washers (for the pivot point)
- Two small eye hooks (optional, for holding targets)
Tools:
- Saw (hand saw or power saw)
- Drill with drill bits
- Measuring tape
- Pencil
- Sandpaper
Step-by-Step Building Guide
Let’s start building. First, take your two 6-foot long pieces of wood. These will be for one ‘A’ frame.
Measure 3 feet on each piece. Mark this spot. This is where the two pieces will meet at the top.
You can cut a slight angle on the ends. This helps them sit together nicely. Or, just join them flat.
Now, drill a pilot hole through both pieces at your 3-foot mark. Use a drill bit slightly smaller than your bolt. This makes it easier to screw.
You want to join them securely. Use your 2.5-inch bolt here. Put it through the hole.
Add a washer on each side. Then add a nut. Tighten it, but not too tight.
You want the ‘A’ to pivot a little.
Next, decide how wide you want the base of your ‘A’ to be. A good spread is about 2 feet at the bottom. Measure 2 feet apart on the floor.
Place the two legs of your ‘A’ frame onto these marks. Make sure they are even. Now, drill pilot holes.
Use screws to attach a small brace. This brace goes across the back. It stops the legs from splaying out too much.
Repeat these steps for the second ‘A’ frame. Make sure it’s exactly the same size. Accuracy here is important for stability.
Now you have two ‘A’ frames. They should look like open scissors. Set them up.
Decide how far apart you want them. This distance will match your target width. Let’s say 12 inches apart.
Take your 12-inch crossbar. Place it across the front of both ‘A’ frames. It should sit at a height that works for your targets.
About halfway up the ‘A’ frame legs is good. Drill pilot holes through the crossbar into the legs. Use two screws for each side.
That’s four screws total. This connects the two ‘A’ frames. Your stand should now stand on its own.
Adding Target Holders
Eye Hooks: For paper targets, you can screw two small eye hooks into the crossbar. Space them apart to match your target holes. Then you can hang your target from these.
Clips: Some people use spring clamps or binder clips to hold targets. These can attach directly to the crossbar or to the edge of the target.
Staples: For a very simple setup, you can use a staple gun to attach the target directly to the crossbar. Just be careful not to shoot the staples.
Making it Foldable and Portable
The design we’ve outlined is already somewhat foldable. The pivot point at the top of the ‘A’ frames allows them to fold inwards. When you’re done shooting, you can fold the two ‘A’ frames towards each other.
The crossbar will then be between the legs.
This makes it much easier to carry. You can then store it flat in your car. Or hang it up in your garage.
If you want it even more compact, you could make the crossbar removable. Instead of screwing it in, you could use a bolt and wingnut. This allows you to detach it completely.
For carrying, you might want to add a handle. A simple strap or a piece of rope tied to the top pivot point can work. It makes it easier to grab and go.
Or, if you use larger lumber like 2x4s, the stand itself might be a bit heavy to carry long distances without a good grip.
Quick Scan: Wood vs. Metal Stands
| Feature | Wood Stand (DIY) | Metal Stand (Purchased) |
| Cost | Low | Moderate to High |
| Ease of Repair | Very Easy | Difficult |
| Weight | Moderate | Light to Moderate |
| Durability | Good (if treated) | Good |
| Customization | High | Low |
Real-World Considerations and Stability
When you’re out at the range, conditions can change. Wind is a big factor. If it’s very windy, even a sturdy stand can be a problem.
The target itself can catch the wind. It acts like a sail. This can blow the target over.
Or make it swing wildly.
To combat this, make sure your ‘A’ frames have a wide stance. A wider base is always more stable. You can also add weight to the legs.
Some people put small sandbags or rocks on the bottom. This helps keep it from blowing over. Ensure your legs are firmly on the ground.
Avoid soft, muddy spots if possible.
Also, think about the surface you are shooting on. Is it flat and level? If not, the stand might sit unevenly.
This can make it unstable. You might need to adjust the legs. Or dig them in slightly for better grip.
Consider using longer legs for uneven terrain. Or legs that can be adjusted.
The type of target you use matters too. Heavy cardboard targets are better in wind than thin paper. Some targets have grommets.
These holes help them hang better from eye hooks. This reduces the chance of them flapping. Always check your target holder before you start shooting.
Make sure everything is tight and secure.
Tips for Outdoor Stability
Wide Stance: Spread the legs of your ‘A’ frames wider for a larger base.
Ground Grip: Ensure the legs are planted firmly. Dig them in a bit if the ground is soft.
Add Weight: Place small sandbags or rocks on the base of the legs.
Level Surface: Try to set up on flat, firm ground.
Secure Target: Use sturdy targets and secure them well to the crossbar.
When is a Target Stand “Good Enough”?
A good target stand is one that does its job. It holds your target steady. It doesn’t fall over.
And it doesn’t break easily. For most shooting needs, a simple wooden stand will be more than enough. It’s a good balance of cost and performance.
You don’t need a super complex design. Especially for casual plinking or target practice. What matters most is the stability.
A wobbly target makes it hard to tell if you’re improving your aim. Or if the target itself is moving. This is frustrating for any shooter.
Look for a design that is easy to set up. And easy to take down. You don’t want to spend a lot of time fiddling with it.
Especially when you’re ready to shoot. The ability to fold it makes it much more useful. It also makes it easier to store and transport.
Consider how many targets you plan to shoot. If you’re using very large targets, you might need a wider stand. Or one with a stronger crossbar.
But for standard paper targets, the simple design is usually fine. The key is building it well. Use good screws.
Make sure the joints are solid.
Quick Fixes and Enhancements
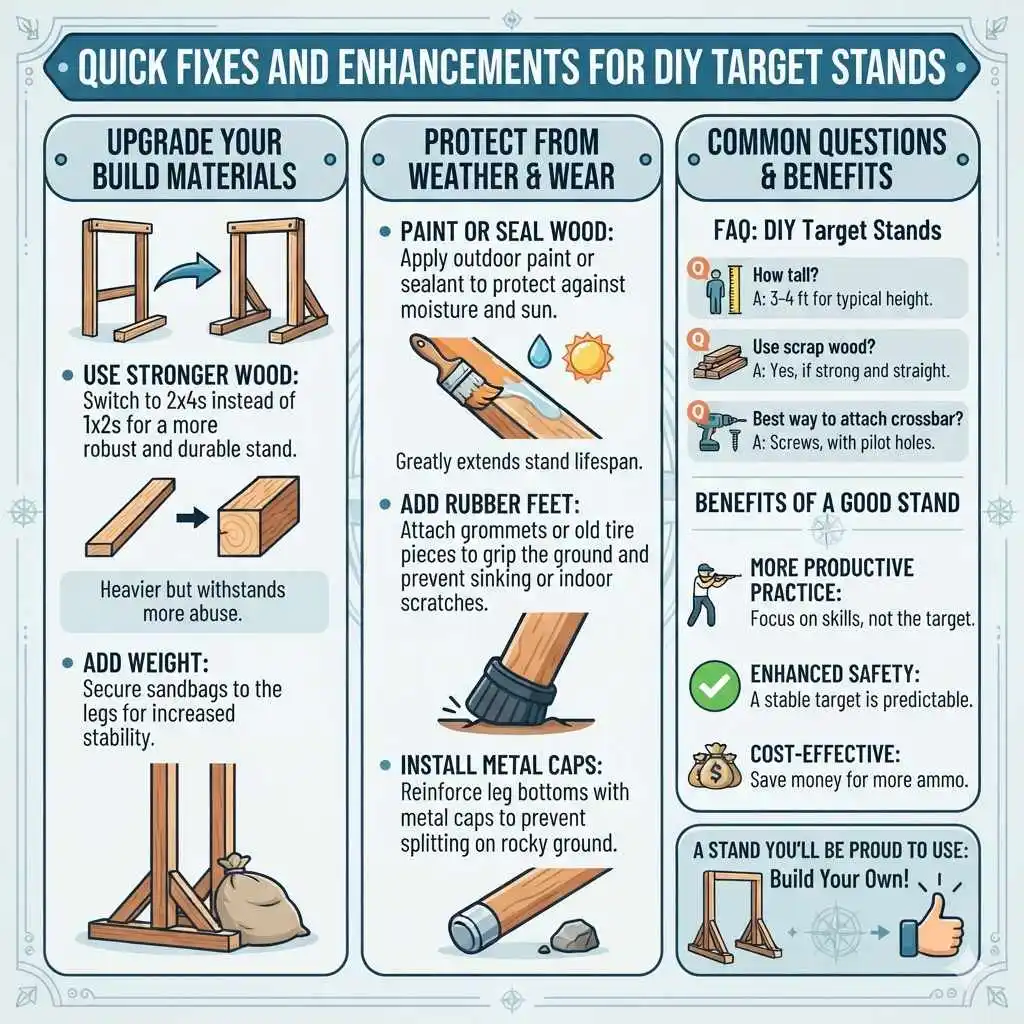
Sometimes you want to make your stand a little better. A simple upgrade is to paint or seal the wood. This helps protect it from the weather.
Especially if you leave it outside often. Use a good outdoor paint or sealant. This will make it last much longer.
You could also add rubber feet to the bottom of the legs. This helps them grip the ground better. It also stops them from digging into soft earth.
And it can prevent scratches on indoor ranges. Small rubber grommets or even pieces of old tire can work.
For a more permanent setup, you could use larger, stronger wood. Like 2x4s instead of 1x2s. This would make it much more robust.
It would be heavier too. But it would stand up to more abuse. It might be overkill for casual use, though.
If you shoot in areas with lots of rocks or hard surfaces, consider adding metal caps to the ends of the legs. This will prevent the wood from splitting or wearing down too quickly. It’s a small detail that can add a lot of life to your stand.
Common Questions About DIY Target Stands
Q: How tall should my target stand be?
A: It depends on where you are shooting. A good general height is around 3-4 feet. This puts the target at a typical shooting height.
Q: Can I use scrap wood?
A: Yes, if the wood is strong and not rotten. Make sure it’s straight and free of major cracks.
Q: What’s the best way to attach the crossbar?
A: Screws are usually best. Drill pilot holes first. Make sure the screws are long enough to go deep into the leg wood.
Q: How many targets can one stand hold?
A: This design holds one target across the main crossbar. You can add more crossbars if you need to hang multiple targets.
Q: How do I make it even more stable?
A: A wider base is key. You can also use heavier wood or add weight to the legs.
What This Means for Your Shooting
Having a good target stand makes a real difference. It means your practice sessions are more productive. You can focus on your shooting skills.
Not on keeping your target up. This saves you time and reduces frustration.
It also makes shooting safer. A stable target is less likely to move unexpectedly. This is important for everyone at the range.
You have more control over your shooting environment.
A DIY stand can also be very cost-effective. You can build a strong, reliable stand for a fraction of the cost of buying one. This frees up money for other shooting gear.
Or more ammo.
Overall, it’s a project that pays off. It’s a practical skill to learn. And it results in a useful piece of equipment.
You’ll be proud to use something you made yourself.
Frequently Asked Questions About DIY Target Stands
What is the primary function of a shooting target stand?
The main job of a shooting target stand is to hold a target upright and stable. This allows shooters to clearly see their shot placements and practice their accuracy.
Why is building your own target stand a good idea?
Building your own can save money, allow for customization, and result in a more durable stand than some store-bought options. It’s a rewarding DIY project.
What are the essential components of a simple DIY target stand?
Typically, it involves legs that form an ‘A’ shape, a crossbar to hold the target, and possibly braces for added stability. These parts are usually made from wood.
How can I make my DIY target stand more stable, especially outdoors?
Ensure a wide base for the legs, plant them firmly in the ground, add weight to the legs like sandbags, and try to set up on level terrain. Using heavier wood also helps.
Can I make a target stand that folds for easy transport?
Yes, by using a pivot point at the top of the ‘A’ frames, the stand can be folded inwards. Some designs also use removable crossbars for more compact storage.
What kind of wood is best for building a target stand?
Commonly used woods include pine, fir, or cedar. For greater durability, especially if exposed to weather, pressure-treated lumber can be a good choice, but ensure it’s dry before painting.
Final Thoughts on Your Target Stand Project
Creating your own shooting target stand is a fun and useful project. You can make it exactly how you want it. It doesn’t take too many fancy tools.
And the result is something you can use for years. Enjoy your trips to the range with your new, custom-built stand!