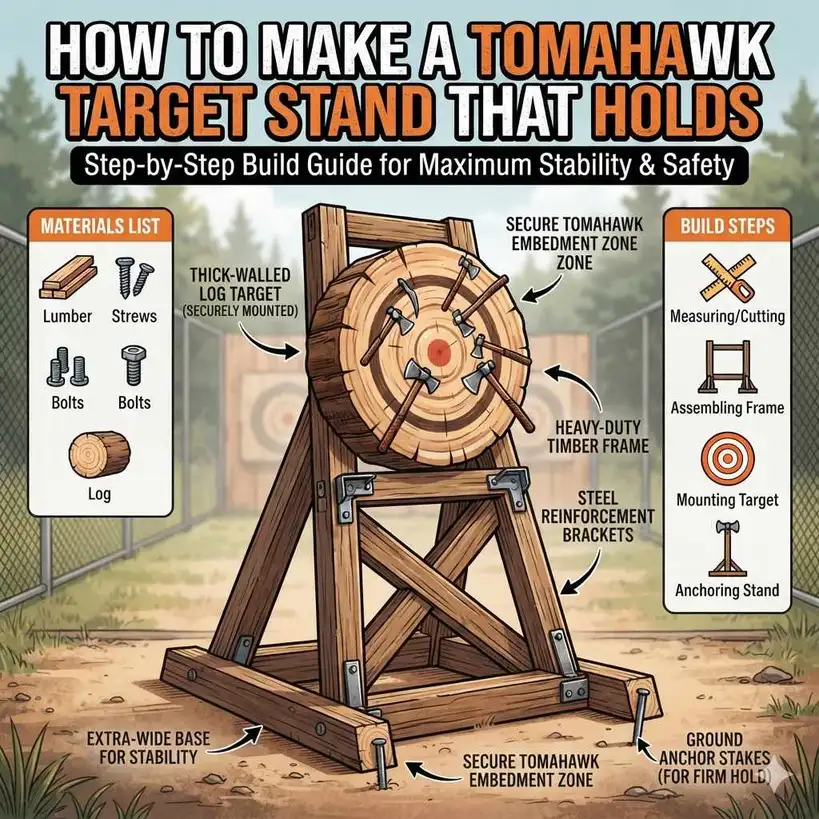
How To Make A Tomahawk Target Stand That Holds
Building something that stands up to a tomahawk throw can feel tricky. You want it to be safe. You also want it to last a long time.
Hitting the target just right is part of the fun. But if the stand wobbles or breaks, it takes away from the enjoyment. This guide will help you make a great stand.
A well-built tomahawk target stand should be stable, durable, and safe. It needs to withstand repeated impacts from thrown tomahawks without tipping over or falling apart. Proper design uses strong materials and secure assembly to ensure a reliable throwing experience for enthusiasts of all skill levels.
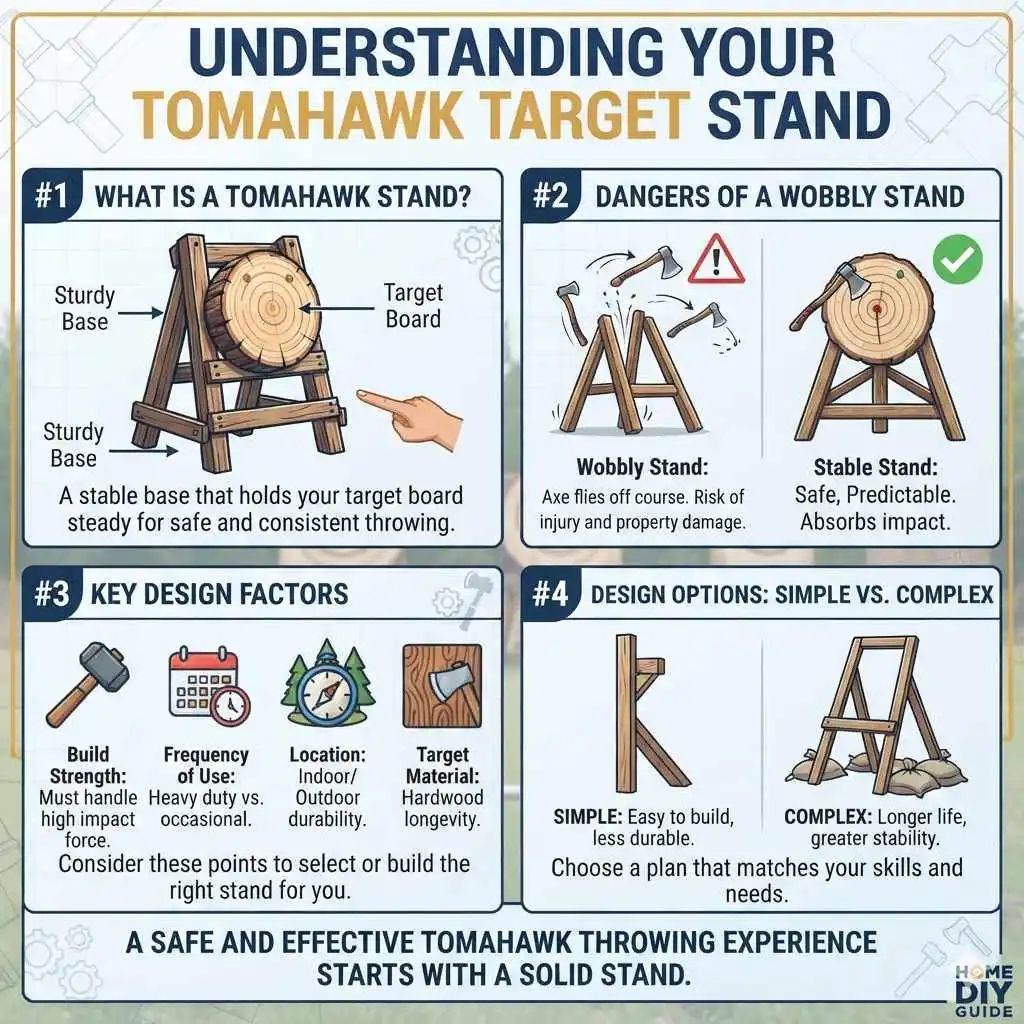
Understanding Your Tomahawk Target Stand
A tomahawk target stand is basically a base. It holds your target board steady. This is important for safe throwing.
A wobbly stand is dangerous. It can make the tomahawk fly off course. It could also fall over.
This could hurt someone. The stand needs to be strong. It needs to handle the force of the throw.
There are many ways to build one. Some are simple. Others are more complex.
The best design depends on your needs. How often will you use it? Where will you use it?
What kind of wood will your target be made of? Thinking about these things helps you pick the right plan. It ensures your stand is perfect for you.
My First Wobbly Stand Experience
I remember the first target stand I ever made. It was for my backyard. I was so excited to try throwing my new tomahawk.
I grabbed some scrap wood. I hammered some pieces together quickly. It looked okay at first.
But as soon as I threw the tomahawk, it rocked back. My heart jumped into my throat.
The second throw was worse. The stand started to lean. I quickly ran to catch it.
That’s when I knew I had made a big mistake. It was flimsy. It wasn’t built to last.
I felt a bit silly, but also worried. Safety is number one. I learned a lot that day.
A good stand needs more than just some wood.
Choosing the Right Wood for Your Stand
Sturdy Wood is Key: Look for strong, dense wood. Oak is a great choice. Pine can work, but pick the strongest, knot-free pieces you can find.
Cedar is good for outdoors because it resists rot. Avoid soft woods like fir if you can. They might not hold up to hard hits.
Designing for Stability
Stability is the most important part. A stable stand won’t move. It won’t tip over.
Think about the base. A wide base is much better. It spreads the weight out.
This makes it harder to tip. Legs that angle outwards also help a lot. They create a wider footprint on the ground.
Consider the height. The target should be at a comfortable throwing height. But if the stand is too tall and narrow, it can become unstable.
You need a good balance. Maybe the stand has a back support. This support stops the stand from tipping forward.
It adds a lot of strength. Think of it like a tripod. It’s hard to knock over.
Base Design Ideas
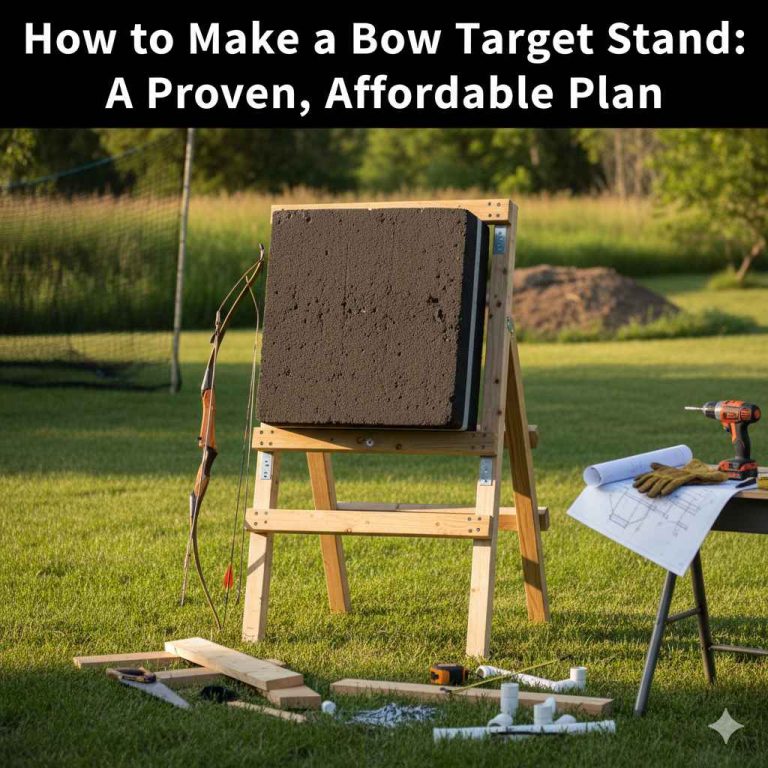
A-Frame Legs: This is a very common and stable design. The legs form an ‘A’ shape. This gives a wide stance.
Cross Braces: Adding horizontal pieces between the legs makes the stand super strong. They stop the legs from spreading apart.
Heavy Base: For extra stability, you could add weight to the base. Maybe a heavy wooden box at the bottom. Or even concrete feet.
But this makes it harder to move.
When you build the frame, make sure it’s square. Measure twice. Cut once.
Use good screws or bolts. These hold things together better than nails. Nails can come loose over time.
Screws and bolts give a stronger, lasting connection. Think about how the pieces join. Overlapping joints are stronger than butt joints.
Materials You’ll Need
Gathering your materials is the next step. You’ll need wood. Good quality lumber is worth the cost.
You’ll also need screws or bolts. Make sure they are strong and rust-resistant. Outdoor screws are best.
Wood glue adds extra strength to joints. You might also need some metal brackets for extra support.
Don’t forget tools. You’ll need a saw to cut the wood. A drill is essential for making holes and driving screws.
A measuring tape is a must. A level helps ensure everything is straight. Safety gear is also important.
Wear safety glasses when cutting or drilling. Gloves can protect your hands.
Quick Scan: Essential Hardware
- Wood Screws: 2.5-inch and 3-inch outdoor-rated screws.
- Carriage Bolts: For very strong connections. Use with washers and nuts.
- Wood Glue: High-quality, waterproof wood glue.
- Metal Brackets: L-brackets for reinforcing corners.
Having all your tools and materials ready makes the job much smoother. It saves time. It also stops you from having to run to the store mid-project.
This way, you can focus on building. You can build it right the first time.
Step-by-Step Assembly Guide
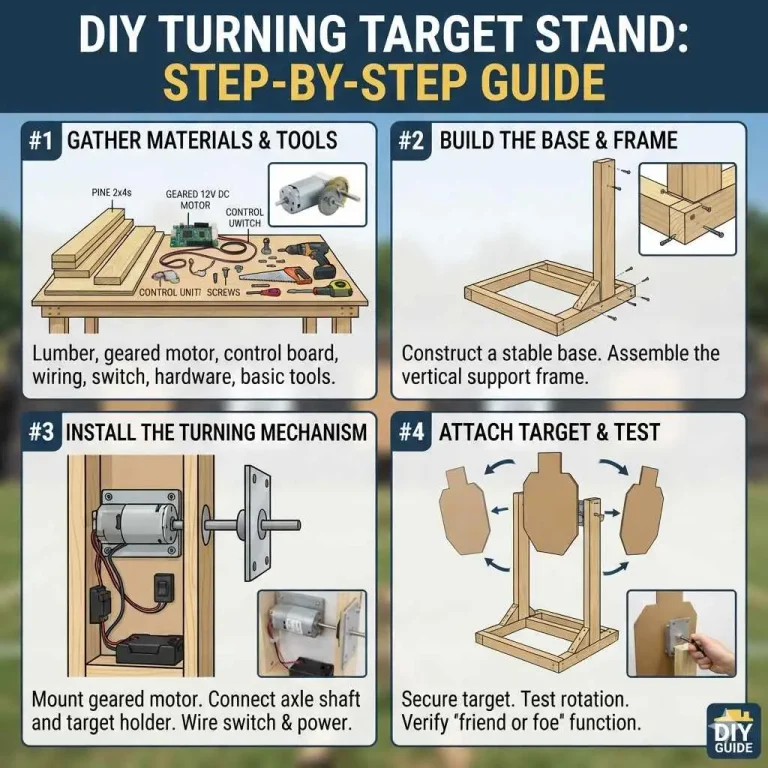
Let’s break down how to build a solid stand. We will focus on a common A-frame design. It’s strong and not too hard to build.
First, cut your wood. You’ll need four main legs. Two for each side of the A-frame.
Cut them to the same length. The angle at the top where they meet should be consistent.
Next, create the cross braces. These connect the two A-frames. They keep the stand rigid.
Measure the distance between your legs at the desired height. Cut pieces of wood to fit. Attach these braces securely.
Use screws and wood glue. Make sure they are level. This is important for stability.
Assembly Flow: Building the A-Frames
- Cut Legs: Cut four identical leg pieces.
- Form the ‘A’: Join two legs at the top with a screw or bolt. Create a consistent angle.
- Add Braces: Attach a cross brace between the two legs about a third of the way down from the top. Ensure it’s square.
- Repeat: Build a second identical A-frame.
Now, you need to connect the two A-frames. You’ll use more cross braces for this. These go across the back.
They link the two frames together. This forms a sturdy structure. Think about how the target will attach.
You might need a flat surface or some support pieces on the front. This is where your target board will sit.
For attaching the target board, you can create a simple frame. Or you can drill holes through the stand to mount the board. Make sure it’s centered.
It should be level. Check that the entire stand is sturdy. Give it a good push.
It should not sway much.
Attaching the Target Board
Method 1: Frame Mount: Build a smaller rectangular frame on the front of the stand. Screw your target board to this frame. This allows for easy target board replacement.
Method 2: Direct Mount: Drill holes through the main stand. Use long bolts to attach the target board directly. Use large washers on both sides to spread the load.
Method 3: Hook System: Install hooks or sturdy eye bolts on the stand. Then attach corresponding eye bolts to your target board. This makes swapping targets very quick.
Reinforcing for Durability
Even a well-built stand can use extra reinforcement. Especially if you plan to use it a lot. Or if you live somewhere with harsh weather.
Metal L-brackets are great for this. Place them at the joints where the legs meet the braces. They add a lot of strength.
Consider using bolts instead of just screws for key connections. Especially where the main legs join. Or where the cross braces attach.
Bolts with washers and nuts make a very strong, lasting joint. They resist loosening better than screws over time. They can handle more stress.
Myth vs. Reality: Stand Strength
Myth: Nails are good enough for building. Reality: Nails can loosen with impact. Screws and bolts offer much better long-term hold and stability.
Myth: A tall, thin stand is fine. Reality: A wider base and angled legs are crucial for preventing tip-overs.
Myth: Any scrap wood will work. Reality: Using strong, dense wood significantly increases the stand’s lifespan and safety.
If your stand will be outdoors, think about protection. Apply a good quality outdoor wood sealant or stain. This will protect the wood from rain and sun.
It stops rot and makes your stand last longer. Make sure to reapply it every year or two. Check for any signs of wear.
Real-World Contexts for Your Stand
Where will you use your tomahawk target stand? This matters a lot. If it’s for a backyard, portability might be important.
You might want to move it. Or store it away. A lighter design with fewer cross braces might work.
But you’ll still need good stability.
If it’s for a dedicated range, weight might not be an issue. You can build something heavier. Something more permanent.
You might even anchor it to the ground. For competitions, rules might dictate the design. Check those if you plan to compete.
They often have strict safety and design requirements.
Location Considerations
Backyard Use: Prioritize portability and ease of setup. Ensure it’s stable even on uneven ground.
Dedicated Range: Focus on maximum durability and stability. Anchoring to the ground is an option.
Travel/Mobile Use: Design for quick assembly and disassembly. Consider lighter but strong materials.
Think about the ground. Will it sit on grass? Concrete?
Gravel? Grass can be soft. A stand might sink into it.
This can make it uneven. You might need wider feet. Or a base plate.
Concrete is stable. But it can be hard. You might need rubber pads.
They reduce vibration.
What This Means for You
So, what’s the takeaway from all this? It means building a good tomahawk target stand isn’t hard. It just needs care and attention.
You need to think about stability first. Then durability. Then how you will use it.
Don’t rush the build. Take your time. Measure carefully.
A well-made stand protects you. It protects others. It lets you practice your aim.
It makes the whole experience more fun. You get that satisfying thud when the tomahawk sticks. It won’t wobble.
It won’t fall. It’s a solid, reliable piece of equipment.
Normal vs. Concerning Stand Behavior
Normal: Slight settling into soft ground. Minor movement if a throw is very off-center.
Concerning: Any rocking or tipping. Visible cracks or splitting wood. Loose joints.
The stand leaning significantly forward or backward.
If you see any concerning signs, stop. Fix them immediately. A damaged stand is a danger.
Don’t throw until it’s repaired. It’s better to be safe than sorry. Your practice is important, but safety is more important.
Always check your stand before you start throwing.
Quick Fixes and Tips for Your Stand
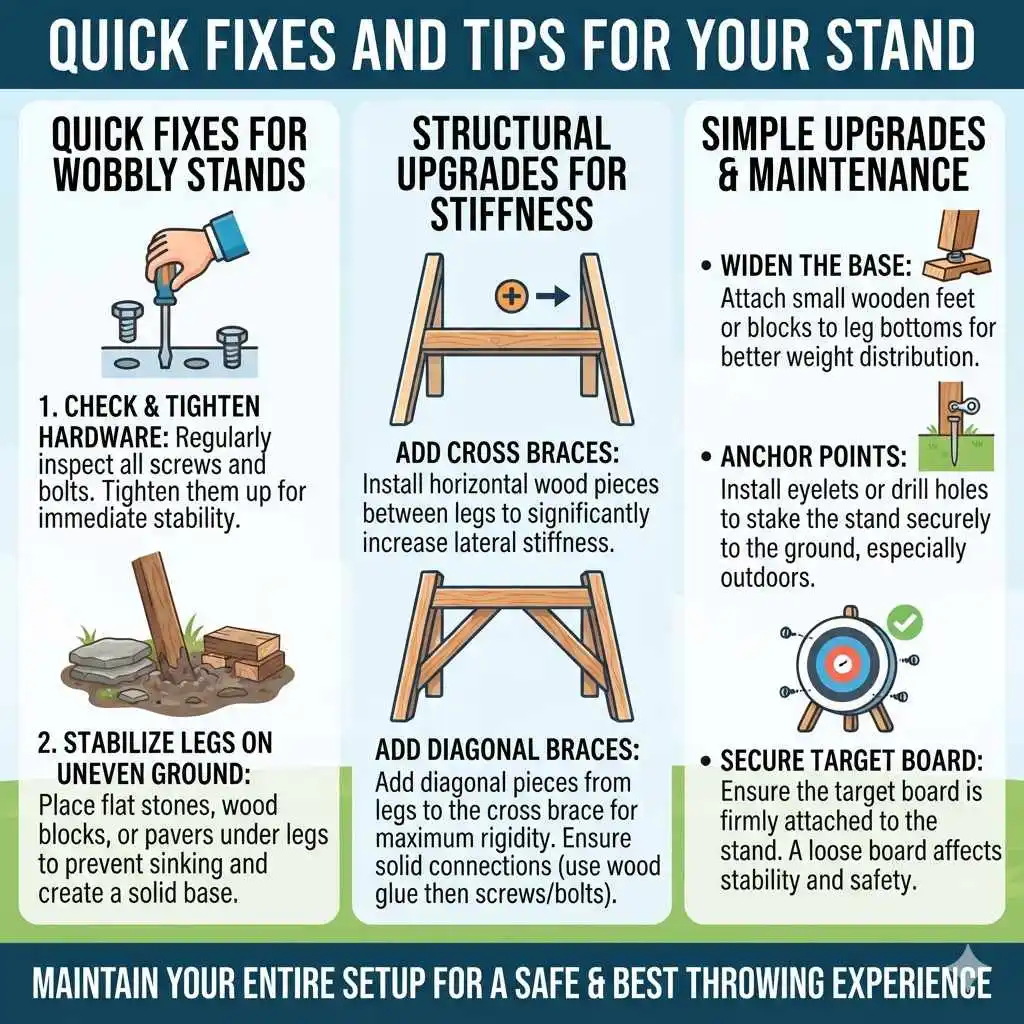
If your current stand is a bit wobbly, here are some quick ideas. First, check all the screws and bolts. Tighten them up.
Sometimes, that’s all it needs. If the legs are sinking into the ground, try placing flat stones or wood blocks under them. This makes a more stable base.
You can add cross braces. If your stand only has legs, adding a horizontal brace between them will make it much stiffer. You can also add diagonal braces.
These go from a leg to a cross brace. They add a lot of rigidity. Make sure all your connections are solid.
Use wood glue. Then add screws or bolts.
Simple Upgrades for Stability
- Tighten Hardware: Regularly check and tighten all screws and bolts.
- Add Braces: Install new cross or diagonal braces where needed.
- Widen the Base: Attach small wooden feet to the bottom of the legs.
- Anchor Points: If possible, add eyelets or holes to stake the stand to the ground.
Don’t forget about the target board itself. If the board is loose or damaged, it can affect the stand. Make sure your target is attached securely.
A loose board can cause the stand to react more to hits. Keep your entire setup in good shape. This ensures the best and safest throwing experience.
Frequently Asked Questions About Tomahawk Target Stands
What is the best wood to use for a tomahawk target stand?
Strong hardwoods like oak or maple are ideal for durability. Good quality pine or cedar can also work well if they are dense and free of knots. Avoid very soft woods.
How tall should a tomahawk target stand be?
The height can vary. A common target height is around 3 to 4 feet off the ground. This allows for a comfortable throwing stance and good visibility of the target.
Should I anchor my tomahawk target stand to the ground?
If you are in a permanent location and want maximum stability, anchoring can be a good idea. You can use stakes, ground anchors, or even concrete for a very secure setup.
How do I protect my wooden target stand from the weather?
Apply a good quality outdoor wood sealant, stain, or paint. Reapply regularly, usually once a year, to maintain protection against moisture and UV rays.
What is the most common and stable design for a tomahawk target stand?
An A-frame design is very popular and stable. It uses two sets of legs forming an ‘A’ shape, connected by cross braces, which provides a wide and secure base.
How often should I check my target stand for wear and tear?
It’s best to check your stand before each throwing session. A more thorough inspection should be done at least once a season to check for loose hardware, cracks, or rot.
Conclusion
Building a tomahawk target stand is a rewarding project. It leads to safer, more enjoyable throwing. Focus on a strong base.
Use good materials. Take your time during assembly. A well-made stand will be a trusted friend for many throwing sessions to come.