How To Make An Arrow Target Stand: Diy Setup Guide
Finding a good target stand can feel tricky. Many are flimsy or hard to manage. Building your own is often the best way. It lets you make something perfect for your space. This guide shows you how to create a sturdy, simple arrow target stand yourself. It’s easier than you might think.
Understanding the Arrow Target Stand
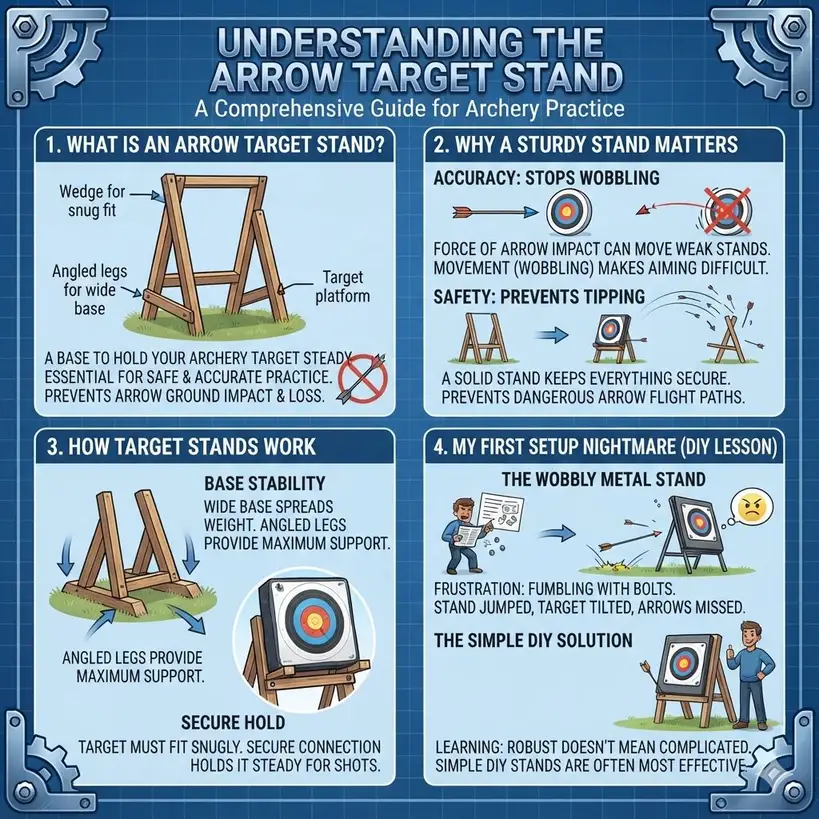
An arrow target stand is a base. It holds your archery target up. This lets you shoot arrows safely. The stand needs to be strong. It must keep the target still. A shaky target makes practice hard. It can also be unsafe. The stand prevents arrows from hitting the ground directly. This can damage your arrow tips. It also makes finding lost arrows difficult. Good stands let you set up anywhere. You can use them in your yard or at a range. They are key to good archery practice.
Why a Sturdy Stand Matters
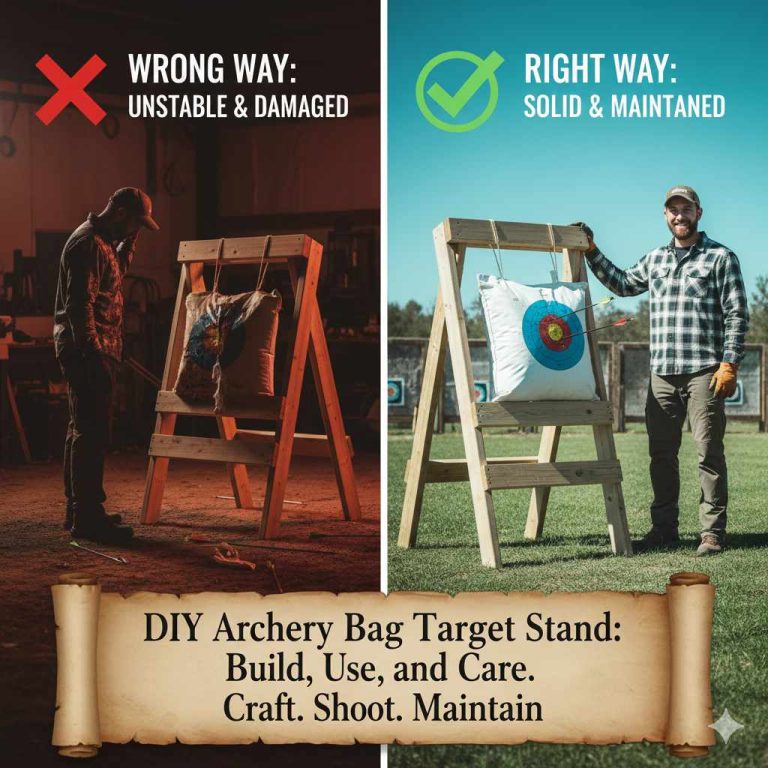
When you shoot an arrow, it has a lot of force. That force hits the target. The target then pushes back on the stand. If the stand is weak, it will move. This movement is called wobbling. Wobbling makes it hard to aim well. Your arrows might not go where you want them to. Imagine trying to hit a moving bullseye. That’s what a wobbly stand feels like.
A stable stand also helps keep you safe. If the target falls over, arrows might go in unexpected directions. This is dangerous. A solid stand keeps everything in place. It means you can practice with confidence. You know your setup is secure. This lets you concentrate on your shooting form.
How Target Stands Work
Most target stands have a few main parts. There’s usually a base that sits on the ground. This base is wide. It helps spread the weight. This makes the stand stable. Legs often extend from the base. These legs might angle outwards. This gives more support.
On top of the stand, there’s a way to hold the target. Some stands have a flat platform. Others have arms or brackets. You place your target on this part. It needs to fit snugly. It shouldn’t slide around. The connection between the target and the stand is important. It must be secure. The whole system works together. It holds the target steady for your shots.
My First Archery Setup Nightmare
I remember my very first attempt at setting up an outdoor archery range. I had this brand-new target buttress. It was the kind made of foam. I bought a fancy metal stand online. It looked good in the pictures. It promised easy assembly. Well, easy for whom? I spent an hour fumbling with bolts. The instructions were a single, blurry page.
Finally, it was up. I placed my target on it. It looked okay. I took my first shot. THWACK! The stand jumped. The target tilted. My arrow hit the grass beside it. I tried another shot. This time, the stand leaned so much the arrow bounced off the side. It was incredibly frustrating. I felt defeated before I even really started. I ended up propping the target against an old fence that day. It wasn’t ideal, but it was better than the wobbly metal monstrosity. That experience taught me a lot. It showed me that sometimes, the simplest DIY solution is the most effective. I learned that robust doesn’t have to mean complicated.
Building Your Own Simple Arrow Target Stand
Let’s get hands-on. Building your own stand is very rewarding. You control the quality and size. You can tailor it to your needs. We’ll focus on a simple, strong design. It uses common materials.
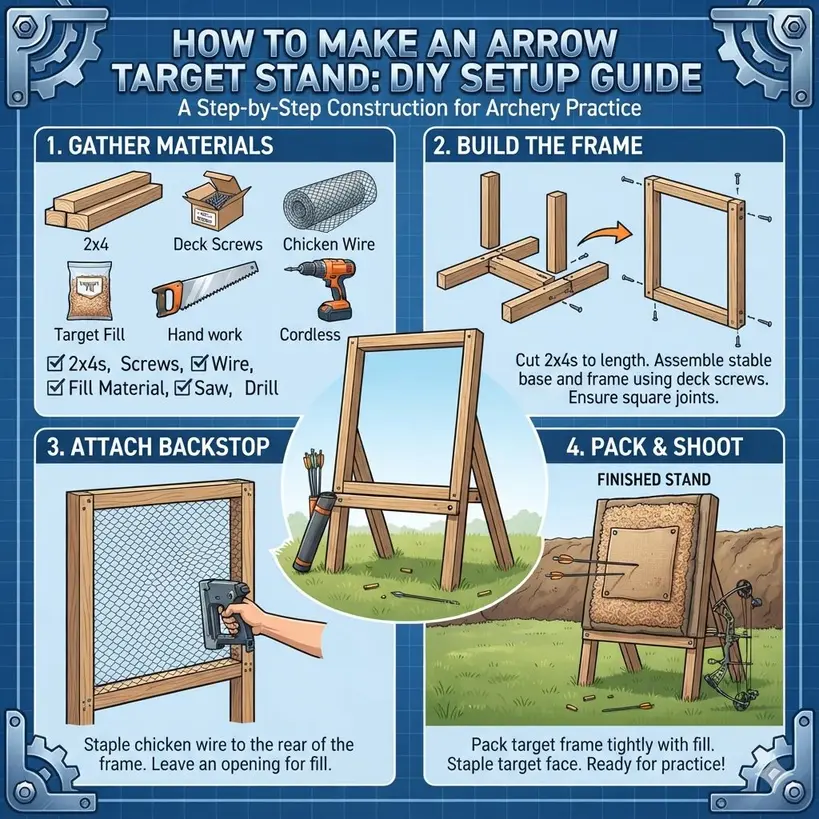
Gathering Your Materials
You won’t need a super fancy workshop. Most of these items are at any hardware store.
Wood: Look for sturdy lumber. Pine or fir 2x4s work well. You’ll need a few pieces. About 8-foot lengths are good.
Screws: Get outdoor wood screws. They won’t rust. About 2.5-inch screws are usually good for joining 2x4s.
Tools: You’ll need a saw to cut wood. A measuring tape is essential. A pencil marks your cuts. A drill helps drive screws easily. A level makes sure everything is straight.
Optional: Sandpaper smooths rough edges. Paint or sealer protects the wood from weather.
Cutting the Wood Pieces
Here’s a simple plan. It makes a solid A-frame style stand.
1. Front Legs (2): Cut two pieces of 2×4, each about 3 feet long.
2. Back Legs (2): Cut two pieces of 2×4, each about 3.5 feet long. These are longer. They help the stand lean back.
3. Top Cross Brace (1): Cut one piece of 2×4, about 2 feet long. This connects the two front legs at the top.
4. Bottom Cross Braces (2): Cut two pieces of 2×4, each about 18 inches long. These connect the legs lower down.
5. Target Support (1): Cut one piece of 2×4, about 2 feet long. This will hold your target. You might need to adjust its length based on your target size.
Assembling the Stand
Now, let’s put it together. Work on a flat surface.
Quick-Scan Assembly Steps
Step 1: Frame Front Legs
Take the two 3-foot front legs. Place the 2-foot top cross brace between them. It should be near the top ends.
Screw the brace into the legs. Make sure the legs angle outwards slightly at the bottom.
Step 2: Frame Back Legs
Do the same for the two 3.5-foot back legs. Use another 2-foot piece as the top cross brace. Screw it securely.
These legs will also angle outwards.
Step 3: Connect the Frames
Now you have two A-frames. Stand them up. Connect the front legs to the back legs using the two 18-inch bottom cross braces.
Place one brace about halfway down the legs. Place the other brace lower. This creates a stable, boxy shape.
Step 4: Add Target Support
Attach the 2-foot target support piece. Place it across the top of the front legs. You might angle it slightly forward.
Screw it firmly. This is where your target will rest.
Making it Even Stronger
For extra stability, you can add more braces. A diagonal brace on the back of each A-frame helps a lot. Use a scrap piece of 2×4 for this. Cut it to fit from the top point down to the side. Screw it in well.
You can also make the base wider. This gives more room for the legs to spread. More spread means more stability. Ensure all your screws are tight. Check for any wobble. If you find any, add another brace or a longer screw.
Real-World Usage Scenarios
Think about where you’ll use this stand most. Is it a permanent setup in your yard? Or do you need to move it often?
Backyard Archery Range
For a backyard setup, weather resistance is key. Once you build the stand, consider sealing or painting it. This protects the wood from rain and sun. If you leave it out all year, use a good outdoor sealant. Make sure the stand is on level ground. If your yard slopes, you might need to dig a little to level the base. This prevents tipping.
Mobile Archery Practice
If you plan to take your stand to a park or range, portability matters. The A-frame design is pretty good for this. You can often fold it up. Or at least, it’s easy to carry. If you need it to be lighter, consider using 2x3s instead of 2x4s. But remember, lighter wood means less strength. You might need to reinforce it more.
Target Types
This stand works well with most common targets. Foam targets are popular. They fit easily on the support piece. Bag targets also work. You might need to secure them with bungee cords or straps. Make sure the target isn’t too heavy for the stand.
What This Stand Means for Your Practice
Having a reliable target stand changes your archery experience. It means less hassle. More focused practice.
When It’s Just Right
Your stand is working well when:
It doesn’t move when you shoot.
It stands up straight on its own.
Your target feels secure and stable.
You can easily set it up and take it down.
If these things are true, you’ve got a great stand.
When to Consider Changes
You might need to tweak your stand if:
It wobbles, especially with powerful bows.
The wood starts to show wear and tear from weather.
Your target doesn’t fit well or feels loose.
You want to shoot heavier arrows or use a larger target.
These are signs it’s time for a little adjustment. Maybe you need longer screws, or thicker wood. Perhaps a new coat of paint is in order.
Quick Tips for a Better Stand
Here are a few ideas to make your stand even better.
Stand Improvement Ideas
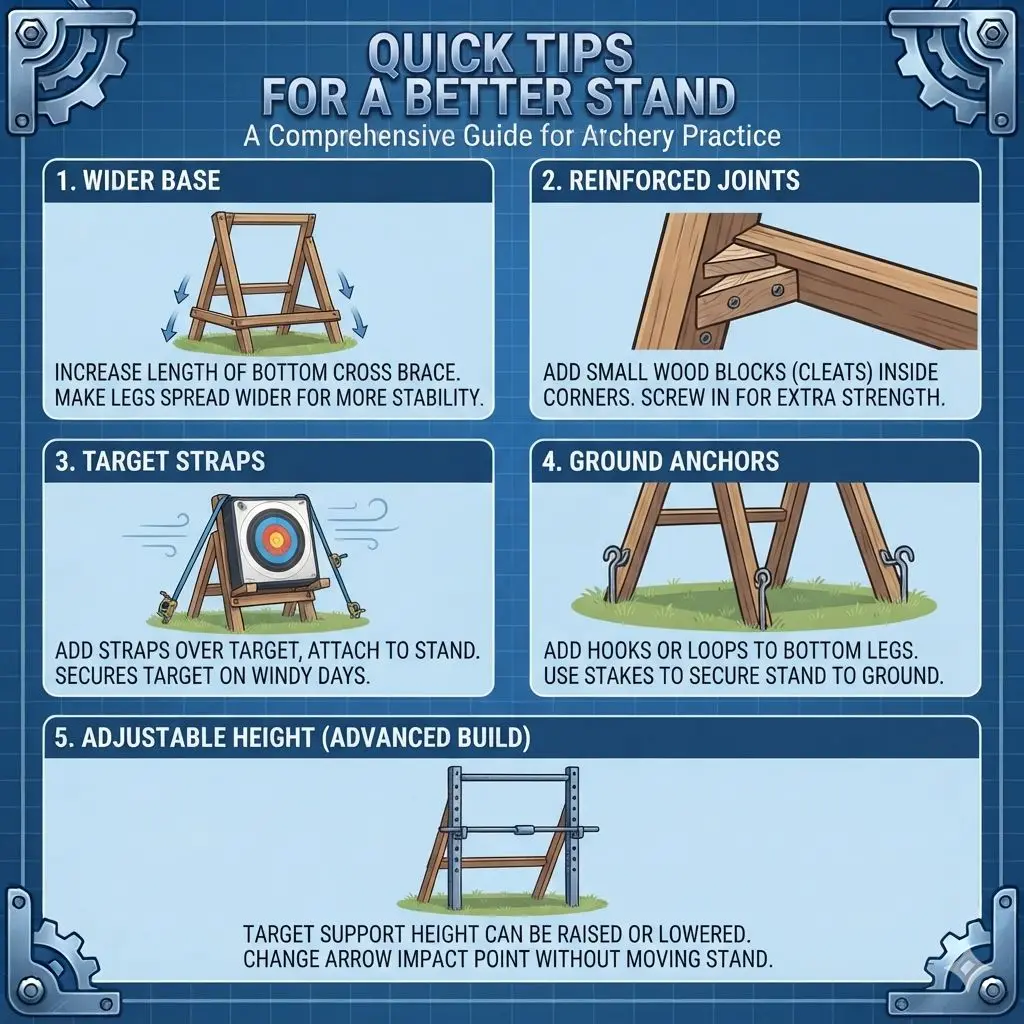
Wider Base: For more stability, increase the length of your bottom cross braces. Make the stand legs spread wider apart.
Reinforced Joints: If you have a lot of leftover wood, add small blocks of wood (cleats) inside the corners where the legs and braces meet. Screw these in for extra strength.
Target Straps: Even with a snug fit, consider adding a strap or two. These can go over your target and attach to the stand. This is especially helpful for windy days.
Ground Anchors: If you’re in a very windy area, you can add hooks or loops to the bottom of the legs. You can then use stakes to secure the stand to the ground.
Adjustable Height: For a more advanced build, you could make the target support height adjustable. This lets you change the arrow impact point slightly without moving the whole stand.
Frequently Asked Questions
What kind of wood is best for an arrow target stand?
Sturdy, weather-resistant wood is best. Pine and fir 2x4s are good choices. They are strong and readily available.
For extra durability, cedar or redwood can be used, but they are more expensive.
How do I make my target stand more stable on uneven ground?
You can dig small shallow holes for the feet of the stand. This creates a level base. Another option is to use shims (small wedges of wood) under the feet to balance it.
Ensure the entire stand is level before shooting.
Can I use this stand for a broadhead target?
Generally, no. Broadhead targets are very dense. They cause a lot of force on impact.
This simple wood stand is best for field points. For broadheads, you need a much more robust setup, often with metal components or a specialized ground-level stand.
How far apart should the legs of my target stand be?
The legs should be spread wide enough to provide a stable base. A good rule of thumb is that the base width should be about two-thirds of the height. For a 3-foot front leg, a base width of around 2 feet would be stable.
What is the best way to attach the target to the stand?
This depends on your target. For foam targets, resting them on a sturdy horizontal support is often enough. You can use straps or bungee cords to secure it.
For bag targets, you might need to add hooks or eye screws to the stand to tie it down.
How do I protect my DIY target stand from rain and sun?
Sealing or painting the wood is essential. Use a good quality exterior wood sealant or paint. Apply multiple coats.
Reapply every year or two. Storing the stand indoors during bad weather will also extend its life significantly.
Conclusion
Building your own arrow target stand is a great project. It’s practical and saves money. You get a sturdy, reliable setup. This lets you enjoy your archery practice more. Focus on your shots, not your equipment wobbling. With a few tools and some wood, you can create a stand that lasts. It’s a satisfying way to improve your archery experience.