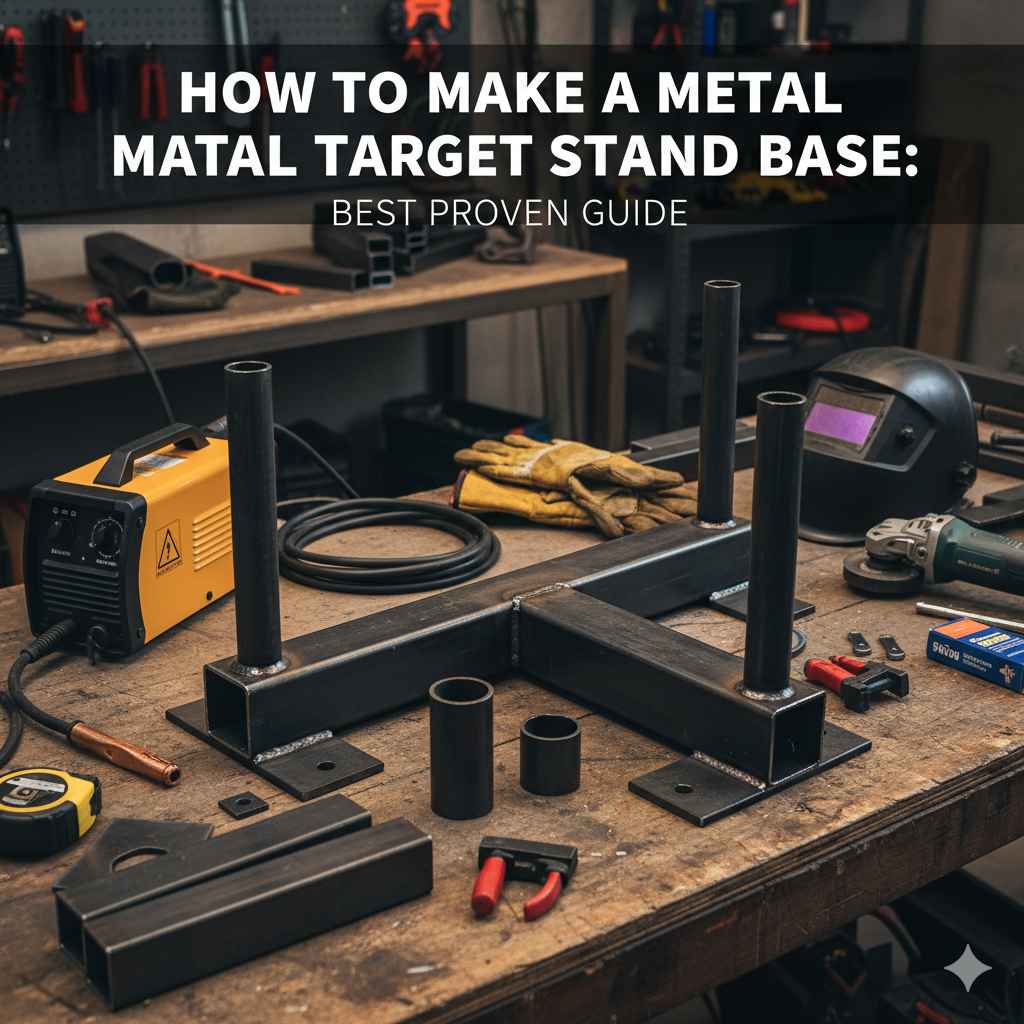
To make a metal target stand base, cut four pieces of steel angle iron or square tubing to create a stable H-frame or X-frame. Assemble the pieces using either a welder for a permanent bond or drill holes and secure them with bolts and corner brackets for a no-weld option. Finally, attach a vertical holder for your target post.
Hello, fellow archers! Salman here. Have you ever set up your target, only to have it wobble or tip over with the slightest breeze? It’s a common frustration that can really break your focus. A steady target is key to good practice, but store-bought stands can be expensive or flimsy. That’s why building your own is such a great solution.
You get a super-sturdy stand tailored to your needs, and it’s a fun project, too! Don’t worry if you’re not a metalworking pro. I’m going to walk you through every step in plain, simple language. We’ll cover the tools, the materials, and the assembly, including an easy no-weld option. Let’s build something that will last for years!
Why Build Your Own Target Stand?
Taking the time to build your own metal target stand base might seem like extra work, but the benefits are well worth the effort, especially for a dedicated archer. When you control the build, you control the quality and design, leading to a much better practice experience.
- Unmatched Stability: Commercial stands, especially cheaper models, often use thin metal and lightweight designs. This makes them prone to tipping in the wind or shifting when an arrow hits the target. Building your own lets you use heavy-duty steel, creating a wide, low-profile base that stays put no matter the conditions.
- Customization is Key: Do you need a stand for a large foam block? A hanging steel target? Or maybe something that can hold cardboard backers? When you build it yourself, you can design the base and upright holder to fit your specific target type perfectly. You can also adjust the height and width to match your shooting environment.
- Cost-Effective in the Long Run: While there’s an initial cost for materials, a well-built homemade stand will outlast several flimsy store-bought versions. You’re investing in durability. Over time, you’ll save money by not having to replace a wobbly or broken stand every few seasons.
- A Rewarding Project: There’s a special kind of satisfaction in using equipment you built with your own hands. It’s a practical skill to learn, and the finished product is something you can be proud of every time you head out to practice. It connects you even more deeply to your hobby.

Safety First: Non-Negotiable Rules
Before we pick up a single tool, let’s talk about safety. Working with metal is straightforward, but it requires your full attention and respect. These rules are not optional—they are essential to keeping you safe and sound throughout the project.
General Safety Gear
- Safety Glasses: Always, always, always wear eye protection. Metal shavings, sparks from a grinder, or debris from drilling can cause serious eye injury. Make sure they are ANSI Z87.1 rated.
- Gloves: Heavy-duty work gloves are a must. They protect your hands from sharp metal edges, burrs, and heat. Choose leather or other durable materials.
- Hearing Protection: Using an angle grinder or a metal chop saw is loud. Protect your hearing with earplugs or earmuffs, especially during prolonged cutting sessions.
- Proper Clothing: Wear long sleeves and pants made of non-flammable material like cotton or denim. Avoid synthetic fabrics like polyester, which can melt if exposed to sparks. Sturdy, closed-toe boots are also essential.
Welding-Specific Safety
If you choose the welding route, you need additional protective gear. Welding creates intense light, heat, and fumes.
- Welding Helmet: An auto-darkening welding helmet is crucial to protect your eyes and face from harmful UV/IR radiation and sparks.
- Welding Jacket and Gloves: A flame-resistant jacket and proper welding gauntlets provide protection from sparks and heat.
- Ventilation: Work in a well-ventilated area, preferably outdoors or in a garage with the door open, to avoid inhaling welding fumes. For more information on welding hazards, you can review guidelines from the Occupational Safety and Health Administration (OSHA).
- Fire Extinguisher: Keep a fire extinguisher rated for Class A, B, and C fires nearby. Clear the area of any flammable materials before you start.
Tools and Materials You’ll Need
Having all your tools and materials ready before you begin makes the process smooth and enjoyable. We’ll cover everything for both the welded and no-weld methods. You can find most of these items at your local hardware or home improvement store.
The Basic “H-Frame” Design
We’ll be building a simple and incredibly stable “H-Frame” base. It consists of two long “feet” and a shorter crosspiece connecting them in the middle. This design is easy to build, provides a wide footprint for stability, and is easy to transport.
Materials Checklist
| Material | Recommended Type | Quantity & Size | Notes |
|---|---|---|---|
| Metal Tubing/Angle Iron | 1.5″ or 2″ Steel Square Tubing or Angle Iron | One 8-foot or 10-foot length | This will be for the base and upright holder. Square tubing is often easier for beginners to work with. |
| Fasteners (No-Weld Option) | 1/4″ or 3/8″ Bolts, with Nuts and Washers | 8 sets | Ensure they are long enough to go through the metal and corner brackets. |
| Brackets (No-Weld Option) | Heavy-Duty Corner Brackets or Flat Mending Plates | 4 pieces | These will connect the frame pieces together securely. |
| Upright Post Material | 2×4 or 1×2 Lumber | One 4-foot piece | This is what your target will actually hang on. Wood is cheap and easy to replace if damaged by stray arrows. |
| Finishing Supplies | Metal Primer & Rust-Resistant Spray Paint | 1 can of each | Protects the metal from rust and gives it a professional look. |
Tools Checklist
- Measuring & Marking: Tape Measure, Speed Square, Permanent Marker or Paint Pen
- Cutting: Angle Grinder with a cut-off wheel OR a Metal Chop Saw OR a Hacksaw (Hacksaw will take much more effort)
- Smoothing: Angle Grinder with a flap disc OR a Metal File (to remove sharp edges)
- Drilling (No-Weld Option): Power Drill, Drill Bits designed for metal (cobalt or titanium-coated)
- Assembly (Welding Option): Welder (MIG or Stick), Welding Clamps, Welding Magnets
- Assembly (No-Weld Option): Wrench Set or Socket Set
- Safety Gear: As listed in the safety section above.
Step-by-Step Guide to Building Your Target Stand Base
Now for the fun part! Follow these steps carefully, and you’ll have a rock-solid target stand in no time. Remember the golden rule of all projects: measure twice, cut once.
Step 1: Planning and Measuring Your Cuts
A good stand starts with a good plan. The “H-Frame” is balanced and stable. We’ll decide on the dimensions first. A wider base is more stable, so don’t make it too narrow.
- Determine Dimensions: A good starting point is to have two “feet” that are each 24 to 30 inches long. The crosspiece connecting them can be around 18 to 24 inches long. This creates a wide, stable footprint.
- Mark Your Cuts: Lay your 8-foot piece of steel tubing on a flat surface. Using your tape measure and permanent marker, mark the following cuts:
- Two pieces at 30 inches each (these are the feet).
- One piece at 24 inches (this is the crosspiece).
- One piece at 6 inches (this will be the vertical holder for your 2×4 post).
- Double-Check Your Marks: Use your speed square to ensure your marks are perfectly straight and square (90 degrees). This is critical for making sure the pieces fit together flush.
Step 2: Cutting the Metal
This is where your project starts to take shape. Take your time and focus on making clean, straight cuts. Make sure your metal piece is securely clamped to a workbench before cutting.
- Gear Up: Put on your safety glasses, gloves, and hearing protection.
- Make the Cuts:
- Using an Angle Grinder: Secure the metal tubing in a vise or with clamps. Hold the grinder firmly with both hands and let the tool do the work. Follow your marked line slowly and steadily.
- Using a Chop Saw: A metal-cutting chop saw makes this step very fast and accurate. Simply line up your mark with the blade, clamp the material down, and make your cut.
- Deburr the Edges: After cutting, the edges of the metal will be extremely sharp. Use an angle grinder with a flap disc or a metal file to smooth down all the cut edges. This process is called “deburring” and is a crucial safety step.
Step 3: Assembling the H-Frame Base
Here you have two choices: the permanent, ultra-strong welded method, or the simple and accessible no-weld bolted method. Both create a fantastic stand.
Method A: Welding the Base (Strongest)
- Prepare for Welding: Put on your welding helmet and all other welding safety gear. Set up in a well-ventilated area away from flammable objects.
- Lay Out the Frame: Place your two 30-inch feet parallel to each other on a flat, fire-proof surface. Place the 24-inch crosspiece in the middle, forming an “H” shape. Use your speed square and tape measure to ensure everything is centered and perfectly square.
- Tack Weld First: Use welding magnets or clamps to hold the pieces firmly in place. Apply a small “tack weld” at each corner where the pieces meet. This temporarily holds the frame together so you can check that it’s still square before committing to a full weld.
- Complete the Welds: Once you’re happy with the alignment, lay a solid bead of weld along each joint. Weld all sides of each joint for maximum strength.
- Weld the Upright Holder: Stand the 6-inch piece of tubing vertically in the very center of the crosspiece. Ensure it is perfectly straight up (90 degrees). Tack weld it in place, check for squareness again, and then complete the weld all the way around its base.
Method B: The No-Weld Bolted Base (Easiest)
This method is perfect for anyone without a welder. It uses heavy-duty brackets and bolts to create a surprisingly strong and rigid frame.
- Lay Out the Frame: Just like the welding method, arrange your feet and crosspiece into an “H” shape on a flat surface. Make sure it’s perfectly square.
- Mark Your Drill Holes: Place your corner brackets or mending plates where the crosspiece meets the feet. Use your marker to mark where you need to drill holes through both the bracket and the frame pieces. You should have two bolts per connection point.
- Drill the Holes: Use a center punch to make a small indent on your marks. This prevents the drill bit from wandering. Start with a smaller pilot bit and then move to the final size. Use cutting oil to keep the bit cool and make drilling easier. Drill all the marked holes.
- Bolt the Frame Together: Align the holes in the brackets and frame pieces. Insert your bolts with washers on both ends and tighten the nuts securely with a wrench. Your “H” frame is now assembled.
- Attach the Upright Holder: Center the 6-inch tube on top of the crosspiece. Mark and drill holes through the bottom of the 6-inch tube and through the crosspiece below it. Use two or three bolts to securely fasten it in place.
Comparing Assembly Methods
| Feature | Welded Method | No-Weld (Bolted) Method |
|---|---|---|
| Strength | Extremely strong and permanent. The joints become one solid piece of metal. | Very strong and rigid, but bolts can loosen over time and may need occasional tightening. |
| Tools Required | Welder, welding safety gear, angle grinder. Higher initial tool cost. | Power drill, metal drill bits, wrenches. More common household tools. |
| Skill Level | Requires basic welding skills and knowledge of welding safety. | Beginner-friendly. If you can use a drill and a wrench, you can do this. |
| Portability | The stand is one solid piece and cannot be disassembled. | Can be disassembled by unbolting the pieces for easier storage or transport. |
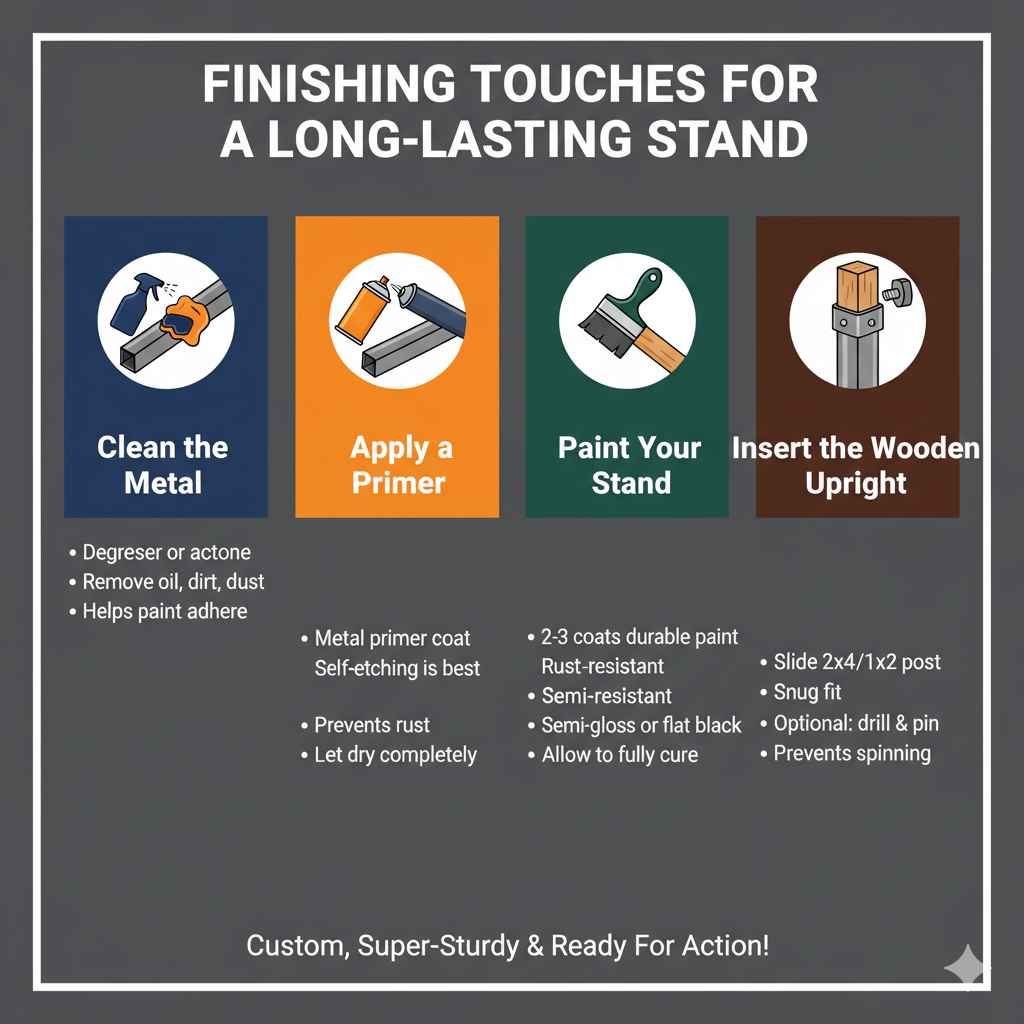
Finishing Touches for a Long-Lasting Stand
A little prep work now will protect your stand from the elements and keep it looking great for years.
- Clean the Metal: Wipe down the entire stand with a degreaser or acetone to remove any oil, dirt, or metal dust. This helps the paint adhere properly.
- Apply a Primer: Spray the entire stand with a coat of metal primer. A self-etching primer works best on bare metal. This prevents rust and creates a great surface for the top coat of paint. Let it dry completely according to the can’s instructions.
- Paint Your Stand: Apply two or three light coats of a durable, rust-resistant spray paint. A semi-gloss or flat black looks professional, but feel free to choose any color you like. Allow the paint to fully cure before use.
- Insert the Wooden Upright: Once the paint is dry, slide your 2×4 or 1×2 wooden post into the 6-inch vertical holder. It should be a snug fit. You can drill a hole through the metal holder and the wood and insert a pin or bolt to keep it from spinning if you wish.
That’s it! Your custom, super-sturdy metal target stand base is complete. You can now hang your bag target, prop up your foam block, or attach a cardboard backer and know it will stay put, session after session.
Frequently Asked Questions (FAQ)
What’s the best metal to use for a target stand base?
For beginners, 1.5-inch or 2-inch steel square tubing is excellent. It’s strong, widely available at hardware stores, and its flat sides make it very easy to cut, drill, and assemble squarely. Steel angle iron is another great, affordable option.
Can I really build this without any welding?
Absolutely! The no-weld method using bolts and heavy-duty corner brackets is very effective. As long as you use quality hardware and tighten the bolts properly, the stand will be incredibly sturdy and reliable for holding archery targets.
How tall should the upright wooden post be?
This depends on your preference, but a good starting height is to have the center of your target at about shoulder height. A 4-foot post is a versatile length that works for most archers. The great thing about a wooden post is that it’s easy to swap out for a different length if you change your mind.
How can I make the stand more stable on uneven ground?
The “H-frame” design is already quite stable. For very uneven ground, you can drill holes near the ends of the feet. This allows you to drive stakes or large nails into the ground, anchoring the stand securely in place.
What kind of paint is best for protecting the metal?
Use a high-quality, rust-resistant spray paint designed for outdoor metal. Brands like Rust-Oleum are perfect. Always start with a good metal primer first—this is the most important step for preventing rust in the long term.
Is it cheaper to build my own stand than to buy one?
Yes, in most cases, especially when you compare it to high-quality commercial stands. The cost of a single length of steel and some hardware is often significantly less than a pre-made heavy-duty stand. Plus, the one you build will likely be much more durable, saving you money over time.
How do I hang my target from the wooden post?
For a foam block target, you can simply rest it on the base, leaning against the post. For a hanging bag target, screw a heavy-duty hook or eyelet into the top of the 2×4 post and hang the target’s strap from it. For cardboard backers, you can use clamps or screws to attach them directly to the post.
Conclusion
Congratulations on building your own metal target stand base! You’ve not only created a piece of high-quality, durable equipment but also gained valuable hands-on skills. This stand is more than just metal and bolts; it’s a testament to your dedication to archery and a tool that will help you practice more effectively and enjoyably.
No more wobbly targets or frustrating setups. You now have a reliable, sturdy base that you can count on every time you nock an arrow. It’s customized to your needs and built to withstand years of practice. Take pride in your work, enjoy the stability it brings to your shooting sessions, and keep aiming for that bullseye. Happy shooting!