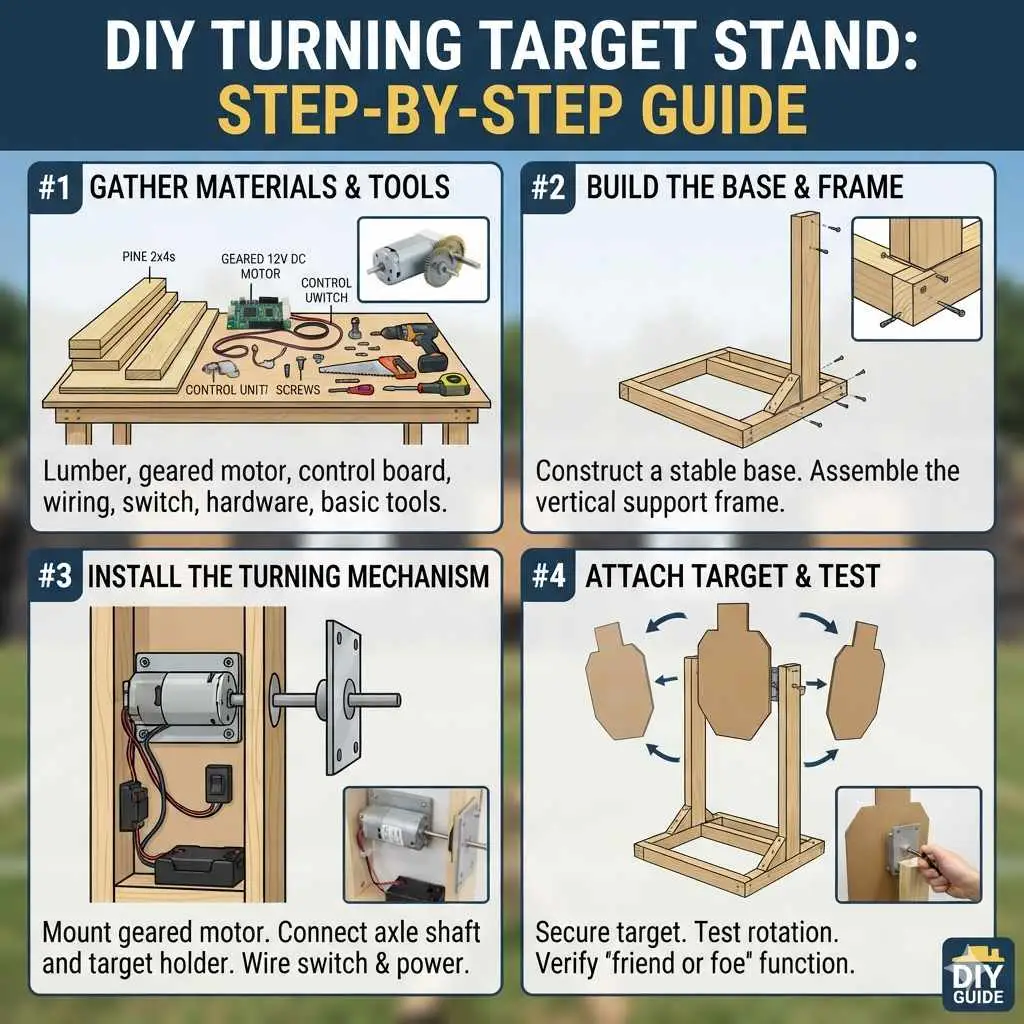
Diy Turning Target Stand: Step-By-Step Guide
What is a Turning Target Stand?
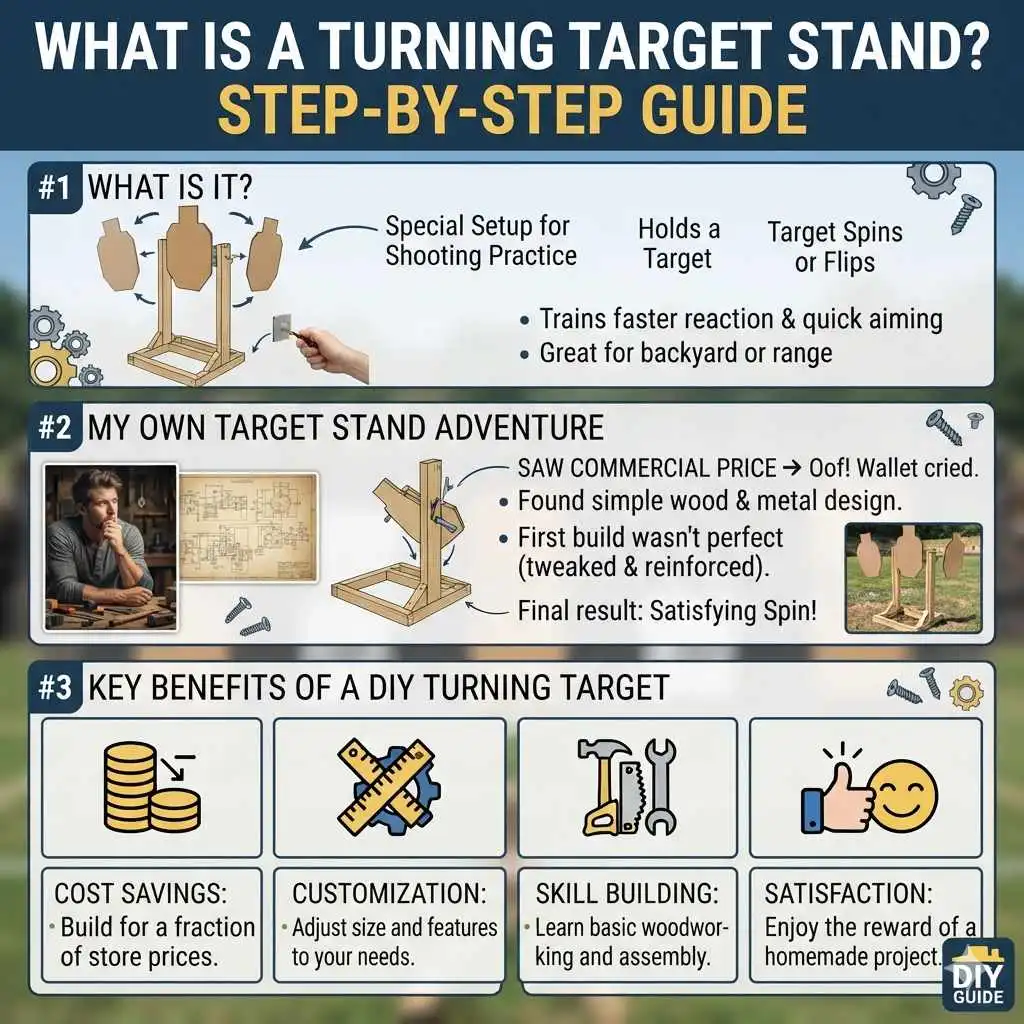
A turning target stand is a special setup for shooting practice. It holds a target. The target can spin or flip.
This makes practice more fun. It also helps you train better. You have to react faster.
You need to aim quickly. It’s like a moving target. But you build it yourself.
It’s a great way to improve your skills. It’s also rewarding to make your own gear.
Why build your own? Cost is a big reason. Commercial systems are expensive.
Building it yourself saves money. You also get exactly what you want. You can make it the right size.
You can pick the materials. This guide helps you do just that. We aim for a simple, effective design.
It’s great for backyard or range practice.
My Own Target Stand Adventure
I remember the first time I wanted a turning target. I saw one at a local match. It was so cool.
The targets would spin around. It made everyone’s shooting better. But then I saw the price tag.
Oof. My wallet cried. I thought, “There has to be a cheaper way.” I spent hours online.
I looked at many designs. Some were too complex. Some looked flimsy.
I finally found a simple idea. It involved wood and a few metal parts. I decided to try it.
My first build wasn’t perfect. The wood split a little. The spinning part stuck once.
But I learned a lot. I tweaked it. I reinforced it.
Soon, I had a working stand. It was so satisfying. The sound of the target spinning after a good hit was music.
Key Benefits of a DIY Turning Target
Cost Savings: Build for a fraction of store prices.
Customization: Adjust size and features to your needs.
Skill Building: Learn basic woodworking and assembly.
Satisfaction: Enjoy the reward of a homemade project.
Gathering Your Materials
Let’s talk about what you’ll need. Think of this like baking a cake. You need all the right ingredients.
For our stand, we’ll use wood. It’s easy to work with. It’s also strong enough.
You’ll need some bolts and nuts. These will hold things together. A bearing or swivel will help it turn.
We’ll aim for a simple pivot design. This keeps it easy for beginners.
Here’s a basic list. You might adjust it. This is a starting point.
Always check for sales. You can often find good deals. Local lumber yards are great.
Hardware stores have everything else.
Wood Components
- Base Supports: Two pieces, about 2-3 feet long. 2×4 lumber works well.
- Uprights: Two pieces, about 4-5 feet long. Again, 2x4s are good.
- Top Brace: One piece, about 1-2 feet long. This connects the uprights.
- Target Arm: One sturdy piece. About 1-2 feet long. This holds the target.
- Cross Brace (Optional): For extra base stability.
Hardware and Other Parts
- Bolts, Nuts, Washers: Various sizes. For joining wood and attaching the swivel.
- Swivel/Bearing: A lazy Susan bearing or a heavy-duty boat swivel. This is key for smooth turning.
- Screws: Wood screws for assembly.
- Eye Bolts or Hooks: To hang your actual paper targets.
- Wood Glue (Optional): For extra strong joints.
- Sandpaper: To smooth rough edges.
Quick Material Check
Wood: (e.g., 2x4s) – Enough for base, uprights, arm.
Hardware: Bolts, nuts, washers, screws.
Turning Part: Lazy Susan bearing or swivel.
Target Hanger: Eye bolts or hooks.
Tools You’ll Need
Now for the tools. Don’t worry if you don’t have everything. Many tools can be borrowed.
Or you might find good deals on used ones. Safety first is key. Wear safety glasses.
Work in a well-lit area.
Having the right tools makes the job easier. It also helps ensure a good result. A few power tools are helpful.
But you can do this with hand tools too. It just takes a bit more time. Let’s list the basics.
Essential Tools
- Saw: Circular saw or hand saw. To cut wood.
- Drill: With drill bits. For making holes for bolts and screws.
- Measuring Tape: For accurate cuts.
- Pencil: To mark your cuts.
- Wrench or Socket Set: For tightening bolts.
- Screwdriver: To drive screws.
- Safety Glasses: Absolutely essential.
Helpful Tools
- Clamps: To hold wood pieces while you work.
- Level: To ensure parts are straight.
- Sander: For a smooth finish.
Toolbox Essentials
Cutting: Saw (circular or hand).
Joining: Drill, drill bits, screws, bolts, nuts, washers.
Measuring: Tape measure, pencil.
Safety: Safety glasses.
Building the Base
This is where our stand gets its feet. A strong base is important. It keeps the stand from tipping.
We’ll make an A-frame or H-frame base. This gives it good stability. Let’s go with a simple H-frame.
It’s easy to build. It’s also very stable on flat ground.
Take two of your long pieces. These are your base supports. They will run parallel.
Lay them on the ground. Measure out your desired width. About 2-3 feet is usually good.
Then, take two shorter pieces. These are your cross braces. They will connect the long pieces.
Attach one cross brace near each end. Use screws or bolts for this. Make sure they are square.
A quick check with a corner of your saw or a speed square helps.
This forms your base shape. It looks like a wide H. Make sure all connections are tight.
If you’re using wood glue, apply it before screwing. Clamps help hold everything in place while you screw. This base will support the uprights.
It needs to be solid. You don’t want it shifting.
Base Construction Steps
1. Lay Out: Place two long base pieces parallel.
2. Measure Width: Decide on stand width (e.g., 30 inches).
3. Attach Braces: Screw two shorter pieces across the ends.
4. Ensure Squareness: Check corners are 90 degrees.
5. Tighten: Make all connections very secure.
Adding the Uprights
Now we add the tall parts. These uprights hold the turning mechanism. Take your two longer pieces of lumber.
These will stand up from the base. You need to attach them firmly. Position them on the base.
They should be a good distance apart. This distance depends on your swivel size. Measure it carefully.
You want the swivel to fit between them.
Attach the uprights to the base. You can screw them in. Drilling pilot holes first helps.
This stops the wood from splitting. Using bolts is even stronger. Drill holes through the base and the upright.
Then put bolts and nuts through. Washers spread the pressure. Make sure the uprights are straight up.
Use a level if you have one. The top brace will connect these soon. This will make them very strong together.
Ensure the uprights are parallel to each other. This is crucial for smooth turning later. If they are angled, the swivel might bind.
Take your time here. Good alignment makes a big difference. Once they are attached, they should feel very solid.
They shouldn’t lean or wobble at all.
Upright Attachment Tips
Placement: Position uprights on base, spaced for swivel.
Attachment: Use screws or bolts. Drill pilot holes.
Alignment: Ensure uprights are perfectly vertical and parallel.
Stability: Make sure they are rock-solid.
Attaching the Top Brace
The top brace ties the uprights together. This adds huge stability. It also provides a mounting point for the swivel.
Take your top brace piece. Place it across the top of the uprights. It should span between them.
The distance should be just right. You want it to be snug.
Attach the top brace. Again, use screws or bolts. Drill pilot holes.
Make sure it’s level and square. This connection is very important. It prevents the uprights from spreading apart.
It also stops them from wobbling. You can use wood glue here too. It adds extra strength.
Clamp it in place while you secure it. This brace is the main support for the turning action.
Double-check all connections. Everything should feel sturdy. Give it a gentle shake.
It shouldn’t move much. This solid foundation is what makes the stand reliable. When the targets spin, the stand stays put.
It’s designed to handle recoil too. But a good base helps absorb that.
Top Brace Function
Connects Uprights: Locks them in place.
Adds Rigidity: Prevents swaying.
Supports Swivel: Provides a stable mounting surface.
Installing the Swivel Mechanism
This is the heart of the turning stand. It’s what makes it spin. We are using a lazy Susan bearing or a heavy-duty swivel.
These are designed to rotate smoothly. They usually have two plates. Each plate has holes for screws or bolts.
First, attach one plate of the swivel to the top brace. Line it up carefully. Make sure it’s centered.
Use screws or bolts to secure it. Ensure the screws don’t go too deep. You don’t want them poking through the other side.
Now, attach the second plate of the swivel. This plate will connect to the target arm. Center it on the other plate of the swivel.
Screw it in place.
Test the swivel. Does it spin freely? Is there any binding?
If it feels stiff, check your mounting. Make sure the plates are parallel. Make sure the uprights are still straight.
Sometimes, over-tightening bolts can warp the plates. Loosen them slightly. Add washers if needed.
This mechanism needs to move without resistance.
The quality of your swivel matters. A cheap one might not last. It might get wobbly.
Look for something rated for weight. Even though it’s a target, it needs to be durable. Boat swivels are often strong.
Lazy Susans for kitchens can work for lighter targets.
Swivel Mounting Steps
1. Attach Plate 1: Secure one swivel plate to the top brace.
2. Attach Plate 2: Secure the second swivel plate to Plate 1.
3. Center Everything: Ensure the swivel is centered on the brace.
4. Test Smoothness: Spin it to check for easy rotation.
Creating the Target Arm
This is the piece that actually holds your target. It needs to be strong. It will extend out from the swivel.
We’ve already cut a piece for this. Make sure it’s long enough. About 18 to 24 inches is a good start.
You can always make it longer later if needed.
Attach one end of the target arm to the top swivel plate. Use screws or bolts. You want a very strong connection here.
This arm will take some force. It needs to be well-secured. If you used a lazy Susan bearing, the top plate might have holes already.
Use those. If you used a boat swivel, it likely has mounting points too.
Consider the balance. Where will the target hang? You might want to add a small weight to the opposite end.
This helps balance the arm. It makes the spinning smoother. A small block of wood or some metal plates can work.
You can also attach a simple bracket to the arm. This bracket will hold your target. Eye bolts or hooks are good for this.
Make sure the target arm is level when it’s at rest. It shouldn’t droop. If it does, reinforce the arm.
You might need a thicker piece of wood. Or you could add a brace underneath it.
Target Arm Design
Material: Sturdy wood (e.g., 1×4 or 2×4).
Length: 18-24 inches (adjustable).
Attachment: Securely bolt/screw to the swivel plate.
Balance: Consider adding a counterweight if needed.
Hanger: Add eye bolts or hooks for target.
Mounting Your Targets
Now for the fun part. How do you attach the actual targets? This depends on the type of targets you use.
Most people use paper targets. These can be hung from eye bolts. We added those to the target arm.
You can screw two eye bolts into the end of the target arm. Space them out. This lets you hang standard paper targets.
You can also use target clips. These are metal clips that hold paper targets. You can screw those directly to the wood arm.
For steel targets, you’ll need a more robust hanging system. Some people use chains. Others use specialized hangers.
If you’re using reactive targets, like steel spinners or knock-overs, the design might change. For this basic DIY stand, we’re focusing on paper targets. They are easy to replace.
They are also light. This puts less stress on the swivel. Make sure the targets hang freely.
They shouldn’t rub against the stand itself.
Consider the size of the target. A larger target will catch more wind. This can make it wobble more.
It might also affect the spinning. Start with standard 8.5×11 or 11×17 targets. You can experiment with larger ones later.
Always be aware of your backstop. Ensure you have a safe area.
Target Hanging Options
Eye Bolts: Simple and effective for paper targets.
Target Clips: Hold paper targets firmly.
Chains: For heavier reactive targets (use caution).
Custom Brackets: For specific target types.
Making it Turn (Manual Operation)
This version of the stand is manually operated. That means you’ll turn it by hand. Or you can give it a gentle push to start it spinning.
Once it’s spinning, it will rotate smoothly thanks to the bearing. You can stop it with your hand too.
To use it, load your target. Then, gently push the target arm. Give it a spin.
See how long it rotates. You want it to spin for a good amount of time. If it stops too quickly, something might be wrong.
Check for friction. Is anything rubbing? Is the swivel stiff?
You can add a small handle to the target arm. This makes it easier to grab and spin. A simple wooden knob or a metal handle can work.
Screw it onto the arm. This gives you a better grip. It’s also safer than reaching directly for the target.
The spin speed and duration depend on the swivel quality. And the balance of the arm. And the target’s weight.
A lighter target will spin longer. A heavier target might spin less. Experiment to see what works best for you.
This manual method is great for practicing accuracy. You get a stable shot. Then you get a moving target for follow-up shots.
Manual Operation Tips
Gentle Push: Start the spin with a smooth push.
Check Friction: Ensure no rubbing or binding.
Add a Handle: Makes spinning easier and safer.
Balance is Key: A well-balanced arm spins longer.
Enhancing Stability
Stability is super important. A wobbly stand is dangerous. It can affect your shots.
It can also tip over. We built a solid base. But we can make it even better.
Especially if you shoot in windy areas.
Add Weight: You can put heavy objects on the base. Bricks or sandbags work well. Just place them on the base supports.
This adds extra weight. It keeps the stand planted. Be careful not to obstruct the turning mechanism.
Ground Stakes: If you are on grass or dirt, you can use stakes. Screw large eye bolts into the ends of the base supports. Then you can use tent stakes or rebar.
Drive them into the ground through the eye bolts. This anchors the stand. This is great for outdoor ranges.
Diagonal Braces: You can add diagonal braces to the base. Or between the uprights and the base. These add structural rigidity.
They prevent racking or twisting. Use wood or metal brackets for these. They don’t need to be huge.
Just enough to add stiffness.
Check Connections: Regularly re-tighten all bolts and screws. Wood can expand and contract. Vibrations can loosen things.
A quick check before each shooting session is a good idea.
Stability Boosters
Add Weight: Bricks, sandbags on the base.
Anchor Down: Use stakes or ground anchors.
Add Braces: Diagonal supports for extra rigidity.
Regular Checks: Tighten all hardware.
Safety Considerations
Safety is paramount. Always. Even with a DIY project.
Know your backstop. Make sure there’s nothing dangerous behind your target. Never shoot at a target that’s unstable.
Ensure everyone knows the rules. No one should cross the firing line. Treat every firearm as if it’s loaded.
When using a turning target, be aware of the spin. Don’t stand too close when it’s rotating. Ensure the stand is stable before you shoot.
A tipping stand is a hazard. Keep the area around the stand clear. You don’t want to trip.
Or have something fall onto it.
If you are using a powered swivel (more advanced), be extra careful. Understand the power source. Ensure all wiring is safe.
For this manual stand, the risks are lower. But still, always be alert. And use appropriate eye and ear protection.
This DIY stand is for stationary shooting practice primarily. The turning is a bonus. It’s not meant for rapid fire into a turning target.
That’s a different level of setup. Focus on accuracy. Focus on safety.
A safe range is a fun range. Always supervise children.
Essential Safety Practices
Backstop: Always know what’s behind your target.
Stable Stand: Never shoot at a wobbly or unstable target.
Clear Area: Keep the shooting zone free of obstructions.
PPE: Always wear eye and ear protection.
Firearm Safety Rules: Treat every gun as loaded.
Maintenance and Care
Like any gear, your DIY target stand needs care. This keeps it working well. And makes it last longer.
After each use, give it a quick look. Check for any loose parts.
Clean it: Wipe down the wood. Remove any dirt or debris. If you shot steel and got lead spatter on the wood, clean it off.
A damp cloth usually works. For rust on metal parts, a wire brush can help. Then you can paint or oil it.
Lubricate the Swivel: If your swivel feels stiff, it might need lubrication. A bit of WD-40 or a spray lubricant can help. Apply it sparingly.
Too much can attract dirt. Some lazy Susan bearings can be disassembled. You can clean and re-grease them.
Check Wood: Inspect the wood for any cracks or damage. Especially around bolt holes. If you see any, you might need to reinforce that area.
A metal bracket can help. Or you can replace the damaged section.
Storage: When not in use, store the stand in a dry place. This prevents rot and rust. You can cover it.
Or bring it into a shed or garage. Protecting it from the elements is key.
Stand Maintenance Checklist
Clean: Wipe down wood and metal parts.
Lubricate: Keep the swivel moving smoothly.
Inspect: Check for wood damage or loose hardware.
Store: Keep it dry when not in use.
When to Worry
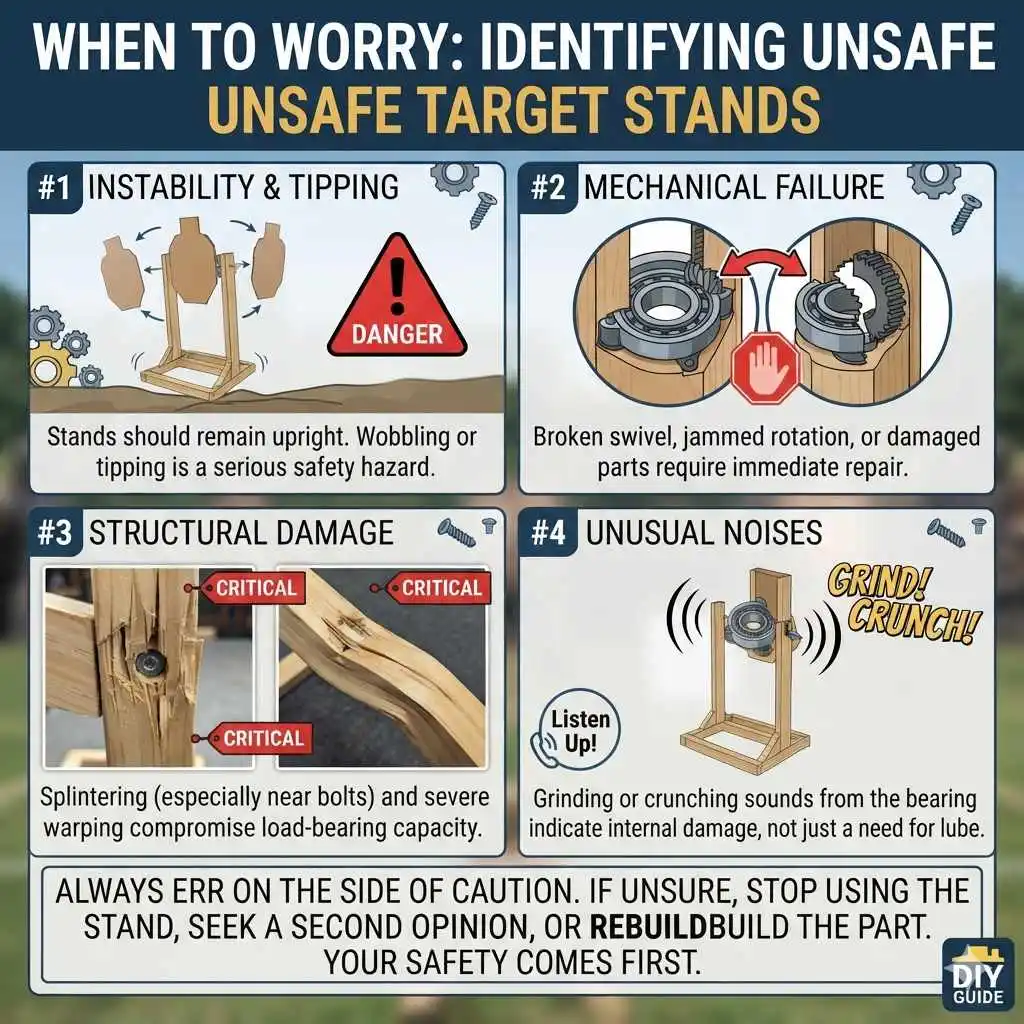
Most issues are minor. But sometimes, things need more attention. You should worry if the stand becomes unstable.
If it tips, that’s a serious safety issue. If the swivel mechanism breaks or jams badly, it’s time for repair or replacement.
Listen for odd noises. Squeaking is usually just a need for lube. But grinding or crunching could mean internal damage to the bearing.
If the wood starts to splinter badly, especially where bolts go, that’s a structural concern. The load it can bear might be compromised.
If you notice significant warping in the wood, that could also be a problem. It might mean the wood is too wet. Or it’s under too much stress.
Always err on the side of caution. If you’re unsure about the stability or integrity of your stand, stop using it. Get a second opinion.
Or rebuild the suspect part.
Warning Signs
Instability: If the stand wobbles or tips.
Mechanical Failure: Broken swivel or jammed parts.
Structural Damage: Splintering wood, significant warping.
Unusual Noises: Grinding or crunching sounds.
Conclusion
Building your own turning target stand is achievable. It’s a rewarding project. It saves money.
It gives you a great training tool. With simple materials and basic tools, you can make a functional stand. Remember to prioritize safety.
Check your work. And enjoy your practice. A DIY stand is a great addition to any shooter’s setup.
Frequently Asked Questions
What kind of wood is best for a target stand?
Pine or fir 2x4s are common and work well. They are strong and affordable. Cedar is good if you want more weather resistance.
Avoid particle board or soft plywood for structural parts.
How do I make the target spin automatically?
Automated spinning requires a motor and gearbox. This is more complex. For a DIY stand, manual turning is easiest.
You can manually push the target arm to spin it.
Can I use this stand for rifles?
This design is best for handguns or .22 rifles. For heavier rifle calibers, you may need a much sturdier base and uprights. Consider thicker lumber and stronger hardware.
Always ensure a robust backstop.
How far apart should the base legs be?
A width of 2 to 3 feet is usually good. This provides a stable footprint. Measure the span needed for your swivel and uprights.
Ensure the base is wider than it is tall.
My swivel feels stiff. What should I do?
Check if the mounting bolts are too tight. They can warp the swivel plates. Ensure the uprights are perfectly parallel.
Try lubricating the swivel with a spray lubricant. Clean off any grit or debris.
How can I make the stand more portable?
For portability, you could design the base to be collapsible. Or use wing nuts for easier disassembly. You could also build two smaller, lighter stands instead of one large one.
What is the best swivel for a DIY target stand?
A heavy-duty lazy Susan bearing is a good choice for lighter targets. For more durability, consider a ball-bearing swivel designed for gates or heavy loads. Look for weight ratings.