The bullseye in Olympic archery, also known as the Gold, is 12.2 centimeters (4.8 inches) in diameter for the standard 122cm target face size. This small, crucial area is the ultimate goal for archers aiming for perfection and the highest score.
Ever wondered what it takes to hit that tiny bullseye at the Olympics? It’s a common question that pops up when watching archers perform their incredible feats of accuracy. The target might look small from a distance, and it’s easy to underestimate just how small it truly is when aiming for that perfect shot. Many beginners find themselves frustrated when their arrows don’t land where they expect, and understanding the target’s dimensions is a crucial first step to improving. Don’t worry, we’re going to break down exactly how big the Olympic bullseye is, why its size matters, and what it means for your archery journey. Let’s get you informed and ready to aim with more confidence!
Understanding the Olympic Archery Target
The target used in Olympic archery is a marvel of precision and standardization. It’s designed to test archers’ skills to the absolute limit. While the whole target is important, the bullseye, or ‘Gold’, is where every single arrow is aimed. Knowing its size is fundamental for any aspiring archer looking to compete or simply improve their accuracy.
The Standard Olympic Target Face
In OlympicRecurve archery, the standard target face has a diameter of 122 centimeters (approximately 48 inches). This is the official size used in international competitions governed by World Archery. This large face is divided into ten scoring zones, each represented by a different colored ring with a specific point value.
The Bullseye: The Gold
The bullseye is the innermost ring of the target. On the standard 122cm target face, the bullseye, officially called the “10” or “Gold” ring, has a precise diameter of 12.2 centimeters (4.8 inches). This is the area archers are striving for to achieve the highest possible score.
Scoring Zones and Their Sizes
It’s helpful to understand how the bullseye fits into the broader scoring system. The entire target is divided into concentric rings, each with a specific point value. The rings are as follows, moving from the center outwards:
| Scoring Zone (Ring) | Point Value | Color | Size (Diameter) |
|---|---|---|---|
| Center (Inner Gold) | 10 | Gold | 12.2 cm (4.8 inches) |
| Outer Gold | 9 | Gold | 24.4 cm (9.6 inches) |
| Inner Blue | 8 | Blue | 36.6 cm (14.4 inches) |
| Middle Blue | 7 | Blue | 48.8 cm (19.2 inches) |
| Outer Blue | 6 | Blue | 61.0 cm (24.0 inches) |
| Inner Red | 5 | Red | 73.2 cm (28.8 inches) |
| Middle Red | 4 | Red | 85.4 cm (33.6 inches) |
| Outer Red | 3 | Red | 97.6 cm (38.4 inches) |
| Inner White | 2 | White | 109.8 cm (43.2 inches) |
| Outer White | 1 | White | 122.0 cm (48.0 inches) |
As you can see, the “Gold” section, which yields the highest scores (9 and 10 points), is actually made up of two rings. The absolute bullseye, the tiny 12.2 cm circle, is the zone worth 10 points. Achieving this requires immense precision and control.

Why is the Bullseye Size Important?
The size of the bullseye isn’t just a random number; it’s a critical factor in the sport of archery for several reasons:
- Standardization: A consistent bullseye size ensures fair competition. Every archer, regardless of where they are competing, faces the same challenge. This is crucial for Olympic standards.
- Testing Skill: The small diameter forces archers to develop and demonstrate exceptional consistency in their aiming, anchor points, release, and follow-through. It’s a true test of fine motor control and mental fortitude.
- Scoring Differential: While all scoring rings are important, the difference between hitting the 10 and the 9, or the 9 and the 8, can decide matches. The bullseye’s size makes these close calls significant.
- Psychological Factor: For archers, the bullseye represents perfection. Its small size can be both intimidating and motivating. Knowing the exact dimensions helps in setting realistic goals for practice.
The Impact on Olympic Archers
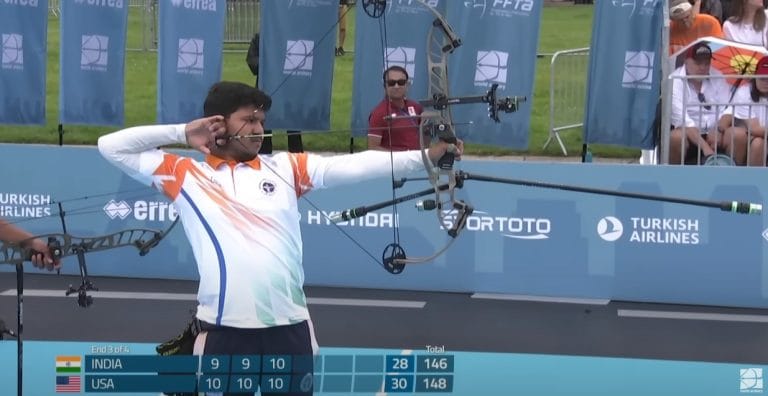
For elite Olympic archers, every millimeter counts. They train for years to shrink the perceived size of the target. Their focus is razor-sharp, and their movements are incredibly precise. When they aim, they aren’t just thinking “I need to hit the target.” They are visualizing the exact spot, fine-tuning their position, and executing a shot that needs to be repeatable thousands of times.
The 12.2 cm bullseye is the culmination of this dedication. It’s the ultimate confirmation of their mastery over technique and equipment. Even for professionals, shots landing in the 10-point ring are a source of pride and a testament to their hard work.
How Beginners Can Approach the Bullseye
As a beginner, thinking about the tiny 12.2 cm bullseye might seem overwhelming. But don’t let it discourage you! The journey to hitting it starts with understanding the fundamentals and gradually improving. Here’s a simple, step-by-step approach:
Step 1: Master the Basics
Before even thinking about the bullseye, focus on building a solid foundation. This includes:
- Stance: Standing balanced and relaxed is key. There are several stances, but consistency is what matters most.
- Grip: Hold the bow lightly. The bowstring, not the grip, should do the work of holding the bow while you’re drawing. Tight grips create unwanted tension.
- Nocking the Arrow: Ensure the arrow is securely placed on the string and bow rest.
- Drawing the Bow: Use your back muscles, not just your arms. Imagine pulling your shoulder blade back.
- Anchor Point: Find a consistent spot where your drawing hand touches your face. This is crucial for repeatable aiming.
- Aiming: For beginners, this might involve simply aligning the sights with the center of the target.
- Release: A surprise release, where your fingers simply relax and let go of the string, is ideal. Avoid plucking the string.
- Follow-through: Keep your aim and body still after the shot until the arrow lands.
Step 2: Start with Larger Targets
When you’re just beginning, don’t fixate on the bullseye. Start by shooting at a larger target or even just the entire target face if that’s all you have. The goal is to get comfortable with the shot process and start developing consistency in grouping your arrows.
Focus on getting your arrows to land close together, even if they are in the lower scoring rings. A tight group, even in the white or blue area, shows that your technique is repeatable, which is more important than scattering arrows all over the target with a few in the gold.
Step 3: Understand Your Equipment
If you’re using a recurve bow with sights, learn how to adjust them. Your sights will need to be adjusted both vertically and horizontally to move your arrow’s impact point. Generally:
- Moving the sight up will move your arrow impacts higher on the target.
- Moving the sight down will move your arrow impacts lower on the target.
- Moving the sight left will move your arrow impacts right on the target.
- Moving the sight right will move your arrow impacts left on the target.
When your arrows are grouped consistently but too high, too low, too left, or too right, you use your sight adjustments to bring that group into the center of the scoring zones you are aiming for. For example, if your arrows are grouping tightly but consistently landing low, you will adjust your sight upwards.
Step 4: Gradually Focus on Smaller Areas
As your groups tighten and you achieve consistent shot execution, you can start to focus more intently on the higher scoring rings. You might even use practice targets with only the gold rings or smaller bullseye sections to train your focus.
Consider using a smaller target face for practice. Many archery ranges offer smaller targets that simulate the bullseye or sections of the target. Practicing on these can build confidence and accuracy for the full-size target.
Step 5: Practice and Patience
Archery is a sport of continuous improvement. Hitting the bullseye consistently takes hundreds, if not thousands, of hours of practice. Celebrate small victories, like hitting all your arrows in the red, then all in the blue, and eventually working your way to the gold. Patience with yourself and your progress is key.
Remember, even professional archers at the Olympics are aiming for a 12.2 cm circle, and they don’t hit it every single time. The goal is consistency and aiming for the highest possible score with each shot.
Types of Targets and Their Bullseyes
While the 122cm target face with its 12.2cm bullseye is standard for OlympicRecurve, other archery disciplines use different targets. Understanding these can provide context:
Compound Bow Targets
Compound archery often uses smaller targets to account for the higher accuracy and speed of these bows. A common target size for compound archery is 80cm. On an 80cm target face, the bullseye (the “10” ring) is typically 16cm in diameter. This is larger than the OlympicRecurve bullseye, but it emphasizes that targets are scaled to the equipment used.
Indoor Archery Targets
Indoor archery typically uses a 40cm target face. On this smaller face, the bullseye (the “10” ring) is much smaller, measuring 4cm in diameter. This scaled-down version presents a different kind of challenge, requiring even greater precision.
Field Archery Targets
Field archery involves shooting at targets at various distances in an outdoor environment, often on uneven terrain. These targets can vary in size depending on the distance of the stake. For example, at 20 yards, a target might be a 6-inch (15cm) circle where the center 2-inch (5cm) circle is the ‘X’ ring (used for tie-breakers, scored as a 10).
Practice Targets
For beginners, there are many affordable practice targets available. These range from large foam blocks to paper targets with various scoring diagrams. Many paper targets mimic the Olympic style, allowing you to practice hitting a 12.2cm bullseye from closer distances as you progress. You can even print your own targets from online resources, many of which offer scaled-down versions of the official target zones to help you focus on the bullseye area.
Essential Equipment for Improving Accuracy
While practice is paramount, the right equipment can significantly help you on your journey to hitting that bullseye. As Salman Arfeen, I always recommend starting with equipment that suits you and your goals:
- A Suitable Bow: For beginners, a recurve bow is often recommended due to its simplicity and its use in the Olympics. Ensure it has a comfortable draw weight for your strength. A bow that is too heavy will introduce tension and inconsistencies into your shot.
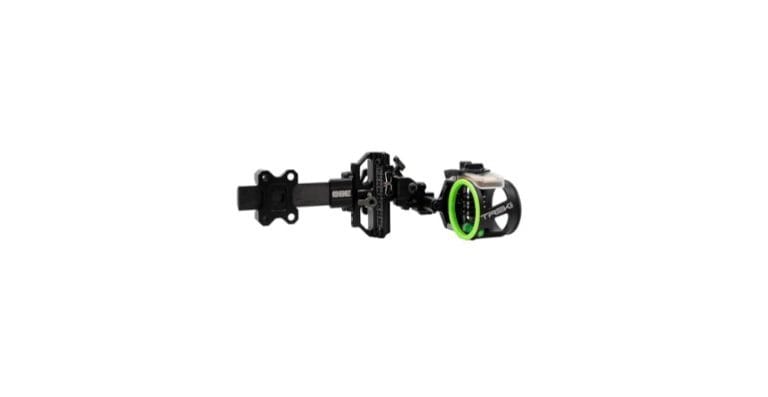
- Sights: A good quality sight is essential for aiming. Most beginner recurve bows come with adjustable sights that allow you to fine-tune your aim. Learning to use your sight is a direct path to improving accuracy.
- Arrow Rest: This small but crucial component guides the arrow as it leaves the bow. A well-tuned arrow rest ensures a clean release.
- Stabilizers: These help to absorb vibration and balance the bow, contributing to a steadier shot.
- Bow Square (T-Square): This tool is invaluable for ensuring your arrow is nocked at the correct position on the string, perpendicular to the arrow rest. Proper nocking point placement is vital for consistent arrow flight. You can find guides on setting your nocking point from organizations like USA Archery.
- Arrow Tuning Tools: Once you become more serious, simple tools for checking arrow straightness or spine alignment can help ensure your arrows are flying true.
The Importance of Arrow Selection
Arrows are not one-size-fits-all. The right arrows for your bow and shooting style are critical for accuracy. Key factors include:
- Spine: This refers to the stiffness of the arrow shaft. It needs to match your bow’s draw weight and your draw length. Arrows that are too stiff or too weak will fly erratically.
- Weight: Heavier arrows are generally more forgiving but fly slower. Lighter arrows are faster but can be more affected by wind.
- Length: Arrows must be the correct length for your draw length.
Consulting with a local archery shop or experienced coach can help you select the perfect arrows. They might use tools like an “arrow spine calculator” to recommend the best fit.

Frequently Asked Questions About Bullseye Size
Q1: Is the bullseye always the same size in Olympic Archery?
Yes, for OlympicRecurve archery, the bullseye (the 10-point ring) on the standard 122cm target face is always 12.2 centimeters (4.8 inches) in diameter. This ensures a consistent challenge for all competitors.
Q2: What is the difference between the bullseye and the X-ring?
In OlympicRecurve archery, the bullseye is the entire gold ring worth 10 points. There isn’t a separate ‘X’ ring that scores higher than 10 visible on the target face itself during play. However, an ‘X’ mark is sometimes used for tie-breaking purposes to signify the absolute center of the 10-point ring. This ‘X’ is for judging shoot-offs when scores are tied, not for scoring individual arrows during the match.
Q3: How far away are the targets in Olympic Archery?
For OlympicRecurve, the competition distance is 70 meters (approximately 76.6 yards) for outdoor rounds. For indoor events, the targets are typically set at 18 meters (approximately 19.7 yards).