To know what spine arrow to shoot, you need to match your bow’s draw weight and your draw length to the arrow’s spine rating. Spine is the stiffness of the arrow shaft. Choosing the correct spine ensures your arrows fly straight and true, hitting your target accurately and safely. Our guide breaks down how to find this perfect match.
Hey there, fellow archers! Salman Arfeen here, ready to help you navigate one of the most important decisions in archery: picking the right arrow spine. It’s a common question for beginners, and getting it wrong can lead to frustratingly inaccurate shots or even unsafe conditions. But don’t worry! We’re going to break this down together, step by step. You’ll learn exactly what spine means, why it matters, and how to confidently choose the perfect arrows for your bow. Let’s get your arrows flying straight and true, making your archery experience more enjoyable and successful than ever before!
Understanding Arrow Spine: The Stiffness That Matters
When we talk about arrow spine, we’re essentially talking about how stiff the arrow shaft is. Think of it like bending a ruler. A very stiff ruler will resist bending more than a flexible one. In archery, this stiffness is crucial because it affects how the arrow flexes as it leaves your bow. This controlled flex, or “porpoising,” is a normal part of an arrow’s flight. The spine rating tells you how much force it takes to bend an arrow shaft a specific amount. This is usually measured in pounds (lbs).
Why Does Spine Matter So Much?
The spine of your arrow needs to be matched accurately to your bow’s specifications. If an arrow is too stiff (high spine rating for a light bow), it won’t flex enough and might hit left (for a right-handed shooter) of your target. If it’s too weak (low spine rating for a powerful bow), it will flex too much, flutter erratically, and likely hit right of your target. This is because the arrow doesn’t stabilize quickly enough before reaching its target. A correctly spined arrow will shoot off the bow cleanly and fly straight, giving you the best chance for accurate shots and a safer shooting experience.
Improperly spined arrows can wobble in flight, leading to inconsistent groupings and missed targets. In extreme cases, a weak arrow can even crack or break upon release, which is a dangerous situation for both the archer and anyone nearby.
How Spine is Measured
Arrow spine is typically measured using an industry standard. A test is performed where a 1.94-pound weight is hung from the center of a 28-inch arrow shaft supported at two points 26 inches apart. The amount the shaft bends under this weight is its spine rating. For example, if the shaft bends exactly 0.500 inches, it is rated as a 500 spine arrow. Lower numbers indicate stiffer arrows, while higher numbers indicate more flexible arrows.
Key Factors in Choosing Your Arrow Spine
To find the right spine, you need to consider a few essential factors that work together. These aren’t complicated, and once you know them, the process becomes much clearer. We’ll guide you through each one.
1. Bow’s Draw Weight
This is the force required to pull your bowstring back to your full draw length. It’s usually printed on the limbs of your bow in pounds (e.g., 40-50 lbs). The heavier the draw weight, the more energy your bow transfers to the arrow. Therefore, a heavier draw weight generally requires a stiffer arrow shaft (lower spine number).
2. Your Draw Length
This is the distance from your bow’s grip to your anchor point when you are fully drawn. It’s typically measured in inches. When you draw a bow, the effective length your arrow “sees” from the rest to the plunger button (where it flexes) changes. A longer draw length means the arrow effectively becomes slightly weaker because it has more free shaft to flex. Conversely, a shorter draw length makes the arrow effectively stiffer.
3. Arrow Length
The length of your arrow also plays a role in its effective spine. Longer arrows are more flexible than shorter arrows cut from the exact same shaft material and diameter. So, if you’re using longer arrows, you might need a stiffer shaft (lower spine number) compared to someone using shorter arrows.
4. Bow Type (Recurve vs. Compound)
While spine is important for both, the way it interacts can differ slightly between bow types.
- Recurve Bows: Traditional recurve bows, especially those without a solid center shot design, can be more sensitive to arrow spine. The arrow often rests on a simple arrow rest or “shelf.”
- Compound Bows: Compound bows typically have more advanced arrow rests (like drop-away rests) and a more forgiving center-shot design. This can sometimes allow for a slightly wider range of acceptable spines, but accuracy and performance are still best with the correct match.
5. Arrow Material and Weight
While spine is the primary stiffness indicator, the material (carbon, aluminum, wood, composite) and the overall weight of the arrow also influence how it behaves. Heavier arrows generally require a slightly weaker spine (higher spine number) to flex correctly, while lighter arrows may need a stiffer spine (lower spine number).
How to Find Your Ideal Arrow Spine: A Step-by-Step Approach
Now that we understand the factors, let’s put them together to find that perfect arrow spine.
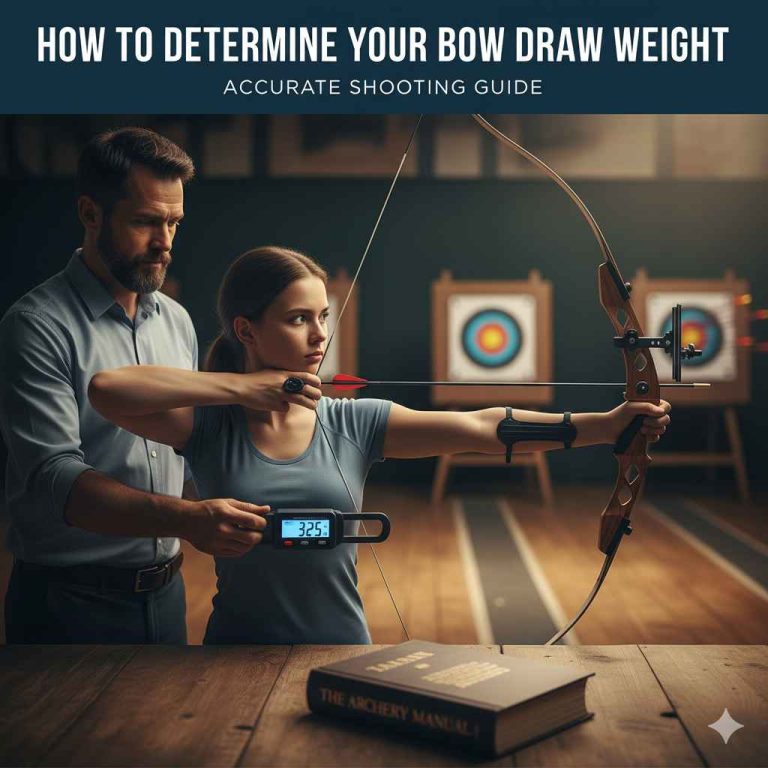
Step 1: Determine Your Bow’s Effective Draw Weight
While your bow might say “40-50 lbs,” that usually refers to the draw weight at a 28-inch draw length. If your draw length is different, the actual draw weight your arrow experiences will change. You can:
- Check your bow’s specifications: Some manufacturers provide charts showing draw weight at different lengths.
- Use a bow scale: This is the most accurate method. Attach a bow scale near your bow’s string loop and draw your bow to your exact draw length. The scale will show the peak draw weight you are exerting.
This is the critical number to use when consulting spine charts.
Step 2: Measure Your Draw Length Accurately
This is a very important measurement! To do this:
- Stand holding your bow.
- Extend your bow arm straight out, as if you are holding the bow.
- With your other hand, bring the bowstring to your typical anchor point (this is where you naturally pull the string back to your face before releasing).
- Have a friend measure the distance from the very front of the bow riser (the grip area) to the nocking point on your string.
Alternatively, you can measure from the string at full draw to the deepest part of your grip. Another common method is to measure your wingspan and divide by 2.5. While not perfectly precise, it gives a good ballpark figure for many people.
Step 3: Determine Your Arrow Length
Your arrow length is typically measured from the nock groove (where the string attaches) to the front of the shaft. Many archers cut their arrows so the tip of the arrow extends about 1 inch past the bow’s riser. You can:
- Measure current arrows: If you have arrows that shoot well, measure their length.
- Cut to preference: A common guideline for compound bows is to have the arrow extend about 1 inch beyond the rest at full draw, or about 1 inch past the riser. Recurve archers might prefer them flush with the riser or extending slightly.
It’s often best to have arrows cut slightly longer than you think you’ll need and then experiment. You can always cut them shorter. This is because a longer arrow is weaker, and you can trim it to make it stiffer if needed.
Step 4: Consult a Spine Chart or Dyna-Line
Once you have your effective draw weight, draw length, and desired arrow length, you can use a spine chart. Most arrow manufacturers provide these charts online or in their catalogs. These charts are invaluable tools. Spine charts are typically organized with draw weight on one axis and draw length on another, showing you the recommended spine range.
Example Spine Chart (Manufacturers Vary)
| Bow Draw Weight (lbs) | Draw Length (inches) | Recommended Arrow Spine Range (e.g., 350-400, 400-450, 450-500) |
|---|---|---|
| 35 | 26 | 500-550 |
| 35 | 28 | 450-500 |
| 40 | 27 | 400-450 |
| 40 | 29 | 350-400 |
| 50 | 28 | 350-400 |
| 50 | 30 | 300-350 |
You’ll find that as draw weight increases or draw length decreases, you’ll need a stiffer arrow (lower spine number). Conversely, as draw weight decreases or draw length increases, you’ll need a weaker arrow (higher spine number).
Online resources like the Easton Arrow Selector Tool are excellent for this. Easton is a highly reputable manufacturer, and their tools are based on extensive testing and data. Using such a tool simplifies this process immensely.
Step 5: Consider Arrow Weight and Tuning
Spine charts provide a starting point. The overall weight of your arrow (grains per inch) also matters. Heavier arrows will generally fly slightly weaker than lighter arrows of the same spine rating. If you are between spine sizes, consider:
- If your arrow is slightly too weak: You can often add weight to the front of the arrow by using a heavier point. This helps stiffen the arrow’s flex.
- If your arrow is slightly too stiff: In some cases, you might reduce point weight, or if using a fixed-blade broadhead, you might need to switch to a stiffer shaft.
Tuning your bow is the final step to confirm your arrow spine is correct. This involves making small adjustments to your bow’s setup (like rest position or tiller) to achieve “bullet holes” – where arrows shot in succession appear to pass through the same hole in your target, indicating perfect flight.
A good indicator of correct spine is how your arrows fly from your bow. If they are flying straight and grouping well, you’re likely in the right ballpark. If you’re seeing consistent fishtailing or erratic flight, it’s a sign that your spine might be off.
Arrow Spine and Tuning: The Perfect Partnership
The spine of your arrow is the foundation, but proper bow tuning is what brings it all together for optimal performance. Even with the correct spine, a poorly tuned bow will make your arrows fly as if they were spined incorrectly.
What is Bow Tuning?
Bow tuning is the process of adjusting your bow and arrow setup so that your arrows leave the bow in the most consistent and accurate way possible. This minimizes any unwanted movement or flex of the arrow.
Common Tuning Indicators Related to Spine
When you are paper tuning, you are looking for tears in the paper target as the arrow passes through it. These tears give you clues about what needs adjustment:
- Vertical Tears: Often indicate issues with arrow spine or nock height. A tear high on the paper might suggest a stiff arrow or your arrow rest being too low. A tear low on the paper might suggest a weak arrow or your arrow rest being too high.
- Horizontal Tears: Usually indicate problems with the arrow rest’s side-to-side adjustment or your bow’s tiller. A tear to the left (for a right-handed shooter) might suggest the arrow is too stiff or the rest is too far left. A tear to the right might suggest the arrow is too weak or the rest is too far right.
It’s important to note that these are general indicators. Sometimes horizontal tears can be caused by broadheads versus field points, or by the way your hand is gripping the bow. For this reason, many archers start by ensuring their arrow spine is correct for their equipment before diving deep into advanced tuning techniques.
Adjusting for Spine: Points and Inserts
It’s often easier to make small adjustments to arrow spine by changing the weight of your arrow’s point (the tip) or by using specialized inserts. For example, if you are using a carbon arrow and your spine chart suggests you are right on the edge between two spine sizes:
- If the recommended spine is slightly too stiff (lower number): You can often achieve proper flight by using a heavier point. A heavier point puts more weight on the front of the arrow, causing it to flex more upon release, effectively making it act like a weaker spined arrow.
- If the recommended spine is slightly too weak (higher number): You might need to switch to a lighter point or consider a stiffer arrow shaft.
When you purchase arrows, they usually come with standard inserts. However, you can buy heavier or lighter inserts, and of course, arrow points come in many different weights. Aim to have your finished arrow (with point and nock) weigh between 5 and 7 grains per pound of your bow’s draw weight for optimal performance. For example, a 40 lb bow would ideally have arrows weighing between 200 and 280 grains.
For a more in-depth understanding of tuning, resources from organizations like the USA Archery often provide valuable training materials and information on proper equipment setup and maintenance.
Common Beginner Mistakes to Avoid
Every archer makes mistakes when starting out! Learning what to watch out for can save you time, money, and frustration.
- Guessing: Simply picking an arrow off the shelf without consulting charts or asking for help is the most common mistake.
- Ignoring Draw Length: Thinking that your bow’s draw weight alone is enough to pick an arrow. Draw length is just as critical.
- Using Incorrect Arrow Length: Arrows that are too long or too short can negatively impact flight and safety.
- Not Considering Bow Type: Assuming all bows of the same draw weight require the exact same arrow spine.
- Buying the Cheapest Arrows: While budget is important, extremely cheap arrows might have inconsistent spines or be made of lower-quality materials, leading to poor performance and safety issues.
- Failing to Tune: Assuming any arrow will shoot well out of any bow without fine-tuning.
FAQs: Your Burning Questions Answered
Q1: What happens if my arrows are too weak?
If your arrows are too weak (too flexible for your bow), they will likely fly erratically, often porpoising or wobbling significantly before hitting the target. This typically results in arrows hitting to the right of your intended point of aim (for a right-handed archer). In severe cases, a far-too-weak arrow can break upon release, which is dangerous.
Q2: What happens if my arrows are too stiff?
If your arrows are too stiff (not flexible enough for your bow), they tend to fly as if they are too weak, but in the opposite direction. Typically, a too-stiff arrow will hit to the left of your intended point of aim (for a right-handed archer). They can also exhibit less of a controlled flex upon release, leading to a straighter, but potentially less accurate, trajectory.
Q3: How important is arrow weight (grains) compared to spine?
Both are crucial! Spine dictates how the arrow flexes, which is fundamental for straight flight. Arrow weight (measured in grains) influences the arrow’s momentum and how it reacts to wind and kinetic energy. A common guideline is to have your total arrow weight (including point, shaft, vanes, and nock) be between 5 and 7 grains per pound of bow draw weight. So, a 50 lb bow would ideally use arrows weighing 250-350 grains. You can’t ignore either factor for optimal performance and accuracy.
Q4: Can I use the same arrows for my compound bow and my recurve bow?
Generally, no. While they might have the same draw weight, the way they launch an arrow and the tuning characteristics are different. Compound bows are often more forgiving due to their “let-off” and precise launching mechanism, while recurve bows can be more sensitive.