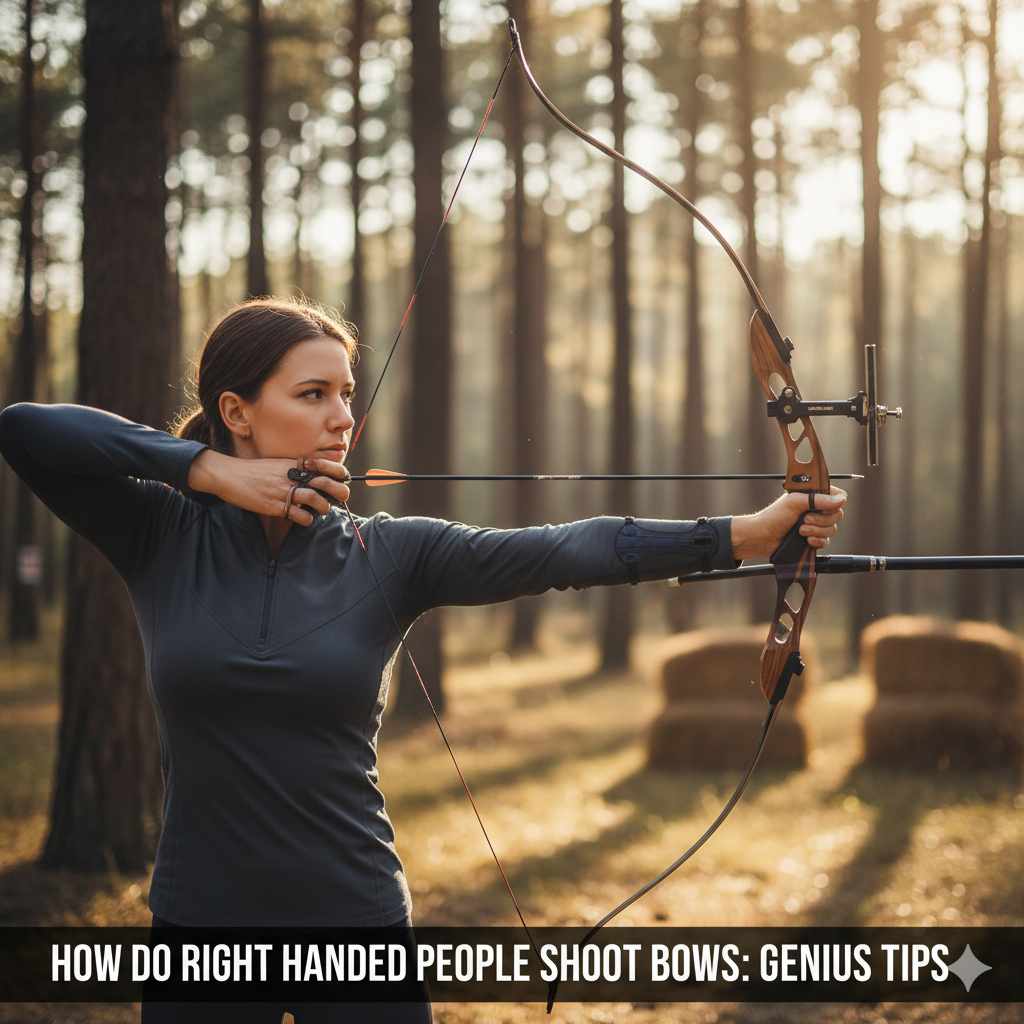
Right-handed people shoot bows by using their left hand to hold the bow and their right hand to draw and release the arrow. This dominant-eye preference guides the bow hand, while the dominant hand typically handles the drawing and shooting action.
Learning to shoot a bow can feel a bit tricky at first, especially figuring out which hand does what! Many beginners wonder, “How do right-handed people shoot bows?” It’s a common question, and the answer is simpler than you might think. It all comes down to using your body’s natural leanings. We’ll break down the steps in a way that makes sense, so you can feel confident and ready to hit the target. Let’s get you shooting with precision and enjoyment, the safe and easy way!
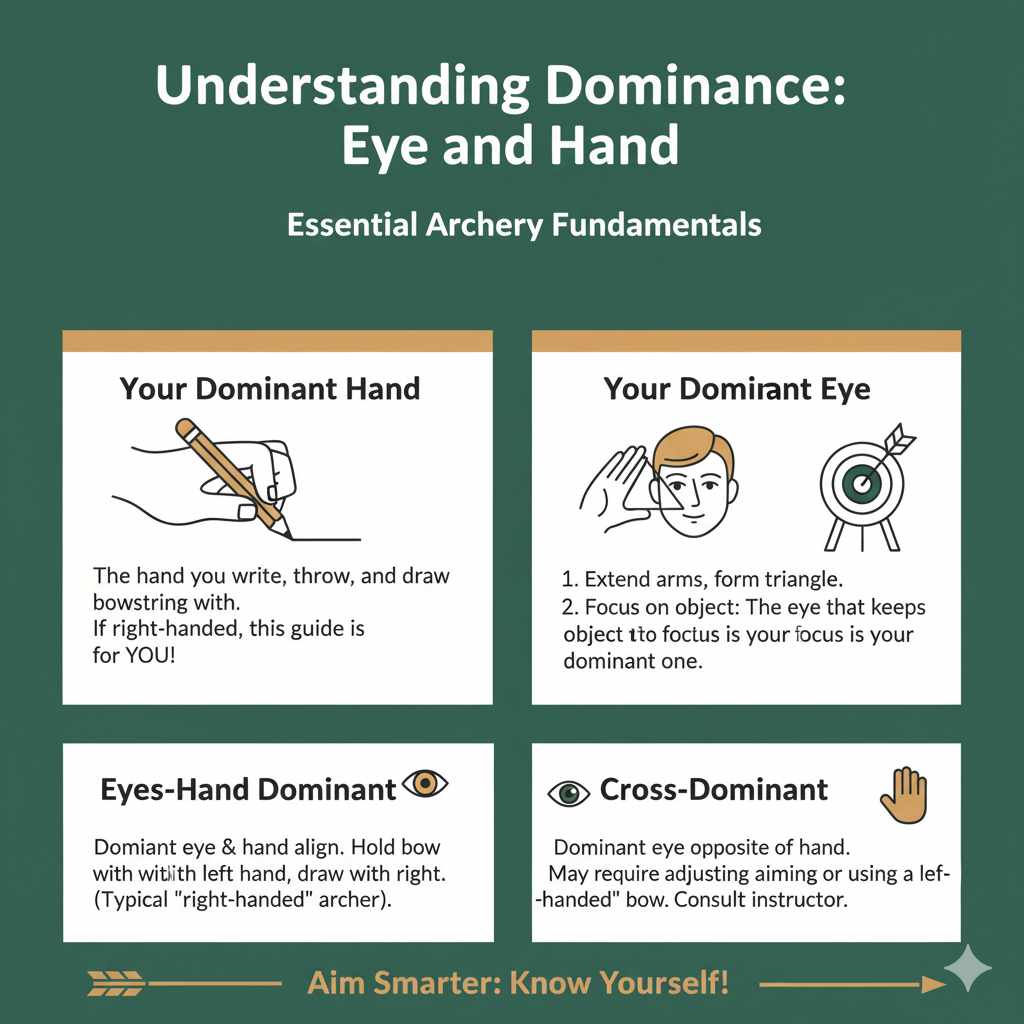
Understanding Dominance: Eye and Hand
Before we get into the how-to, it’s crucial to understand two key concepts: your dominant hand and your dominant eye. For most right-handed individuals, these often align, but not always! Knowing your dominant eye is just as important as knowing your dominant hand in archery.
Your Dominant Hand
This is usually the hand you write with, throw a ball with, or even brush your teeth with. If you’re right-handed, this article is tailored for you! Your dominant hand will be the one that draws back the bowstring.
Your Dominant Eye
Archery is a visual sport, and your dominant eye helps with aiming. To find your dominant eye, extend your arms straight out in front of you, forming a triangle shape with your thumbs and index fingers. Focus on a distant object through this triangle. Now, close one eye at a time. The eye that keeps the object in focus when the other is closed is most likely your dominant eye.
If your dominant eye is on the same side as your dominant hand: You are “eyes-hand dominant” on that side, and will likely shoot a “right-handed” bow (where the bow is held in your left hand and drawn with your right).
If your dominant eye is on the opposite side of your dominant hand: You are “cross-dominant.” This might mean you’re right-handed but have a left dominant eye. In this case, some right-handed people still shoot a “right-handed” bow and learn to aim with their non-dominant eye, while others might find it more comfortable to shoot a left-handed bow. For this guide, we’ll focus on the most common scenario: right-handed and right-eye dominant. If you’re cross-dominant, it’s worth experimenting or seeking advice from an archery instructor.
The Right-Handed Shooting Setup: Step-by-Step
Now that we know about dominance, let’s get to the core of “how do right-handed people shoot bows?” It’s a sequence of actions performed with precision and control.
1. Stance: Grounding Yourself
A stable stance is the foundation of good archery. Think of it as your anchor point for stability.
What a Good Stance Looks Like:
- Feet Placement: Stand with your feet shoulder-width apart. Your feet should be perpendicular to the target, like you’re standing on railroad tracks with the train going directly away from you.
- Weight Distribution: Distribute your weight evenly on both feet, with a slight bend in your knees. This keeps you balanced and prevents you from leaning too far forward or backward.
- Body Alignment: Your body should be facing slightly to the side of the target, not directly at it. Imagine your non-shooting shoulder pointing towards the target.
2. Gripping the Bow: Gentle Does It
The way you hold the bow is critical. You don’t want to grip it too tightly, as this can cause your arm to tense up and affect your shot.
The Bow Hand Explained:
- Hand Position: Place the grip of the bow into the fleshy part of your palm, between your thumb and index finger.
- Angle: Your elbow should be pointed slightly outwards, away from the bow. This creates a straight line from your elbow to your knuckles.
- Grip Pressure: Your grip should be relaxed. Think of holding a delicate bird – you want to hold it securely, but not crush it. Too much tension will cause the bow to twist, impacting accuracy. The bow should rest in your hand and want to fall forward naturally when you relax your grip.
3. Nocking the Arrow: Connecting the Pieces
“Nocking” means placing the arrow onto the bowstring and the bow itself. This is a precise step.
How to Nock Correctly:
- Arrow Orientation: Most arrows have a “fletching” (the small fins at the back). One of these fletchings is usually a different color – this is the “index vane” or “cock feather.”
- Placement: The arrow should be placed on the “nocking point” on the bowstring. This is usually a small brass crimp or a marked serving on the string.
- Index Vane Out: When nocking, ensure the index vane points away from the bow riser (the main body of the bow). This prevents the fletching from hitting the bow when you shoot.
- Secure Fit: The nock of the arrow should snap onto the string with a gentle click, but not be so tight that it’s difficult to get off or so loose that it falls off on its own.
4. Drawing the Bowstring: Power and Control
This is where your dominant hand comes into play. You’ll use the muscles in your back and shoulder to pull the string back, not just your arm.
Drawing Technique for Beginners:
- Grip: Use three fingers of your drawing hand: your index finger above the nock, and your middle and ring fingers below the nock. This is called a “three-finger grip” or “Mediterranean draw.”
- Pulling Motion: Instead of just pulling with your arm, focus on pulling your elbow back. Imagine you’re trying to bring your elbow towards your ear and then back. This engages your back muscles, which are stronger and more stable.
- Smoothness is Key: Draw the string back smoothly and consistently. Avoid jerking the string.
5. Anchoring the Draw: Consistency is Vital
Anchoring is the point where you stop drawing the string back, holding it steady before you aim and release. Consistency here is crucial for accuracy.
Finding Your Anchor Point:
- Reference Point: A common anchor point for right-handed shooters is to bring the string hand’s knuckles to the corner of their mouth or the same side of their jawbone.
- Consistent Contact: Whatever anchor point you choose, make sure it’s the same every single time you shoot. This consistency helps build muscle memory and predictable shot placement.
- Relaxed Hold: While at full draw, try to maintain a relaxed but firm hold on the string. Don’t overdraw or strain.
6. Aiming: Your Dominant Eye Takes the Lead
This is where your dominant eye comes into its own.
Aiming Methods:
There are a few ways to aim:
- Instinctive Shooting: This relies heavily on your dominant eye and years of practice. You simply look at the target and shoot. It’s natural but takes time to develop.
- Using a Sight: Many modern bows have sights. For a right-handed shooter using a sight, you’ll align your eye with the sight pin(s) and then align the sight pin with the target. Your dominant eye is naturally positioned to do this.
- Closing the Non-Dominant Eye: For beginners, it’s often easiest to close or cover your non-dominant eye while aiming. This ensures your dominant eye is doing the work.
7. Releasing the Arrow: The Gentle Push
The release should be as smooth and surprise-free as the draw.
How to Execute a Good Release:
- Finger Relaxation: Instead of “plucking” the string, imagine you are gently letting your fingers relax and peel away from the string.
- Follow-Through: After the release, your drawing hand should continue its motion back slightly, as if following through with a tennis swing. This helps prevent “target panic” or jerking the bow.
- Maintain Focus: Keep your eyes focused on the target even after the arrow has left the bow.
8. Follow-Through: The Unsung Hero of Accuracy
Many beginners overlook this step, but it’s vital for consistency.
Why Follow-Through Matters:
A good follow-through means maintaining your form and body position for a moment after the arrow has been released. This helps ensure:
- Bow Stability: It keeps the bow arm steady, preventing unnecessary movement that could affect the arrow’s flight.
- Muscle Memory: It reinforces good shooting habits.
- Accuracy: It allows the arrow to leave the bow cleanly and without interference.
Think of it as holding your pose for a beat after you’ve finished the action. It’s a sign of good control and form.
Troubleshooting Common Issues for Right-Handed Archers
Even with clear steps, beginners often encounter similar hurdles. Here are some common issues and how right-handed archers can address them.
Arrow Hitting Left or Right:
- Bow Arm Torque: A common culprit is gripping the bow too tightly with the left hand (for right-handed shooters). This twists the bow. Try a more relaxed grip.
- Anchor Point Inconsistency: If your anchor point varies, your aim will vary. Ensure you’re consistently placing your drawing hand in the same spot on your face.
- Bow Sight Adjustment: If you’re using a sight, it might need adjustment. Remember, for a right-handed shooter, if your arrows are consistently hitting left of your aim point, you generally need to move the sight left. If they’re hitting right, move the sight right. Always follow the manufacturer’s instructions for your specific sight.
Arrow Hitting High or Low:
- Over-drawing or Under-drawing: Not drawing the bowstring back to a consistent full draw length can cause shots to go high or low. Focus on reaching your set anchor point every time.
- Release Technique: Plucking the string or releasing too early/late can significantly impact vertical accuracy. Practice a smooth, surprise release.
- Eyepath: Ensure your dominant eye is consistently aligned with the sight or aiming point.
Feeling of Jerking or Plucking:
- Tension: Often caused by excessive tension in the drawing arm or fingers. Focus on the back tension draw technique and a relaxed release.
- Fear of Release: Beginners can sometimes anticipate the release and tense up. This is known as “target panic.” Practice shooting at closer distances where consistency is easier to achieve and build confidence.
- Bow Weight: If the bow is too heavy, it’s hard to hold steady and control the release. Consider a lighter draw weight bow until you build strength. You can find resources on choosing the right draw weight from organizations like the USA Archery.
Essential Equipment for Right-Handed Beginners
While you can technically shoot a bow with just a bow, string, and arrow, a few accessories make the process safer, more comfortable, and more effective for a beginner right-handed archer.
Table: Beginner Archery Gear Checklist
| Item | Description | Why it’s Important for Right-Handed Beginners |
|---|---|---|
| Bow | Typically a recurve or compound bow. For beginners, a lighter draw weight is recommended. | The choice of bow depends on preference, but a right-handed bow is held in the left hand for a right-handed archer. |
| Arrows | Made of wood, aluminum, carbon, or fiberglass. Must match your bow’s draw weight and your draw length. | Properly spined (stiff enough) arrows are crucial for safe and accurate shooting. |
| Bowstringer | A tool used to safely string and unstring a recurve or longbow. | Prevents injury to yourself and the bow by allowing you to string it without putting undue stress on your body. |
| Armguard | Worn on the forearm of the bow arm (left arm for a right-handed shooter). | Protects your forearm from the snap of the bowstring, preventing painful string slap. |
| Finger Tab/Glove | Worn on the drawing fingers (right hand for a right-handed shooter). Protects fingertips and provides a consistent contact surface with the string. | Prevents blisters and calluses, and ensures a smoother release. |
| Quiver | Holds arrows. Can be worn on the hip or back, or rest attached to the bow. | Keeps your arrows organized and readily accessible. |
| Bow Square | A tool to measure the correct nocking point height on the bowstring. | Ensures your arrow is nocked at the correct height for consistent flight. |
| Release Aid | Optional for recurve shooters, common for compound shooters. Attaches to the bowstring and is triggered by a button. | Can help achieve a cleaner, more consistent release, especially if string tension is a challenge. |
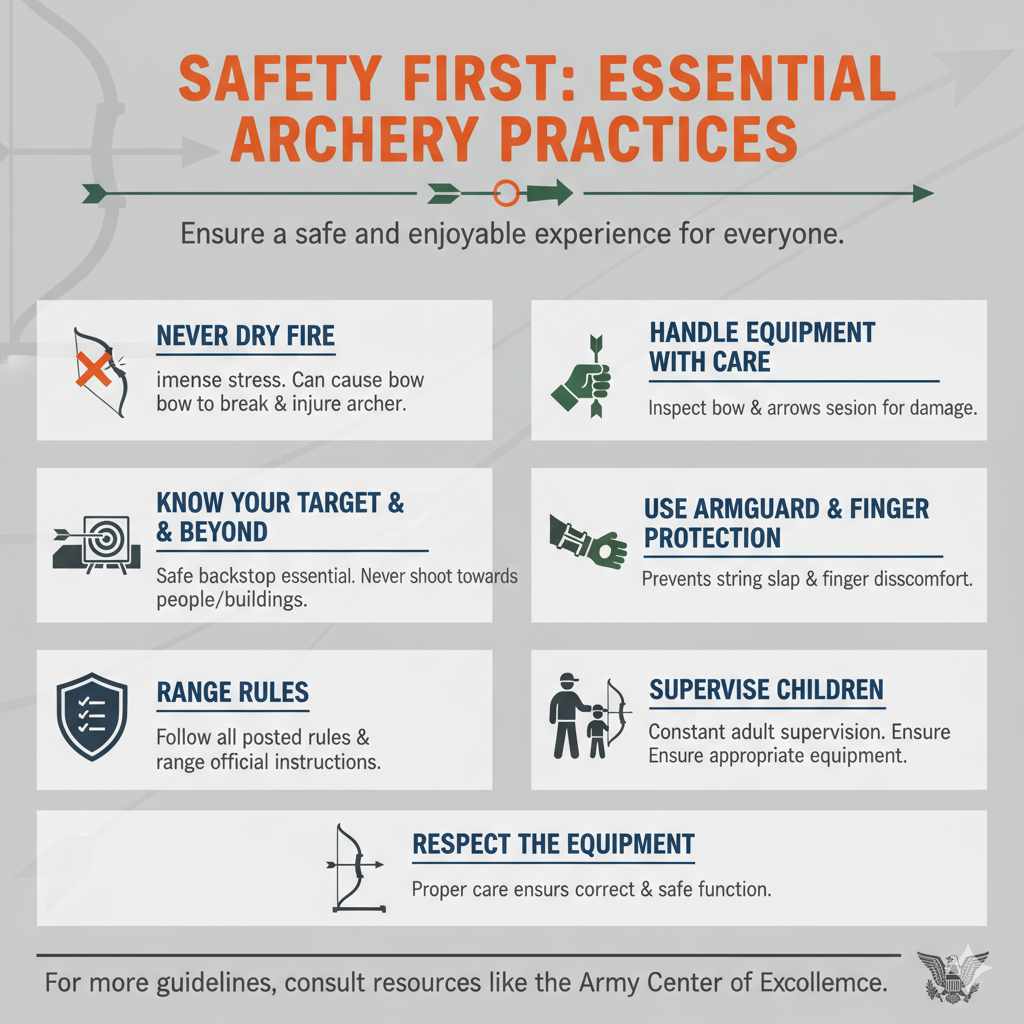
Safety First: Essential Archery Practices
Archery is a fantastic sport, but safety must always be your top priority. Following these guidelines will ensure you and everyone around you stays safe and enjoys the experience.
Key Safety Rules:
- Never Dry Fire: Never draw and release a bowstring without an arrow nocked. This puts immense stress on the bow and can cause it to break, potentially injuring the archer.
- Know Your Target and Beyond: Always be aware of what is behind your target. Ensure there’s a safe backstop (like an approved archery target or a natural embankment) to catch any missed arrows. Never shoot towards people or buildings.
- Range Rules: If you are at a formal archery range, follow all posted rules and instructions from range officials.
- Handle Equipment with Care: Inspect your bow and arrows before each session for any signs of damage. Broken arrows can be dangerous.
- Always Use an Armguard and Finger Protection: These prevent injuries from string slap and finger discomfort.
- Supervise Children: Never allow children to use a bow without direct, constant adult supervision. Ensure they use equipment appropriate for their size and strength.
- Respect the Equipment: Treat your bow and arrows with respect. Proper care ensures they function correctly and safely.
For more comprehensive safety guidelines, consult resources like the Army Center of Excellence, which provides excellent general safety advice applicable to all archery activities.
Frequently Asked Questions (FAQ)
Q1: Do I need to close my non-dominant eye when shooting a bow?
A1: While many beginners find it easier to close their non-dominant eye to focus on aiming with their dominant eye, it’s not strictly necessary. Some experienced archers learn instinctive shooting without closing an eye, or they might use a bow sight that helps align their vision. Experiment to see what works best for you. If you’re using a bow sight, you’ll typically keep both eyes open or align your dominant eye with the sight.
Q2: How do I know if I have the right draw weight for my bow?
A2: You should be able to draw the bowstring back smoothly to your anchor point without excessive straining. If you’re shaking, struggling to draw, or can’t hold it steady, the draw weight is likely too high. Conversely, if it feels extremely easy and uncontrolled, it might be too light. Aim for a weight that challenges you slightly but allows for consistent form and release.