Adding a wood shelf to your arrow storage shed is a straightforward DIY project. This guide provides essential steps, tool recommendations, and safety tips to help you create functional storage for your archery gear securely and efficiently.
Storing your archery equipment properly is key to keeping it in top condition. Sometimes, the shelves in a shed aren’t quite right for what you need, especially for specialized gear like arrows. Adding a custom wood shelf is a fantastic way to optimize your shed space, making it easier to organize and access your bows, arrows, and accessories. Don’t worry if you’re new to DIY; this guide breaks down the process into simple, manageable steps. By the end, you’ll have a sturdy, custom-built shelf that perfectly suits your needs, giving you more organized and enjoyable archery experiences.
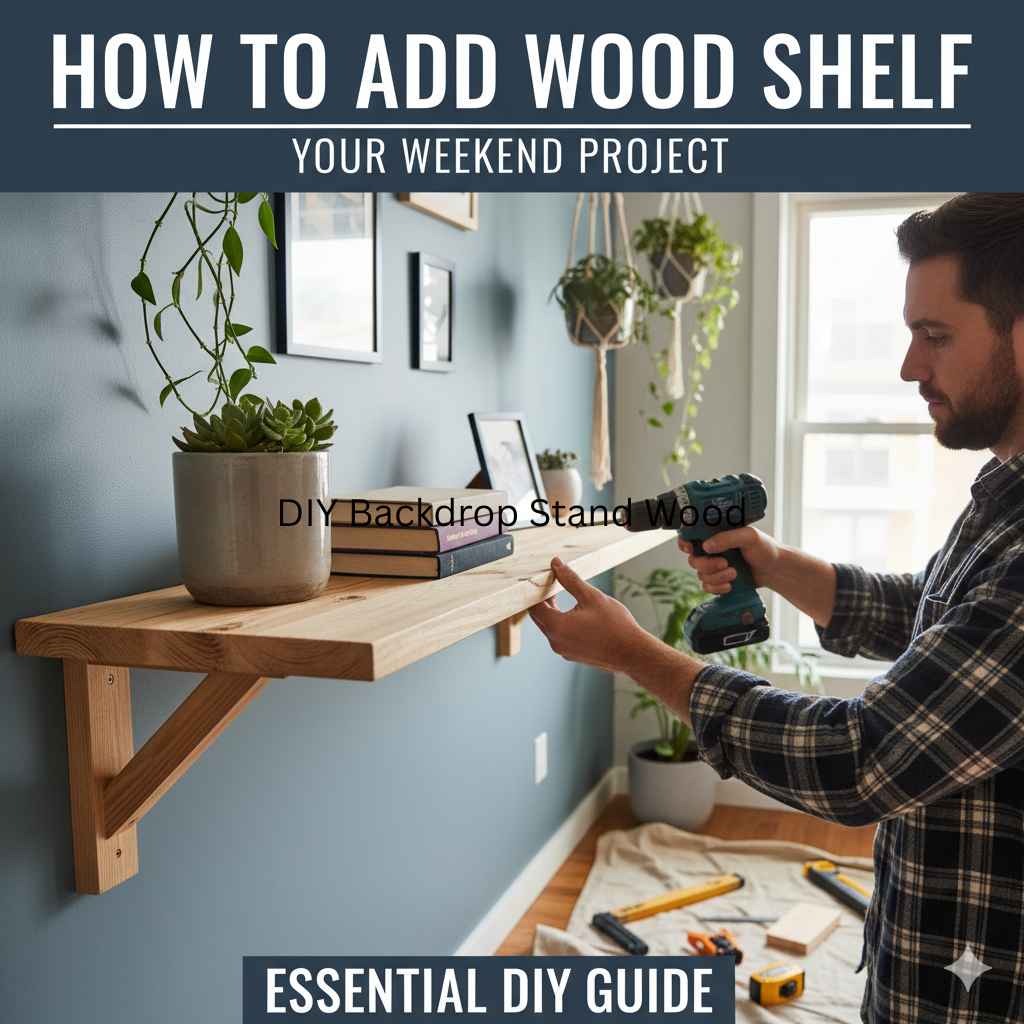
Why Add a Wood Shelf to Your Arrow Storage Shed?
An organized shed is like a well-maintained bow—it just performs better. Standard shed shelving can be too deep, too shallow, or just not sturdy enough for the weight of archery equipment. Adding your own wood shelf allows for:
- Customized Dimensions: Tailor the shelf size to fit your specific arrows, bows, or cases.
- Enhanced Durability: Use robust wood and strong fasteners for a shelf that lasts.
- Optimized Space: Maximize vertical space, keeping the floor clear and everything accessible.
- Protection for Gear: Prevent arrows from getting bent or bows from being scratched by creating dedicated storage spots.
- A Sense of Accomplishment: Building something useful with your own hands is incredibly satisfying!
For many archers, the frustration of a cluttered shed leads to misplaced equipment or even damage. A well-placed shelf can solve these issues, ensuring your valuable gear is always ready for your next range day.
Planning Your Wood Shelf Project
Before you grab your tools, a little planning goes a long way. This ensures you have the right materials and the shelf fits perfectly in your shed.
1. Measure Your Space and Needs
This is the most crucial step. Grab a tape measure and head to your shed.
- Determine Location: Where do you want the shelf? Consider wall studs for maximum support.
- Measure Height: How high do you want the shelf? Account for the height of items you’ll store on it, plus a little extra room.
- Measure Width: How wide can the shelf be? Measure between existing structures or walls.
- Measure Depth: How deep should the shelf be? Consider the size of your arrow cases or bow quivers. Don’t make it too deep if you have limited space; a shallower shelf is often better for organization.
For arrow storage, especially, consider how you’ll store them. Will they be in tubes, cases, or loose? This will dictate the length and depth needed.
2. Choose Your Wood
The type of wood you choose affects durability, cost, and appearance. For a sturdy shed shelf, common and effective choices include:
| Wood Type | Pros | Cons | Best For |
|---|---|---|---|
| Pine | Affordable, lightweight, easy to cut and work with. | Softer, can dent or scratch easily, may warp over time if not sealed. | General storage, lighter loads. |
| Fir | Stronger than pine, good balance of strength and cost. | Can be a bit harder to work with than pine. | Moderate loads, general-purpose shelving. |
| Plywood (¾ inch thick) | Very strong, stable, comes in large sheets, resistant to warping. | Can be heavier, edges may need finishing (e.g., with a wooden trim). | Heavy loads, deep shelves, strong base. |
| Hardwood (e.g., Oak, Maple) | Extremely durable, attractive grain, very strong. | Most expensive, harder to cut and work with. | Heaviest loads, shelves where appearance matters. |
For a standard arrow storage shed shelf, ¾ inch plywood or sturdy pine boards are excellent, budget-friendly options. Plywood offers great strength, especially for holding multiple bows or heavy accessory bins.
3. Select Your Mounting Method
How will the shelf be attached to the wall? There are a few reliable methods:
- Directly to Studs: This is the strongest method. Locate wall studs and attach your shelf supports or the shelf itself directly to them. You can find stud finders at most hardware stores. Use long screws that go through the shelf material and into the stud.
- Brackets: Heavy-duty shelf brackets are a popular choice. They attach to the wall (preferably into studs) and support the shelf from underneath. Choose brackets rated for the weight you intend to store.
- Cleats: A wooden cleat (a strip of wood) is attached horizontally to the wall, usually screwed into studs. The shelf then rests on top of this cleat and is secured to it. This can be a very strong and simple method, especially for longer shelves.
For storing archery equipment, especially heavier bows, attaching directly to studs or using very robust brackets is highly recommended. For a guide on locating wall studs, the U.S. Department of Energy offers some helpful insights on home energy saving tips, which often involve understanding wall structure.
Gather Your Tools and Materials
Having everything ready beforehand makes the DIY process smooth and enjoyable. Here’s a list of what you’ll likely need:
Essential Tools
- Tape Measure
- Pencil
- Safety Glasses (always wear these when cutting or drilling!)
- Work Gloves
- Stud Finder (if mounting to studs)
- Level
- Saw (hand saw, circular saw, or miter saw – depending on your comfort and precision needs)
- Drill/Driver
- Drill Bits (various sizes, including pilot holes and driver bits)
- Sandpaper (medium and fine grit)
- Clamps (optional, but helpful for holding pieces in place)
Materials List
- Wood for the shelf (e.g., ¾ inch plywood, pine boards)
- Wood for supports (e.g., 1×3 or 1×4 pine boards, if not using brackets)
- Screws (wood screws of appropriate length – aim for screws long enough to anchor securely into studs)
- Shelf Brackets (if using this mounting method)
- Wood Glue (optional, for extra strong joints)
- Wood Finish (paint, stain, or sealant – optional, but recommended to protect the wood)
Step-by-Step Guide: How to Add a Wood Shelf
Let’s get building! This process assumes you’re attaching your shelf to wall studs, as it’s the most secure method for archery gear.
Step 1: Prepare Your Wood
Based on your measurements, cut your shelf board(s) and any support pieces to size. If you purchased a pre-cut board, you can skip this. If cutting yourself:
- Measure twice, cut once! Ensure your cuts are straight and square.
- Sand all edges and surfaces until smooth. This removes splinters and gives a professional finish. Start with medium-grit sandpaper and finish with fine-grit for a nice feel.
Step 2: Locate Wall Studs
This is vital for a strong shelf. Use your stud finder to mark the center of at least two studs where your shelf will be mounted. For longer shelves, you might mark three or more studs.
- Slide the stud finder horizontally across the wall at the height where you plan to install the shelf.
- When the finder indicates a stud, mark the center point directly on the wall with your pencil.
- Repeat this process for all necessary studs along the planned shelf location.
If you don’t have a stud finder, you can sometimes find studs by gently tapping the wall. A solid thud indicates a stud, while a hollow sound means you’re between studs. You can also remove a small section of trim or baseboard to visually locate a stud.
Step 3: Install Shelf Supports (If Not Using Brackets)
If you’re attaching directly to studs without separate brackets, you’ll likely be screwing the shelf directly into supports you attach to the wall. A common method is using simple ‘ledge’ supports.
- Cut two (or more) pieces of wood (e.g., 1×3 or 1×4 pine) to the desired depth of your shelf. These will be your front supports.
- Hold one support piece horizontally against the wall, aligning its top edge with your shelf height line, and ensure it’s perfectly level.
- Mark the screw holes on the support piece that align with the stud locations you marked on the wall.
- Pre-drill pilot holes through the support piece at these marks.
- Secure the support piece to the wall by driving wood screws through the pilot holes and into the wall studs. Use at least two screws per stud.
- Repeat for the second support piece, ensuring it’s perfectly level with the first.
Alternative: Using Brackets
- Hold your chosen shelf brackets in place at your marked stud locations.
- Ensure they are level and mark the screw hole positions.
- Pre-drill pilot holes into the studs.
- Securely attach the brackets to the wall studs with appropriate screws. Make sure they are firmly in place and can support weight evenly.
Step 4: Attach the Shelf Board
Now for the main event! Place your cut and sanded shelf board onto the installed supports or brackets.
- Center the shelf board, ensuring an even overhang (if any) on the sides.
- Use your level to confirm the shelf is perfectly horizontal.
- From underneath (if using supports) or from the top (if attaching through brackets), pre-drill pilot holes through the shelf board and into your supports or brackets. For added strength, you can also drill down through the shelf and into the supports.
- Drive wood screws through the pilot holes to securely attach the shelf. For a cleaner look on top, you can use screws that are countersunk, meaning they are driven slightly below the surface. You can then fill these holes with wood filler later if you plan to paint or stain.
If using plywood and you want a cleaner look for the front edge, you can glue and nail a thin strip of matching wood (a ‘return’ or ‘edging’) along the front edge after the main shelf is attached.
Step 5: Finishing Touches (Optional but Recommended)
To protect your shelf from moisture and wear, and to give it a polished look:
- Clean the Shelf: Wipe away any sawdust with a damp cloth.
- Apply Finish: You can paint, stain, or seal your shelf.
- Stain: Apply wood stain with a brush or rag, wipe off excess. Let dry completely.
- Paint: Apply a primer, then one or two coats of paint. Let each coat dry thoroughly.
- Sealant: Apply a clear polyurethane or varnish for protection. This is great for utility shelves.
- Wood Filler: If you countersunk your screws, fill the holes with wood filler. Once dry, sand smooth and apply your finish.
Allow the finish to cure fully according to the product’s instructions before loading the shelf.
Tips for Storing Archery Gear on Your New Shelf
Now that your sturdy wood shelf is installed, here’s how to use it effectively for your archery essentials:
Arrow Storage
- Arrow Tubes/Cases: Store arrows vertically in dedicated arrow tubes or cases. These can stand upright on the shelf, preventing fletching damage and keeping them organized.
- Dedicated Slots: For a more custom approach, you could build simple dividers or drill holes into a thicker piece of wood to create individual slots for each arrow.
- Avoid Overcrowding: Don’t pack arrows too tightly. This can bend fletching or even damage shafts.
Bow Storage
- Bow Cases: Place bow cases horizontally on the shelf. Ensure the shelf is strong enough for the weight.
- Bow Stands/Racks: If you have a bow stand or rack, it can sit directly on your new shelf, creating a dedicated archery corner.
- Weight Considerations: Compound bows can be heavy. Distribute weight evenly and ensure your shelf, supports, and wall attachments are robust. For extremely heavy items, consider reinforcing the shelf with extra supports underneath.
Accessory Management
- Bins and Containers: Use smaller bins or containers to keep accessories like release aids, extra strings, cleaning kits, and arrows lubricants tidy and contained.
- Labeling: Labeling bins can save you time searching for specific items.
Remember that proper storage protects your investment and ensures your gear is in excellent condition for every shot. For more detailed information on bow care, it’s always worth checking resources from organizations like the Archery Trade Association, which often share best practices for equipment maintenance and storage.
Safety First!
Working with tools can be rewarding, but safety should always be your top priority. Keep these points in mind:
- Eye Protection: Always wear safety glasses when cutting, drilling, or sanding.
- Hand Protection: Gloves protect against splinters and minor cuts.
- Secure Your Work: Ensure all materials are stable before cutting or drilling. Use clamps where necessary.
- Know Your Tools: Read the manuals for your power tools and understand how to use them safely.
- Ventilation: If you’re painting or staining, work in a well-ventilated area.
- Weight Limits: Be realistic about how much weight your shelf can hold. Overloading can cause failure and potential injury.
Frequently Asked Questions (FAQs)
Q1: What is the best type of wood for a shed shelf holding archery gear?
For a good balance of strength, cost, and ease of use, ¾ inch plywood or solid pine/fir boards are excellent choices. Plywood offers superior strength against sagging, especially for heavier items like bows.
Q2: How do I ensure my shelf is strong enough?
The most critical factor is attaching your shelf directly into wall studs. Use long, sturdy screws that anchor firmly into the studs. If using brackets, ensure they are rated for the intended weight and are also secured into studs.
Q3: Can I hang a shelf from the ceiling instead?
Hanging a shelf from the ceiling is possible but generally more complex and may not be as stable as wall-mounted shelves for heavy items. It’s best to consult specialized guides for ceiling-mounted shelves if you consider this route.
Q4: What if I can’t find wall studs?
If you absolutely cannot locate studs, you can use heavy-duty drywall anchors specifically designed for significant weight. However, directly attaching to studs is always the preferred and most secure method. Tools like advanced stud finders or even a small inspection camera can help locate studs behind drywall.
Q5: How deep should a shelf be for storing arrows?
For most standard arrow cases or tubes, a depth of 6-8 inches is usually sufficient. This allows your arrow containers to sit neatly without taking up excessive space in your shed.
Q6: Do I need to seal or paint the wood?
Sealing or painting is highly recommended. It protects the wood from moisture and humidity common in sheds, preventing rot and warping. It also gives a more finished and professional appearance.
Conclusion
Adding a custom wood shelf to your arrow storage shed is a rewarding DIY project that significantly enhances organization and gear protection. By carefully measuring, selecting appropriate materials, and following these simple steps, you can create a durable and functional storage solution tailored to your archery needs. Remember to prioritize safety throughout the process, and enjoy the peace of mind that comes with a well-organized space. Now you have the perfect spot for your bows, arrows, and accessories, keeping them safe, accessible, and ready for your next adventure at the range!