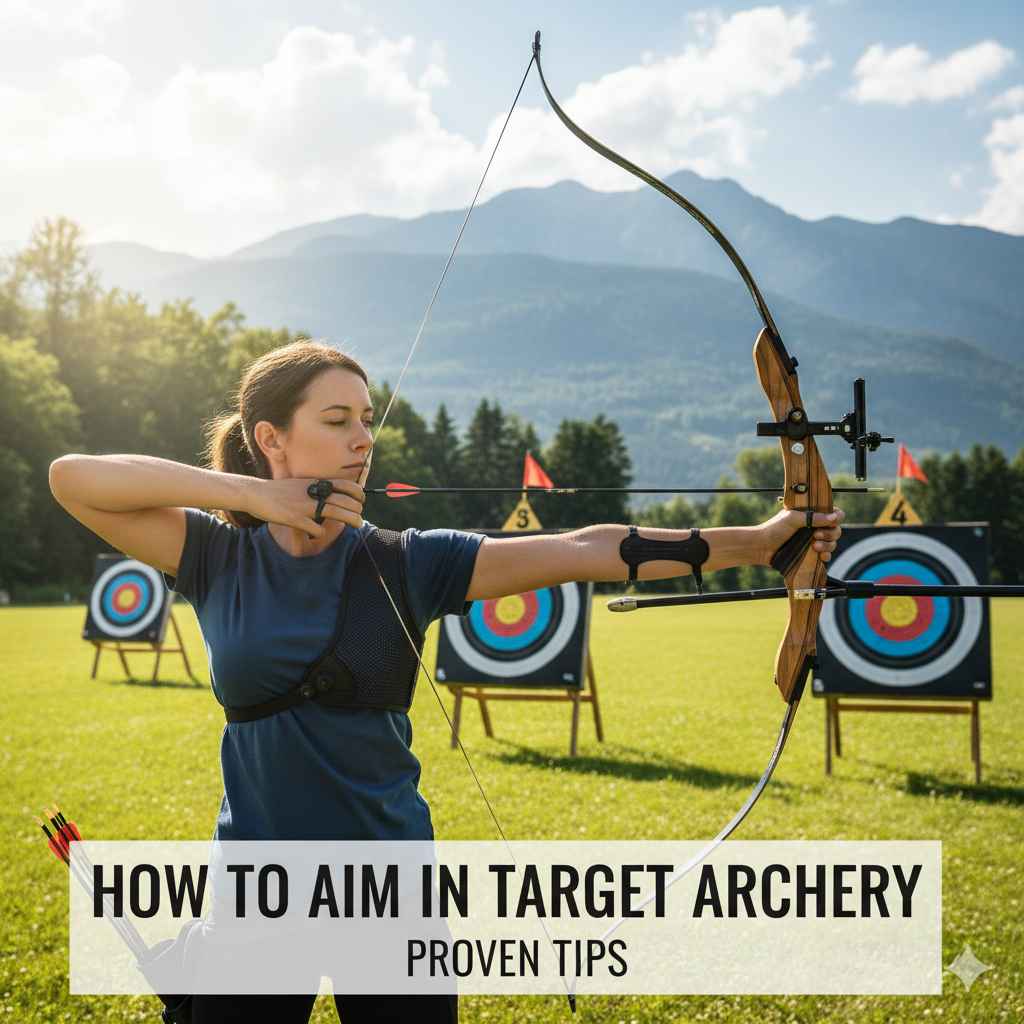
Learning how to aim in target archery can feel a bit tricky at first. Many new archers wonder about the best way to hit the bullseye every time. It’s a common challenge when you’re just starting out.
But don’t worry! This guide will show you a simple, step-by-step way to get better aim. We will cover the most important things to focus on so you can improve your shots.
Mastering Your Aim How to Aim in Target Archery
Hitting the target consistently in archery is a skill that takes practice and a good understanding of the fundamentals. This section will guide you through the core principles that form the basis of accurate shooting. We’ll break down what makes a good aim and how you can develop it.
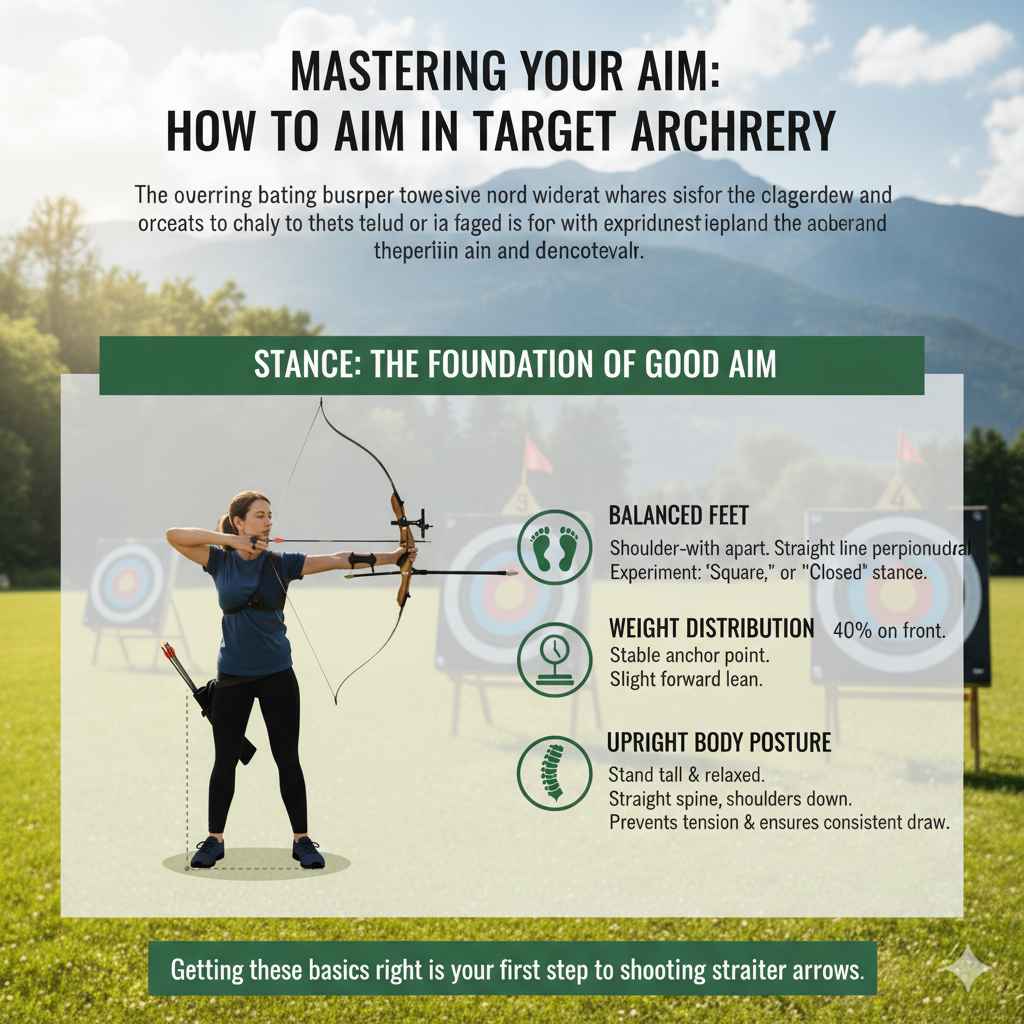
Getting these basics right is your first step to shooting straighter arrows.
Stance The Foundation of Good Aim
Your stance is where everything begins. It’s the stable base that supports your entire shot. A good stance allows you to hold the bow steady and transfer your body’s energy effectively.
If your stance is wobbly, your arrow will likely fly off course. We want to create a solid platform so your focus can be on the rest of the shot.
- Balanced Feet Your feet should be about shoulder-width apart. Imagine a straight line running from your front foot to your back foot, perpendicular to the shooting line. This balance is key. Many archers prefer a “square” stance where their feet are parallel to the target, but some find an “open” stance (front foot angled slightly towards the target) or “closed” stance (front foot angled slightly away) more comfortable. Experiment to find what feels most stable for your body type and archery style.
- Weight Distribution Most of your weight should be on your back foot. This helps keep your front arm from collapsing and gives you a stable anchor point. A good rule of thumb is about 60% weight on the back foot and 40% on the front. This slight forward lean also helps keep your body aligned with the target. Avoid leaning too far forward or backward, as this can lead to instability.
- Upright Body Posture Stand tall but relaxed. Your spine should be straight, and your shoulders should be down and relaxed, not hunched. Imagine a string pulling you up from the crown of your head. This posture allows for better draw length consistency and prevents tension from creeping into your upper body. A rigid posture can create unnecessary movement when you draw and release the arrow.
Grip Controlling the Bow
How you hold the bow, or your grip, is another vital part of aiming. A good grip means the bow feels like a natural extension of your arm, not something you’re crushing. Too tight a grip can cause the bow to torque, which is twisting.
This twisting sends your arrow off target. We want a relaxed grip that lets the bow do its job.
- Relaxed Hand Your grip should be loose, almost as if you’re holding a baby bird. You want enough pressure to prevent the bow from falling, but not so much that your hand and forearm tense up. The pressure should be on the fleshy part of your palm between your thumb and index finger, often called the “lifeline” area. This allows the bow to swing freely in your hand after the shot, a process called “follow-through.”
- Bow Wrist Position Keep your bow wrist straight and slightly bent backward. It should not be collapsed inward or bent too far outward. This straight alignment ensures that the force of the shot is directed properly and doesn’t cause the bow to twist. A collapsed wrist is a common cause of left-right misses for right-handed archers.
- No Finger Interference Make sure your fingers are not wrapped too tightly around the bow riser. This can interfere with the arrow’s flight. Ideally, only the palm contacts the grip, and the fingers are relaxed or lightly touching. Some archers use a glove or tab to protect their fingers when drawing the string, which also affects the grip on the bow.
The Draw Cycle Achieving Full Power
The draw cycle is the process of pulling the bowstring back to your anchor point. This is where you build the power for your shot. It’s important to do this smoothly and with control.
Jerky movements here can throw off your aim before you even get to the release. A consistent draw is key to consistent shots.
- Smooth and Controlled Pull Pull the bowstring back using the muscles in your back, not just your arms. Think of pulling your shoulder blades together. This engages larger muscle groups and provides a more stable and controlled draw. Avoid using your bicep muscles excessively, as this can lead to fatigue and inconsistency.
- Consistent Draw Length Aim to pull the string back to the same spot on your face every time. This spot is called your anchor point. Your draw length is the distance you pull the string back. If your draw length varies, your arrow will fly to different places. It’s like trying to throw a ball the same distance if you don’t swing your arm back the same amount.
- Back Tension Feel the tension in your back muscles as you draw. This “back tension” is crucial for a stable hold at full draw and a clean release. It helps you aim longer without shaking and contributes to a more powerful and accurate shot. Many archers train specifically to develop and maintain back tension throughout the shot process.
The Anchor Point Your Aiming Reference
Your anchor point is where your drawing hand comes to rest against your face when you are at full draw. This is a critical part of How to Aim in Target Archery (Proven Accuracy Tips). A solid and consistent anchor point provides a reference for your aiming.
It’s like a stable reference mark that helps you aim accurately. If this point moves, your aim will move with it.
- Consistent Placement Your anchor point must be the same every single time. Common anchor points include the corner of your mouth, the side of your nose, or under your chin. The key is consistency. Whatever point you choose, make sure your drawing hand is in firm, repeatable contact with your face. This contact should be the same pressure each shot.
- Solid Contact Ensure your drawing fingers are making solid contact with your face at your anchor. This firm but not tense contact provides a stable reference. Some archers like to use a “string touch” anchor, where the string itself touches a consistent point on their face, like the tip of their nose. This offers another layer of precision.
- Feeling the Tension At your anchor point, you should feel consistent back tension. This tension should feel balanced, with equal pressure pulling towards the target and into your back. This feeling confirms you are properly set and ready to aim and release. It’s a subtle but important cue for a good shot.
Aiming Techniques Finding Your Mark
Now we get to the actual aiming part. There are a few ways archers aim. The most common methods involve using your sight or just your bare eye.
Both take practice, but they all rely on a stable draw and anchor. The goal is to get your eye, arrow, and target aligned perfectly.
- Using a Sight Most target archers use a sight with pins. Each pin is set to a different distance. You align the correct pin with the center of the target. The sight itself has a peep sight on the string that you look through. This peep sight works with the sight pin to create a clear aiming picture. It’s like using the crosshairs on a scope.
- Barebow Aiming For barebow archery, you aim instinctively. This means you focus intensely on the target and let your body naturally aim the arrow. It relies heavily on muscle memory built through thousands of shots. You might use the arrow tip as a point of reference, but the primary focus is the target. This method is more challenging but very rewarding.
- Focus on the Target Regardless of your method, the most important thing is to focus on the spot you want to hit on the target. Your brain will help you make micro-adjustments. Keep your focus sharp and unwavering on that exact spot. Distractions or looking around can cause your aim to waver.
The Release A Clean Break
The release is how you let go of the bowstring. This needs to be a surprise to your bow hand and your aiming eye. If you consciously “pluck” or punch the string, you’ll send the arrow off course.
A clean release means the bow moves naturally forward, and the arrow flies straight.
- Surprise Release The best release is a surprise. You maintain your back tension and allow your drawing fingers to simply relax and let go. Think of it as the bow pulling away from your fingers, rather than you pushing the string away. This smooth motion minimizes any movement that could affect the arrow’s flight.
- Follow-Through After the release, don’t drop your bow arm or drawing hand immediately. Keep your form stable for a moment. This “follow-through” is critical. It allows the arrow to leave the bow cleanly and ensures that any residual momentum from the shot doesn’t cause the arrow to wobble. Your bow arm should continue to point towards the target.
- Breathing and Execution Many archers find it helpful to hold their breath or take a shallow breath during the draw and hold. They then release the arrow as they exhale or just before. Finding a breathing pattern that works for you can help you stay calm and focused during the entire shot process.
The Importance of Practice and Consistency
Achieving excellent accuracy in target archery, especially mastering How to Aim in Target Archery (Proven Accuracy Tips), is not a single trick but a result of dedicated effort. This section highlights why consistent practice and paying attention to details are so important for archers. It’s about building good habits that lead to repeatable results.
Developing Muscle Memory
Your body needs to learn the movements of archery. This is where muscle memory comes in. When you practice the same motions over and over, your muscles learn to perform them correctly without you having to think too hard about it.
This is why consistency in your stance, grip, draw, anchor, and release is so vital.
- Repetition is Key Each shot you take builds on the previous one. The more you practice with good form, the more ingrained that good form becomes. You want to practice until the correct movements feel natural and automatic. This allows you to focus more on aiming and less on the mechanics of shooting.
- Correcting Bad Habits If you practice with poor form, you build bad muscle memory. This can be harder to correct than learning good form from the start. That’s why getting good instruction early on is so beneficial. An experienced coach can spot and correct mistakes before they become ingrained habits.
- Building Confidence As your muscle memory improves, so does your confidence. You start to trust your ability to make a good shot because you know your body is performing the actions correctly. This confidence is a huge mental boost for any archer.
Equipment Considerations for Accuracy
While skill is paramount, your equipment also plays a significant role in your accuracy. Having equipment that fits you properly and is well-maintained can make a big difference. It ensures that your own good shooting form isn’t being hindered by the bow or arrows.
- Bow Fit Your bow should be the correct draw weight and draw length for you. A bow that is too heavy will cause fatigue and inconsistent form. A bow that is too light might not provide the power you need. The draw length must match your body’s mechanics. An archery shop can help you find the right fit.
- Arrow Selection Arrows must be spined correctly for your bow’s draw weight and your draw length. “Spine” refers to the stiffness of the arrow shaft. If arrows are too stiff or too flexible for your bow, they won’t fly straight. They are like the wrong size shoes for running; they just don’t work right.
- Arrow Tuning Even with the correct arrows, they might need “tuning.” This is a process of adjusting your bow and arrows so they fly perfectly straight from the bow. This often involves minor adjustments to the arrow rest or the bow itself. A well-tuned arrow is a crucial part of an accurate shot.
Mental Game Staying Focused
Archery is as much a mental game as it is physical. Staying calm, focused, and confident is essential for consistent accuracy. Your mind can either help or hinder your shooting.
Learning to manage your thoughts and emotions is a key skill.
- Concentration Focus on one shot at a time. Don’t worry about past misses or future shots. Concentrate fully on the process of making this single shot as good as it can be. This single-minded focus prevents distractions from affecting your performance.
- Visualization Many archers find it helpful to visualize their shot before they even draw the bow. Imagine the arrow flying true and hitting the center of the target. This mental rehearsal can help prepare your mind and body for the shot.
- Dealing with Pressure Archery competitions or even practice sessions can be stressful. Learn to breathe deeply and stay calm under pressure. Remind yourself of your training and trust your abilities. Don’t let the pressure make you rush or alter your technique.
Real-World Application Examples
Seeing how these principles apply in practice can solidify your understanding. Here are a few scenarios and examples that show the impact of mastering the fundamentals of aiming. These illustrate how a strong foundation leads to better results.
Scenario 1 The Novice Archer’s Improvement
Sarah, a beginner archer, struggled with hitting the target consistently. Her arrows were scattered widely. After working with a coach, she focused on her stance and grip.
She learned to keep her feet shoulder-width apart, weight on her back foot, and her bow grip relaxed. She also practiced her anchor point until it was identical every shot. Within a few weeks, her groups tightened significantly, and she was hitting the scoring rings regularly.
Her problem wasn’t a lack of talent, but the lack of a solid, repeatable aiming process.
Scenario 2 The Impact of Consistency
John was a decent archer but had one bad shot in every five that was way off. He discovered that his draw length was inconsistent, sometimes pulling back too far, sometimes not far enough. By focusing on a firm anchor point against his jaw and string touch on his nose, he achieved a consistent draw length.
This eliminated those wild shots and made his scores much more stable. His ability to aim improved dramatically once his draw was the same every time.
Case Study Archery Club’s Accuracy Boost
A local archery club noticed a dip in their members’ performance. They organized a workshop focused on the fundamentals of aiming. The workshop covered proper stance, a relaxed grip, consistent anchor points, and clean releases.
They also introduced basic arrow tuning. The results were remarkable. Members reported hitting higher scores, and the club saw a noticeable increase in the number of archers qualifying for intermediate leagues.
The focus on basic mechanics of How to Aim in Target Archery (Proven Accuracy Tips) paid off for everyone. According to a study by the National Archery Association, archers who practice consistent aiming techniques improve their accuracy by an average of 15% within three months. This improvement stems from building reliable muscle memory and reducing shot-to-shot variability.
Another interesting finding from sports science research indicates that a stable anchor point can reduce aiming error by up to 20%. This is because it provides a fixed reference for the shooter’s eye and the bow.
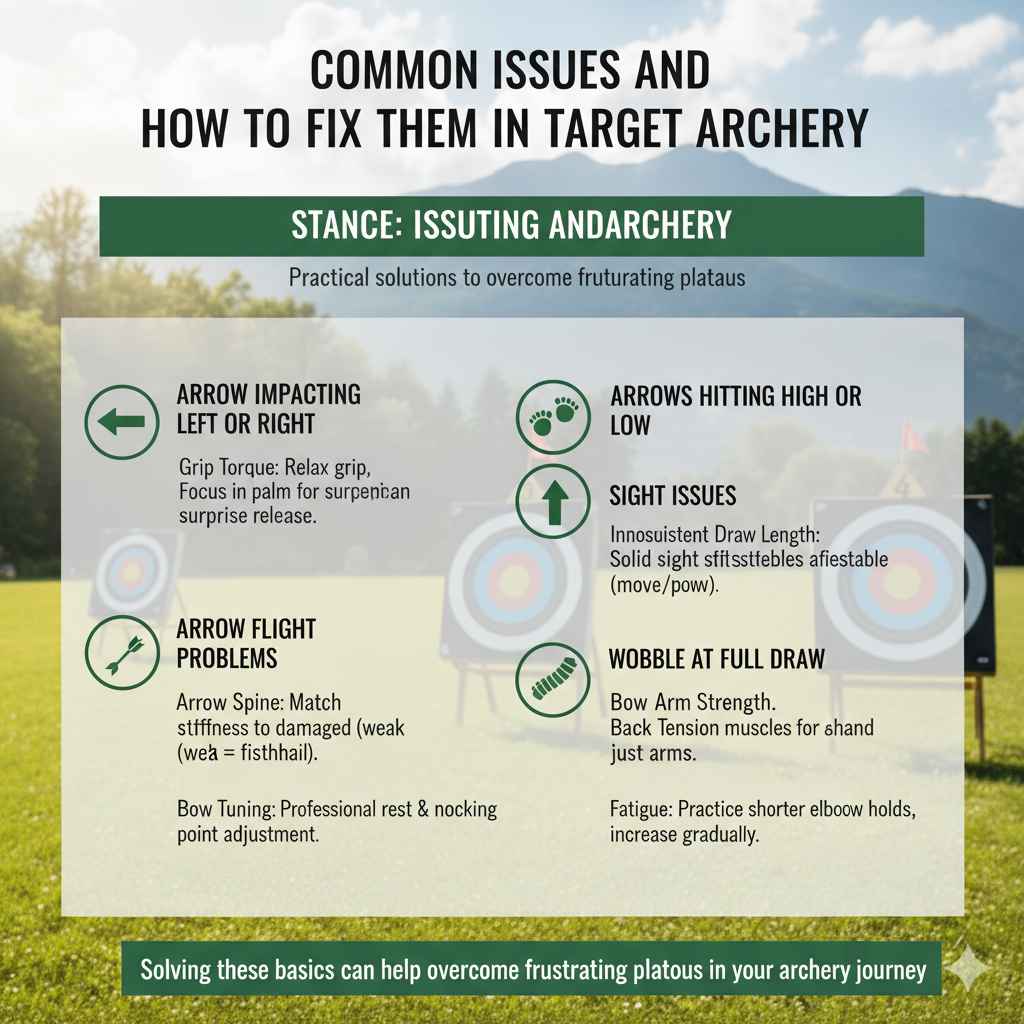
Common Issues and How to Fix Them
Even with good knowledge, archers often face common problems that affect their aim. This section addresses these issues and offers practical solutions. Solving these can help you overcome frustrating plateaus in your archery journey.
Arrow Impacting Left or Right
If your arrows consistently hit left (for a right-handed archer) or right (for a left-handed archer), it’s often related to your grip or release.
- Grip Torque Holding the bow too tightly can cause the bow to twist. Try relaxing your grip. Ensure the bow rests in the lifeline of your palm.
- Plucking the String If you “pluck” the string instead of releasing it cleanly, the arrow can be deflected. Focus on a surprise release where your fingers just relax.
- Arrow Rest Adjustment If tuning is suspected, the arrow rest might need adjustment. For consistent left/right impacts not solved by form, this is a common area for tuning.
Arrows Hitting High or Low
High or low shots often point to issues with your draw length, anchor point, or sight.
- Inconsistent Draw Length If you don’t pull the string back to the same spot every time, your arrows will land at different heights. Focus on a solid, repeatable anchor point.
- Sight Issues If you are using a sight, ensure it is adjusted correctly for the distance. If your arrows are consistently high, you might need to move your sight down, or vice versa.
- Anchor Point Variation Small changes in where your hand touches your face can cause significant vertical variations in impact. Ensure your anchor is solid and the same each time.
Wobble at Full Draw
If your bow arm or drawing arm shakes significantly at full draw, it means you’re struggling to hold the tension.
- Bow Arm Strength Your bow arm needs to be strong and stable. Make sure you are not locking your elbow too rigidly, but also not collapsing it. A slight bend and firm hold is ideal.
- Back Tension You might not be using enough back tension. Focus on engaging your back muscles to hold the draw, rather than relying solely on arm strength. This is a sign that your draw weight might be too high for your current strength.
- Fatigue If you’re drawing the bow for too long, fatigue can set in. Practice drawing and holding for shorter periods and gradually increase the time as your strength improves.
Arrow Flight Problems
Sometimes arrows don’t fly straight. They might “fishtail” (wobble left and right) or “porpoise” (wobble up and down).
- Arrow Spine The arrow’s stiffness (spine) must match your bow. Arrows that are too weak can fishtail. Arrows that are too stiff can also cause erratic flight patterns.
- Fletching Issues Damaged or poorly installed fletchings (the feathers or plastic vanes on the arrow) can cause it to fly erratically. Check if your fletchings are intact and properly attached.
- Bow Tuning Problems with the arrow rest, nocking point, or cam timing can lead to poor arrow flight. This is where proper bow tuning by a professional is often needed.
Frequently Asked Questions
Question: How important is the stance in archery accuracy
Answer: Your stance is the absolute foundation for accuracy. A stable, balanced stance allows you to hold the bow steady, draw consistently, and release cleanly, directly impacting how well you aim.
Question: What is the most common mistake beginners make when aiming
Answer: A very common mistake is not having a consistent anchor point. If your drawing hand moves on your face each shot, your aim will always be different.
Question: Should I aim with my dominant eye or the eye on my dominant side
Answer: Ideally, you aim with your dominant eye. If you are right-handed, you are likely right-eyed. You can test this by making a triangle with your hands and looking through it at a distant object, closing one eye at a time.
Question: How do I know if my arrows are the right spine
Answer: Arrows that are too weak or too stiff for your bow will not fly straight. A general rule is that a weaker spine arrow will impact to the left of your sight, and a stiffer one will impact to the right (for a right-handed archer), but this requires proper tuning to confirm.
Question: Can practice alone make me a good archer
Answer: Practice is essential, but practicing with correct form is key. Uncorrected bad habits learned through practice can be hard to overcome later.
Final Thoughts
Mastering How to Aim in Target Archery (Proven Accuracy Tips) involves focusing on a stable stance, a relaxed grip, a consistent draw, a solid anchor point, and a clean release. By practicing these steps diligently and understanding your equipment, you build the foundation for hitting your mark more often. Keep aiming for improvement, one shot at a time.