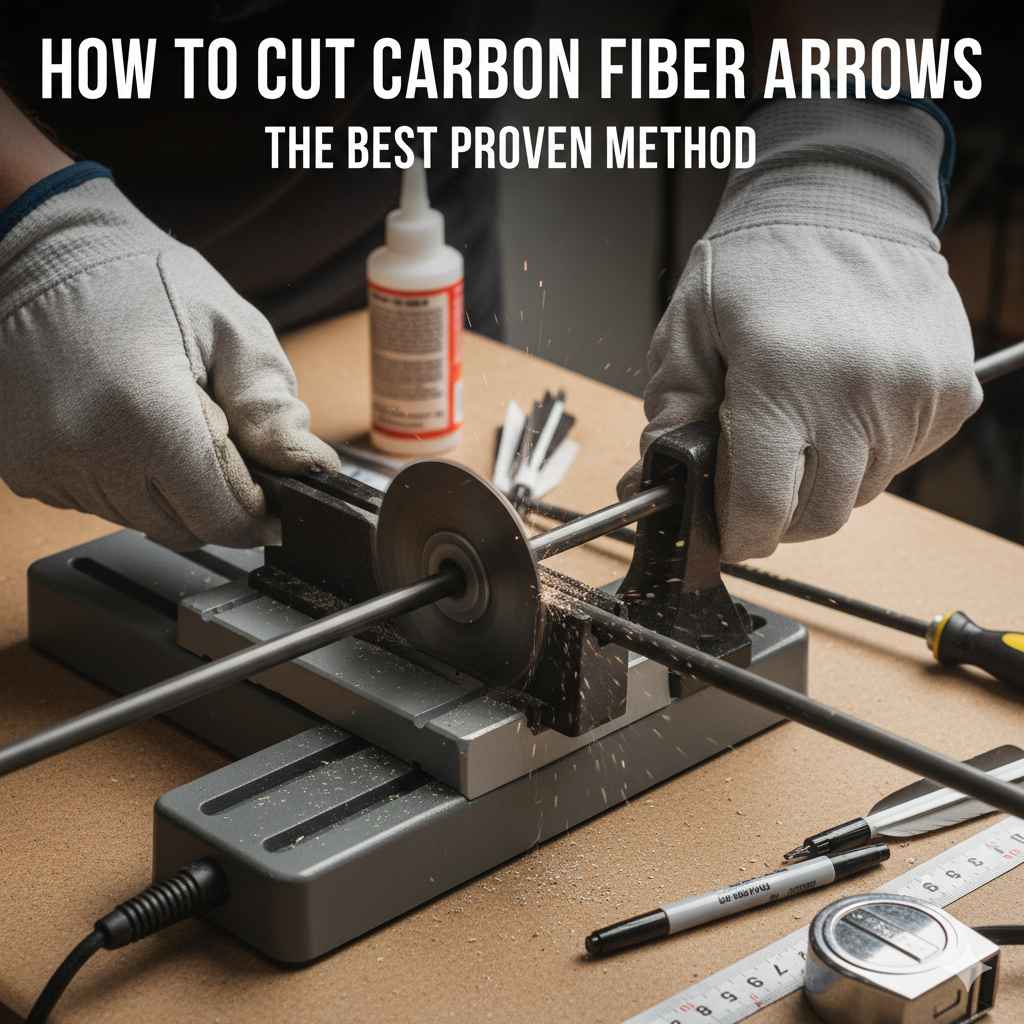
The best proven method to cut carbon fiber arrows is using a high-speed abrasive wheel arrow saw. This tool ensures a clean, perfectly square cut, which is critical for proper insert and broadhead alignment. Always wear a dust mask, safety glasses, and gloves, as carbon fiber dust is a serious respiratory hazard.
Welcome, fellow archers! If you’re ready to take your archery skills to the next level, learning to work on your own gear is a fantastic step. One of the first things many archers learn is how to cut their own arrows. It might sound a little intimidating, but I promise it’s easier than you think. Getting the perfect arrow length is key to better accuracy and safer shooting.
Many new archers struggle with arrows that are too long, which can affect flight and consistency. But don’t worry! I’m here to walk you through the process, step by step. We’ll cover the safest, most reliable way to get a perfect cut every time. Let’s get you set up for success and build some confidence with your equipment.
Why Proper Arrow Length Is Crucial for Accuracy
Before we grab any tools, let’s talk about why this is so important. Cutting an arrow isn’t just about making it fit on your bow. The correct length is a cornerstone of archery performance, affecting safety, accuracy, and how your arrow behaves in flight.
Understanding Draw Length and Arrow Spine
Your arrow length is directly tied to your draw length—the distance from the nock point to the throat of the grip when you’re at full draw. A properly cut arrow should extend about one to two inches beyond your arrow rest when you are at full draw. This extra length provides a crucial safety margin, ensuring the broadhead or field point always stays safely in front of your hand and the bow’s riser.
Arrow length also impacts the arrow’s spine, which is its stiffness. Cutting an arrow makes it stiffer. If your arrows are too long (too flexible) or too short (too stiff) for your bow’s draw weight, they won’t fly straight. This is called a spine mismatch, and it’s a common cause of frustrating accuracy problems. By cutting your arrows to the correct length, you are fine-tuning their dynamic spine to match your bow perfectly.
The Impact on Safety and Performance
An arrow that is too short is extremely dangerous. It can fall off the arrow rest at full draw, potentially causing it to strike your hand or arm, leading to serious injury. On the other hand, an arrow that is too long can be less stable and harder to tune. Finding that “just right” length is the goal, and it’s a simple measurement we’ll cover in the steps below.
Safety First: Essential Gear and Precautions
Okay, this is the most important part of the entire process. Cutting carbon fiber creates very fine, sharp dust that you do not want to breathe in or get in your eyes. It can cause serious respiratory and skin irritation. There are no shortcuts when it comes to safety.
Your Essential Safety Checklist:
- N95 or P100 Respirator Mask: This is non-negotiable. A simple cloth mask is not enough. Carbon fiber dust particles are tiny and can lodge deep in your lungs. Protect yourself with a quality respirator. For more information on respiratory protection, you can review guidelines from the National Institute for Occupational Safety and Health (NIOSH).
- Safety Glasses: Full-coverage safety glasses will protect your eyes from flying dust and debris. Your regular eyeglasses are not a substitute.
- Gloves: Nitrile or leather gloves will keep the sharp dust off your hands and prevent tiny, irritating splinters.
- Well-Ventilated Area: Work in a garage with the door open, a workshop with a fan, or outdoors. Avoid cutting arrows in a confined, indoor space where dust can linger in the air. A shop vacuum held near the cutting area can also help capture dust right at the source.
Treat carbon fiber dust with the same respect you would treat any hazardous material. A few minutes of preparation can save you from a world of hurt later on. Safety is skill, and it’s the mark of a smart archer.
The Tools You’ll Need for a Perfect Cut
Having the right tools makes any job easier, and cutting arrows is no exception. While you might be tempted to use tools you already have, using equipment designed for the job will give you the clean, square cut needed for top-notch accuracy.
Here’s a breakdown of what you’ll need:
| Tool | Purpose | Why It’s Important |
|---|---|---|
| Arrow Saw | To cut the carbon fiber shaft. | This is the best tool for the job. It uses a high-RPM abrasive wheel that grinds through the carbon cleanly, preventing splintering and ensuring a perfectly square cut. |
| Measuring Tape or Arrow Ruler | To measure the correct arrow length. | Precision is key. A dedicated arrow ruler (yardstick) is great, but a quality tape measure works just fine. Measure twice, cut once! |
| Fine-Tip Marker | To mark your cut line. | A silver or white permanent marker shows up well on black carbon shafts, making it easy to see your mark while cutting. |
| Arrow Squaring Tool (ASD) | To ensure the cut end is perfectly flat. | Even the best saw can leave a slightly uneven edge. An ASD shaves the end of the shaft, making it perfectly 90 degrees. This is crucial for insert alignment. |
| Deburring Tool or Fine Sandpaper | To clean up the inside and outside edges of the cut. | This removes any tiny burrs or frayed fibers, allowing the insert to fit snugly and preventing damage to your arrow rest. |
The Best Method: Using an Arrow Saw (Step-by-Step)
Using a dedicated arrow saw is the gold standard for a reason. It’s fast, precise, and gives you a professional-quality result every time. If you plan on building arrows for yourself or friends, it’s a worthy investment. Let’s walk through the process together.
Step 1: Determine Your Correct Arrow LengthFirst, you need to know how long your arrows should be. The most reliable way to do this is to have an experienced archer or a pro shop employee help you measure your draw length. However, you can get a good estimate at home.
A simple method is to stand with your arms outstretched to your sides, forming a “T”. Have someone measure your wingspan from fingertip to fingertip in inches. Then, divide that number by 2.5. This will give you a close approximation of your draw length.
Once you have your draw length, your final arrow length should be that number plus one to two inches. For example, if your draw length is 28 inches, a good arrow length would be 29 or 30 inches. Remember: the measurement is from the bottom of the nock groove to the end of the carbon shaft (not including the insert or point).
Step 2: Measure and Mark the Arrow Shaft
Take an uncut arrow and insert a nock. Place it on an arrow ruler or lay it next to a tape measure. Be precise here. Measure from the throat (the deepest part of the groove) of the nock down the shaft to your desired length. Use your fine-tip marker to make a clear, thin line all the way around the shaft. This line will be your guide for the saw.
Double-check your measurement before moving on. It’s always better to cut an arrow a little too long than too short—you can always trim more off, but you can’t add it back on!
Step 3: Set Up Your Arrow Saw
Place your arrow saw on a stable, flat surface. Make sure it’s securely positioned and won’t wobble during use. Put on your safety glasses, gloves, and respirator mask now. Plug in the saw and turn it on to ensure it’s running smoothly. Most arrow saws have an adjustable guide or stop. Set it so that your marked line on the arrow lines up perfectly with the cutting wheel.
Step 4: Make the Cut
Hold the arrow firmly with both hands, keeping it pressed lightly against the saw’s V-block supports. Slowly and gently push the arrow into the spinning abrasive wheel. While pushing, rotate the arrow shaft consistently. This rotation is the secret to a clean, square cut. It ensures the wheel grinds the carbon evenly from all sides, preventing splintering and an angled cut.
Don’t force it. Let the saw do the work. The process should be smooth and take only a few seconds. Once the cut is complete, pull the arrow back and turn off the saw.
Step 5: Deburr and Square the Arrow End
Your arrow is now cut, but we’re not done yet. The cut end needs to be cleaned up. Use a deburring tool or a small piece of fine-grit sandpaper to lightly smooth the inside and outside edges of the cut. This removes any sharp burrs.
Next, use your arrow squaring device (ASD). An ASD is a small, hand-operated tool that holds the shaft perfectly perpendicular to a small piece of sandpaper or a grinding stone. Place the cut end of the arrow in the tool and twist it a few times. You’ll see a fine ring of carbon dust form, which tells you it’s working. This step guarantees the end is perfectly flat, which is critical for your inserts and broadheads to sit flush and fly true.
That’s it! You’ve successfully cut your first carbon fiber arrow. After the first one, the rest of your set will be a breeze.
Alternative Method: Using a Dremel Tool
What if you don’t have an arrow saw? For those on a budget or who only need to cut a few arrows, a Dremel-style rotary tool with a reinforced abrasive cutoff wheel can work. However, this method requires much more care to get a square cut and produces more free-floating dust.
If you choose this method, you MUST build a simple jig to hold the arrow and the Dremel steady. You can make one from a block of wood by cutting V-grooves to hold the arrow. The goal is to replicate the stability of an arrow saw.
Steps for Using a Dremel:
- Safety first! All the same safety gear applies: mask, glasses, gloves. This method can kick up even more dust.
- Build a simple jig out of wood to hold the arrow securely.
- Measure and mark your arrow just as you would for an arrow saw.
- Secure the arrow in your jig.
- Turn on the Dremel to its highest speed.
- Gently lower the cutoff wheel onto your mark while slowly rotating the arrow shaft by hand. The rotation is just as important here as it is with an arrow saw.
- Proceed to deburr and square the end with an ASD. This step is even more critical when using a Dremel, as it’s much harder to get a perfectly square cut by hand.
Arrow Saw vs. Dremel Tool: A Quick Comparison
| Feature | Arrow Saw | Dremel with Cutoff Wheel |
|---|---|---|
| Cut Quality | Excellent, consistently square. | Can be inconsistent; requires a jig and practice to get a square cut. |
| Speed & Efficiency | Very fast, ideal for cutting a dozen arrows. | Slower, more setup required for each arrow. |
| Safety | Generally safer due to built-in guards and arrow supports. | Requires more user control; higher risk of slipping. Dust control is more difficult. |
| Cost | Higher initial investment ($100+). | Lower cost if you already own a Dremel. You can find quality tools at a local home improvement store. |
| Best For | Serious archers who build their own arrows regularly. | Archers on a tight budget who only need to cut a few arrows occasionally. |
Final Touches: Preparing Your Arrow for Flight
Once your arrow is cut and squared, there are just a couple of small things left to do before you can install your inserts and points.
Cleaning the Inside of the Shaft
Take a cotton swab dipped in a little 90% isopropyl alcohol and clean the inside of the shaft where the insert will go. Swab it out until the cotton comes out clean. This removes all the carbon dust and any residue, ensuring your insert adhesive creates a strong, permanent bond.
Installing the Insert
Once the inside is clean and dry, you’re ready to glue in your inserts. Use a quality insert adhesive (hot melt or a two-part epoxy works best). Apply a small amount of glue to the insert shank, push it into the shaft, and give it a slight turn to spread the adhesive evenly. Wipe off any excess glue immediately. Let it cure according to the manufacturer’s instructions, and you’re ready to screw in a point!
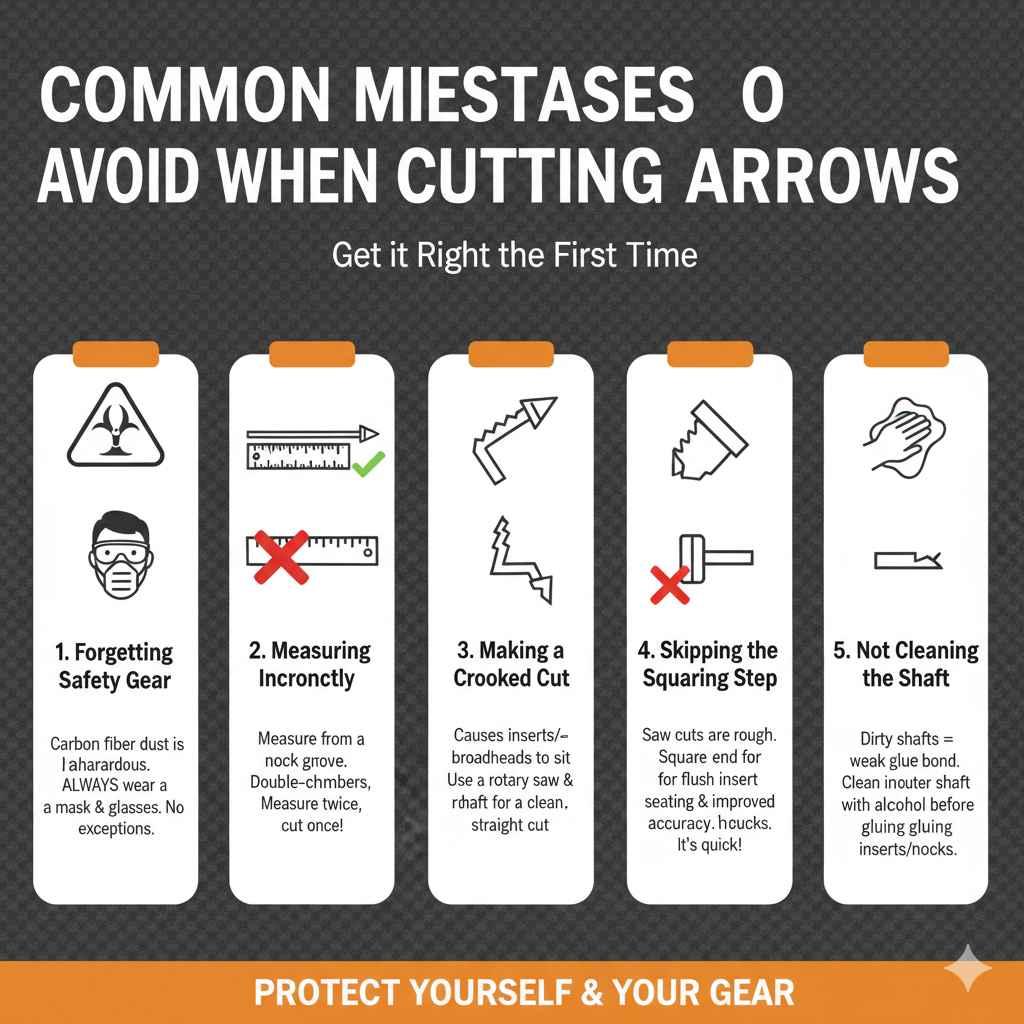
Common Mistakes to Avoid When Cutting Arrows
Learning any new skill involves a few bumps in the road. Here are some common mistakes to watch out for so you can get it right the first time:
- Forgetting Safety Gear: Never cut carbon fiber without a mask and glasses. It’s a mistake you’ll regret.
- Measuring Incorrectly: Always measure from the nock groove, not the end of the nock. Double-check your numbers before you cut.
- Making a Crooked Cut: This usually happens when you don’t rotate the arrow while cutting or try to use a hacksaw. A crooked cut means your insert won’t sit straight, and your broadheads will never fly true.
- Skipping the Squaring Step: Many people think a saw cut is good enough. It’s not. Squaring the end is a quick step that has a huge impact on your arrow’s accuracy.
- Not Cleaning the Shaft: A dirty shaft leads to a weak glue bond. Inserts can pull out in a target, and you could lose an expensive arrow and broadhead.
Frequently Asked Questions (FAQ)
Can I use a hacksaw to cut carbon arrows?
I strongly advise against it. A hacksaw blade will splinter and fray the carbon fibers, creating a weak and uneven end. It is almost impossible to get the perfectly square cut needed for good arrow flight. Stick to a high-speed abrasive wheel for the best results.
How do I know my exact draw length?
The most accurate way is to visit a local archery pro shop. They have specialized tools and the expertise to measure you properly. A properly measured draw length is the foundation for a well-tuned bow and correctly sized arrows.
What is “arrow spine” and why does cutting affect it?
Arrow spine is a measure of the arrow’s stiffness. When you shoot, the arrow flexes as it leaves the bow. The amount of flex needs to match your bow’s power. Cutting an arrow makes it shorter and therefore stiffer. This is why it’s important to start with an arrow that has the correct spine for your setup before you cut it.
Is an arrow squaring device (ASD) really necessary?
Yes, I believe it is. While an arrow saw provides a very good cut, an ASD perfects it. For a field point, a slightly unsquare end might not be noticeable. But for a fixed-blade broadhead, a perfectly square end is essential for preventing wobble and ensuring the broadhead flies straight. It’s a small tool that makes a big difference.
How much does a good arrow saw cost?
You can find quality hobbyist-level arrow saws starting around $100 to $150. While it may seem like a lot upfront, if you shoot frequently and plan to build your own arrows, it pays for itself quickly compared to having a shop cut them for you every time.
Can I cut aluminum arrows with the same saw?
Yes, most abrasive wheel arrow saws are designed to cut both carbon and aluminum arrow shafts. The process is exactly the same. Just be sure to wear your safety gear, as aluminum dust is also not good to inhale.
What if I cut my arrows too short?
Unfortunately, there is no safe way to lengthen a carbon arrow that has been cut too short. A too-short arrow is a safety hazard and should not be shot. This is why the “measure twice, cut once” rule is so critical. Always use one arrow as your test piece, cut it slightly long, and check it on your bow before cutting the rest of the batch.
You’re Ready to Take Control of Your Gear
There you have it—everything you need to know to cut your carbon fiber arrows with confidence. Taking the time to prepare your arrows correctly is one of the most rewarding parts of archery. It connects you more deeply with your equipment and gives you full control over your performance.
Remember, the keys are safety, precision, and using the right tools for the job. Don’t rush the process. Take your time, follow these steps, and you’ll be building arrows that fly straight and true. This is a skill that will serve you well for your entire archery journey, helping you become a more consistent and successful archer.
Happy shooting, and I’ll see you on the range!