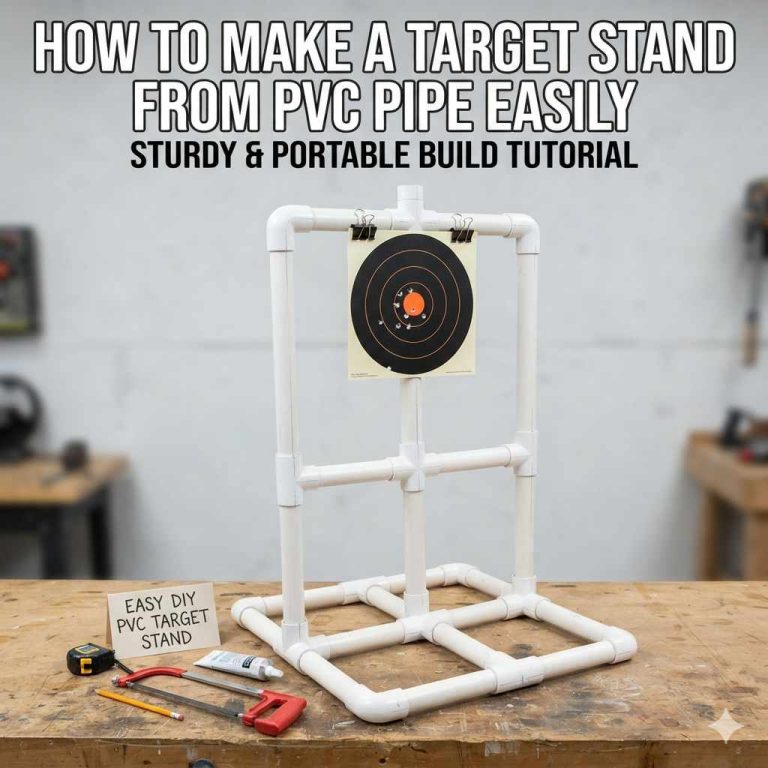
DIY Target Stand Safety Checklist: Spacing, Angles
Use a go/no-go check: stand about 5 yards behind the target line, keep the target face angled about 10–15 degrees downward, and leave a clear 2×2-yard impact area with no hard objects in the miss path. Skip that check and a missed arrow can skip, ricochet, or vanish into a fence, window, car, or person. This guide turns spacing, angle, and clearance into a simple pre-shot safety checklist you can run before the first arrow.
Quick go/no-go check


A first shot should feel like an inspection, not a practice end. The setup only passes if the stand stays planted, the target face is intact, the lane is open, and the backstop sits where an overshoot or side miss can land without reaching a hard surface. Check that archery is allowed on the property before you choose any distance or gear.
Fail the check if the stand rocks, the target leans and sends arrows toward a wall, the shooting lane crosses a fence line or driveway, or the backstop leaves hard surfaces exposed behind the target. A backyard can look open from the shooting line and still fail if a missed arrow can reach a window or road.
Picture a 36-inch target face set in a narrow side yard with a shed on one side and a fence on the other. If a miss has only a few feet before it hits wood, glass, or wire, the lane is too tight for a first shot, even when the stand feels solid.
What makes a setup safe enough for a first shot
A safe-enough setup has three things: the stand does not shift under hand pressure, the arrow path has room to miss without hitting hard surfaces, and the backstop sits behind the target where the arrow is most likely to travel. That last part matters because different bows and arrow types create different miss patterns.
What fails the check immediately
Stop if the target stand sits on soft soil and sinks when weight is added, if one leg lifts on uneven ground, if the face tilts toward a wall, or if the arrow lane points toward people, pets, vehicles, or glass. Stop also if the setup depends on hope instead of a backstop that matches the likely miss path.
Why the first shot should be a test, not a full session
The first arrow tells you whether the stand, target, and backstop work together. That matters most for a new build, a new location, or a different bow. One test shot lets you check lean, side clearance, and backstop placement before you start repeating shots.
Target stand footprint
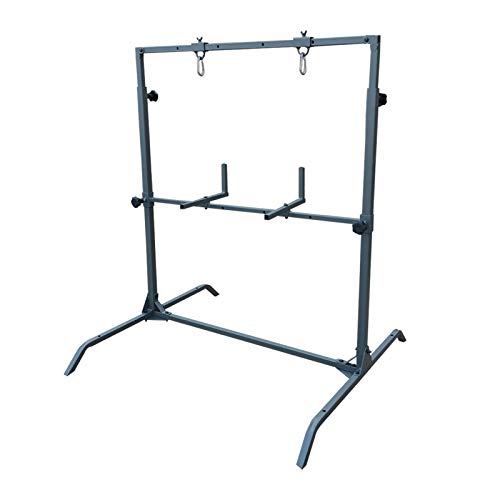
The stand footprint is the full patch of ground the stand occupies, including overall width, depth, and where the legs touch the surface. A wider footprint usually resists tipping better, but only if all feet contact the ground evenly. Narrow stands and stands on a slope are more likely to shift when hit or bumped.
Check overall width and depth
Measure the outside width and depth of the stand, not just the frame that holds the target. If the target face hangs beyond the footprint, the stand can feel stable until an arrow lands off-center. For a first setup, the footprint should be wide enough that the stand does not yaw or twist when pressed from the side.
Check leg spacing and ground contact
Leg spacing matters because the arrows do not hit the center every time. Legs set too close together can make a stand easy to tip, especially when the target face is tall or heavy. Each leg should sit flat. If one corner hangs in the air, the footprint is already compromised.
Level ground versus uneven ground
Level ground gives the stand the best chance of staying put. Uneven ground changes the load on each leg and can create a slow lean that is hard to spot until the first arrow hits. Gravel, soft dirt, and sloped grass all deserve a slower inspection than flat turf.
Is the shooting lane clear?
The shooting lane is only clear if the archer can draw, anchor, and release without stepping into obstacles and if a missed arrow can travel without reaching a hazard. That means clear ground underfoot, clear side space, and a clear space behind the target. If any of those are compromised, the lane is not ready.
Set a clear approach path
Keep the path to the shooting line free of tools, hoses, toys, loose stones, and wet spots. A narrow path can force a shooter to shift stance while drawing, which changes the release and can send an arrow off line. The approach should be simple and repeatable every time.
Confirm side clearance for misses
Missed shots do not always go straight through the target. They can drift left or right at launch, especially if the archer is new or the wind is moving. Leave a side buffer large enough that a left or right miss still lands in open space, not in a fence, wall, or neighbor’s yard.
Check rear and overhead clearance
Rear clearance matters because some arrows pass through soft target materials or strike the target at a shallow angle and continue behind it. Overhead clearance matters too. Low branches can interfere with the draw or catch a high miss. If the target sits under a tree, check the branch spread before shooting.
Target angle and lean
Target angle changes how the face takes the hit and where a missed or shallow arrow goes after impact. A small forward lean can help some targets stop arrows more cleanly, but too much lean can raise deflection risk, change penetration depth, or make the target behave unpredictably by arrow type.
Why target angle changes arrow stopping
An angled face can send the arrow into the target material instead of letting it glance straight off the surface. That can help energy absorption on some foam or bag targets. It can also make a poor target worse if the angle is wrong for the material, the draw weight, or the point type.
Why too much lean can increase deflection risk
Too much forward lean can make a hard arrow glance downward or sideways, especially if the face is dense, dry, or uneven. It can also make arrows strike the lower edge of the target frame instead of the center of the face. The result is less predictable stopping behavior, not more safety.
How to confirm the angle matches the target type
Check the maker’s guidance for the specific target. If no guidance is available, treat the angle as a site-dependent setting, not a universal safety rule. Use the smallest lean that keeps the target stable and the face readable. Recheck after a few shots, because soft ground can change the angle.
Backstop placement check
A backstop belongs behind the target, not as a substitute for a stable stand or a clear lane. Bags, nets, hay, foam, and berms all have limits. None is universal, and none should be treated as a guarantee against fast compound arrows, shallow-angle hits, or broadheads.
Bag, net, hay, foam, or berm
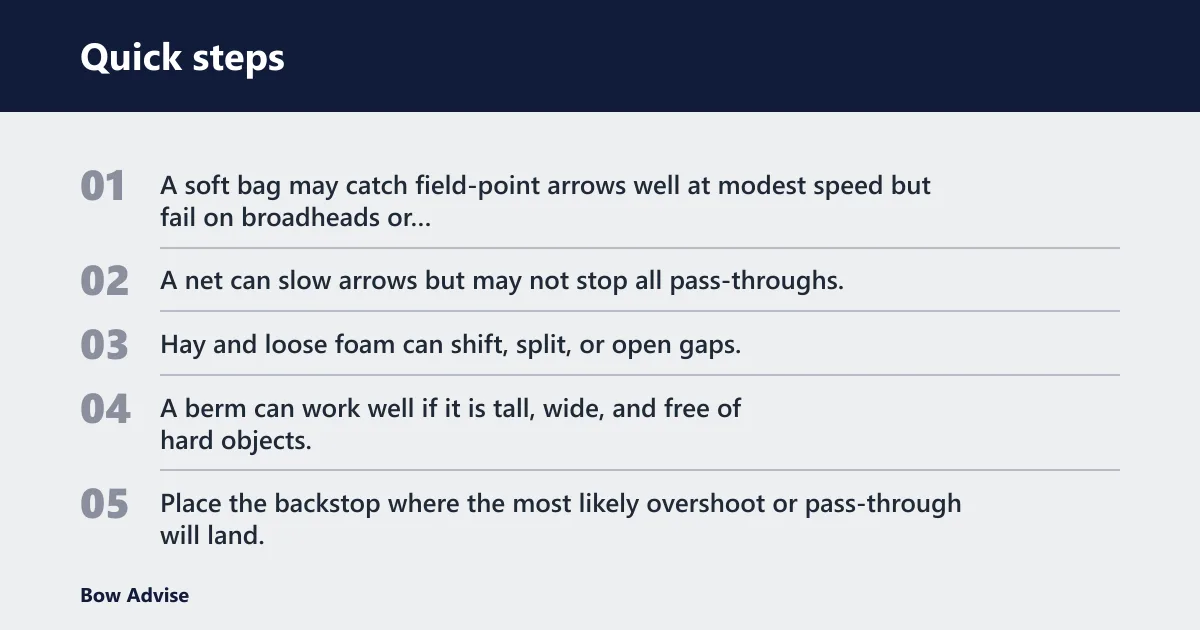
Each backstop type behaves differently. A soft bag may catch field-point arrows well at modest speed but fail on broadheads or repeated hits in the same spot. A net can slow arrows but may not stop all pass-throughs. Hay and loose foam can shift, split, or open gaps. A berm can work well if it is tall, wide, and free of hard objects.
Where the backstop should sit behind the target
Place the backstop where the most likely overshoot or pass-through will land, with enough width and height to cover the target and the common miss pattern. The backstop should sit directly behind the target face, not off to one side where a straight-through arrow can miss it. If the lane is narrow, widen the safety zone before you shoot.
When a backstop is not enough
A backstop is not enough if the setup can still send an arrow toward a fence, road, or neighbor’s property after a bounce-back or miss. It is also not enough if the target is so close to the backstop that the arrow has no safe stopping space, or if the material is unsuitable for broadheads or high-speed compound arrows.
Arrow and bow match
Arrow type and bow type change the safety picture. Field points are easier on most backyard targets than broadheads. Recurve setups and compound setups can both be safe, but a compound bow usually sends arrows faster and can increase penetration risk. Check the target and backstop against the actual bow and arrow combination.
Field points versus broadheads
Field points are the safer choice for most backyard target practice because they are designed for target use. Broadheads cut instead of simply penetrating, so they can tear target material, pass through more easily, and reduce the chance that a bag, net, or foam block will stop the arrow cleanly. Use broadheads only with equipment rated for that use.
Recurve versus compound draw weight
Higher draw weight generally means more arrow speed and more chance of pass-through if the target is too light or too thin. A beginner recurve setup with field points may be easier on a basic target than a high-energy compound setup, but exact suitability depends on the bow, the arrow, and the target construction. Check the manufacturer’s listing for your model.
Carbon and aluminum shaft concerns
Carbon and aluminum shafts behave differently when they hit hard edges or hard stops. Carbon can splinter if damaged. Aluminum can bend and stay bent. Either shaft type should be inspected before use, because a damaged shaft can affect flight and increase the chance of an unsafe strike on the target frame or backstop.
What should the ground and surroundings pass?
The site passes only if the surface supports the stand, the footing stays non-slip, and nearby hazards are outside the likely miss path. Grass, dirt, gravel, and concrete each have different risks. The wrong site can fail even when the stand itself is fine, so ground and surroundings deserve the same attention as the target face.
Surface check for grass, dirt, gravel, or concrete
Grass is usually easier on footing than smooth concrete, but wet grass can still be slippery. Dirt can shift under load, especially after rain. Gravel can make legs wander or twist. Concrete gives a flat base, but it can be slippery and unforgiving if an arrow skips off the target or frame.
Nearby hazards to remove or avoid
Clear fences, buildings, windows, roads, parked cars, pets, children, and bystanders from the shooting lane and the miss zone. A target can look safe from the line but still point directly toward a hazard if the lane is rotated only a few degrees. Wind can also push a light arrow off line enough to matter.
When to stop because the site is wrong
Stop if the only safe target position points toward a hard surface, if the ground cannot be leveled, if the stand cannot sit flat, or if the property is too narrow to give the arrow a real miss zone. A cramped backyard corridor is a site problem, not a technique problem.

Use this checklist before the first shot. Pass every row before you draw the bow. If one row fails, correct the setup or stop. Keep the notes specific to the bow and arrow type you plan to use, because recurve, compound, and broadhead setups do not behave the same way.
| Check | Pass condition | Fail condition | Notes for recurve, compound, and broadhead use |
|---|---|---|---|
| Stand footprint | All legs touch the ground; stand does not rock by hand; footprint stays flat on the surface | One leg lifts, the frame twists, or soft ground lets the stand sink | Compound setups usually need the most stable footprint; broadheads increase the need for a rigid, well-placed stand |
| Target angle | Face has only the lean needed for the target type; no sharp forward tilt; no frame edge in the arrow line | Angle is guessed, steep, or changes the arrow path toward a hard surface | Do not assume one angle works for every target; broadheads are the least forgiving |
| Side clearance | Clear left and right miss space with no fences, walls, windows, or vehicles in the likely miss path | Any hard object sits close enough that a miss could reach it | Compound bows and inexperienced shooters need more room for errant shots; broadheads need the most caution |
| Rear clearance | Backstop sits behind the target with room for pass-through or overshoot without hitting a hard surface | No backstop, or the backstop is too close to a fence, wall, or road | Field points may stop in some soft backstops; broadheads and fast compounds may pass through or bounce back |
| Ground level | Surface is stable, dry enough for footing, and level enough to keep the stand from shifting | Soft soil, slope, gravel drift, wet grass, or slick concrete changes the stance | On uneven ground, stop and level the site rather than trying to compensate with a steeper angle |
| Backstop placement | Backstop matches the likely miss path and covers the target area behind the face | Backstop is off-center, too small, or unsuitable for the arrow type | Use the manufacturer’s guidance when available; no homemade material is universal |
- Check that archery is allowed on the property and that no local rule blocks the setup.
- Inspect the stand for loose parts, wobble, and uneven leg contact.
- Confirm the target face is sound and the backstop is placed behind the target.
- Walk the lane for fences, windows, roads, people, pets, and hard surfaces.
- Verify the ground is stable and the target angle is appropriate for the target type.
- Only then take a close first shot and recheck the stand after the arrow lands.
Suppose a beginner sets up a 40-pound compound bow on a gravel drive with a foam target and no backstop. The stand may look solid, but the surface can shift, the arrow can pass through the target, and a miss can travel into a garage wall or parked car. That setup fails before the first shot.
Frequently asked questions
How much space do I need behind a DIY target stand?
Enough space for an overshoot or pass-through to stop without reaching a fence, wall, road, or other hard object. There is no universal yardage that fits every backyard. The right answer depends on bow speed, arrow type, target material, and how much room the backstop actually covers behind the face.
What angle should my target stand sit at for safer arrow stopping?
Use only the lean needed for the specific target type, and verify the maker’s guidance if it is available. Do not treat a single angle as a universal safety rule. Too much lean can increase deflection risk, especially with hard faces, shallow hits, or broadheads.
How far apart should the legs or uprights be on a target stand?
Far enough apart that the stand stays flat, does not rock, and resists tipping when the target is struck off-center. The correct spacing varies by frame design and target size. If the stand twists or a leg lifts on contact, the footprint is too narrow or the ground is too uneven.
How much clearance do I need around a target stand for missed shots?
Leave enough open space that a left, right, or high miss does not reach a hard surface. The exact buffer depends on the bow, the shooter, and the site. For a first setup, treat any fence, wall, window, vehicle, or road inside the likely miss zone as a failed check.
Can I use a DIY target stand on uneven ground safely?
Only if the stand can sit flat, stay stable, and keep the arrow lane clear. Uneven ground raises the chance of wobble, drift, and surprise lean after the first hit. If the legs cannot contact the surface evenly, move the stand or level the site before shooting.
What should I check before shooting my first arrow at a new target stand?
Check the stand footprint, target angle, side clearance, rear clearance, ground level, and backstop placement. Then verify the arrow type matches the target and the lane is free of people, pets, and hard surfaces. If any part of that check fails, do not take the shot.