How To Attack The String To A Bow And Arrow
Archery remains a captivating blend of art, science, and tradition, drawing enthusiasts for both sport and survival. Whether you’re a historical reenactor, a competitive archer, or a beginner assembling your first kit, one critical skill stands out: correctly attaching the string to your bow. This seemingly simple step is foundational for safety, accuracy, and optimal performance. Incorrect stringing risks equipment damage, personal injury, and poor shooting results, a concern for novices and seasoned archers alike.
Mastering how to attack the string to a bow and arrow is not just about following instructions; it’s about understanding the interplay between materials, tension, and technique. With a variety of bows, longbows, recurves, and compound bows, each presents unique challenges and methods for stringing.
The right approach ensures your bow delivers consistent power and longevity, while the wrong one can lead to costly mistakes. This comprehensive guide walks you through every detail, from preparation and tool selection to step-by-step stringing, troubleshooting, and maintenance, empowering you to approach archery with confidence and expertise.
Key Takeaways
- Properly stringing a bow is crucial for safety and optimal shooting performance.
- Different types of bows require specific stringing techniques and tools.
- Material choice and string tension greatly affect accuracy and equipment lifespan.
- Regular inspection and care of bowstrings prevent accidents and extend usability.
- Detailed, step-by-step instructions and real-world examples clarify the process for all skill levels.
Understanding Bow Types And Stringing Methods
The first step in mastering bow stringing is recognizing the differences in bow types and their unique requirements. Each bow presents distinct challenges and demands particular techniques to ensure both safety and function.
Traditional Longbows
Longbows have a simple, classic design, essentially a single curved piece of wood. Stringing a longbow typically involves the ‘step-through’ or ‘push-pull’ method. These bows lack modern amenities, making stringing both more straightforward and more physically demanding.
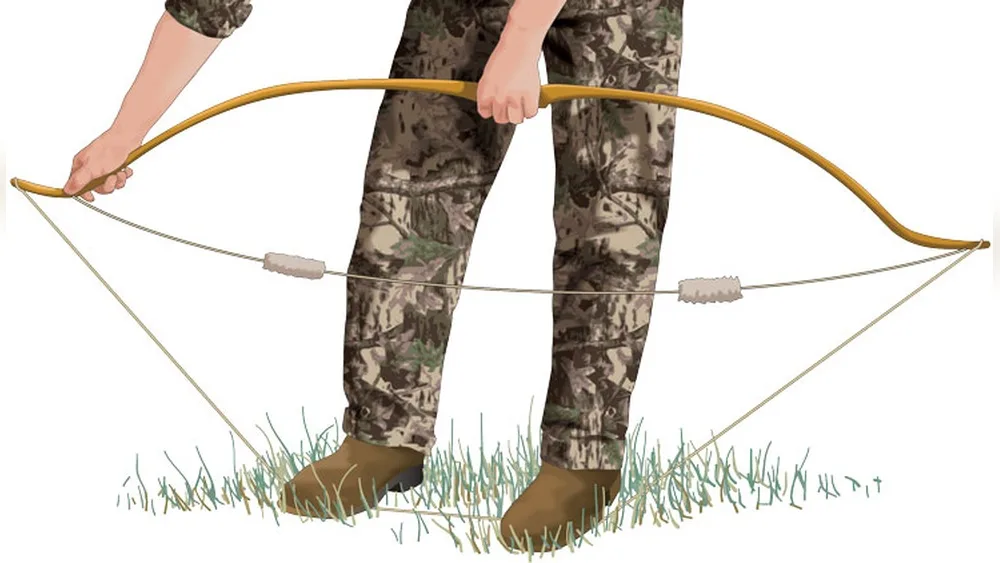
- Step-Through Method: The archer steps through the bow, using the leg to brace and flex it while slipping the string into place.
- Push-Pull Method: The bow is braced against the body, with hands used to bend and string the bow.
Recurve Bows
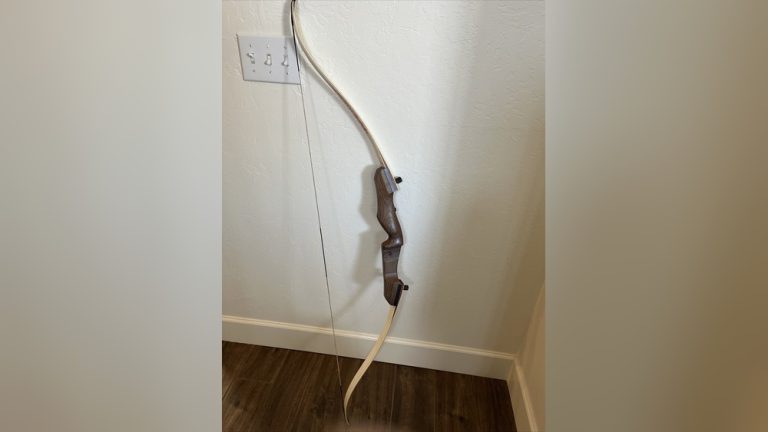
Recurve bows, popular among both target archers and Olympians, have limbs that curve away from the archer at the tips. This design stores more energy, but also introduces more tension, necessitating careful stringing.
- Use of a Bow Stringer: The safest and most recommended method for stringing a recurve bow involves a bow stringer, a tool that distributes tension evenly and prevents limb twisting.
- Manual Methods: Occasionally, archers may use a step-through or push-pull method, though this is discouraged due to risk of injury or bow damage.
Compound Bows
Compound bows are engineered for maximum efficiency, with a system of cams and pulleys. Their complex design means stringing is best left to professionals with specialized tools.
- Bow Press Required: A bow press is essential for safely stringing and unstringing a compound bow, as it relieves limb tension evenly.
Crossbows
Although not the main focus of this guide, crossbows have a unique stringing process involving cocking devices and should be handled as per the manufacturer’s instructions.
Example: Comparing Stringing Methods By Bow Type
The following table summarizes the recommended stringing approaches for each type of bow:
| Bow Type | Recommended Stringing Method | Tools Needed | Skill Level |
|---|---|---|---|
| Longbow | Step-Through / Push-Pull | None (optional: bow stringer) | Beginner, Intermediate |
| Recurve Bow | Bow Stringer | Bow Stringer | Beginner, Expert |
| Compound Bow | Bow Press | Bow Press, Allen Wrenches | Advanced/Professional |
| Crossbow | Manufacturer’s Device | Cocking Device | Intermediate, Expert |
Understanding these distinctions is crucial before attempting any stringing procedure.
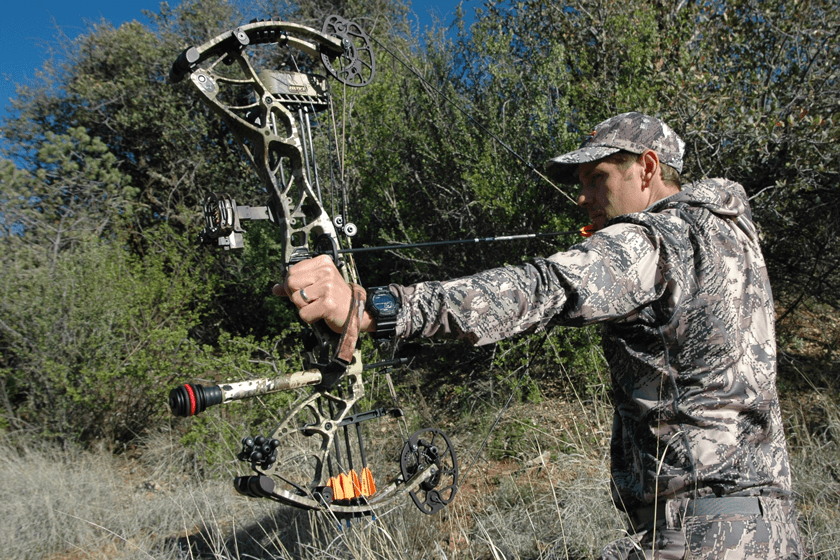
Credit: www.bowhunter.com
Preparing Your Bow And String
Proper preparation is the foundation of a safe and successful stringing process. Neglecting this step can lead to string slippage, limb twist, or even catastrophic bow failure.
Inspecting The Bow
Begin by carefully examining the bow limbs, riser, and tips for cracks, splinters, or signs of excessive wear. Even minor damage can be exacerbated by the stress of stringing, potentially resulting in injury or irreparable harm to your equipment.
- Check for Delamination: Especially in laminated bows, look for any separation of layers.
- Examine Nocks: Ensure the string grooves at the limb tips are clean and undamaged.
Selecting The Correct String
Not all bowstrings are created equal. String material, length, and thickness must match your bow’s specifications.
- Materials: Traditional bows often use Dacron, while modern recurves and compounds may require Fast Flight or other high-performance materials.
- Length: Strings are typically 3, 4 inches shorter than the bow’s length for recurves and longbows. Consult your manufacturer for precise measurements.
- Strand Count: More strands mean a stronger (but heavier) string. Match the strand count to your bow’s draw weight.
Example: String Material Comparison
| String Material | Strength | Stretch | Recommended Use |
|---|---|---|---|
| Dacron (B-50) | Moderate | High | Traditional/Older Bows |
| Fast Flight | High | Low | Modern Recurves/Compounds |
| Kevlar | Very High | Very Low | High-Performance Bows |
Pre-stringing Preparation
- Lubricate Nocks: Apply wax or a small amount of bowstring lubricant to the nock grooves.
- Warm Up the Bow: Allow your bow to acclimate to ambient temperature, cold limbs can be more brittle.
- Lay Out Tools: Have your bow stringer, string, and any necessary tools within arm’s reach.
Stringing Safety Precautions
- Wear Safety Glasses: Especially when stringing high-tension bows.
- Clear the Area: Ensure no pets, children, or distractions are present.
- Follow Manufacturer Instructions: Always defer to your bow’s manual for specific guidance.
Pro Tip: Never attempt to string a bow showing visible cracks or delamination, repair or replace it first.
Credit: www.bowhunter.com
Step-by-step Stringing Techniques
With your equipment prepared, it’s time to string your bow. The following sections provide detailed, step-by-step instructions for each common bow type.
Stringing A Longbow
Step-through Method
- Position the Bow: Hold the bow with the back (the side facing away from the string) against your left leg (for right-handed archers).
- Step Through: Place your right leg through the space between the string and the bow limb.
- Brace the Lower Limb: Rest the lower limb tip against your right calf.
- Bend and String: With your left hand on the upper limb and your right hand on the string loop, flex the bow and slide the string loop into the upper nock.
- Check Alignment: Ensure the string is centered and properly seated in both nocks.
Push-pull Method
- Hold the Bow Vertically: With the lower tip on the ground, grip the handle firmly.
- Push and Pull: Use one hand to push the handle away from your body and the other to pull the upper limb toward you, flexing the bow.
- Slip on the String: Place the string loop over the upper nock.
- Release Slowly: Carefully release tension and check string placement.
Stringing A Recurve Bow
Using A Bow Stringer
- Attach the Stringer: Slide the larger pocket or saddle of the stringer over the lower limb tip, and the smaller pocket or cup over the upper limb.
- Install the String: Place one loop over the lower limb nock and the other loop loosely over the upper limb.
- Step on the Stringer Cord: Stand on the middle of the stringer with both feet.
- Lift the Bow: Pull upward on the handle, flexing the limbs evenly.
- Slide the String Loop: Move the upper string loop into the nock groove.
- Release Tension: Slowly lower the bow until tension is fully on the string.
- Inspect Placement: Confirm the string is securely seated in both nocks.
Manual Methods (not Recommended)
Although some archers use step-through or push-pull methods for recurves, this risks limb twist and voids many manufacturers’ warranties.
Stringing A Compound Bow
Using A Bow Press
- Secure the Bow: Place the bow in a bow press per manufacturer guidelines.
- Relieve Limb Tension: Slowly compress the limbs to reduce string tension.
- Install the New String: Carefully remove the old string and fit the new string onto the cams and nocks.
- Check Cable Routing: Ensure cables are correctly routed and not pinched.
- Release the Press: Gradually return the limbs to their uncompressed state.
- Inspect and Test: Examine all connections and test draw the bow at low tension.
Warning:
Never attempt to string a compound bow without a bow press. This can result in severe injury and equipment destruction.
Real-world Example: Stringing A Bow For Target Practice
Use a bow stringer when working with a traditional recurve bow, such as during a weekend archery class. The process took less than two minutes, but skipping the stringer resulted in noticeable limb twist, affecting accuracy for the rest of the session.
This firsthand experience underscores the importance of using proper tools, especially for beginners.
Credit: www.latimes.com
Ensuring Proper String Tension And Alignment
String tension and alignment are critical for both safety and shooting performance. An improperly tensioned or misaligned string can lead to erratic arrow flight, reduced power, and even equipment failure.
Measuring Brace Height
Brace height, the distance from the bow’s grip to the string, affects arrow speed and accuracy. Each bow has an optimal brace height, typically specified in the owner’s manual.
- Use a Bow Square: Place the square against the grip and measure to the string.
- Adjust as Needed: Twist the string to increase or decrease brace height by small increments.
Centering The String
After stringing, visually check that the string runs straight down the center of the limbs.
- Sight Down the Bow: Align the string with the limb tips and riser.
- Correct Misalignment: If the string drifts to one side, unstring and restring, ensuring even limb flex.
Setting Nocking Points
A nocking point is a mark or attachment on the string where the arrow is placed. Proper nocking height ensures consistent arrow flight.
- Install Brass Nocking Points: Use pliers to crimp a metal nocking point onto the string at the measured height.
- Test Arrow Flight: Shoot a few arrows and observe for porpoising (up-and-down wobble). Adjust as needed.
Data Table: Optimal Brace Heights By Bow Length
| Bow Length (inches) | Recommended Brace Height (inches) |
|---|---|
| 62 | 7.5, 8.25 |
| 66 | 8.25, 8.75 |
| 70 | 8.75, 9.25 |
Consult your bow’s manual or Archery 360 for precise recommendations.
Maintenance And Troubleshooting
Regular care extends the life of your bow and string, while prompt troubleshooting prevents accidents and poor performance.
Routine String Care
- Wax the String: Apply bowstring wax every 2, 4 weeks or after heavy use.
- Inspect for Fraying: Look for loose or broken strands. Replace immediately if found.
- Check Serving: The serving (protective wrapping) should be tight and undamaged.
Limb And Nock Maintenance
- Clean Nocks: Remove dirt and debris from limb tips to ensure secure string seating.
- Examine Limbs: Regularly check for cracks, especially after dry firing (shooting without an arrow).
Common Stringing Problems And Solutions
- String Slips Out of Nock: String may be too loose or the nock groove dirty. Clean and check string length.
- Limb Twist: Usually caused by improper stringing technique, always use a bow stringer for recurves.
- String Buzz or Vibration: May indicate incorrect brace height or a worn string. Adjust or replace as necessary.
Example: Emergency String Replacement
During a hunting trip, an archer noticed fraying on the bowstring. Using a pre-waxed spare string and a portable bow stringer, they replaced the string in the field, allowing them to finish the hunt safely and effectively.
Advanced Tips For Performance And Longevity
Experienced archers seek every advantage in consistency and equipment lifespan. These advanced tips can make a significant difference over time.
Upgrading String Materials
Switching to high-performance strings (such as Fast Flight or Dyneema) can increase arrow speed and reduce stretch. However, ensure your bow is rated for these materials, older bows may not withstand the extra stress.
Using String Silencers
Adding string silencers (small fur or rubber accessories) reduces noise, which is vital for hunting. Install these according to manufacturer instructions, usually 8, 10 inches from each limb tip.
Rotating Strings
Alternate between two or more strings to reduce wear. Store unused strings in a cool, dry place, away from sunlight.
Storing The Bow
- Unstring When Not in Use: Especially for traditional bows, unstring after each session to relieve limb stress.
- Use a Bow Sock or Case: Protects from dust and accidental knocks.
Real-world Example: Tournament Preparation
A competitive archer preparing for a national event rotated between three strings during practice. This reduced stretch and allowed for quick replacement if a string showed signs of fatigue mid-tournament, ensuring consistent shooting.
Common Mistakes And How To Avoid Them
Learning from common errors helps both beginners and seasoned archers avoid costly setbacks and dangerous situations.
Attempting To String Without Proper Tools
Many injuries occur when archers forgo bow stringers or presses. Always use recommended tools, especially for recurves and compounds.
Ignoring Manufacturer Recommendations
Using the wrong string material or length can void warranties and damage your bow. When in doubt, consult your manual or reach out to experts via forums or at local archery shops.
Failing To Inspect Equipment Regularly
Small issues like frayed strings or hairline cracks can escalate quickly. Set a routine for thorough inspections.
Over-tightening Or Under-tightening
Improper brace height affects both performance and safety. Measure and adjust regularly, particularly after changing strings.
Example: Mistake In The Field
An archer ignored a slightly frayed string, assuming it would last one more session. The string snapped mid-draw, causing the bow limb to strike their forearm. A quick inspection before shooting could have prevented the injury.
Resources For Learning And Safety
Expanding your knowledge and skillset is essential for safe and enjoyable archery. Numerous resources are available for archers of all levels.
Archery Clubs And Coaches
Joining a local archery club or seeking guidance from a certified coach accelerates learning and offers hands-on help with stringing and maintenance.
Online Tutorials And Forums
Websites like Archery Talk feature detailed guides, videos, and community advice on bow stringing and care.
Manufacturer Support
Most bow manufacturers provide comprehensive manuals and customer support. Always refer to these resources for model-specific recommendations.
Books And Manuals
Investing in reference materials, such as “The Traditional Bowyer’s Bible” series, deepens your understanding of the craft.
Frequently Asked Questions
What Happens If I Use The Wrong Length String On My Bow?
Using a string that is too short or too long can drastically affect your bow’s brace height, resulting in poor arrow flight and increased stress on the limbs. In some cases, it can even make the bow unstringable or dangerous to use.
Always match the string length to the manufacturer’s specifications for your specific bow model.
Can I Use Modern String Materials On An Older Wooden Bow?
Not all older bows are designed to withstand the higher tension and reduced stretch of modern materials like Fast Flight or Dyneema. Using these strings on a vintage or self bow can cause limb damage or failure. If you’re unsure, consult a professional bowyer or the original manufacturer before upgrading string materials.
How Often Should I Replace My Bowstring?
The lifespan of a bowstring varies with use, material, and maintenance. As a general guideline, recreational archers should replace their strings every 1-2 years, while competitive shooters may need to replace them more frequently. Signs of fraying, broken strands, or excessive fuzziness indicate it’s time for a replacement.
Is It Safe To String A Bow In Cold Weather?
Stringing a bow in extremely cold conditions increases the risk of limb damage, especially for wooden bows. Cold makes materials more brittle and less flexible. Allow your bow to warm to ambient temperature before stringing, and avoid shooting if the limbs feel unusually stiff or make creaking sounds.
What Should I Do If My String Frequently Slips Off The Nock?
Frequent slippage suggests either the string loops are too large, the nock grooves are worn or dirty, or the string is not installed properly. Clean the nock grooves, inspect for wear, and consider replacing the string with one that fits your bow more securely.
If problems persist, consult an archery professional for a hands-on assessment.
With a solid understanding of bow types, stringing methods, and careful attention to maintenance, you can ensure both safety and high performance every time you shoot. Investing extra time in preparation and proper technique pays dividends in accuracy, consistency, and enjoyment, on the range or in the field.