How Do You Properly Shoot A Bow
Archery is both an ancient art and a modern sport, captivating enthusiasts with its blend of precision, discipline, and focus. Whether you’re aiming to master traditional archery, compete in tournaments, or simply enjoy recreational shooting, learning how to properly shoot a bow is essential for safety and accuracy.
Yet, for many beginners and even experienced archers, consistent shooting can feel elusive, tiny technical flaws and overlooked habits often make the difference between hitting the bullseye and missing the target entirely.
Mastering archery is more than just pulling a string and releasing an arrow. It requires an understanding of proper stance, equipment selection, draw mechanics, aiming techniques, and safety protocols. In my experience, even small adjustments in posture or grip can dramatically improve performance and confidence.
This article provides a comprehensive guide to shooting a bow correctly, grounded in expert insights, real-world examples, and actionable strategies. Whether you’re just starting out or refining your form, you’ll find everything you need to elevate your archery skills.
Key Takeaways
- Proper shooting technique involves mastering stance, grip, draw, anchor, aim, and release.
- Equipment selection, from bow type to arrow spine, directly impacts accuracy and comfort.
- Consistent practice with attention to form is crucial for improvement.
- Safety measures are non-negotiable and protect both the archer and bystanders.
- Common mistakes can be fixed with mindful adjustments and expert guidance.
- Data-driven comparison of bow types helps in choosing the right equipment.
Credit: www.bowhunter.com
Understanding Archery Equipment
The foundation of proper bow shooting starts with the right equipment. Choosing gear that fits your body and skill level not only enhances accuracy but also prevents injury.
Types Of Bows
Selecting the correct type of bow is crucial for comfort and effectiveness. The main types include:
- Recurve bows: Widely used in Olympic archery and beginner courses, these bows have limbs that curve away from the archer.
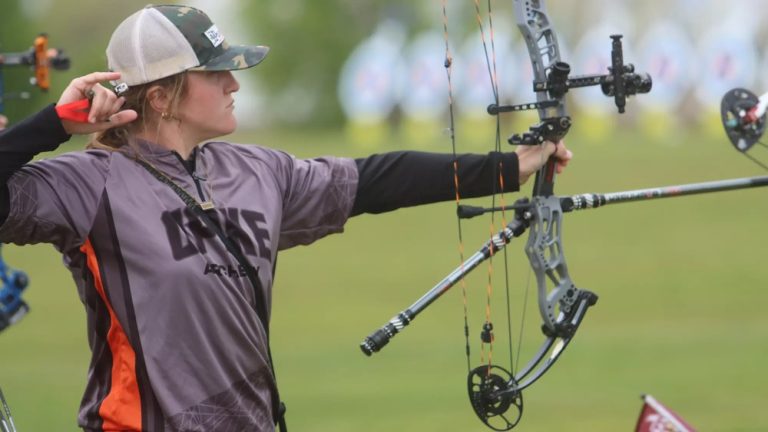
- Compound bows: Feature cams or pulleys for mechanical advantage, offering increased power and accuracy.
- Longbows: Traditional, simple design without significant recurve.
- Barebows: Shot without sights or stabilizers, relying on instinctive aiming.
| Bow Type | Best For | Draw Weight Range | Common Uses |
|---|---|---|---|
| Recurve | Beginners, Olympians | 15, 40 lbs | Target, Competition |
| Compound | Hunters, Advanced Archers | 30, 70 lbs | Hunting, Target |
| Longbow | Traditionalists | 20, 70 lbs | Field, Recreation |
| Barebow | Instinctive Shooters | 15, 50 lbs | Field, Competition |
Arrow Selection
The right arrow spine (stiffness), length, and tip weight ensure consistent flight. Arrows that are too stiff or flexible can veer off target. Consult manufacturer charts and test a few options to match your draw weight and bow type.
Accessories And Safety Gear
- Armguards: Protect your forearm from string slap.
- Finger tabs or gloves: Prevent finger injury during release.
- Chest guards: Keep clothing away from the string.
- Sight and stabilizers: Optional for improved accuracy.
Pro Tip: Visit a certified archery shop for equipment fitting and personalized advice.

Credit: www.wikihow.com
The Fundamentals Of Proper Shooting Technique
Perfecting your shooting form is the backbone of archery success. Each phase, stance, grip, draw, anchor, aim, and release, must be executed with intention.
Establishing The Correct Stance
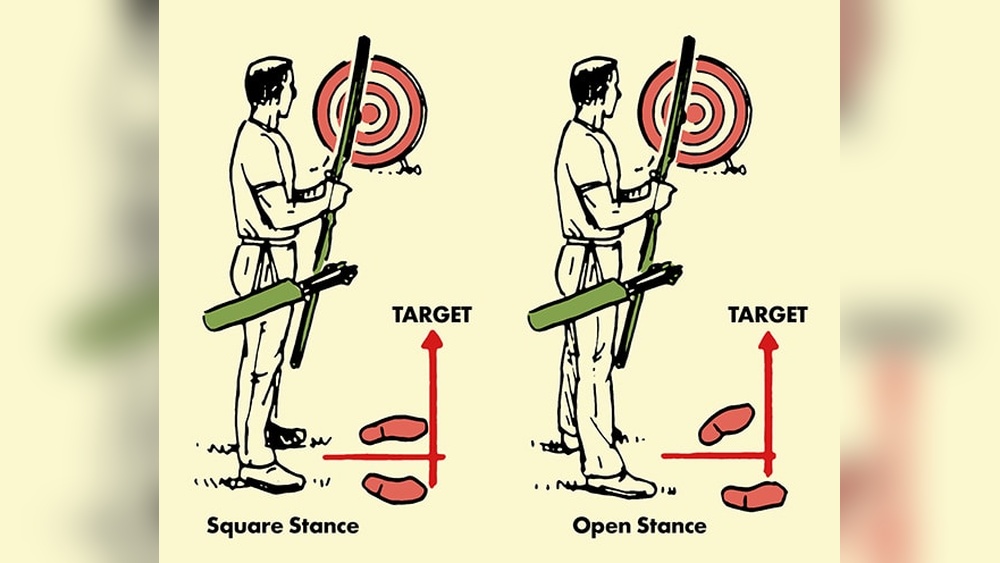
A stable stance sets the foundation for every shot. The two most common stances are:
- Square stance: Feet shoulder-width apart, perpendicular to the target.
- Open stance: Front foot slightly back, opening the hips for greater stability.
Maintain even weight distribution, relaxed knees, and an upright posture. Avoid leaning forward or backward, which can throw off balance.
Grip: Holding The Bow Properly
The bow grip should be firm but relaxed, resting in the web between your thumb and index finger. Over-gripping causes torque and inconsistent arrow flight. Let your other fingers wrap loosely around the riser.
Drawing And Anchoring
Drawing The Bow
Pull the string smoothly, engaging your back and shoulder muscles rather than just your arm. Keep your elbow high and in line with the arrow.
Anchoring
Consistently anchor the string at a fixed point, commonly at the corner of your mouth or chin. This reference point ensures repeatable shots.
Aiming Techniques
- Sighted aiming: Use pin or target sights to line up your shot.
- Instinctive aiming: Focus on the target and develop muscle memory through repetition.
Stay focused on the target, not the arrow tip.
The Release And Follow-through
Release the string by relaxing your fingers, avoiding any plucking motion. After release, maintain your position and let your bow arm follow through naturally. This prevents last-second flinching that can alter arrow flight.
Example: Olympic archers practice thousands of shots, emphasizing anchor consistency and clean release. Video analysis often reveals that their hand and body positions remain unchanged until the arrow hits the target.

Credit: www.youtube.com
Developing Consistency Through Practice
Consistency is what separates average archers from skilled marksmen. Building muscle memory and refining technique require deliberate, structured practice.
Creating A Practice Routine
Set aside dedicated practice sessions, focusing on:
- Warm-ups: Stretch shoulders, arms, and back.
- Form drills: Practice each step in isolation.
- Shot cycles: Shoot groups of 3, 6 arrows, evaluating each for consistency.
- Cool-downs: Gentle stretches to prevent soreness.
Track your results in a shooting log to identify trends and areas for improvement.
Setting Realistic Goals
Start with short distances (10, 15 yards) and gradually increase as your accuracy improves. Set specific targets, such as grouping arrows within a certain diameter.
Mental Focus And Visualization
Archery is as much mental as physical. Use visualization techniques to picture successful shots and manage performance anxiety. Controlled breathing before each shot can calm nerves.
Incorporating Feedback
Record yourself shooting or ask a coach for feedback. Small adjustments in form, like correcting a dropped elbow, can yield dramatic results.
Example: In my experience, filming practice sessions revealed a subtle twist in my grip that led to inconsistent arrow flight. Fixing this improved my scores within weeks.
Real-world Examples And Case Studies
Learning from others’ experiences can illuminate the nuances of proper bow shooting.
Case Study 1: Improving Accuracy Through Stance Adjustment
A youth archer struggled with consistent grouping at 18 meters. An instructor noticed the archer’s weight shifted heavily onto the toes. By adjusting to a balanced stance, arrow groups tightened by 30% over the next month.
Case Study 2: Equipment Misfit Leading To Technique Issues
An adult beginner used arrows that were too short for his draw length, causing erratic shots and discomfort. After switching to properly sized arrows, his accuracy and confidence improved significantly.
Case Study 3: Overcoming Target Panic
A competitive archer developed target panic, flinching at release. With guided breathing exercises and mental rehearsal, she regained control and set a personal best in her next tournament.
Pro Tip: Don’t hesitate to consult experienced coaches or join archery clubs for peer feedback and support.
Common Mistakes And How To Fix Them
Even seasoned archers develop bad habits. Recognizing and correcting these common mistakes can dramatically improve your shooting.
Over-gripping The Bow
A tight grip causes torque, resulting in left or right misses. Focus on a relaxed, neutral grip to allow the bow to move naturally.
Inconsistent Anchor Point
Changing your anchor point with each shot leads to wild arrow groups. Always draw to the same facial reference, whether it’s your chin, jaw, or mouth corner.
Poor Follow-through
Dropping your bow arm or moving after release can send arrows off target. Practice holding your position until the arrow lands.
Ignoring Equipment Maintenance
Frayed strings or loose arrow rests affect accuracy. Inspect and maintain your gear regularly.
Neglecting Mental Preparation
Rushing shots or losing focus under pressure impacts performance. Develop a pre-shot routine to center yourself before every arrow.
Warning: Skipping safety checks can result in injury to yourself or others. Always verify your surroundings and equipment before shooting.
Safety Protocols Every Archer Must Follow
Archery is safe when practiced responsibly. Prioritize safety for yourself and those around you.
Range Safety Rules
- Always point the bow downrange, never at people.
- Only nock arrows when on the shooting line and given the all-clear.
- Retrieve arrows only after everyone has finished shooting and the range is declared safe.
Equipment Checks
Before each session, examine:
- Bow limbs for cracks or splits.
- String for frays or wear.
- Arrows for straightness and undamaged nocks.
Personal Protective Gear
Wear an armguard and finger protection at all times. These simple accessories can prevent painful string slap and long-term finger injuries.
Emergency Procedures
Know the location of first-aid supplies and have a plan for contacting help in case of an accident.
Supervision And Coaching
Beginners should always shoot under supervision until they master basic safety and technique.
Pro Tip: Even experienced archers benefit from periodic safety refreshers and equipment inspections.
Comparing Bow Types For Different Skill Levels
Choosing the right bow is essential for progress and enjoyment. The table below compares bow types based on skill level, maintenance, and cost.
| Bow Type | Beginner-Friendly | Maintenance | Average Cost |
|---|---|---|---|
| Recurve | Yes | Low | $100, $500 |
| Compound | Moderate | Medium | $300, $1,200 |
| Longbow | Moderate | Low | $150, $600 |
| Barebow | Yes | Low | $100, $500 |
For in-depth guidance, consider resources like the Archery Wikipedia page.
Training Methods To Accelerate Improvement
Structured training accelerates learning and helps break through plateaus.
Working With A Coach
A certified coach provides personalized feedback, spots subtle issues, and designs tailored drills. The USA Archery coaching directory is a great place to find qualified instructors.
Using Technology
- Video analysis: Review your form frame-by-frame.
- Apps and devices: Track progress with shot counters and electronic targets.
Physical Conditioning
Archery demands upper body strength and endurance. Focus on:
- Core exercises for stability.
- Resistance bands for shoulder conditioning.
- Yoga or stretching for flexibility.
Participating In Tournaments
Local competitions provide valuable experience under pressure and expose you to different shooting environments.
Pro Tip: Compete against yourself by tracking personal bests and celebrating incremental improvements.
Archery For Recreation, Competition, And Hunting
Archery offers something for everyone, from casual backyard shooting to high-level competition and hunting.
Recreational Archery
Shooting for fun improves focus and relieves stress. Set up safe backyard ranges or visit community facilities.
Competitive Archery
Tournaments range from local club shoots to international events. Scoring is based on accuracy and consistency, with formats tailored to bow type and distance.
Bowhunting
Hunting regulations vary by region, always consult state wildlife agencies. Use appropriate draw weights and broadheads for ethical harvesting.
Example: The National Field Archery Association (NFAA) reports over 100,000 active competitive archers in the US, highlighting the sport’s broad appeal.
Historical And Cultural Significance
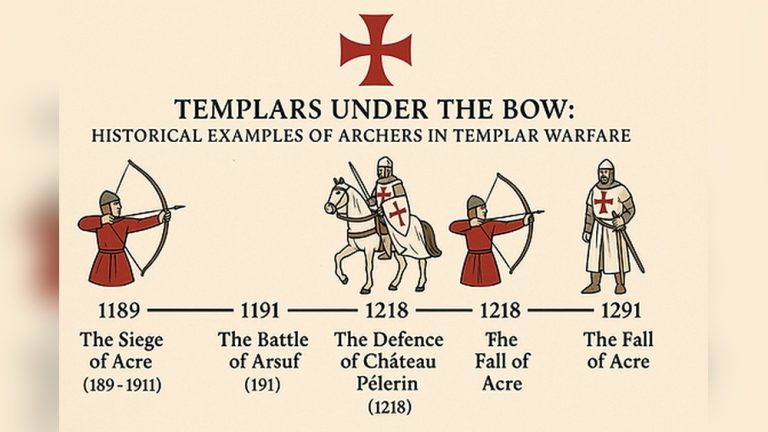
Archery has roots in ancient warfare and hunting, as well as ceremonial traditions. Today, it’s celebrated as an Olympic sport and a lifelong hobby.
For a comprehensive list of resources, visit the USA Archery official site.
Frequently Asked Questions
How Do I Know What Draw Weight Is Right For Me?
The ideal draw weight depends on your age, strength, and experience. Beginners often start with 15, 25 lbs for recurve bows. If you can draw the bow smoothly and hold at full draw for several seconds without shaking, it’s an appropriate weight. Consult a pro shop for a personalized fitting.
What’s The Difference Between Target And Field Archery?
Target archery is usually shot on flat ranges at fixed distances, focusing on accuracy. Field archery involves shooting at varying distances, often in wooded terrain, simulating hunting scenarios. Each requires slightly different techniques and equipment setups.
How Often Should I Replace My Bowstring?
Bowstrings should be replaced every 1, 2 years, or sooner if you notice fraying or excessive wear. Waxing regularly prolongs string life. String maintenance is essential for safety and consistency.
Are There Physical Exercises To Improve My Archery Performance?
Yes. Strengthening your shoulders, back, and core through resistance training enhances stability and reduces fatigue. Exercises like rows, planks, and band pulls are especially beneficial. Flexibility routines help prevent injury.
Is Archery Safe For Children?
With proper supervision and safety protocols, archery is a safe sport for children as young as 8. Youth programs use lighter bows and emphasize safety and fun. Always use age-appropriate equipment and never allow unsupervised shooting.
Archery, at its core, is about precision, patience, and continuous self-improvement. By understanding your equipment, refining technique, practicing mindfully, and prioritizing safety, you’ll experience the unique satisfaction of hitting your mark. Whether you shoot for recreation, competition, or tradition, the journey to mastering the bow is both challenging and deeply rewarding.