Paper Tuning Arrows: Tear Patterns and Fixes
Paper tuning arrows starts with the tear family: fix vertical tears first, then horizontal, then diagonal. That order usually points to the real cause before you move the rest. Skip it and you can chase one tear into another, wasting time and hiding a bad nock height, centershot, grip, or rest setup. This guide shows how to read each tear pattern and choose the first correction for compound and recurve bows.
What paper tuning tells you


Paper tuning uses butcher paper stretched in a frame to read arrow flight. The goal is a clean bullet hole, a round hole with three or four straight fletching slits. That tells you the arrow left the bow cleanly enough to fly straight at close range.
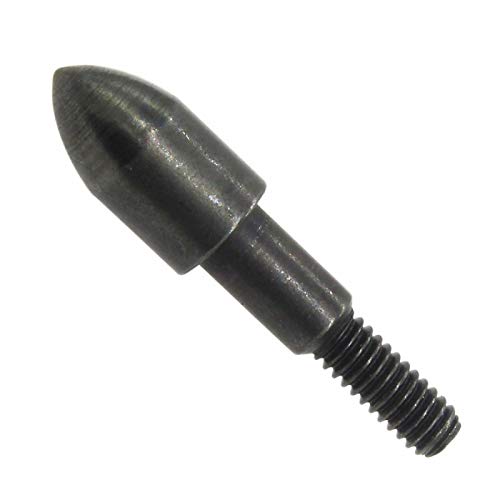
Use field points, not broadheads, for this check. Broadheads add blade drag and can hide the real tear pattern. Shoot from close range so the arrow reaches the paper before long-flight steering can blur the result.
What you need
- Butcher paper stretched in a frame or tuning rack
- Field points that match your arrows
- A compound bow rest, or a recurve setup with a plunger and button
- Notes on your nocking point, D-loop, and rest settings
- A tape measure or marked scale for small changes
- Fletched arrows for the first pass
How far should you stand from the paper?
Stand close enough that the arrow path stays clean and the tear is easy to read. A common setup is about six feet from the paper, while other guides use four to six feet or 6 to 8 feet. Keep the distance the same for every shot so the tear shape means something.
Hold stance, grip, and anchor the same. The paper reads the shot you just made, not the setup you wish you had. If your distance changes every shot, the tear can change with it.
- Set the paper lane at a fixed close distance.
- Use the same stance and anchor point for each shot.
- Shoot one fletched arrow through the paper.
- Mark the tear shape before changing anything.
- Repeat only after one adjustment, then re-shoot.
Read vertical tears first
Vertical tears tell you whether the arrow tail is up or down at the paper. A nock high tear means the tail is up and the point is low. A nock low tear means the tail is down and the point is high. On a compound, the first checks are usually nocking point or D-loop height, then rest position if needed.
For recurves, vertical tears usually point to nocking point height first, with plunger pressure and button setup as follow-up checks. If the same vertical tear keeps coming back after a correct nocking point change, stop and inspect spine or timing before moving farther.
How do you read left and right tears?
Left and right tears describe where the arrow tail went at the paper. For a right-handed archer, a nock left tear means the tail is left and the point is right; a nock right tear means the tail is right and the point is left. Left-handed archers reverse that reading.
On compounds, the first fix is usually a rest move in very small steps. On recurves, use the plunger and button before large changes elsewhere. If the same side tear keeps returning after a clean setup change, arrow spine becomes a stronger suspect than the rest.
Mixed or diagonal tears
Diagonal tears are usually not a separate problem. Treat the vertical part first, then the horizontal part. That sequence matters because a vertical fault can tilt the tear and make the horizontal read look worse than it is. A diagonal tear that does not change after a correct vertical fix often points to spine, timing, or contact.
Say your compound bow shows a nock high and nock right tear at 6 feet. Fix the vertical part first with the nocking point or D-loop, then recheck the side tear before moving the rest. Changing both at once makes it harder to know which correction helped.
Tear-to-fix decision table
Use this table to match the tear shape to the first adjustment, the next check, and the point where tuning should stop and move to form, spine, timing, or contact inspection. For left-handed archers, reverse left and right in the directional rows.
| Tear shape | Most likely cause | First compound fix | First recurve fix | Next check | Stop and inspect when | Left-handed note |
|---|---|---|---|---|---|---|
| Bullet hole | Good tune | No change | No change | Confirm the same hole repeats | Leave setup alone unless other signs point elsewhere | No reversal needed |
| Nock high | Tail up, point low | Raise or lower the nocking point/D-loop in a 1/16 inch step | Raise or lower the nocking point in a 1/16 inch step | Shoot again from the same distance | Stop if the tear stays the same after two correct vertical moves | Direction does not reverse |
| Nock low | Tail down, point high; can point to under-spined arrows | Adjust nocking point/D-loop first, then check spine | Adjust nocking point first, then check spine and button | Watch whether the tear narrows or stays fixed | Stop if the vertical tear will not move with nock changes | Direction does not reverse |
| Nock left | Right-handed archer: tail left, point right | Move rest in 1/32 inch steps | Change plunger tension or button depth, then tiny centreshot moves | Confirm the tear follows the move | Stop if the side tear repeats after a correct setup change | Reverse left/right meaning |
| Nock right | Right-handed archer: tail right, point left | Move rest in 1/32 inch steps | Change plunger tension or button depth, then tiny centreshot moves | Re-shoot with the same grip and anchor | Stop if the side tear points the same way after repeated changes | Reverse left/right meaning |
| Diagonal up-left or up-right | Mixed vertical and horizontal error | Fix the vertical part first | Fix the vertical part first | Re-read the side tear after the vertical correction | Stop if the second tear still does not respond | Reverse the side direction only |
| Diagonal down-left or down-right | Mixed error, contact, or spine mismatch | Correct nocking point, then rest | Correct nocking point, then button/plunger | Look for fletching contact marks | Stop if the tear survives clean setup changes | Reverse the side direction only |
| Jagged or torn slit | Form issue, nock fit, or contact | Check cam timing, rest contact, and grip torque | Check string picture, plunger, and grip torque | Reshoot with a cleaner release | Stop tuning until the shot itself is steady | Reverse side read if directional |
Compound and recurve fixes
Compound bows usually respond to small rest changes, but the rest should move in measured steps, not swings. A change of 1/32 inch is enough to see a trend without losing the original tune. Adjust the nocking point or D-loop only when the vertical tear calls for it.
Recurve bows use a different logic. The nocking point is the main vertical setting, and the plunger or button handles much of the horizontal work. If the same tear stays put after sensible changes, check arrow spine, then examine whether the button pressure or nock fit is part of the problem.
Suppose a right-handed recurve archer keeps getting a nock right tear after a 1/16 inch nocking point correction and a button tension change. That is the point to stop chasing the rest and inspect arrow spine and release consistency. More adjustment will not fix a weak shaft or a changing hand position.
- Make one change only.
- Shoot the same arrow through the same paper distance.
- Record the tear shape.
- Move the rest, nocking point, or button in the smallest useful step.
- Stop after the next repeat shot if the tear changes in the right direction.
What if the tear will not go away?
If the tear stays the same after correct setup changes, the bow may be telling you to stop tuning and inspect the shot. Grip torque, hard hand pressure, poor nock fit, cam timing, rest contact, and bad spine all live in that category. A setup change cannot fix a release problem.
That is also where a practical limit helps. A small nock high tear under about 1/2 inch on a recurve may be acceptable if the arrow flight is stable and the group is good. Past that, keep tuning only if the tear still points to a setup issue.
- Check grip pressure and wrist angle.
- Inspect arrow spine against draw weight and setup.
- Look for fletching contact on the rest or riser.
- Verify cam timing on a compound bow.
- Confirm nock fit is not too tight or too loose.
Common first-timer mistake: moving the rest, nocking point, and D-loop in one pass because the tear looks messy. That hides the real cause. Another error is reading a diagonal tear as two unrelated faults when the vertical part may be the only thing that needs attention first.
Prevention: keep a written note of each change, including direction and amount, so the next shot has one clear comparison point.
Frequently asked questions
How do I read a paper tune tear pattern?
Sort the tear into vertical, horizontal, or diagonal first. Vertical tells you nock height. Horizontal points to centershot, rest, or plunger work. Diagonal means both need attention, but fix the vertical part before the side part so one correction does not hide the other.
What does a nock high tear mean on a compound bow?
It means the tail is up and the point is low. Start with the nocking point or D-loop height, then shoot again from the same close distance. If the tear barely changes after two correct moves, inspect cam timing and rest contact next.
What does a nock left tear mean for a right-handed archer?
For a right-handed archer, the tail is left and the point is right. On a compound, move the rest in a very small step, about 1/32 inch, then re-shoot. On a recurve, check plunger tension and button setup before making larger changes.
Should I fix vertical or horizontal tear patterns first?
Fix vertical first. A bad nock height can tilt the tear and make the horizontal read look worse than it is. Once the vertical tear is close, move to the side tear. Diagonal tears follow the same order: vertical first, then horizontal.
How far should I stand from the paper when tuning arrows?
Use a close, consistent distance. Common setups range from four to six feet, about six feet, or 6 to 8 feet. Pick one distance and keep it fixed for every shot during that tuning session so the tear pattern stays comparable.
Can bad arrow spine cause a tear that won’t tune out?
Yes. A shaft that is too stiff or too weak can keep a left or right tear in place even after reasonable rest or nocking point changes. If the same tear repeats after careful setup work, match the arrow spine to draw weight, arrow length, and bow type.
Do I use field points or broadheads for paper tuning?
Use field points. Paper tuning is meant to read arrow flight, and a broadhead adds blade drag that can confuse the result. Start with a fletched arrow and a field point, then make one change at a time before shooting through the paper again.