How to Increase Draw Weight of Self Bow: Expert Tips and Tricks
Building a self bow is both art and science. But what if your finished bow feels too light and easy to pull? For many traditional archers, knowing how to increase draw weight of self bow is a valuable skill. Maybe you want more power for hunting, or simply desire a bow that matches your growing strength. Adjusting a self bow’s draw weight is possible, but it requires careful technique, patience, and a clear understanding of the bow’s limits.
This guide explains practical ways to boost draw weight without damaging your bow. Whether you’re a hobbyist or an experienced bowyer, you’ll find step-by-step advice, real-world examples, and some common mistakes to avoid. The goal: to help your self bow reach its full potential, safely and effectively.
Understanding Draw Weight In Self Bows
Draw weight is the force needed to pull a bowstring to a specific distance, usually 28 inches. For self bows (bows made from a single piece of wood), this depends on wood type, bow dimensions, and tillering (shaping the limbs). Increasing draw weight means making the limbs resist bending more, so each adjustment must be done with care.
Why Draw Weight Matters
A higher draw weight means:
- More arrow speed: Stronger bows shoot arrows faster and farther.
- Better penetration: Heavier draw weights are important for hunting.
- Suiting the archer: Some archers need higher or lower weights for comfort or skill level.
But there’s a balance: too much weight can break the bow or cause injury.
Factors That Influence Draw Weight
Several things affect how stiff (and thus how strong) a self bow is:
- Width and thickness of the limbs
- Type of wood used
- Tiller (the shape and curve of limbs)
- String material and brace height
Understanding these variables helps you choose the best method for increasing draw weight.
Methods To Increase Draw Weight
Making your self bow stronger is not just about brute force. Each method below has pros, cons, and technical limits.
1. Reducing Limb Width Less Than Thickness
The most reliable way to increase draw weight is to reduce limb width less than thickness. If you make the limbs narrower but keep them thick, they resist bending more, raising draw weight.
How to do it:
- Mark each limb’s width with a pencil. Plan to take off a small amount, usually 1, 2 mm per side.
- Use a sharp rasp, file, or scraper to carefully remove wood from the edges, staying even on both sides.
- Check the draw weight after each pass. Stop if you reach your desired weight.
Pro Tip: Always remove less wood than you think. You can take more off, but you can’t put it back.
Example: If your bow is 2 inches wide at the handle and 1 inch at the tips, removing 2 mm per side could add 3, 5 pounds of draw weight, depending on the wood.
2. Shortening The Bow
Shortening the overall length of a self bow increases stiffness, and therefore draw weight. This is only possible if your bow is longer than needed for your draw length.
How to do it:
- Remove material from the tips, typically ½ to 1 inch at each end.
- Retaper the tips so the string sits correctly.
- Re-nock and string the bow, then measure the new draw weight.
Warning: If your bow is already just long enough for your draw, shortening it may cause stacking (rapid increase in draw weight near full draw) or risk breaking the bow.
Example: Reducing a 70-inch bow to 68 inches can add 5, 8 pounds of draw weight, but always measure carefully.
3. Adding A Rawhide Or Sinew Backing
For bows near their breaking limit, adding a rawhide or sinew backing can allow you to raise draw weight without snapping the limbs. The backing strengthens the bow’s back (the side facing away from you).
How to do it:
- Prepare the backing by soaking sinew strips or thin rawhide.
- Glue the material to the back of the bow using hide glue.
- Clamp and let it dry for several days.
- After drying, you can carefully scrape the belly (the side facing you) to increase draw weight further.
Insight: Sinew backing is especially useful for woods that tend to break in tension, such as Osage orange or yew. It also helps if your bow has minor back flaws.
4. Increasing Belly Thickness
If your self bow is not bending much at full draw, you can carefully add material to the belly (the side facing the archer) using glued-on wood laminations.
How to do it:
- Choose a matching hardwood lamination, thin enough to bend but strong.
- Glue it to the belly with a strong adhesive (epoxy or hide glue).
- Clamp until dry, then carefully tiller the new lamination to match the rest of the bow.
- Test the draw weight frequently.
Caution: This method requires experience and can change the bow’s shooting feel.
Example: Adding a 1, 2 mm thick hickory lamination can add 5, 10 pounds, depending on the bow’s original weight.
5. Raising The Brace Height
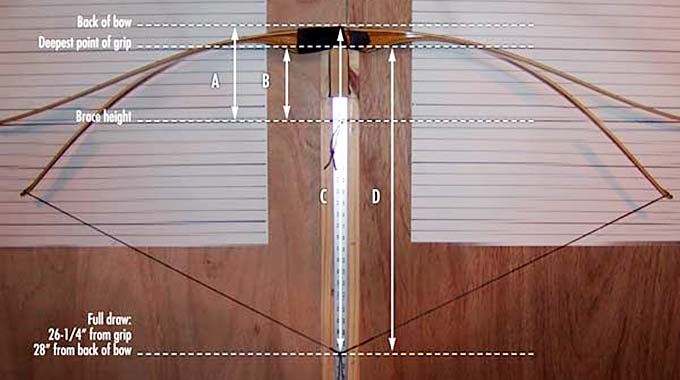
Brace height is the distance from the string to the bow’s deepest grip point. Raising it by twisting the string (making it shorter) increases draw weight slightly.
How to do it:
- Unstring the bow.
- Twist the string several more times to shorten it.
- Restring the bow and measure the new brace height.
- Check draw weight at your draw length.
This method adds only 1, 2 pounds, but can fine-tune the feel of the bow.
6. Using A Heavier String
Switching to a heavier, less stretchy string (such as Dacron or fast-flight) can increase draw weight by a small margin. This is because less string stretch means more force is transferred to the limbs.
How to do it:
- Make or buy a string with more strands or tougher material.
- Replace your current string.
- Measure draw weight again.
Pro Tip: Always check if your bow’s wood can handle a high-stress string. Not all self bows are suitable for modern string materials.
7. Adjusting Limb Profile
Sometimes, the bow’s limbs are too flat or not properly tillered. By reshaping the limbs to a more efficient profile, you can increase stiffness and draw weight.
How to do it:
- Identify flat spots or uneven bends.
- Use a rasp or scraper to adjust the limb’s belly, making it more rounded.
- Test the draw weight after each adjustment.
Insight: Over-tillering (making limbs too flexible) is a common beginner mistake. Careful profiling can recover some lost draw weight.
8. Heat Treating The Belly
Heat treating (also called tempering) the belly of the bow makes the wood stiffer and raises draw weight.
How to do it:
- Use a heat gun or open flame (such as a gas stove) with great caution.
- Move the heat source slowly along the belly, never holding it in one place.
- Monitor the wood for color change, stop when it turns a light brown, not black.
- Let the bow cool, then check draw weight.
Warning: Excess heat can ruin the bow. Practice on scrap wood first.
Example: Heat treating can add 5, 15% to draw weight, depending on wood and technique.

Credit: fairbowusa.com
When Not To Increase Draw Weight
Sometimes, increasing draw weight is not a good idea. Here are situations where it’s best to avoid modifications:
- Old or cracked bows: Attempting to increase draw weight can cause breakage.
- Already at wood’s limit: If the limbs are thin or heavily tillered, more stress may snap them.
- For beginner archers: Higher weights are harder to shoot accurately and can cause injury.
Respect your bow’s natural limits, and prioritize safety above all.
Comparing Methods: Draw Weight Gains And Risks
Here’s a quick comparison of the main methods:
| Method | Average Weight Gain | Risk Level | Skill Needed |
|---|---|---|---|
| Reduce Limb Width | 3, 5 lbs per mm | Low | Beginner, Intermediate |
| Shorten Bow | 5, 8 lbs per inch | Medium | Intermediate |
| Sinew/Rawhide Backing | 5, 15% | Medium | Advanced |
| Add Belly Lamination | 5, 10 lbs | High | Advanced |
| Heat Treat Belly | 5, 15% | Medium | Intermediate |
| Raise Brace Height | 1, 2 lbs | Low | Beginner |
| Heavier String | 1, 2 lbs | Low | Beginner |
| Adjust Limb Profile | 3, 6 lbs | Medium | Intermediate |
Tools And Safety Gear You Need
Working with bows involves sharp tools and sometimes heat. These are the essentials:
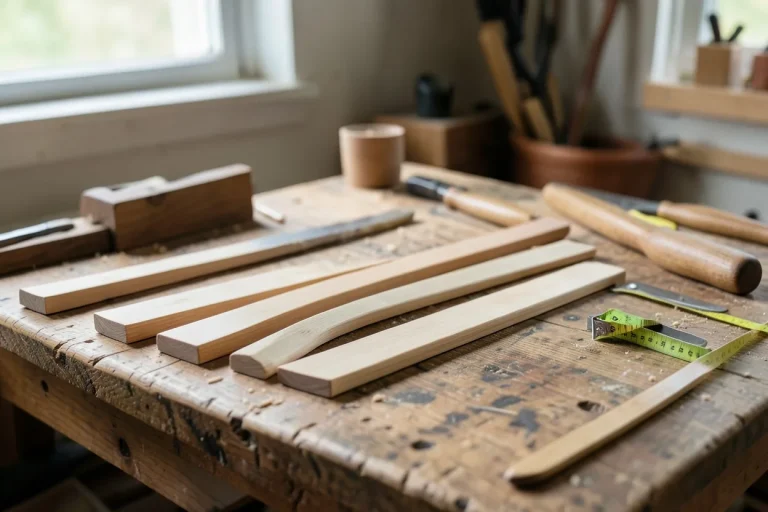
- Rasp, file, and cabinet scraper: For shaping limbs and belly.
- Calipers: To measure thickness and width accurately.
- Draw weight scale: To check progress at each step.
- Heat gun or torch: For heat treating (advanced only).
- Clamps: For laminations or backing.
- Safety glasses and gloves: To protect yourself from wood splinters and glue.
Pro Tip: Always work in a well-ventilated area, especially when using glue or heat.
Real-world Example: Increasing Draw Weight Step By Step
Let’s say you have a 68-inch hickory self bow pulling 35 pounds at 28 inches. You want to reach 42 pounds.
Step 1: Measure and Plan
- Current width at fade (just past the handle): 1.5 inches
- Limb thickness: 0.5 inches
- Draw weight: 35 pounds
Step 2: Reduce Limb Width
- Mark 2 mm on each side of both limbs.
- Carefully rasp the edges, keeping the shape even.
Step 3: Check Draw Weight
- After removing wood, string the bow and check draw weight.
- New weight: 38 pounds.
Step 4: Heat Treat the Belly
- Using a heat gun, gently heat the belly until it turns light brown along both limbs.
- Let it cool, then test draw weight again.
Step 5: Raise Brace Height
- Twist string to raise brace height from 6.5 to 7 inches.
- Final weight: 41.5 pounds.
Result: With careful work, the bow now draws close to your goal, and still shoots smoothly.
Common Mistakes And How To Avoid Them
Increasing draw weight can backfire if you’re not careful. Here are the most frequent errors:
- Removing too much wood at once: Always take small amounts and measure often.
- Unbalanced limbs: Adjust both limbs equally. An uneven bow will twist or break.
- Ignoring wood type limits: Some woods (like elm or maple) are less forgiving than others.
- Skipping tiller checks: Always check limb bend during modifications.
- Using the wrong glue or materials: For laminations and backing, use proven adhesives.
Warning: Never rush the process, patience is key to a strong, safe bow.
When To Seek Professional Help
If your self bow is valuable, historic, or has sentimental value, consider consulting a professional bowyer for draw weight adjustments. Professionals have specialized tools and experience that can save your bow from damage.
Credit: buildyourownbow.com
Table: Suitable Wood Types For Self Bow Modification
Some woods respond better to draw weight increases than others. Here’s a summary:
| Wood Type | Forgiveness | Best Methods |
|---|---|---|
| Osage Orange | High | All except heavy lamination |
| Hickory | Very High | All methods |
| Yew | Medium | Backed, heat treat |
| Maple | Low | Minor adjustments only |
| Elm | Medium | Backed, minor width reduction |
Maintenance After Increasing Draw Weight
Once you’ve modified your bow, regular care is essential:
- Check for cracks: Inspect limbs after every shooting session.
- Oil the wood: Use linseed oil or tung oil to prevent drying.
- Store correctly: Hang the bow unstrung in a cool, dry place.
- Retiller as needed: If you notice uneven bending, re-tiller immediately.
Pro Tip: Record each change you make. This helps if you need to retrace steps or diagnose issues later.
The Importance Of Testing And Patience
Every self bow is unique. Always test after each adjustment, never change too much at once. In my experience, even small modifications can have big effects. Sometimes, waiting a day between steps allows the wood to settle, giving you more accurate results.
Frequently Asked Questions
What Is The Maximum Safe Increase In Draw Weight For A Self Bow?
Generally, you should not increase draw weight by more than 10, 15% of the bow’s original weight. Going beyond this risks damaging the bow or causing it to break. The bow’s wood type, grain quality, and age