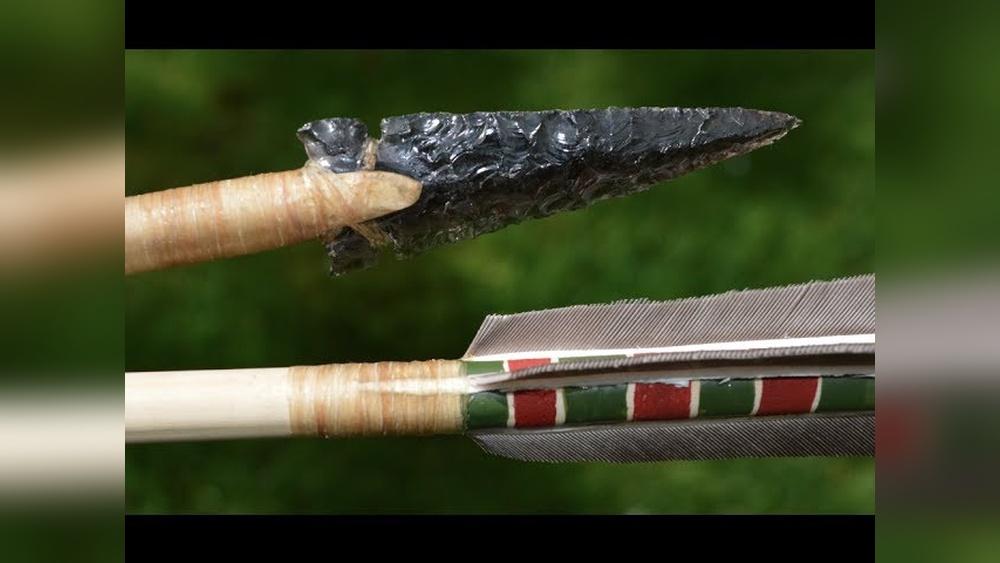
How to Make a Traditional Native American Bow: Step-by-Step Guide
Building a traditional Native American bow is a journey into both history and craftsmanship. For centuries, Indigenous peoples across North America have made bows for hunting, survival, and cultural ceremonies. Every bow tells a story, shaped by the land, climate, and available resources.
By making your own, you’re not just creating a tool, you’re connecting with a tradition that helped countless generations thrive.
Learning to make a Native American bow requires patience, care, and respect for nature. It’s not about speed, but about understanding each step: from picking the right wood, to shaping it, till you string the bow and watch your first arrow fly. This guide walks you through every phase, mixing practical advice, traditional knowledge, and real-world tips. Whether you want a working bow or a piece of heritage, you’ll find all you need right here.
Understanding Traditional Native American Bows
Before starting, it’s helpful to know what makes these bows special. Traditional Native American bows are usually self bows, made from a single piece of wood. Some tribes, especially in the Plains and Southwest, also made composite bows by combining wood, sinew, and horn for extra power. But for most beginners, a self bow is the best place to start.
Typical Native American bows were shorter than European longbows, often between 36 and 54 inches, making them easier to use on horseback or in dense forests. They were designed for quick shots at close range, perfect for hunting deer, rabbits, or birds.
Here’s a quick overview of bow types you might encounter:
| Bow Type | Main Materials | Typical Length | Regions/Tribes |
|---|---|---|---|
| Self Bow | Single wood piece | 36, 60 in | Eastern Woodlands, Great Plains |
| Composite Bow | Wood, sinew, horn | 30, 48 in | Plains, Southwest |
| Flat Bow | Wide, flat wood | 50, 60 in | Great Lakes, West |
Choosing The Right Wood
Selecting the correct wood is the foundation of a strong, flexible bow. Native Americans used what their local environment offered, but some species are especially prized.
Best Wood Types
- Osage orange: Famous for strength and flexibility; used by many Plains tribes.
- Hickory: Common in the Eastern US; tough and forgiving for beginners.
- Yew: Highly valued in the Pacific Northwest; smooth draw.
- Ash: Easy to find and work with, but slightly heavier.
If you’re in North America, you can probably find at least one of these nearby. Avoid softwoods like pine, which don’t have enough tensile strength.
Wood Selection Tips
Look for a straight sapling or branch, about 2 inches in diameter and 5, 6 feet long. The wood should be free from knots, twists, or cracks. Green (freshly cut) wood is easier to carve, but it must be dried, or “seasoned”, before use, or the bow will warp and crack.
Pro Tip: If you’re not sure about your wood’s quality, gently bend it. If it creaks loudly or splinters, choose a different piece.
Preparing And Seasoning The Stave
Once you have your wood, you need to prepare it for bow-making. This piece of wood is called a stave.
Removing Bark And Shaping
Use a drawknife or sharp knife to strip the bark. Keep the outermost growth ring (the cambium) intact, this becomes the bow’s back, which faces away when shooting. Damaging this layer makes the bow much weaker.
Roughly shape the stave so it’s about 1. 5 to 2 inches wide in the middle, tapering gently to about 0. 5 inch at each end.
Seasoning The Wood
Let the stave dry in a cool, dry place for at least 4, 6 weeks. Lean it upright against a wall or hang it with cords. If you rush this step, your bow is more likely to break.
Example: In my experience, hickory dries a bit faster than osage orange. If you live in a humid area, give your wood extra time.
Designing Your Bow
Every bow is unique, but there are some traditional measurements and shapes to guide you. Native American bows were rarely symmetrical, so don’t worry if yours isn’t perfect.
Bow Length And Draw Weight
- For hunting, aim for a bow length roughly your own height or a bit shorter.
- Draw weight (the force needed to pull the string) should be 35, 50 pounds for hunting, or 20, 35 for practice.
Bow Shape
Most Native bows have a gentle curve. The middle section (the handle or grip) stays thicker and stiffer, while the limbs (the arms of the bow) taper and flex.
Here’s a simple comparison of traditional bow shapes:
| Shape | Description | Ease for Beginners |
|---|---|---|
| Flat | Wide, thin limbs, even curve | Easy |
| Long, straight | Minimal curve, longer limbs | Medium |
| Short, recurved | Ends curve away from archer | Hard |

Credit: www.youtube.com
Shaping The Bow Stave
Now it’s time to carve the stave into a real bow. This is where patience pays off.
Marking The Handle And Limbs
With a pencil or charcoal, mark the center 5, 7 inches for the handle. Mark both limbs so they taper smoothly from the grip to the tips.
Carving The Shape
Use a sharp knife, drawknife, or rasp. Start by thinning the limbs evenly, working on both sides to keep balance. Do not thin the handle area yet.
Check your progress often: flex the bow gently. Both limbs should bend equally. If one side is stiffer, remove a bit more wood from that limb.
Warning: Don’t rush this! Removing too much wood in one spot can cause weak points and breakage.
Back And Belly
The “back” faces away when you shoot; the “belly” faces you. Never carve into the back, leave the growth ring intact. Shape the belly into a gentle arc, thinning until the limbs start to bend with moderate pressure.
Tillering: Getting The Perfect Bend
Tillering is the process of adjusting your bow so it bends smoothly and evenly. This step makes the difference between a strong, long-lasting bow and one that fails.
Creating A Tillering Stick
A tillering stick is a board with notches to hold the bow string at various draw lengths. Place the bow on the stick and pull the string back, watching how each limb bends.
Adjusting The Limbs
Remove tiny amounts of wood from stiff areas. The goal is a smooth, even curve in both limbs. If one limb bends more, it will break first. Be patient, this step can take hours or even days for beginners.
Pro Tip: Take breaks. Wood can “set” if you work it too quickly, leading to uneven tension.
Cutting Nocks And Final Shaping
With tillering finished, carve small notches (nocks) near each end of the bow for the string. These should be about 1/2 inch from the tips and shaped like shallow “V”s or grooves around the sides.
Smooth all surfaces with sandpaper or a scraper. Remove sharp edges to prevent splinters and make the bow comfortable to hold.
Optional: Adding A Handle Wrap
Traditional bows sometimes used leather or sinew wraps for grip. If you want, glue or tie a strip of leather around the handle.
Making And Attaching The Bowstring
A good string is just as important as the bow itself. Native Americans often used animal sinew or rawhide, but plant fibers like flax or nettle work too.
Materials For Bowstrings
- Sinew: Strong, flexible, and traditional. Harvest from deer or elk tendons.
- Rawhide: Soak, cut into thin strips, and twist.
- Plant fibers: Twist together multiple strands for strength.
Twisting The String
Measure a length about 8, 10 inches longer than your bow. Twist or braid the fibers tightly, then tie a secure loop (the eye) for one end.
Stringing The Bow
Slip the eye over one nock. Bend the bow carefully and tie the other end around the opposite nock. The string should sit about 5, 7 inches from the grip when the bow is unstrung.
Pro Tip: For your first bow, synthetic string like dacron is easier to work with and safer while you learn.
Finishing Touches And Decoration
Now your bow is functional, but many Native American bows were also decorated to show tribal identity or personal style.
Sealing The Wood
Rub the bow with bear fat, beeswax, or modern oils to protect it from moisture. This step helps prevent cracking and warping.
Painting And Decoration
Use natural dyes, ochre, or charcoal to add designs. Feathers, beads, and leather wraps are all traditional options. Just be sure decorations don’t interfere with the bow’s performance.
Example: Some Plains tribes painted lightning bolts or animal tracks to honor the spirit of the hunt.
Testing And Shooting Your Bow
Before using your bow for hunting or serious practice, test it carefully.
Safety First
- Always check for cracks before drawing.
- Stand in an open area.
- Wear eye protection if possible.
First Draw
Pull the string back a few inches at first, then gradually increase to your full draw length. Listen for unusual creaks or pops, these can signal weak spots.
Adjustments
If the bow feels uneven or one limb bends much more, return to the tillering step. A well-tillered bow should draw smoothly and shoot arrows consistently.
Comparing Traditional And Modern Bows
It’s helpful to see how a hand-crafted Native American bow stacks up against modern alternatives. Here’s a direct comparison:
| Feature | Traditional Bow | Modern Compound Bow |
|---|---|---|
| Materials | Wood, sinew, natural fibers | Aluminum, fiberglass, steel, synthetics |
| Draw Weight | 20, 50 lbs | 40, 70 lbs (adjustable) |
| Draw Length | Fixed by bow length | Adjustable cams |
| Ease of Use | Requires skill, practice | More forgiving, sighted |
| Maintenance | Simple, occasional oiling | Needs tuning, parts replacement |
| Cultural Value | High, tied to tradition | Low |
While modern bows can shoot farther and with more power, traditional bows offer a deeper connection to history and nature. Many archers find traditional bows more rewarding, even if they’re less precise.
Common Mistakes And How To Avoid Them
Building your first bow is a learning process. Here are mistakes beginners often make, and how to avoid them:
- Choosing wood with knots or cracks: These weak points can cause breakage.
- Rushing the seasoning: Impatience leads to warped or broken bows.
- Over-carving one limb: Always check both sides for balance.
- Damaging the back: Never cut into the outer growth ring.
- Using the wrong string material: Weak string can snap and injure you.
- Not testing the bow carefully: Small cracks can grow quickly if ignored.
Pro Tip: Keep notes and photos as you work. This helps you spot problems early and learn from each bow you make.
Respect And Cultural Considerations
Making a Native American bow is not just a craft, it’s a way to honor Indigenous knowledge and tradition. Many tribes still use traditional bows for hunting or ceremony. If you’re not Native, show respect by learning about the history and cultural meaning of these tools.
It’s also important to avoid copying sacred symbols or designs without understanding their meaning. If you want to use tribal patterns, research their significance or consult with tribe members.
If you’re interested in learning more, the Smithsonian National Museum of the American Indian offers resources and guides on Native technology and art.
Frequently Asked Questions
What Is The Best Wood For A First-time Bow Maker?
While osage orange is excellent, it can be hard to find. Hickory is more widely available and very forgiving for beginners. It resists breaking even if you make small mistakes in shaping or tillering.
How Do I Know If My Bow Is Safe To Shoot?
Check for any visible cracks, especially after tillering. Flex the bow gently, listening for sharp creaks or splinters. Always test with short draws at first, and never stand directly in front of the limbs when drawing for the first time.

Credit: www.youtube.com
Can I Use Modern Tools, Or Must Everything Be Traditional?
You can use modern tools like rasps, sandpaper, and clamps to make the process easier and safer. Many Native American bowyers today use a mix of old and new techniques. What matters most is respecting the traditional design and function.
What Arrows Should I Use With A Traditional Bow?
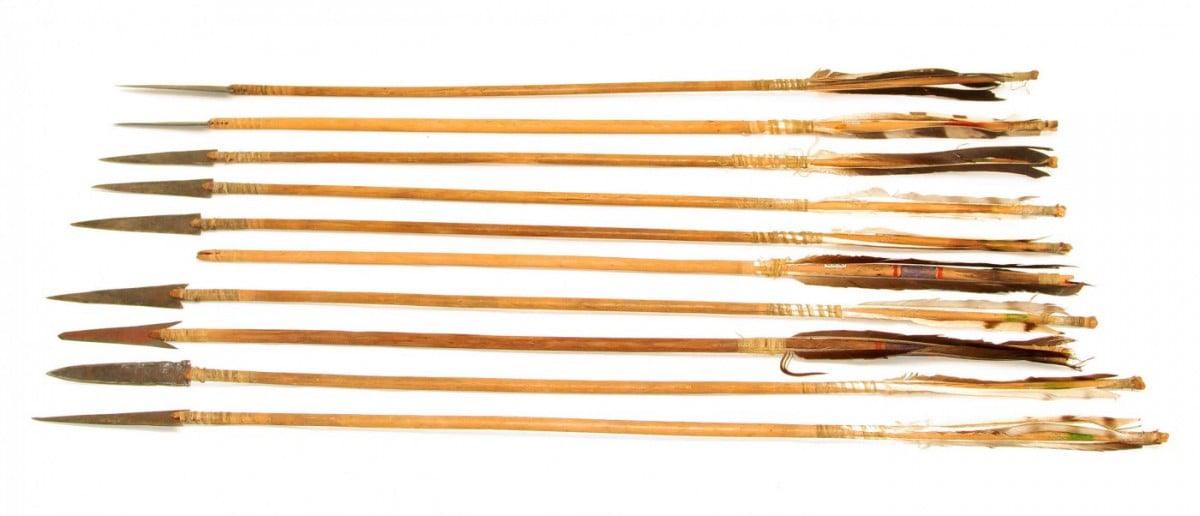
For authenticity, use wooden shafts with natural fletching and stone or metal points. The arrows should be matched to your bow’s draw weight and length. Lightweight arrows fly faster but may be less stable; heavier arrows penetrate deeper.
Credit: centerofthewest.org
How Can I Learn More About Native American Bow Making?
There are excellent books, museums, and online resources on this topic. For a detailed look at various tribal bow styles, see the