How to Make a Traditional Native American Bow And Arrow Easily
Few objects in history blend survival, culture, and craftsmanship like the traditional Native American bow and arrow. For centuries, Indigenous peoples across North America relied on this simple yet powerful tool for hunting, defense, and ceremony. Today, making your own bow and arrow can offer a deep connection to history, a practical outdoor skill, and a rewarding hands-on project.
While modern archery often uses factory-made equipment, building a bow and arrow from natural materials challenges you to understand nature, respect tradition, and develop patience. This guide will walk you through every step, from selecting wood to finishing touches, using clear language and practical advice.
Whether you’re interested in bushcraft, traditional skills, or simply want to try something unique, you’ll find all the details you need to craft an authentic Native American bow and arrow.
Understanding Traditional Native American Bows And Arrows
Traditional Native American bows and arrows were not one-size-fits-all. Tribes from the Great Plains, Southwest, Eastern Woodlands, and Pacific Northwest each developed their own styles to suit local conditions and available materials. Some bows were short and strong for horseback hunting, while others were long and flexible for use in dense forests.
However, most Native bows share a few key traits:
- Made from a single piece of wood (self bow)
- Sinew or plant fiber bowstring
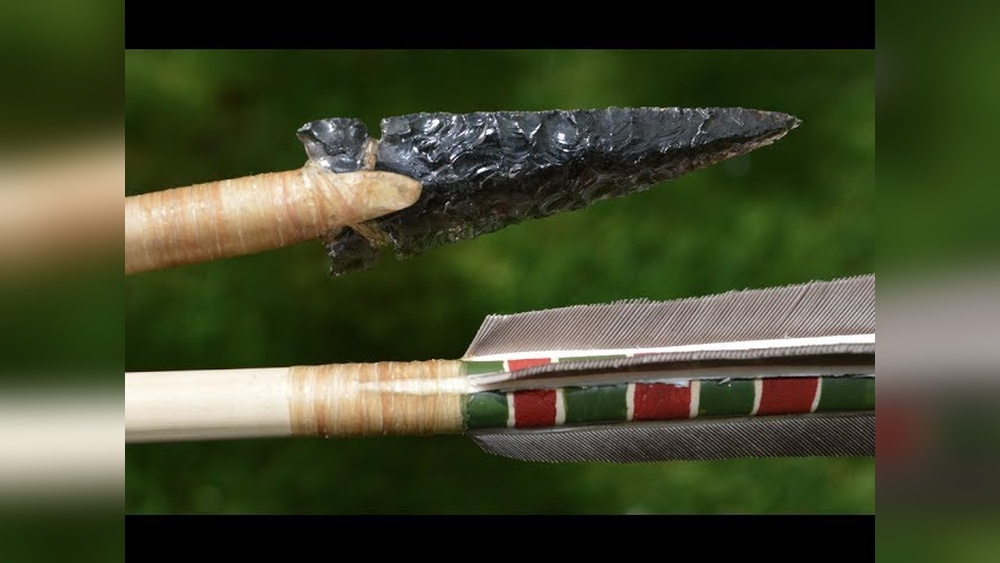
- Arrows with stone, bone, or metal tips
- Simple, functional design
Making a bow the Native way means using natural materials and hand tools as much as possible. This process teaches patience and respect for the materials, echoing the values of the original makers.
Why Materials Matter
The choice of wood, string, and arrow materials is critical. Each affects the bow’s power, flexibility, and durability. Choosing the right material is the single biggest factor in a bow’s success or failure.
Gathering Materials And Tools
Before you start, gather all the materials and tools you’ll need. Using natural resources is ideal, but some modern substitutions are acceptable if you’re learning or lack access to wild materials.
Wood Selection For The Bow
Native Americans used woods that combined strength with flexibility. Some popular choices include:
- Osage orange: Exceptionally strong, bends well
- Hickory: Readily available, durable
- Black locust: Tough, good for powerful bows
- Pacific yew: Used by tribes in the Northwest
If you can’t find these, ash, maple, or elm are good alternatives. The wood should be straight, free from large knots or twists, and about 1. 5, 2 inches thick and 5, 6 feet long (for an adult bow).
Arrow Materials
For arrows, straight shoots from shrubs or small trees work best. Consider:
- Dogwood
- Willow
- Hazel
- Viburnum
Shoots should be 1/4 to 3/8 inch thick and 24, 30 inches long.
Bowstring Materials
Traditional bowstrings were made from:
- Animal sinew (tendon)
- Rawhide
- Plant fibers (such as milkweed or nettle)
If you can’t source these, use modern Dacron string or strong nylon cord for practice.
Arrowheads And Fletching
- Stone (flint, obsidian, chert)
- Bone
- Metal (later periods)
Feathers for fletching were often taken from turkey, goose, or other large birds.
Tools Needed
You’ll need a few simple tools:
- Sharp knife or drawknife
- Hatchet or small axe
- Wood rasp or file
- Sandpaper (optional)
- Awl or nail (for arrow nocks)
- Cordage or string for clamping and tying
Pro Tip: If working with green (freshly cut) wood, let it dry slowly for several weeks to prevent cracking.
Shaping The Bow
This is the stage where patience pays off. Rushing can ruin the wood or result in a weak bow.
Step 1: Preparing The Stave
A stave is your starting piece of wood. Remove bark carefully, but keep the outer growth ring intact on the belly (the side facing away from you when shooting). This ring gives strength and prevents breakage.
- Mark the center point of the stave.
- Measure and mark the handle section (usually 6 inches in the middle).
- From the handle, mark equal limbs on both sides.
Step 2: Rough Shaping
Use a hatchet or knife to shape the stave into a flat, even piece. The limbs should be about 1. 5, 2 inches wide at the handle, tapering to 1/2 inch at the tips.
Remove wood slowly. It’s easier to take more off than put it back.
Step 3: Tillering
Tillering is carefully bending the bow to ensure both limbs flex evenly. A bow that bends more on one side will shoot poorly or break.
- Start by flexing each limb gently.
- Remove wood from stiff areas with your knife or rasp.
- Repeat flexing and shaving until both limbs bend in a smooth arc.
A tillering stick or board (a notched stick to hold the bow at different draw lengths) helps check your progress.
Step 4: Cutting Nocks
At each limb tip, carve a small notch for the bowstring. Make sure not to cut too deeply, just enough for the string to sit securely.
Step 5: Final Smoothing
Smooth the bow with a file and sandpaper. Remove sharp edges to prevent splinters and make it comfortable to hold.
Making And Attaching The Bowstring
The bowstring must be strong, flexible, and resistant to stretching. Traditional sinew strings are challenging to make, but plant fiber or modern materials work for practice.
Making A Sinew Bowstring
- Dry and pound animal sinew until it separates into fibers.
- Twist fibers together tightly, adding more as needed for length.
- Rub with animal fat or beeswax for strength.
Using Plant Fiber
- Harvest long fibers from milkweed, nettle, or dogbane.
- Soak, then twist fibers into a cord.
Attaching The String
- Tie a timber hitch knot at one end.
- Slip it over one limb nock.
- Bend the bow slightly and tie a fixed loop on the other end for the opposite nock.
The string should be tight enough that, when strung, the bow’s string stands about 5, 7 inches from the handle.
Crafting Traditional Arrows
Making arrows requires attention to detail. Straightness, weight, and balance are crucial for accurate shooting.
Step 1: Straightening Shafts
If arrow shoots aren’t perfectly straight, heat them gently over a fire and bend carefully. Roll the shaft on a flat surface to check straightness.
Step 2: Cutting To Length
Adult arrows are usually 24, 30 inches long. Cut to your desired length, leaving extra for the nock and point.
Step 3: Shaping And Smoothing
- Remove any bark.
- Smooth with a knife or sandpaper.
- Taper one end for the arrowhead, the other for the nock.
Step 4: Making Nocks
With an awl or knife, cut a shallow groove (about 1/2 inch deep) in the base of each shaft. This will fit on the bowstring.
Step 5: Adding Arrowheads
If using stone, bone, or metal tips:
- Shape and sharpen the point.
- Split the tapered end of the shaft.
- Insert the arrowhead.
- Bind tightly with sinew or cord.
For simple practice arrows, sharpen the wood tip and harden it in fire.
Step 6: Fletching
Fletching stabilizes the arrow in flight.
- Split feathers in half.
- Attach 2, 3 feather halves evenly spaced near the nock, using glue (pine pitch or hide glue) and sinew.
- Make sure feathers curve away from the shaft for best flight.
Strengthening And Finishing The Bow
Traditional bows often received special treatments to boost performance and durability.
Backing With Sinew
Some Native bows, especially shorter ones, were backed with animal sinew to prevent breaking.
- Pound sinew into fibers.
- Mix with hide glue.
- Lay in strips along the back of the bow (the side away from you).
- Let dry completely before use (can take several days).
Oiling And Sealing
Rub the finished bow with animal fat, beeswax, or natural oils. This protects the wood from moisture and cracking.
Decoration And Symbolism
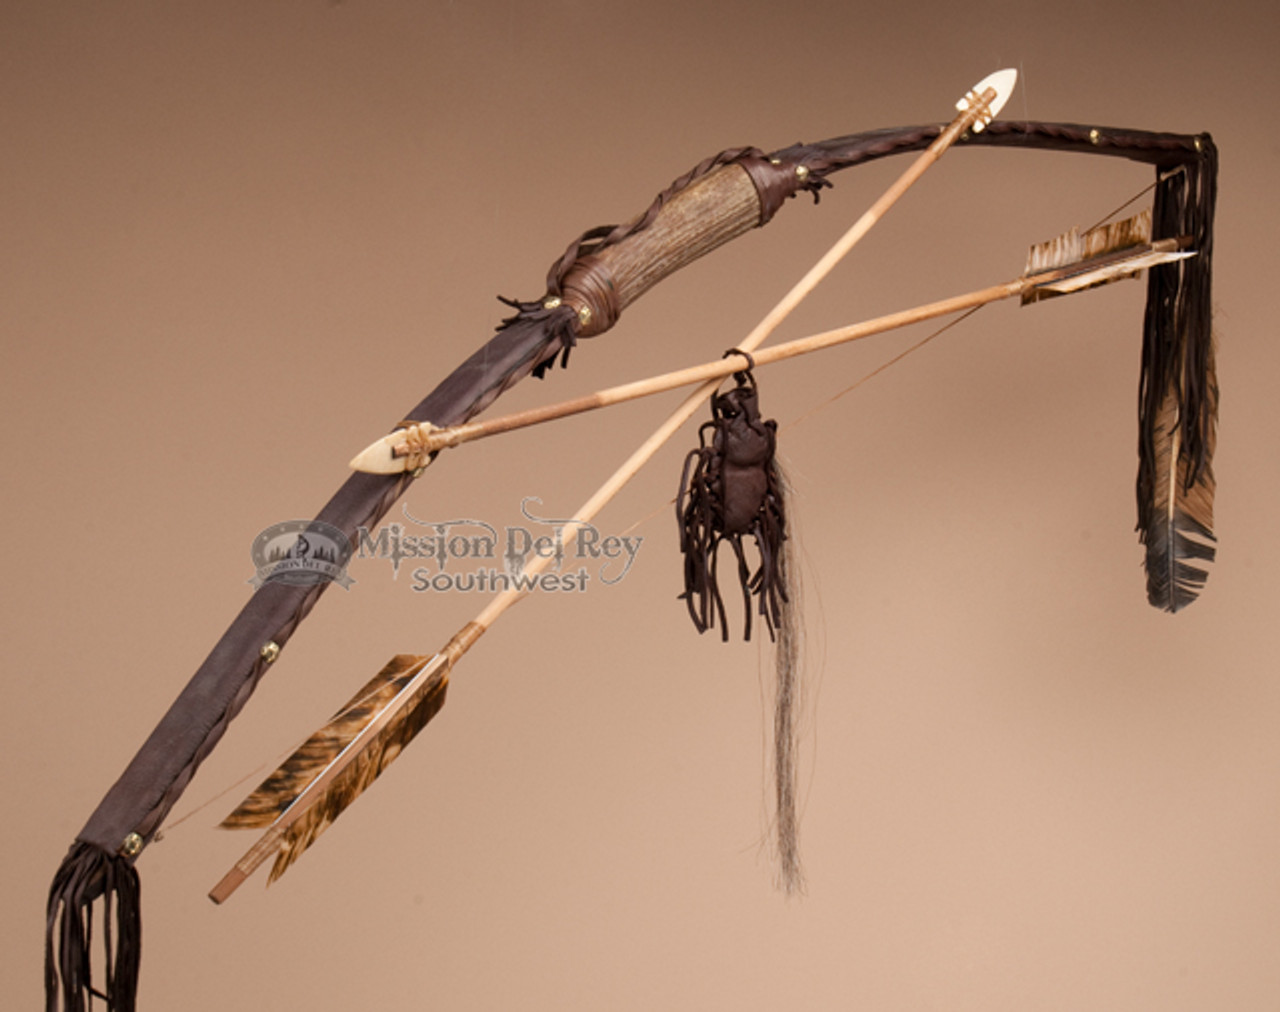
Many tribes decorated their bows with paint, carvings, or beadwork. Designs often had personal or spiritual meaning. While not necessary for function, adding a simple design can help you connect with the craft’s cultural side.

Credit: scoutlife.org
Safety, Maintenance, And Responsible Use
A traditional bow is a powerful tool, not a toy. Treat it with respect, and always follow safety rules.
- Never point a drawn bow at anyone.
- Use arrows only with safe targets (avoid rocks or hard surfaces).
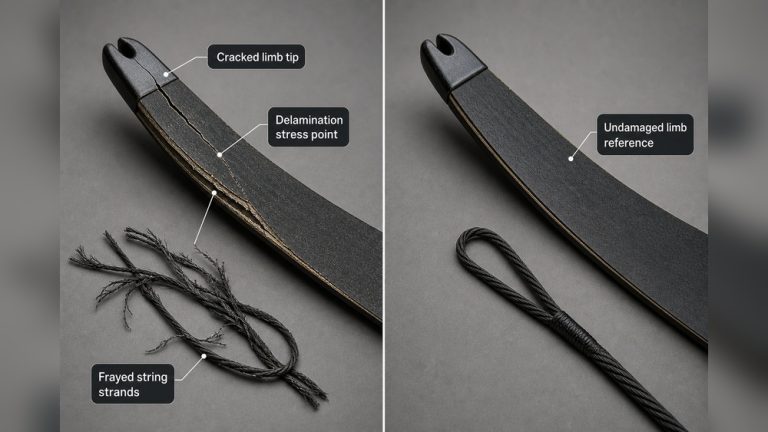
- Check the bow and string for cracks before each use.
- Store your bow in a dry place, away from direct sunlight.
Pro Tip: With regular use, strings can stretch or fray. Replace or repair them as needed to keep your bow safe.
Common Mistakes To Avoid
- Rushing the drying process: Using green wood before it’s dry leads to warping.
- Over-tillering: Removing too much wood weakens the bow.
- Poor material choices: Weak or knotty wood breaks easily.
Comparing Traditional Bow Materials And Types
Understanding how different woods and bow types compare can help you choose the best fit for your project. Here’s a quick overview:
| Wood Type | Strength | Flexibility | Availability |
|---|---|---|---|
| Osage Orange | Very High | Excellent | Rare |
| Hickory | High | Good | Common |
| Black Locust | High | Good | Moderate |
| Pacific Yew | Medium | Excellent | Rare |
| Ash | Medium | Good | Common |
Step-by-step Example: Making A Plains-style Bow
Let’s put it all together with a practical example, modeled after a typical Plains-style bow:
- Select a straight hickory stave, about 5 feet long and 2 inches thick.
- Remove the bark and mark a 6-inch handle in the center.
- Shape the limbs to taper from 1.5 inches at the handle to 1/2 inch at the tips.
- Tillering: Flex and shave limbs until both bend smoothly.
- Carve shallow nocks at each tip.
- Make a sinew string or use strong plant fiber cord.
- Attach the string with loops or a timber hitch.
- Make arrows from dogwood shoots: Cut, straighten, and smooth.
- Shape fire-hardened tips or attach stone arrowheads.
- Add three turkey feather fletchings at the nock end.
With this method, the bow shoots accurately up to 40 yards and can easily penetrate a hay bale target.
Comparing Traditional Vs. Modern Bows
It’s helpful to see how a handmade Native American bow compares to a modern recurve or compound bow.
| Feature | Traditional Bow | Modern Bow |
|---|---|---|
| Materials | Wood, sinew, natural fibers | Aluminum, fiberglass, carbon fiber |
| Draw Weight | 30, 60 lbs (varies) | 20, 80+ lbs (adjustable) |
| Accuracy | Good with skill | Very high |
| Maintenance | Regular oiling, careful storage | Minimal |
| Cost | Low (if self-made) | High |
Real-world Applications And Cultural Importance
For many Native American communities, bow-making is more than a survival skill; it’s a way to pass on cultural values, honor ancestors, and teach patience. Community bow-making events are still held by tribes today, keeping the tradition alive for new generations.
In the wild, a homemade bow and arrow is a valuable emergency tool. It can provide food, signal for help, or offer protection if modern gear is lost.
Example: The Yurok tribe of California crafted bows from yew wood, carefully backed with sinew and decorated with traditional patterns. This blend of utility and artistry set their bows apart, showing that even tools for survival could be works of art.
For anyone learning bushcraft, making a traditional bow is a practical test of your ability to read wood, use hand tools, and solve problems with what nature offers.
Tips For Success
- Take your time: Good bows are never rushed.
- Start with simple designs: Master the basics before trying complex shapes or materials.
- Observe nature: Look for straight, healthy wood, and gather feathers and sinew responsibly.
- Document your process: Keep notes or photos to learn from each attempt.
Pro Tip: Always try to source materials sustainably. Avoid taking wood or feathers from protected species or areas.
Credit: www.missiondelrey.com
Frequently Asked Questions
What Is The Ideal Length For A Traditional Native American Bow?
The ideal length depends on the archer’s height and the bow’s intended use. For adults, bows usually range from 48 to 60 inches. Shorter bows (around 48 inches) were common among Plains tribes for horseback use, while longer bows (over 60 inches) were typical in woodland areas for hunting in dense forests.

Credit: scoutlife.org
How Long Does It Take To Make A Traditional Bow And Arrow Set?
The time required varies depending on your skill level and whether