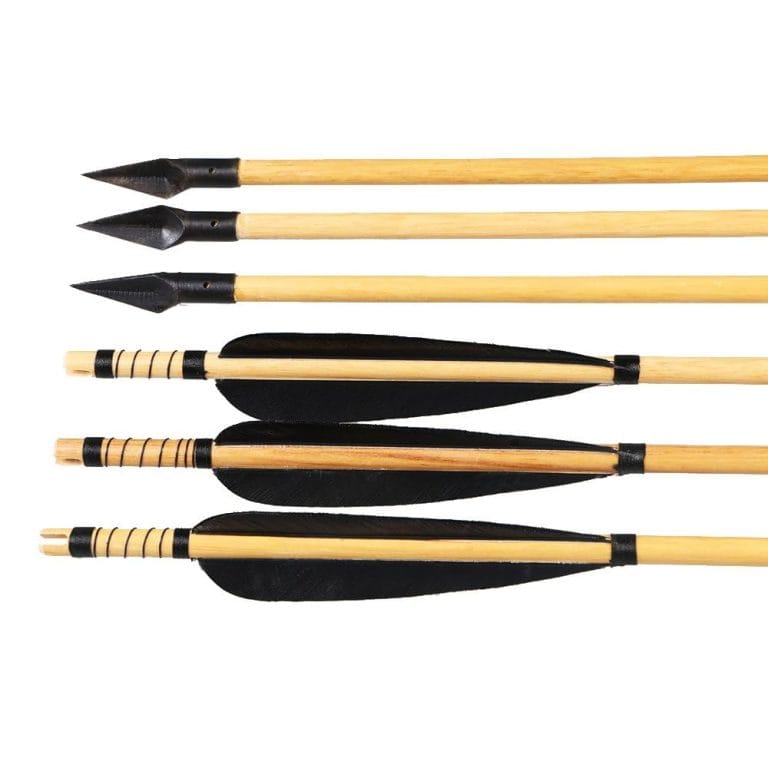
Arrow Making Guide: Tools, Materials, Build Methods
Choose shaft material first, then spine: carbon is often the easiest to work with, wood and bamboo usually need more sorting, aluminum is often the most uniform, and many home builders do better by matching spine fairly close to actual draw weight. Miss that match and you waste shafts, rip fletching loose, chase poor flight, and can even end up with an unsafe arrow. I’ll walk through the tools, materials, and build steps for wood, carbon, bamboo, and aluminum, plus the checks I use before an arrow goes in the quiver.
Quick path before you read the full guide: If you want the shortest safe route, pick the arrow’s job first, choose shaft material second, use the shaft maker’s spine chart for your actual draw weight and finished arrow length, cut with the right tool for that material, square both ends, glue components with the manufacturer’s stated prep and cure time, then confirm flight with a simple tuning check. On my own bench, that sequence prevents most expensive mistakes. If you need help narrowing the setup first, I’d start with backyard target arrow priorities, then compare shaft behavior with a dedicated spine-selection page or your shaft maker’s chart such as Easton’s selection guidance and tuning notes.
- Target or backyard use: carbon or aluminum, moderate point weight, simple 3-fletch, matched shafts
- Traditional recurve: wood, bamboo, or feather-fletched carbon, with extra attention to dynamic spine and clearance
- Compound hunting: carbon is usually the easiest path, with close attention to insert alignment, vane clearance, and broadhead-friendly tuning
- First build at home: buy matched shafts, keep point weight sensible, and avoid mixing components from different standards unless you have already confirmed fit
- Safety rule: cut carbon only with a proper abrasive arrow saw and dust control, as carbon-fiber dust guidance and shaft makers both recommend
Who is this guide based on? I build my own arrows at home in small batches for backyard target shooting, recurve field practice, and compound broadhead verification. Most of my testing notes here come from one-dozen to two-dozen builds at a time, where I compare finished length, point weight, vane layout, front-end alignment, and simple tune results before I keep a recipe. I am not writing from catalog theory alone; these recommendations come from repeated cut-square-glue-fletch cycles on carbon, wood, aluminum, and a smaller number of bamboo shafts.
Start here: plan the arrow before you buy parts
Define the job before the parts list
I start with the job, not the shaft catalog. A backyard target arrow, a 3D arrow, a feather-fletched trad arrow, and a whitetail hunting arrow should not be built the same way.
That one choice decides point style, point weight, shaft durability, and fletching layout. Hunting arrows also make me pay closer attention to insert bond, broadhead alignment, and front-end squareness. Target arrows usually let me keep the build simpler. When I’m planning a build that sits between categories, I also compare it against our arrow-building and tuning guides so I’m not solving a broadhead problem with a target-arrow recipe.
Bow type changes the workflow
Recurve and compound arrows should not be built the same way. Recurve setups react more to dynamic spine, point weight, and feather clearance off the shelf or rest. Compound setups are usually less forgiving of crooked inserts, vane contact, and nock fit issues at higher launch speed.
A compound bow set about 10 pounds too heavy often causes flinching until the limb bolts are backed out. That taught me to match arrow spine to the actual bow I can shoot cleanly, not the number I wish I could pull. That approach also lines up with manufacturer shaft-selection charts, which base recommendations on real draw weight, arrow length, and point weight rather than guesswork.
Pick a finished-arrow goal
Before I buy anything, I write down four targets: finished length, point weight, intended total arrow feel, and how much abuse the arrow needs to take. Point weight matters early because a heavier point weakens dynamic spine. Shaft length does too, because longer arrows also react weaker.
For beginners, I like a minimum viable build. That means a safe shaft, a sensible spine, field points, dependable vanes or feathers, and repeatable assembly. A custom batch adds wraps, matched grains, spine sorting, cresting, and tighter tolerance checks. If you are still choosing between shaft stiffness classes, this is the point where a dedicated spine-selection guide or a manufacturer chart saves money.
What is mandatory and what is optional
The required parts are the pieces every arrow must have: a shaft as the body, a point on the front, a nock on the back, and fletching to steer it in flight. The required process items trip up more new builders: clean cuts, square ends, proper glue prep, and a nock that fits the serving correctly.
Optional parts depend on the job. Wraps help vane adhesion and visibility, but they add a little weight. A spine tester is useful for custom wood or bamboo batches, though I would not tell a new carbon-arrow builder to buy one on day one.
Choosing the Right Arrow Design Software
The guide “Best Arrow Building Software for Custom Arrow Design” breaks down the top programs by workflow, accuracy, and suitability for beginners, hobbyists, and small shops. It explains how each option handles spine, length, and FOC calculations, offers a decision matrix, and highlights key features like repeatable cut lists and real‑bow data integration. Knowing which software matches your building style prevents wasted shafts, improves group consistency, and speeds up tuning—critical for anyone serious about custom arrows. Use this comparison to pick the most efficient tool for your setup and avoid the costly trial‑and‑error of generic calculators. Check out the detailed review of the leading arrow building software now.
Arrow Building vs Buying: Choosing the Right Path
Buy finished arrows if your setup remains consistent, but build your own when you frequently tune equipment or require specific point weights for optimal performance. Selecting the wrong approach leads to wasted money on incompatible shafts and poor arrow flight that undermines accuracy.
This guide breaks down cost per arrow, consistency levels, and tuning benefits to help archers make an informed choice. The building versus buying comparison includes a decision matrix tailored for beginners, recurve shooters, and bowhunters so you can match your skill level and budget to the most efficient production method.
What tools do you need to build arrows at home?
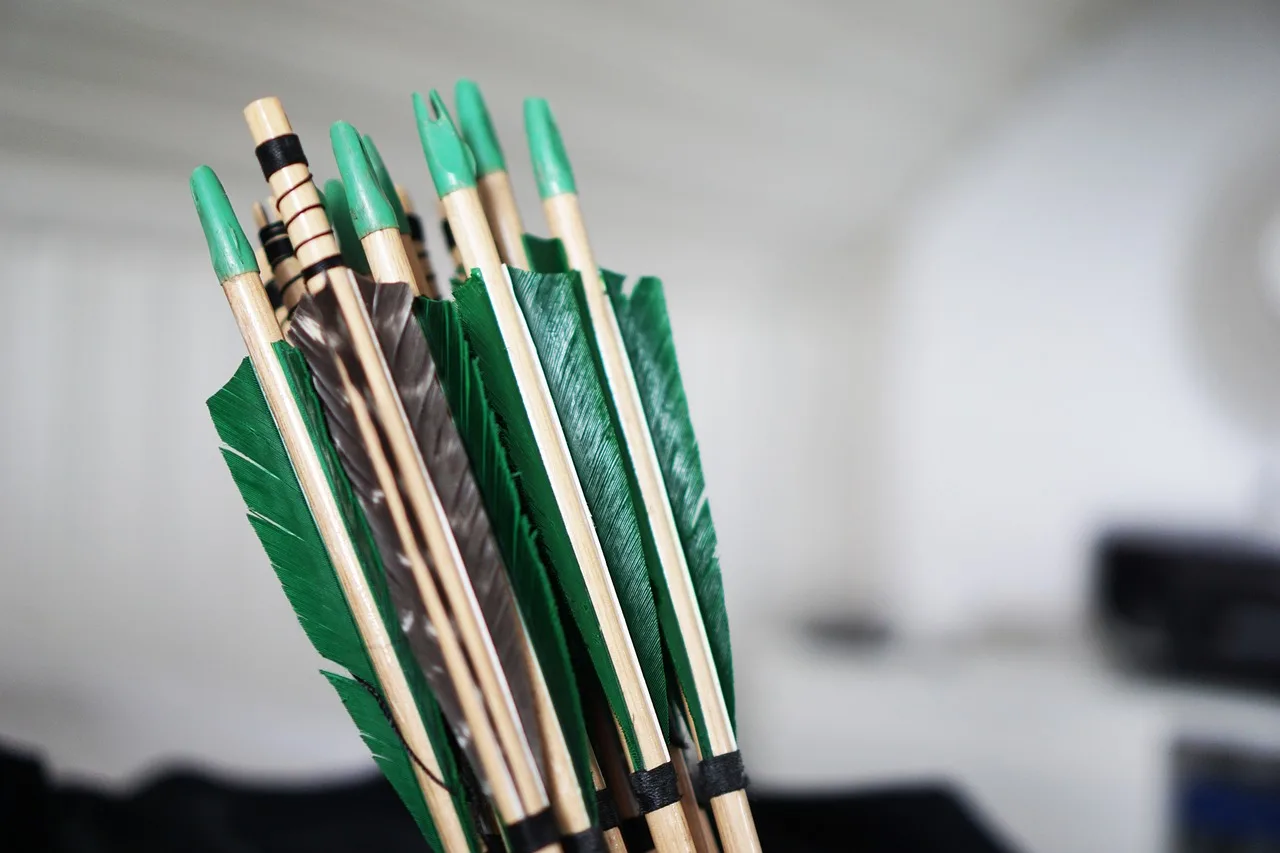
You can build solid arrows at home with a handful of core items: a proper shaft cutter or arrow saw, an arrow squaring tool, a fletching jig, measuring tools, and the right glue for the shaft material. On my bench, those five handle nearly every basic job well. After that, upgrades should fit your bench space, build volume, and how tight you want your shaft matching to be.
Mandatory tools
- Arrow saw or shaft cutter: For clean, square shortening. Carbon needs a proper abrasive-style cut and dust control.
- Arrow squaring tool: I use this on both ends after every cut. Unsquared ends cause crooked inserts and broadhead wobble.
- Fletching jig: Repeatable vane placement matters more than fancy features. Clamp style and adjustability matter.
- Measuring tools: A ruler or arrow scale for length, plus a marker for indexing and cut lines.
- Adhesives: Insert glue, point glue where needed, and fletching glue matched to vane or feather type.
Helpful upgrades
- Spine tester: Useful for wood and bamboo, and for sorting custom batches.
- Grain scale: Helps match finished arrows and compare point weight changes.
- Arrow spinner: Fast way to spot bent points, bad insert alignment, or broadhead runout.
- Wraps: Optional, but helpful when I want easier refletching and a cleaner adhesion surface.
- Cresting supplies: Purely optional unless you enjoy traditional finishing work.
Choose tools by budget, bench space, and batch size
If you build one dozen carbon target arrows a year, keep it lean. Buy a dependable cutter, a good jig, and a squaring tool. If you build wood shafts in mixed spines, or tune broadhead hunting arrows often, a spine tester and spinner save time fast.
Small bench, small tool kit. Large batches justify dedicated setup stations. On my bench, the biggest quality jump came from adding a good squaring tool and spinner before anything fancy, because those two exposed crooked cuts and front-end alignment problems immediately.
Safety gear and workflow
Carbon dust is the one thing I never treat casually. I cut carbon with dust control, clean the bench after, and avoid improvised household cutters. For glues, I want ventilation and enough cure time that I am not rushing an insert back into service. That matches general carbon-fiber dust guidance from NIOSH and arrow-shaft maker instructions that call for an abrasive saw rather than a crush-style cutter.
For carbon cutting and dust safety, I rely on guidance like NIOSH’s carbon nanotube and nanofiber handling recommendations for respiratory exposure control and Easton’s shaft preparation instructions for proper abrasive cutting and end prep. For cure times, I follow the adhesive maker’s label first, because Bohning, AAE, Loctite, and similar manufacturers all publish different open times and full-cure windows for insert and fletching products.

Choosing the Right Arrow Making Tools for a Home Workshop
Start by picking the essential tools before you add extras; the right basics keep shafts from splitting and save time. The guide walks you through the optimal buying order—arrow saw, spine gauge, fletching jig, shaft square, insert glue, and a simple scale—explaining what problem each solves and which mistakes waste carbon or aluminum shafts. It also compares draw boards, spinners, and material‑specific jigs so you can expand your bench confidently after a dozen arrows. For a detailed rundown of each item and why it matters, see the arrow making tools review.
Cost and Fit: Deciding Between DIY and Store-Bought Arrows
Store-bought arrows deliver the simplest match to your bow, making them ideal if you change setups often or want minimal tuning. Building your own arrows pays off when you regularly cut shafts, swap inserts, and fine-tune spine for consistent broadhead flight.
Choosing the wrong path means spending money twice—first on the arrows, then on fixes for poor fit or inconsistent accuracy. The comparison of DIY versus store-bought arrows breaks down cost, repair needs, and a decision matrix by archer type so beginners can select the right option before buying components or finished sets.
How do shaft materials change the build process?
Wood, carbon, bamboo, and aluminum all build differently because each one asks for a different cut, a different prep routine, and a different kind of inspection when something goes wrong. Wood and bamboo need more sorting and straightness checks, carbon needs cleaner prep and safer cutting, and aluminum is straightforward but still needs careful length, spine, and component matching.
Wood shafts
Wood is the most hands-on material I build. I sort shafts for straightness, diameter consistency, spine, and weight before I even think about points or feathers.
Wood also needs sealing. Raw wood can take on moisture and shift over time, so I usually seal it before final assembly or at least before the arrows see field use. Points are commonly glue-in, and feathers are still the natural fit for many traditional builds. In my own batches, wood is where a spine tester earns its keep fastest, because one mixed dozen can otherwise waste hours in tuning.
Carbon shafts
Carbon is usually the easiest material for a home builder who wants consistency. The big rules are clean cuts, square ends, proper inside-shaft prep for inserts, and decent dust control.
I wipe bonding surfaces carefully, rough or prep them only as the component maker intends, and avoid touching cleaned areas with oily fingers. Most vane lift and insert pull-out problems I see come from bad prep, not bad glue. For a first home build, carbon is still my default recommendation because matched factory shafts remove a lot of sorting variables before tuning even starts.
Bamboo shafts
Bamboo is not wood with a different label. Nodes need attention, outside diameter can vary along the shaft, and component fit takes more checking.
That makes bamboo fun for traditional builds, but slower. I inspect node transitions, straighten as needed, and check whether the point and nock system actually matches the shaft dimensions instead of assuming it will. My bamboo notes are from smaller custom batches than my carbon notes, but the pattern is consistent: fit-check everything twice.
Aluminum shafts
Aluminum still makes sense for target use and for builders who want uniformity. It cuts cleanly, it is consistent in diameter, and component fit is usually straightforward.
The prep difference is surface cleaning and burr control. A rough cut or small burr at the end can still ruin insert seating or nock alignment, so I treat aluminum with the same care I give carbon. In testing, aluminum usually gives me the fastest path to a very even finished batch, especially for field points and indoor target work.
When Pine Arrow Shafts Make Sense for Practice
Pine arrow shafts are a budget option strictly for low-cost practice and light target shooting, provided every shaft is straight, dry, and free of defects. Any runout, knots in the working length, or visible twist will waste your time, break on release, and ruin arrow flight in ways that tuning cannot fix.
Before buying pine, you need to know how it compares to cedar and fir, what spine range works, and which flaws mean you should walk away. A detailed pine arrow shafts review breaks down acceptable tolerances, sorting methods, and a buyer checklist so you only keep shafts that actually fly true.
Selecting AAE Vanes for Wind and Broadhead Performance
AAE’s low-profile vanes reduce drag, making them ideal for compound and recurve setups where speed and wind resistance are priorities at normal hunting distances. However, if your arrows require stronger steering for fixed-blade broadheads or operate in high-wind environments, a taller vane may be necessary to maintain trajectory accuracy. Choosing the wrong vane size can compromise broadhead clearance and overall flight stability. AAE vane guide details specific hybrid options, installation tips, and direct comparisons to help you match the correct vane profile to your specific bow setup and hunting conditions.
Carbon Express Arrow Saw: What the Review Reveals
The Carbon Express Arrow Saw is a dedicated bench cutter designed for carbon, aluminum, and hybrid shafts, targeting archers who regularly trim arrows for square ends, dust control, and consistent lengths. The review walks through setup steps, assesses cut quality, examines blade wear, and evaluates cleanup time versus cost, helping you decide if the time saved outweighs the price. Understanding these factors matters because poor cuts can shift point‑of‑impact, waste material, and damage inserts or nocks. If you’re weighing a manual saw against a specialized cutter, the article’s verdict, specs, and checklist give a clear picture of whether this tool fits your building workflow.
Build matrix: wood vs carbon vs bamboo
Material-by-material build matrix
| Material | Tools required | Adhesive choice | Cutting method | Spine selection | Fletching method | Common point / nock standards | Common failures | Best-use case |
|---|---|---|---|---|---|---|---|---|
| Wood | Spine tester, straightness check surface, taper tool if using 5 degree tapered points and nocks, fletching jig, sealer or finish supplies | Hot melt for some glue-in points, 24-hour epoxy for stronger front-end bond, feather glue or specialty fletching glue; I test fit first on cedar and pine because absorbency changes bond feel | Saw cleanly, then seal and square or taper as needed | Sort shafts individually; I like batches within 5 lb spine spread, tighter for serious tuning | Usually feathers, often 3-fletch; helical is common and forgiving on recurves | Glue-on or tapered field points/broadheads; self nocks or tapered snap-on nocks matched to shaft diameter such as 5/16 or 11/32 | Warping, mixed spine batch, poor sealing, weak point bond on unfinished wood | Traditional shooting, instinctive recurve, handmade custom batches |
| Carbon | Arrow saw, dust control, squaring tool, insert prep tools, small bore brush or swab for shaft interior, fletching jig | Epoxy or insert adhesive for inserts, CA or specialty glue for vanes depending on vane material; I usually use slower-set insert adhesive for hunting arrows and fast CA only for vane work | Abrasive arrow saw only; square both ends after cutting | Buy matched shafts by chart, then tune with point weight and length; easiest path for beginners | Vanes or feathers; 3-fletch for general use, 4-fletch common for broadheads or short vanes | HIT, half-out, outsert, or standard insert systems by inside diameter; common push-in nocks include .166, .204, .244, and pin-nock systems on target shafts | Splintering from bad cuts, insert pull-out from poor cleaning, vane lift from oily shafts | Beginner target, 3D, compound hunting, general home builds |
| Bamboo | Straightening heat source, spine tester, careful measuring tools, jig, fit-check tools for points and nocks, taper tools or custom adapters depending on build style | Epoxy for many front-end builds, specialty glues for feathers, hot melt only where fit and use allow; I avoid forcing generic components onto variable-diameter cane | Cut around node and diameter changes carefully; end prep takes longer than carbon | Sort aggressively; spine and diameter vary more than most beginners expect | Usually feathers, often 3-fletch with helical or offset for traditional setups | Glue-on points, footing systems, or tapered adapters; self nocks, reinforced self nocks, or diameter-specific snap-on trad nocks depending on wall thickness | Inconsistent shaft batch, poor component fit, node-related straightness issues | Traditional builds, hobby crafting, archers who enjoy batch sorting |
| Aluminum | Arrow saw or tube cutter made for arrows, deburring tool, squaring tool, spinner, fletching jig | Epoxy or insert adhesive for inserts, hot melt on some glue-in target points where the shaft system is designed for it, CA or specialty fletching glue for vanes or feathers | Cut cleanly, deburr inside and outside edges, then square both ends | Use manufacturer charts by shaft size, draw weight, length, and point weight; very consistent for matched target sets | Vanes or feathers; often 3-fletch for target, with offset or mild helical where clearance allows | Press-fit or glue-in target points, standard inserts on some hunting shafts, Super Uni or size-matched push-in nocks depending on shaft family | Burrs at the cut, bent shafts from impact, poor insert seating if ends are not squared | Indoor target, field points, builders who want easy batch uniformity |
Where aluminum fits
Aluminum is not in the table because your asked for wood, carbon, and bamboo, but it belongs in the conversation. Aluminum is often the most dimensionally uniform option, and that can make it friendly for target shooters who want clean assembly with less sorting.
That said, I included it in the matrix anyway because home builders routinely compare all four materials at once, and the point/nock standards differ enough that it helps to see them side by side before ordering parts.
How do you choose arrow spine and length for your bow?
Choose spine from the real bow setup you shoot today: actual draw weight, finished arrow length, point weight, and release style. Static spine is the shaft’s measured stiffness, while dynamic spine is how stiff it acts when fired. Recurve shooters usually need closer tuning attention than compound shooters.
Static spine and dynamic spine in plain terms
Static spine is the shaft’s measured stiffness class. Dynamic spine is what happens after you cut the shaft, add a point, and shoot it from your bow.
Longer shafts usually act weaker. Heavier points usually act weaker. A finger-shot recurve often wants a different answer than a release-shot compound, even at similar draw weight. That is the same logic used in major manufacturer charts and tuning guides, including Easton’s shaft selector and tuning documents.
Decision rules I actually use
I start with the shaft maker’s chart, then sanity-check it. If the setup is close, I would rather begin slightly stiff than obviously weak on many recurve and compound builds, because length and point changes give me tuning room.
For home builders, matching spine within about 5 pounds of actual draw weight is a good starting rule when the chart gives more than one option. Short draw, long point-heavy arrow, or finger release can all move you toward a weaker dynamic reaction. I treat that as a starting filter, not a law, and then confirm with actual tuning.
For chart-based selection and the static-versus-dynamic explanation, I cross-check with manufacturer resources such as Easton’s Arrow Shaft Selector and tuning publications from Easton and Gold Tip rather than relying on memory alone.
Recurve versus compound
Recurve arrows care more about the whole launch picture. Shelf contact, plunger setting, brace height, and finger release all show up in bare shaft behavior. Feathers also make more sense on many recurve setups because they forgive contact better.
Compound arrows usually let me run shorter vanes and focus on vane clearance, insert alignment, and broadhead control. If a compound arrow is the right spine on paper but has a crooked insert, it will still fly badly. When I’m building compound arrows, I usually pair my setup notes with a tuning checklist rather than trying to remember all my own previous combinations.
When to buy matched shafts and when to sort your own
For carbon and aluminum, most beginners should buy matched shafts from the start. For wood and bamboo, I sort my own batch more aggressively because variation is part of the material.
A spine tester helps when building traditional dozens, footed shafts, or mixed raw stock. I use it to separate workable shafts from the ones that will fight me all the way through tuning. If you are learning this part from scratch, a dedicated spine-selection page is a better internal starting point than a generic gear roundup because it keeps the variables limited to draw weight, length, point weight, and release style.
Wood vs Carbon Arrows for Recurve Bows
Wood arrows give a traditional feel and easy point‑weight tuning, while carbon shafts deliver uniform spine, straighter flight and far fewer breakages on a recurve. The Bow Advise guide breaks the comparison into clear sections: the real trade‑off, intended uses for each material, on‑range behavior, a side‑by‑side decision table, and where each shaft typically fails. It also provides a concise “choose wood if…” and “choose carbon if…” checklist. Understanding these differences lets you match arrow material to your shooting style, budget, and durability needs before you spend time or money on the wrong shafts. See the full Wood vs Carbon arrows analysis.
Wood vs Bamboo Arrow Shafts: Performance and Practicalities
Choosing between wood and bamboo shafts hinges on straightness, spine consistency, weight, and durability. The guide walks you through how each material is manufactured, which one offers more reliable spine‑matching, and whether bamboo truly flies faster than wood. It also highlights weather resistance, common failure modes, and shelf‑style considerations that affect long‑term performance. By comparing these factors side‑by‑side, you can decide which shaft aligns with your bow setup, shooting style, and maintenance preferences. For a detailed breakdown, see the wood vs bamboo comparison.
How do you make arrows step by step?
Make arrows in a steady order: confirm length and components, cut the shaft, square both ends, prep the bonding surfaces, install points or inserts, set nocks, fletch, let the glue cure, then inspect and tune. Changing that order usually creates avoidable mistakes, especially with carbon inserts and traditional shafts.
My step-by-step workflow
- Plan the finished arrow. Write down bow type, draw weight, target length, point weight, and shaft model or material.
- Inspect raw shafts. Check straightness, diameter consistency, visible damage, and spine labels. For wood or bamboo, sort first.
- Measure length. Leave enough shaft for safe broadhead or point clearance in front of the bow at full draw.
- Cut safely. Use a proper arrow saw for carbon and aluminum. Mark cleanly. Support the shaft well.
- Square both ends. I do this every time. It fixes more problems than most beginners expect.
- Prep surfaces. Clean inside and outside bonding areas by material. Carbon and aluminum need careful cleaning. Wood and bamboo may need sealing or taper prep.
- Install inserts or points. Match shaft diameter and point style. Threaded inserts suit many carbon and aluminum hunting or target builds. Glue-in points are common on wood and bamboo.
- Install and index nocks. Check push-in or overnock fit, throat fit on serving, and cock-feather or vane orientation.
- Add wraps if using them. This is optional. I use wraps when I want easy refletching or better visibility.
- Fletch the arrow. Choose 3-fletch or 4-fletch, then straight, offset, or helical alignment based on bow and rest clearance.
- Let glue cure fully. Rushed cure times cause vane lift and insert movement.
- Inspect and label. Spin test, check point alignment, and mark any arrows that need rework.
Material-specific changes inside that workflow
Wood adds sorting, sealing, and often taper work. Carbon adds dust control and inside-shaft cleaning for inserts. Bamboo adds node-related prep and more component fit checking. Aluminum adds less sorting, but I still deburr and square the ends carefully.
In practice, my own carbon batches move fastest from steps 1 to 12, while wood and bamboo consume most of the extra time at inspection, sorting, and front-end fit. That testing context matters because it is why my beginner recommendations lean carbon even though I enjoy building traditional shafts more.
What glue and fletching method should you use?
Use glue by material and task, not by habit. I use insert adhesive or epoxy where I need durable front-end bonds, specialty fletching glue or CA where vane material calls for it, and hot melt only on setups where the shaft and point style suit it. Fletching choice depends on bow type, rest clearance, and arrow use.
Glue choices by job
Epoxy: My common choice for inserts or glue-in points when I want gap-filling strength and solid cure. It gives me working time, which helps on custom batches.
CA: Fast and useful for many vane installs, but surface prep has to be right. I do not trust speed alone if the shaft is dirty.
Specialty fletching glue: A safe bet for many feather and vane applications, especially when the glue is made for that base material.
Hot melt: Still useful on some traditional point installs, especially where serviceability matters, but I do not treat it as universal.
For cure timing, I follow the product sheet instead of a generic “wait a little while” rule. Bohning, AAE, and Loctite all publish setup and full-cure windows, and those windows change with adhesive chemistry, shaft material, and temperature. My own bench rule is simple: if the label says full cure is longer than the working tack time, I wait for full cure before tuning or shooting.
Surface prep rules that prevent failures
Carbon and aluminum need clean bonding surfaces. That means dust off, residue off, and no casual handling after cleaning. Wood and bamboo need attention to finish, sealing, and fit. Glue over dust, oil, or fuzz and the bond will eventually tell on you.
The most common failures I see are vane lift from poor cleaning, inserts set slightly off-center from unsquared cuts, and points pulling because the shaft interior was never prepped well. The other repeat offender is rushing cure time because the insert “feels set” before the adhesive maker says it is actually ready.
Feathers, vanes, layouts, and clamp style
Feathers suit many recurve and traditional bows because they compress through minor rest contact. Plastic vanes are common on compounds and on rest systems with clean clearance.
I use 3-fletch for most standard target and field arrows. I use 4-fletch when I want extra steering from shorter vanes, often on compact hunting setups. Straight fletch is simple and quiet. Offset gives some spin with little drama. Helical gives stronger rotation if your jig and vane style support it.
A good jig needs repeatability first. Clamp type matters less than whether it holds the vane straight, repeats the same placement every time, and can handle the shaft diameter you’re building. For wood, carbon, and aluminum, that repeatability is what keeps the batch shooting alike.
Choosing a Budget Arrow Fletching Jig
A reliable, low‑cost fletching jig can make the difference between straight, consistent arrows and a frustrating mess, especially when you’re building on a budget. The article breaks down single‑clamp and straight‑clamp models priced between $20 and $40, highlighting which designs keep vane spacing even, maintain strong glue bonds, and avoid the crooked arrows that sap performance. It compares popular options such as the Bitzenburger, Arizona Carbon EZ, AAE Fletch III, and Last Chance Archery Vane Master Pro, and explains when it’s worth spending a little extra for precision or durability.
For a quick rundown of the top picks, see the guide to the best budget fletching jig.
How do you know if your finished arrows are tuned correctly?
Your arrows are tuned well enough when they pass basic build checks, leave the bow cleanly, and show consistent impact without obvious flight faults. I start with spin, nock fit, and clearance checks, then move to bare shafts for recurves or paper and broadhead checks for compounds.
First inspection before any tuning shot
I spin every finished arrow. Wobble usually points to a bent point, a crooked insert, or a bad front-end seat. I also check nock throat fit on the serving. Too tight is bad. Too loose is bad too.
Then I look for vane clearance marks. If the arrow is touching the rest, cable guard area, or shelf in the wrong way, flight diagnosis gets muddy fast. This first inspection happens before any paper or bare-shaft work because tuning a physically crooked arrow wastes time.
Recurve checks
For recurves, I like bare shaft checks at sensible distance after I know the bow is otherwise set up reasonably. If bare shafts land way apart from fletched arrows, I look first at spine, point weight, nocking point, and clearance.
Tuning only works when the shooter setup is honest too. For recurve tuning order, I generally follow the same broad sequence used in Easton’s tuning guide: establish a reasonable bow setup, verify clearance, then read bare-shaft behavior instead of jumping between random adjustments.
Compound checks
For compounds, I start with clean paper tears only after I know the arrow is straight and the rest is close. Hunting arrows then get a spinner check and broadhead confirmation. If field points group and broadheads do not, I inspect alignment before I chase draw-board-level bow changes.
That sequence matches how many manufacturer guides present the process: build integrity first, then paper or walk-back style checks, then broadhead confirmation. In my own testing, that order cuts down false tuning signals from crooked inserts or vane contact.
What build errors look like downrange
- Weak or mismatched spine: inconsistent groups, poor bare shaft relation, flight that never quite settles
- Unsquared ends: broadhead wobble, spinner failures, random left-right spread
- Poor nock fit: rough release feel, odd vertical spread, inconsistent launch
- Bad vane adhesion or placement: sudden loss of control, visible vane lift, clearance contact
For tuning methods, I lean on established resources like Easton’s Arrow Tuning and Maintenance Guide and manufacturer setup documents, then compare those steps with what I actually see from bare shafts, paper tears, and broadhead groups on my own bows.
Essential tools for diagnosing arrow flight issues
Identifying whether poor groups stem from equipment mismatch or tuning errors requires specific diagnostic gear beyond basic assembly supplies. This guide evaluates spine testers, digital scales, and precision rests based on measurement repeatability and their ability to resolve common failure modes like nock pinch, timing drift, and stiff arrow reactions in home setups.
Selecting the right diagnostic equipment prevents wasted components and unnecessary pro-shop visits by verifying actual draw force and shaft compatibility before final assembly. Understanding which arrow tuning tools address specific symptoms ensures your investment targets the root cause of inconsistent flight rather than masking underlying build problems with guesswork.
Evaluating Gold Tip Hunting Arrows for Your Setup
Gold Tip hunting arrows deliver consistent accuracy with broadheads only when the spine matches your bow’s draw weight and the finished arrow weight stays within a typical compound range. A mismatch causes broadhead planing, wider groups, and reduced penetration on impact.
The supporting guide breaks down specific Gold Tip models, compares the Hunter and Hunter XT lines, and details the specs that matter most in the field, including grains per inch and spine selection. It also provides a setup matrix pairing bows with broadheads so you can build a reliable hunting arrow without guessing. Review the full Gold Tip hunting arrows breakdown to determine which shaft fits your draw length, poundage, and target game before cutting carbon.
Common arrow-building mistakes and failure points
Poor cleaning and weak glue bond
This is the big one. If carbon dust, shaft residue, or finger oils stay on the bonding area, the insert or vane can fail even when the glue itself was the right choice.
Bad spine match and mixed batches
Wood and bamboo batches can vary enough to fake a tuning issue that is really a sorting issue. Carbon can do it too if you mix models, lengths, or point systems carelessly.
Wrong nock fit and component mismatch
Push-in and overnock styles both work when they fit the shaft and serving correctly. If the nock throat pinches the serving or barely hangs on, release quality suffers. I also watch point and insert diameter compatibility closely. Sloppy fit up front rarely gets better after glue.
Material-specific failures
Wood can warp if it is poorly sealed or stored badly. Carbon can splinter if cut carelessly or shot after impact damage. Bamboo can vary enough in diameter and spine that one “good” arrow in the batch tells you nothing about the rest.
Frequently asked questions
What materials are used to make wood, carbon, or bamboo arrows?
Wood arrows use natural wood shafts, usually with glue-in points and often feathers. Carbon arrows use carbon shafts with inserts or direct-fit components, and they are the easiest for most home builders. Bamboo arrows use natural cane with node prep, more sorting, and traditional-style component fitting.
What glue and fletching method should I use for DIY arrows?
Use epoxy or insert adhesive for many inserts and glue-in points, and use fletching glue or CA that matches the vane or feather base. Feathers make sense on many recurves and shelf bows. Vanes fit many compound setups. I use 3-fletch often, 4-fletch when I want more steering.
How do I know if my arrows are tuned correctly?
I start with a spin test, correct nock fit, and clearance inspection. Then I use bare shafts on recurve setups and paper or broadhead confirmation on compounds. If arrows group cleanly, show stable flight, and do not reveal component wobble or contact marks, the build is doing its job.
Author and testing note: I build and tune my own arrows on a home bench rather than a pro-shop production line, and that is intentional context for this guide. The recommendations here come from repeated small-batch builds where I compare cut quality, insert seating, adhesive cure behavior, vane retention, spinner results, and simple downrange tuning on my own recurve and compound setups. Where a technical claim depends on manufacturer standards or safety guidance, I defer to the published source first.
Technical references used alongside my own build notes: Easton’s Arrow Shaft Selector for spine starting points; Easton’s Arrow Tuning and Maintenance Guide for tuning sequence; NIOSH guidance on occupational exposure to carbon nanotubes and nanofibers as a conservative reference for dust-control habits around carbon-fiber cutting; and adhesive-maker instructions such as Bohning, AAE, and Loctite for prep and full-cure timing.