Arrow Spine Guide for Archers: Choose the Right Shaft
Choose arrow spine from your real peak draw weight and your cut arrow length first, then go stiffer for heavy points, compound cams, and broadheads, and weaker for fingers on a recurve. Get it wrong and you end up chasing poor groups, weak broadhead flight, fake tuning signals, and money wasted on arrows that never tune right. I’ll walk through a field-tested Arrow Spine guide for archers that starts with bow type, then adjusts for draw length, point weight, and release style before tuning confirms the choice.
Before we get into numbers, here is the safest way to use any spine advice: treat charts and “rules of thumb” as starting guidelines, not guarantees. The Archery Trade Association’s spine-chart conventions and AMO/ATA static-spine test give a common baseline, but finished-arrow behavior is dynamic and bow-specific. In my own tuning notes from compounds, ILF recurves, and traditional shelf-shot bows, the chart gets me close and the tune decides the final answer. If you want the companion steps after spine selection, see our bow setup guide, how to paper tune a bow, broadhead tuning for fixed-blade accuracy, and how to choose the right arrow length.
How arrow spine actually works
Static spine vs dynamic spine
Arrow spine tells you how much a shaft resists bending under load. That sounds simple, but archers use one term for two different things.
Static spine is the lab number printed on the shaft. Dynamic spine is how stiff that finished arrow behaves when you shoot it from your bow, at your draw length, with your point weight, insert weight, release style, and actual arrow length.
The part many charts skip is this: I do not tune bare shafts or broadheads to a catalog number. I tune the finished system. A 400 shaft can fly great in one setup and act clearly weak in another after a longer cut and a heavier head.
That distinction is consistent with how manufacturers and standards bodies present spine. The static-spine test is standardized so shafts can be compared, while dynamic response depends on the complete build and launch. Easton’s shaft-selection materials, Black Eagle’s chart notes, and ATA chart guidance all treat the printed spine as a starting point rather than a complete tuning prediction.
Why lower numbers are stiffer and higher numbers are weaker
Spine ratings run backward from what many new archers expect. Lower numbers are stiffer. Higher numbers are more flexible.
In practical terms, 300 spine is described as very stiff for high draw weights. 340 spine is described as stiff for medium-high draw weights. 400 spine is described as medium for medium draw weights, 500 as light-medium for lighter draw weights, and 600 as light for low draw weights.
If I’m helping a club beginner and hear, “I need a stronger arrow, so I should go from 500 to 600,” I stop that purchase right there. That move goes softer, not stiffer.
What spine changes in real arrow flight
Spine changes how the shaft bends at launch and how fast it settles. That recovery affects nock travel, broadhead flight, and whether your tuning test is telling the truth.
A weak arrow can feel loose and react hard to small release mistakes. A stiff arrow can look fine up close, then drift into stubborn left-right misses as distance adds up.
That said, left-right misses are not a pure spine test by themselves. Centershot, cam sync/timing, rest alignment, nock fit, vane contact, and release quality can create similar symptoms. I treat flight clues as evidence, not proof, until a short tuning sequence backs them up.
What arrow spine do I need for my bow?
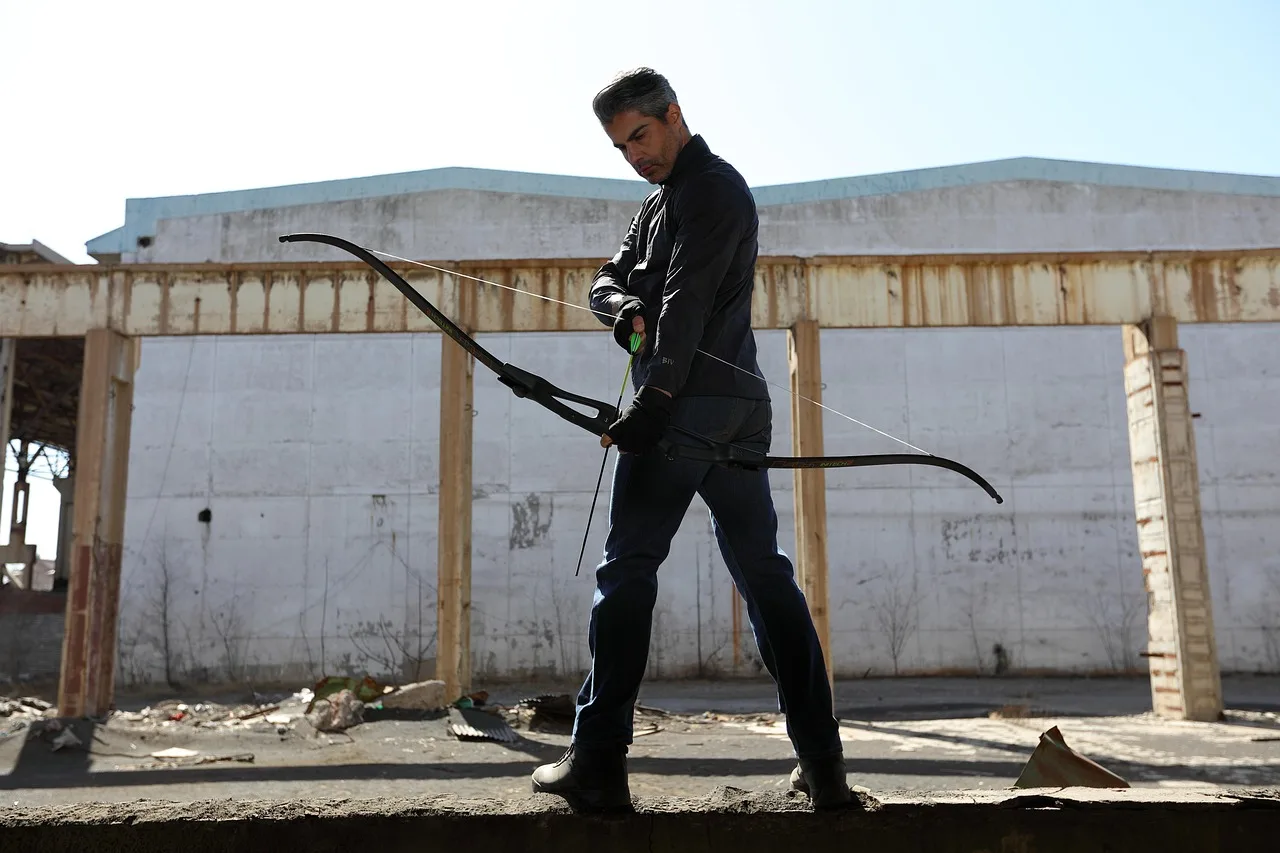
Start with your bow type and release style, then use your real peak draw weight at your actual draw length, then lock in finished arrow length, then correct for point and insert weight. I follow that order because it keeps me from blaming the wrong variable when several setup changes are happening at once.
If you want the compact version, use this calculator logic: input 1 bow type, input 2 actual draw weight, input 3 draw length, input 4 finished arrow length, input 5 total point-end weight. Then pick the manufacturer chart row for bow type and weight, use the column for finished arrow length, and compare your point-end weight with that chart’s assumed point weight, usually 100 grains unless the chart states otherwise. If your front end is heavier or your bow has a harder launch, bias to the stiffer of two close options and confirm by tuning.
Step 1: start with bow type and release style
Compound bows shot with a mechanical release usually tolerate a weaker spine than bows shot off the fingers. The guide says fingers require stiffer arrows than mechanical release setups.
That matches what I see coaching recurve shooters. Finger release puts a different launch into the shaft. A compound with a clean mechanical release sends the arrow straighter off the string, so the dynamic demand often eases a bit.
I still hedge that as a tendency, not a law. Center-cut recurves, shelf-shot trad bows, aggressive cams, and very light GPI hunting arrows can all shift the final answer.
Step 2: use actual draw weight at your draw length
Use the poundage the bow is truly delivering at your draw length, because the shaft only reacts to the load you actually put into it. Do not use the number stamped on the limbs, what the seller guessed, or what the bow peaks at for somebody drawing longer than you.
My first compound bow was set 10 lb too heavy. If the archer cannot reach the wall cleanly, the “rated” setup tells me almost nothing useful about spine.
Step 3: set finished arrow length before choosing spine
Choose spine from the finished arrow length you plan to shoot. Do not buy a shaft from a chart based on an assumed cut, then decide later to leave it longer for broadhead clearance or comfort.
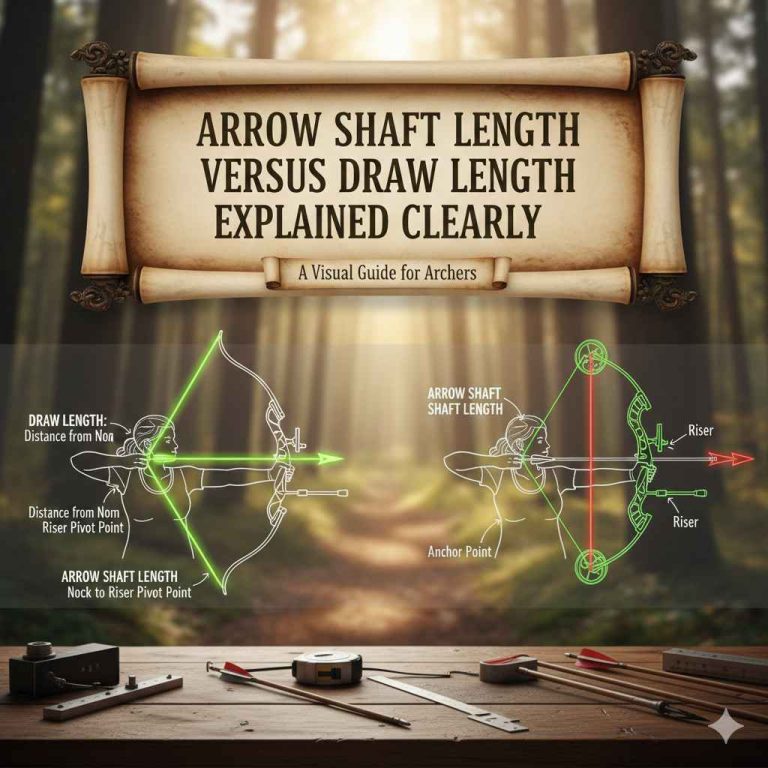
The page says every inch over 28 inches moves about one spine category stiffer. That is a handy in-store correction. If two shafts both look close, and one setup forces a longer finished arrow, I lean stiffer.
I’d treat that “one category per inch” line as a rough shop-floor shortcut, not a universal formula. A better method is to re-check the manufacturer’s chart at the actual finished length, because the effect of extra length is not perfectly linear across all shaft families. As a sourced example, Easton-style selection charts use both draw weight and arrow length together, which is more nuanced than a flat one-category jump.
Step 4: correct for point weight, inserts, and hunting heads
Many spine selections start from a roughly 100-grain point baseline. The page says every 25 grains over 100 grains moves about one spine category more flexible.
That means a finished hunting arrow with a heavier insert and a 125-grain or 150-grain head can act much weaker than the same shaft with a 100-grain field point. The article says 75-grain points are listed as light target points, while 200-grain points are listed as very heavy hunting points. Broadhead setups need that correction before you ever start tuning.
Again, I use that 25-grain rule as a starting guideline only. It is directionally useful, but the actual change depends on total shaft length, FOC, insert/outsert mass, and how hard the bow launches the arrow. In practice, I trust a charted point-weight example from the shaft maker more than a blanket “one category” claim.
Selecting the Proper Spine for Fixed‑Blade Broadheads
Understanding how spine stiffness influences broadhead performance is essential for reliable penetration and consistent flight. The guide walks you through the key variables—draw weight, arrow length, and point weight—and shows when a slightly stiffer shaft is safer versus when the chart‑recommended spine is sufficient. It also details practical tuning checks and warning signs of an under‑spined arrow, helping you avoid planing and lost penetration in the field. For a step‑by‑step breakdown of these factors, consult the broadhead spine guide.
Arrow Spine Guidance for Women Archers
Women archers often face the same spine-selection decisions as anyone else, but their typical setups — shorter draw lengths, lighter draw weights, and varying point weights — can shift the ideal arrow flex. spine selection for women covers how to pick the right starting point using draw length, point weight, and bow type, plus a simple tuning check to confirm your arrows are in the sweet spot.
The guide explains why bad spine leads to poor tune, fishtailing, and broadhead inconsistency, then walks through a practical decision table so you can avoid wasting arrows on the wrong shaft.
Matching Spine to Fletching Size
Fletching size directly impacts how your arrow interacts with the riser and rest, making it a critical partner to spine selection. Faster bows generally require stiffer shafts paired with smaller 2-inch vanes to avoid clearance issues, while slower or barebow setups can utilize weaker spines with larger 3- to 5-inch feathers for enhanced stability. Choosing an incompatible combination results in erratic flight patterns and vanes striking the riser. To find the ideal balance between shaft stiffness and vane dimensions for your specific equipment, review the spine and fletching pairing guide.
How is arrow spine measured?
Arrow spine is measured by how much a shaft bends under a standard load. The AMO test uses a shaft of about 28 inches with support spacing of about 26 inches, hangs a roughly 2-pound weight from the center, then records the deflection in small increments. That gives a useful baseline, but it only describes the raw shaft.
The AMO baseline
The spine test uses a 28-inch shaft with 26-inch support spacing. The standard test hangs a 1.94-pound weight from the center.
Then the shaft deflection is measured in thousandths of an inch. More deflection means a more flexible shaft. Less deflection means a stiffer shaft.
That summary follows the widely cited AMO/ATA static-spine method used by arrow makers for comparison. Older AMO references and modern ATA educational materials describe the same basic baseline: a 28-inch sample, 26-inch span, and 880-gram or 1.94-pound center load with deflection reported in inches or thousandths. If you see a shaft marked “400,” that generally refers to about 0.400 inches of static deflection under that test.
Why the number is useful but incomplete
I trust the test as a starting language, because it lets one shaft compare to another. I do not treat it as the final answer because a finished arrow is no longer the same object that was tested bare.
Length, point mass, insert mass, nock fit, release style, and even how hard the bow drives the shaft all change dynamic behavior. Static spine tells me where to start. I know I’m done only after the arrow passes paper, holds line in walk-back, and if it’s a hunting build, flies fixed blades with field points.
Using the Victory Arrow Spine Chart for Precise Shaft Selection
The review breaks down how to interpret Victory’s spine chart, showing the exact draw‑weight and arrow‑length combos that dictate shaft stiffness. It walks readers through the two‑step verification process—paper‑tune and bare‑shaft flight checks—so they can catch mismatches before buying. Understanding these steps prevents weak‑flight tears, broadhead wander, and wasted money on shafts that never tune cleanly. For anyone whose setup falls between the chart’s recommendations, the article offers concrete guidance on choosing a slightly stiffer shaft and confirming it with simple, repeatable tests. Learn the full workflow in the Victory spine chart guide.
Using the Gold Tip Arrow Spine Chart
The review breaks down the Gold Tip arrow spine chart, showing exactly what the selector assumes about draw weight, arrow length, point weight, and shaft type. It compares the chart’s recommendations for Hunter, Hunter XT, Velocity, and Traditional Classic shafts, and provides a worked decision table for six typical compound and traditional setups. Gold Tip spine chart is highlighted as a starting point, not a final answer.
Understanding those assumptions matters because a mis‑spined arrow can cause broadhead planing, reduced accuracy, and wasted shafts. The article also shows how to verify the chart’s suggestion with real‑world draw weight, bare‑shaft or paper tuning, and point‑weight adjustments before you cut any arrows, saving time and money.
Using Apps to Estimate Arrow Spine
Digital tools like BowSmith provide a fast first-pass estimate for arrow spine across compound, recurve, barebow, and traditional setups. The app lets you compare how changing point weight, draw length, or shaft selection alters your dynamic spine before you buy components or cut arrows.
However, software calculations cannot replace physical verification. A poor spine choice immediately reduces forgiveness and degrades broadhead flight, so every app-generated recommendation still requires bare-shaft or paper-tuning confirmation on the range. This spine tuning app review evaluates where BowSmith’s workflow succeeds in guiding initial setup choices and where its limitations force you back to manual charts and live shooting tests.
Choosing the Right Arrow Spine Tester for Your Budget
When you start building or tuning arrows, a reliable spine tester saves time and material by giving repeatable numbers instead of guesswork. The article on arrow spine tester cost walks you through the three price tiers—entry, mid‑range, and professional—explaining what features (digital readout, logging, high‑speed sorting) actually improve with each step. It also matches each tier to typical workflows, from weekend hobbyists to high‑volume shops, and highlights common pitfalls of under‑specified devices. Knowing which tier fits your needs prevents wasted shafts and helps you tune more consistently.
What an Arrow Spine Test Costs at a Pro Shop vs. DIY
A pro-shop arrow spine test typically costs less than a full tuning session, making it an affordable way to verify your shafts match your bow’s setup before you commit to expensive arrows or broadheads. Skipping this step often leads to poor grouping, broken shafts, and broadheads that plane off target.
The actual price depends on whether you need a basic static deflection check, a dynamic tune with bare-shaft or paper testing, or just a quick home measurement using a scale and supports you already own. Understanding arrow spine test cost helps you decide when paying a shop is cheaper than buying the wrong arrows outright and when a simple DIY check provides enough data for safe shooting.
How do recurve, compound, and finger-release setups change spine choice?
Yes, bow style changes the spine call. Compounds with a mechanical release usually accept a weaker dynamic setup than recurves and longbows shot off the fingers, because finger release and shelf-shot bows put more side load and more launch variation into the shaft.
Compound bows with a mechanical release
If you shoot a compound with a release aid, start from compound chart logic first. The page says 55–65 lbs compound can use 350–400 spine, and 25–35 lbs compound can use 600–700 spine.
Those are starting ranges, not promises. Cam aggressiveness and finished arrow build can still push you one category either way in real use.
Recurve bows shot off the fingers
Finger release changes things fast. The page says 25–35 lbs recurve or fingers can use 600–800 spine.
That extra flexibility range often surprises compound shooters. It should not. The shaft has to bend around a very different launch.
Traditional and longbow setups
Traditional bows can show bigger dynamic swings from small changes. Shelf strike, strike plate thickness, string material, and finger release quality all matter.
If you shoot trad gear, I recommend leaving room for testing. Do not box yourself into one shaft based only on a chart range that ignores your real arrow length and point plan.
How do draw weight, arrow length, and point weight interact?
Draw weight drives the first spine choice, but arrow length and point weight can move the result far enough to change the shaft you should buy. Longer arrows and heavier points make the setup act weaker, so the fix is often to move one category stiffer before tuning.
Why draw weight leads the decision
More draw weight bends the shaft harder at launch. That usually means you need a stiffer arrow.
I start every manual pick with real peak weight because it gives me the strongest first filter. If that number is wrong, the rest of the math can look clean and still land you in the wrong spine bin.
Why longer arrows push you stiffer
Longer shafts bend more. That is why the page says every inch over 28 inches moves about one spine category stiffer.
Use actual arrow length, not your assumed draw length, and not a shop guess. A short-draw archer may still choose a longer finished arrow for broadhead clearance or comfort at anchor. That longer arrow still acts weaker.
For accuracy, I would phrase it this way: each added inch generally weakens dynamic behavior enough that the next stiffer spine may become appropriate, but the exact amount varies by shaft diameter, wall design, and front-end mass. Re-checking a manufacturer chart at the new length is better than assuming the same correction always applies.
What point weight does to dynamic spine
Use 100 grains as the baseline. Above that, the front end becomes easier to bend during launch.
The page says every 25 grains over 100 grains moves about one spine category more flexible. So a shaft that behaves fine with a 100-grain field point can turn weak with a 125-grain fixed blade, and weaker still with a 150-grain head plus a heavier insert.
My practical version is more cautious: 25 grains is often enough to matter, especially on longer arrows or borderline setups, but not every 25-grain step forces a full category jump. Some shaft makers publish examples where 100 and 125 grains still overlap in the same recommendation range depending on arrow length and draw weight. That is why I add point weight after I know the exact finished length.
How setup changes stack together
This is the part many archers miss in a shop aisle. A longer arrow and a heavier point do not happen separately. They stack.
A short-draw hunter may leave arrows longer for broadhead safety, add a brass insert, then jump from 100 to 125 grains. Each choice nudges the arrow weaker. I have watched this create false confidence at ten yards, then ugly broadhead flight once we stepped back.
Common spine ratings and practical starting ranges
What 300, 340, 400, 500, and 600 usually fit
Use the common labels as buckets, not verdicts. 300 spine is described as very stiff for high draw weights. 340 is stiff for medium-high draw weights. 400 is medium for medium draw weights. 500 is light-medium for lighter draw weights. 600 is light for low draw weights.
For compounds, the page says 55–65 lbs can use 350–400 spine. At the lighter end, 25–35 lbs compound can use 600–700 spine. For recurves and finger-release bows, 25–35 lbs can use 600–800 spine.
Those ranges line up broadly with common manufacturer charts, but they are still examples, not a replacement for the specific chart of the shaft you are buying. A micro-diameter hunting shaft and a lighter target shaft can behave differently even if both are labeled the same nominal spine.
When I move one category from the chart
I move stiffer when the arrow will be longer than planned, when point weight climbs above 100 grains, or when the bow has a harsher launch in my hands. I move weaker only when the release style and build clearly support it.
Charts get me close. Real setups decide the finish line.
A more nuanced way to say it is this: I move only after checking the full input set—bow type, actual draw weight, draw length, finished arrow length, and point-end weight—and after seeing whether the setup sits at the edge of a chart box or in the middle of it. If your inputs place you near the stiff/weak boundary, the stiffer option is often safer for a hunting build and the more forgiving option may be better for a beginner target setup, but that is still a tuning decision, not a universal rule.
Manual spine-selection checklist with worked examples
The in-store checklist I use before buying shafts
- Write down the bow type: compound, recurve, or traditional/longbow.
- Write down the release style: fingers or mechanical release.
- Use real peak draw weight at your actual draw length.
- Decide the finished arrow length before choosing spine.
- Start from a chart range for that bow type and weight.
- Correct stiffer if the arrow will be longer than 28 inches.
- Correct stiffer again if point weight goes above the 100-grain baseline.
- Add insert and broadhead mass into the same front-end correction.
- If you are between two spines for hunting or finger release, leave room to tune rather than forcing the weaker option.
- Confirm with paper, then walk-back, then broadhead or fixed-blade comparison if you hunt.
Here is the compact calculator logic I actually use on paper in a shop or at the bench. Enter these exact inputs: bow type, actual draw weight, draw length, finished length, and point weight. Then apply this sequence: (1) find the manufacturer chart row for bow type and actual draw weight; (2) use finished length, not draw length, for the length column; (3) compare chart-assumed point weight to your real point weight; (4) if your point is heavier than the chart assumption, and especially if inserts/outserts add front mass, bias toward the stiffer bordering option; (5) if you shoot fingers, treat the weaker bordering option cautiously; (6) if broadheads are part of the plan, finalize only after broadhead tuning. This is not a physics-perfect formula, but it is more defensible than broad one-category corrections applied in isolation.
Worked example table for three common setups
| Setup | Start point | Manual correction | Likely choice | Weak symptoms to watch | Stiff symptoms to watch | Tuning check to confirm |
|---|---|---|---|---|---|---|
| Beginner recurve, fingers, 25–35 lbs | 600–800 spine is a normal starting range for 25–35 lbs recurve or fingers | If the arrow must stay longer than 28 inches, move stiffer one category; if point weight goes above 100 grains, expect weaker dynamic behavior | Usually lands in 600, 700, or 800 depending on real arrow length and point choice | Tail kick, noisy launch, groups open fast as distance grows | Hard left-right tune, bare shaft acts stubborn, arrow feels dead off the bow | Paper tune first, then walk-back; compare bare shaft only after nocking point and centershot are close |
| Compound, mechanical release, 60 lbs | 55–65 lbs compound can use 350–400 spine | If finished arrows are longer than 28 inches, lean stiffer; if point stays at 100 grains, 400 may work; heavier front end can push toward 340 | Usually 350, 340, or 400 depending on actual build | Paper shows weak tear tendencies, broadheads drift from field points, pin misses grow at longer range | Paper shows stiff tear tendencies, tune feels narrow, walk-back shows stubborn side drift | Paper tune, then walk-back; if used for hunting, finish with broadhead check |
| Hunting setup, broadheads, 125–150 grains | Use your bow’s normal chart range first | The page says every 25 grains over 100 grains moves about one spine category more flexible; include heavier inserts in the same front-end correction | Often one category stiffer than the same bow with a 100-grain field point build | Broadheads plane, field points group but heads drift, paper may look passable while broadheads expose the weakness | Broadheads hit opposite side from weak reaction, bow feels unforgiving, fixed blades never quite settle | Fixed-blade broadhead comparison against field points, then walk-back to catch lingering side bias |
| Decision-table input | What to enter | How I use it |
|---|---|---|
| Bow type | Compound, recurve, or traditional/longbow | Select the correct manufacturer chart family first; do not cross-use compound and finger-release guidance |
| Actual draw weight | Measured peak weight at your real draw length | Primary chart row; if you are between rows, I check both and note whether the setup is near a spine boundary |
| Draw length | Your true draw length | Useful for verifying the bow is really hitting the expected weight and for checking whether the proposed finished arrow is realistic |
| Finished length | Nock groove to end of shaft as planned | Main length input for spine selection; this matters more than guessed cut length |
| Point weight | Field point or broadhead weight, plus note added insert/outsert mass | Compare to the chart assumption, often 100 grains; if heavier, bias toward the stiffer bordering spine and confirm by tuning |
Two shop-floor notes I use with beginners
First, I want a safe, forgiving arrow before I want a tight theoretical match. Beginners do better with a setup that lets form errors show up without turning every shot into a tuning mystery.
Second, I ask whether the archer is using the correct eye side before I argue over spine. Sometimes the biggest “arrow problem” is not the arrow.
Hand-Check Methods When You Skip the Spine Calculator
Software calculators give you a starting point, but bare-shaft paper-tune testing and other manual checks confirm whether your arrows actually fly right. A short-distance bare-shaft test reveals spine issues immediately: if the unfletched arrow strikes far from your fletched group, the shaft is too stiff or too weak before you ever buy a full dozen.
Skipping these hand-checks often means blaming poor groups on form when the real problem is mismatched spine. The guide to manual spine check methods ranks each alternative by reliability and explains which ones work best for recurves, compounds, and hunting setups so you can verify your selection without relying solely on digital charts.
How do I know if my arrows are too stiff or too weak?
Look for a pattern, not one ugly shot. Weak arrows usually show more bend-related instability, broadhead drift, and noisy recovery, while stiff arrows often give stubborn left-right tune issues and a narrow setup window. Then run a short tuning workflow to confirm before you buy more shafts.
Likely weak-arrow symptoms
- Fishtailing or visible tail wag after launch
- Broadheads planning away from field points
- Groups that open fast with distance
- Paper tears that keep hinting weak even after sensible rest moves
- A setup that gets worse after adding point or insert weight
Likely stiff-arrow symptoms
- Left-right misses that stay even when vertical tune looks fine
- Paper tears that keep hinting stiff despite reasonable setup
- A bow that feels touchy and unforgiving with fixed blades
- Better flight after increasing point weight slightly or reducing length less than planned
Failure-case workflow after a setup change
- If you increased poundage, suspect weak first.
- If you left arrows longer than planned, suspect weak first.
- If you moved from 100 to 125 or 150 grains, suspect weak first.
- If you changed from release aid to fingers, suspect the need for a stiffer arrow.
- Do a paper pass at close range.
- Walk back and check whether the side drift grows.
- If it is a hunting setup, compare fixed-blade broadheads against field points before deciding the spine is settled.
I use this because it stops panic adjustments. Too many archers move the rest, twist cables, and swap heads before asking the simpler question: did the arrow just become dynamically weaker?
Which tuning checks confirm your spine choice?
Use paper tuning for the first read, walk-back tuning to catch left-right issues that paper can hide, and broadhead tuning to confirm a hunting arrow. If all three disagree, stop and check form, centershot, cam timing, and nock fit before blaming spine alone.
Paper tuning for first-pass diagnosis
Paper tuning is quick. It tells me whether the launch looks clean enough to keep going.
I do not treat paper as the judge of final arrow choice, especially on broadhead builds. A shaft can cut a decent hole and still act weak once distance grows or fixed blades go on the front.
Walk-back tuning for side drift
Walk-back tuning catches left-right trends that short paper shots can miss. If the line opens to one side as distance increases, I start checking spine interaction before I chase tiny rest moves.
This test saves time.
Broadhead tuning and fixed-blade comparison
If you hunt, broadhead tuning is the truth test. Compare fixed-blade broadheads against field points.
If field points group well but fixed blades plane off, the arrow may be weak, stiff, or simply badly tuned. The comparison matters because broadheads expose small launch problems fast. Mechanical heads can hide some of that, but I still like to know whether the arrow is honest.
When a bad tune is not really a spine problem
Spine is not guilty every time. I check arrow straightness, nock fit, rest alignment, cam timing on compounds, and the shooter’s release.
At the club, I have seen beginners buy new arrows when the real fix was lowering draw weight or cleaning up anchor pressure. Start with the shaft, but do not stop there.
How Lumenok nocks alter spine and tuning
The review breaks down how Lumenok’s lighted nocks shift arrow spine, what nock sizes match common shaft IDs, and how the added rear weight influences recovery and broadhead tune. It walks you through the step‑by‑step checks—nock fit, string tension, and mass balance—needed to decide if the extra weight is worth the gain in consistency. Understanding these factors matters because even a small spine change can throw off your tuning, especially on tight‑draw‑weight setups. If you’re weighing whether to adopt Lumenok on hunting or target arrows, the Lumenok Arrow Spine Chart gives the data and decision‑making framework you need.
What to Expect When Paying for Arrow Spine Tuning
Professional arrow spine tuning typically costs between $30 and $100, but the price only matters if the service includes bare-shaft or paper tuning alongside point-weight verification. A shop that simply references a static spine chart without dynamic testing may leave you with mismatched arrows, wider groups, and the need to pay for a second tune.
The supporting guide details exactly what should appear on your invoice, how labor charges differ between compound and recurve setups, and which add-ons warrant separate fees. It also explains when a basic home check is sufficient versus when professional intervention prevents wasted shafts. Reviewing typical spine tuning service costs ensures you receive thorough diagnostics rather than an incomplete adjustment that compromises accuracy.
Carbon vs. Aluminum Shaft Tuning Differences
Aluminum arrows typically tune faster out of the box because their shaft-to-shaft spine consistency is tighter, making bare-shaft and broadhead flight easier to read. Carbon shafts can achieve excellent tuning results but demand more precise spine sorting and a cleaner overall setup to perform reliably.
The supporting guide breaks down static spine, dynamic spine, and launch behavior across both materials so you know exactly where each shaft type holds an advantage. It also covers how recurve, compound, and broadhead setups respond differently depending on whether you choose carbon or aluminum. Understanding these material-specific tuning characteristics prevents wasted time chasing fletched-bare mismatches that stem from the shaft itself rather than your rest or nocking point. Review the full arrow spine tuning comparison before committing to a new set of shafts.
Frequently asked questions
How does draw weight affect arrow spine?
Draw weight is the first filter because more weight bends the shaft harder at launch. As poundage rises, you usually need a stiffer arrow. Always use the bow’s real weight at your draw length, not the limb label or an assumed number from a catalog.
How does arrow length change spine selection?
Longer arrows act weaker, so longer finished shafts usually need a stiffer spine to stay in tune. The page says every inch over 28 inches moves about one spine category stiffer. Use your real finished arrow length, especially if broadhead clearance keeps you from cutting short.
What point weight should I use with my arrow spine?
Start from a 100-grain baseline, then correct for heavier points and inserts. The page says every 25 grains over 100 grains moves about one spine category more flexible. A 125-grain or 150-grain broadhead setup often needs a stiffer shaft than the same bow with target points.
Do recurve bows and compound bows need different spine?
Yes. Compound bows with a mechanical release often tolerate a weaker dynamic setup than recurves and longbows shot off the fingers. The guide says fingers require stiffer arrows than mechanical release setups, which matches what I see when tuning club recurves beside compounds.
What spine should I use for broadheads?
Use your normal chart range as the start, then correct stiffer for the heavier front end. Broadheads, especially fixed blades, expose weak dynamic setups fast. If you move from 100 grains to 125 or 150 grains and add insert mass, I expect at least a fresh spine check.
Author bio
I’ve been tuning and shooting bows for more than a decade across compounds, ILF recurves, and traditional shelf-shot setups. The recommendations in this guide come from a mix of shop-floor style setup work, club coaching, backyard and range tuning, and field use on hunting-style broadhead builds. I still rely on manufacturer charts and ATA/AMO conventions for the baseline, but the advice here reflects what has repeatedly worked for me after paper tuning, walk-back tuning, and broadhead comparison on finished arrows rather than bare catalog numbers.
Sources
- Archery Manufacturers and Merchants Organization (AMO) / Archery Trade Association (ATA) static spine convention: 28-inch shaft sample, 26-inch support span, 880-gram or 1.94-pound center load, with deflection used as the static spine reference.
- ATA educational chart guidance and manufacturer selection charts, which use bow type, draw weight, and arrow length together and commonly note that point weight and release style can shift the recommendation.
- Easton Arrow Shaft Selection charts and technical notes, used here as a representative chart example showing that arrow length and point weight should be considered together rather than by a single blanket correction rule.
- Black Eagle, Gold Tip, and similar manufacturer chart notes that treat 100-grain points as a common baseline and caution that heavier front-end builds can require a stiffer spine.
- Field experience from compound, recurve, and traditional tuning sessions, used only for practical interpretation and always subordinated to chart verification and tuning confirmation.