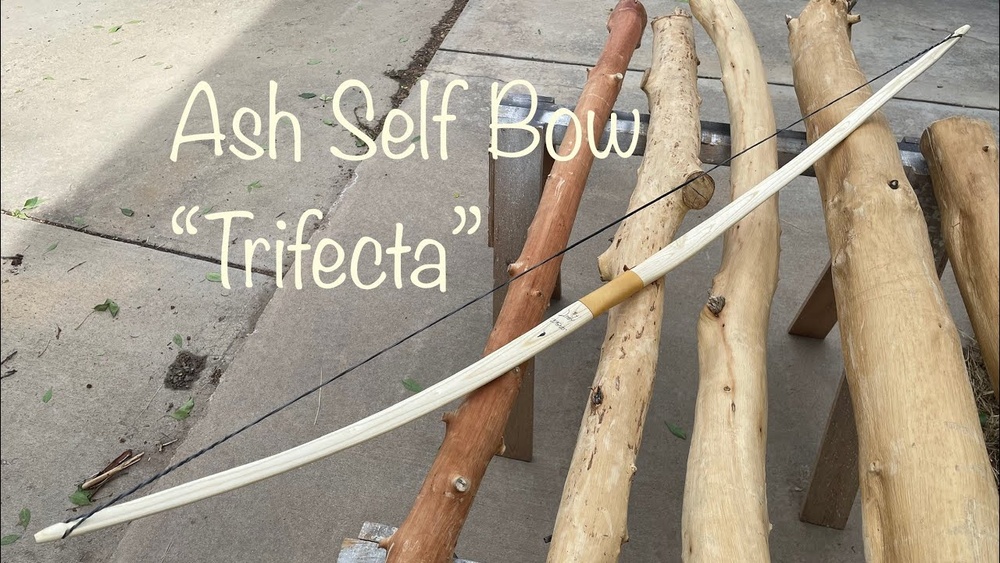
How to Make an Ash Self Bow: Step-by-Step Guide for Beginners
Making your own ash self bow is not just about building a tool, it’s a journey into traditional craftsmanship and understanding of wood. Many archers and outdoor enthusiasts dream about creating a bow from scratch, but the process can seem mysterious or overwhelming. The good news is, with patience and careful attention, almost anyone can shape a strong, reliable bow from a simple ash stave. Whether you want to connect with ancient skills, hunt ethically, or just enjoy a rewarding project, learning to make an ash self bow is both practical and deeply satisfying.
This guide will walk you through every step, from choosing the right ash wood to the final tillering and finishing touches. You’ll learn not just the “how”, but also the “why” behind each stage. Along the way, I’ll share insights that beginners often miss, so you can avoid common mistakes and create a bow you’ll be proud to shoot.
Let’s get started on this rewarding craft.
Why Ash For A Self Bow?
Ash is one of the most popular woods for self bows, bows made from a single piece of wood, because of its unique properties.
Ash wood is strong, flexible, and widely available in North America and Europe. Its open grain structure allows it to bend smoothly without snapping, making it forgiving for beginners. Unlike some other hardwoods, ash is easy to work with hand tools and holds up well to repeated stress.
Another advantage is that ash can be used in both green (freshly cut) and seasoned (dried) states, though seasoned wood is more stable. Compared to hickory or yew, ash is less likely to develop sudden breaks or “chrysals” (compression fractures).
How Ash Compares To Other Bow Woods
See how ash matches up with two other common bow woods:
| Wood Type | Strength | Flexibility | Ease of Use | Availability |
|---|---|---|---|---|
| Ash | High | Very Good | Easy | Common |
| Hickory | Very High | Good | Moderate | Common |
| Yew | Medium | Excellent | Challenging | Rare |
Pro Tip: Ash is ideal for your first self bow because it is forgiving and helps you learn the tillering process without punishing small mistakes.
Selecting The Right Ash Stave
The quality of your bow depends heavily on the wood you start with. Selecting a good ash stave is crucial.
- Look for Straight Grain: The most important feature is a straight, tight grain running the full length of the stave. Curved or twisted grain can create weak spots.
- No Knots or Large Branches: Small pin knots can be acceptable, but avoid large knots, branches, or visible cracks. These weaken the bow dramatically.
- Size: For most adult bows, choose a stave about 72 inches (183 cm) long, 2-3 inches (5-7.5 cm) wide, and at least 1.5 inches (3.8 cm) thick. This allows you to shape the bow and still have enough material.
- Seasoned vs. Green: Seasoned ash (dried for at least 6-12 months) is best. If using green wood, expect more warping and checking as it dries.
Example: I once tried using a stave with a slight twist in the grain. Even though it looked minor, the bow eventually developed a crack during tillering, a costly lesson in patience and wood selection.

Credit: www.youtube.com
Tools And Materials You’ll Need
Making a self bow doesn’t require many expensive tools. Here’s what you need:
- Ash stave (see above)
- Drawknife or sharp machete for rough shaping
- Spokeshave or rasp for finer shaping
- Cabinet scraper or sandpaper for smoothing
- Hatchet or small axe (optional, for rough work)
- Bow saw or handsaw
- Tillering stick or tillering tree (for checking bow shape)
- Measuring tape and pencil
- Wood glue (optional, for small fixes)
- String material (nylon, Dacron, or natural fiber)
- Protective gloves and eye gear
Many of these tools are basic and affordable. For most hand work, a sharp drawknife and spokeshave are more important than power tools.
Designing Your Bow: Dimensions And Draw Weight
Before you start shaping, it helps to plan your bow’s dimensions. Most traditional longbows and flatbows have similar basic measurements. Adjust these based on your draw length and intended use.
Standard Ash Bow Dimensions
| Bow Type | Length | Width (at grip) | Width (at tip) | Thickness |
|---|---|---|---|---|
| Longbow | 68-74 in | 1.25 in | 0.5 in | 0.75 in |
| Flatbow | 66-70 in | 1.75 in | 0.5 in | 0.75 in |
- Draw Weight: For beginners, aim for a draw weight of 30-45 pounds at your draw length (usually 28 inches for adults). Heavier bows are harder to tiller and shoot accurately at first.
Warning: Starting with a bow that is too heavy can result in poor shooting form and even injury. Lighter is better for learning.

Credit: www.youtube.com
Shaping The Bow Stave
Now the real work begins: turning a rough stave into a bow. This is done in stages, from roughing out the shape to fine-tuning the limbs.
Removing The Bark And Sapwood
- Carefully peel off the bark using a drawknife. For ash, the outermost ring of wood (the growth ring) should become the back of the bow (the part facing away from the archer).
- Avoid cutting into the growth ring, as this weakens the bow.
Laying Out The Bow Shape
- Mark the center of the stave for the handle (usually 6 inches).
- Draw the outline of the limbs, tapering from the handle to the tips.
- For a longbow, the limbs are typically about 1.25 inches wide at the grip, tapering to 0.5 inches at the tips.
Rough Shaping
- Use a hatchet or drawknife to remove wood outside your outline. Work slowly and evenly from both sides.
- Leave the stave about 1/8 inch wider and thicker than your final measurements at this stage. This buffer helps prevent mistakes.
Defining The Limbs And Handle
- Begin shaping the limbs into a gentle, even taper. Both limbs should bend equally and have a continuous arc.
- The handle should remain stiff and slightly thicker than the limbs.
- Use a rasp or spokeshave for finer shaping as you get closer to your final dimensions.
Pro Tip: Beginners often remove too much wood from one spot, creating a weak limb that bends more than the other. Always check your progress and work gradually.
Tillering: Achieving An Even Bend
Tillering is the process of carefully removing wood from the limbs until both bend evenly under tension. It’s the most critical part of making a self bow.
Setting Up For Tillering
- Cut shallow nocks at the ends of the bow to hold a tillering string (not your final bowstring).
- Place the bow on a tillering stick, a notched board that holds the string at increasing draw lengths.
- Pull the string a few inches at a time, watching how the limbs bend.
Removing Wood Gradually
- Use a scraper or rasp to remove small amounts of wood from stiff areas.
- Check the bend often. The goal is for the limbs to curve in a smooth, even arc with no “hinges” (sharp bends) or “flat spots” (areas that do not bend).
Example: When I made my first bow, I rushed the tillering and created a hinge near one tip. The bow lost power and eventually broke. Patience is key, remove wood slowly and test often.
Final Tillering And Draw Weight
- Continue tillering until you reach your target draw length (usually 28 inches) and draw weight.
- Use a bow scale to measure the draw weight. If it’s too heavy, remove more wood; if too light, stop and don’t remove more.
Cutting The Nocks And Making The Bowstring
Shaping The Nocks
- Use a small file or knife to cut nocks on each limb tip. These are shallow grooves, angled slightly outward, to hold the string securely.
- Smooth the nocks to prevent the string from fraying.
Making A Simple Bowstring
You can use modern string material like Dacron or natural fibers such as linen or hemp. For beginners, Dacron is easy and strong.
- Measure a string about 5 inches shorter than the unstrung bow.
- Twist or braid the string, adding loops (or “eyes”) at each end to fit over the nocks.
- Install the string and check the brace height (the distance from string to grip). For most ash bows, 6-7 inches is ideal.
Pro Tip: Always check the string for weak spots or unraveling before shooting. A broken string can damage the bow or cause injury.
Final Shaping And Sanding
With the bow strung and tillered, you can refine its shape and appearance.
- Use sandpaper (start with 100 grit, finish with 220 grit) to smooth all surfaces.
- Round the edges of the limbs and handle for comfort and to prevent splinters.
- Remove any tool marks that could create stress points.
Warning: Do not sand into the back of the bow (the outermost growth ring). This can cause the bow to fail.
Finishing The Bow
A good finish protects your bow from moisture and improves its look.
- Wipe the bow with a clean cloth to remove dust.
- Apply several coats of boiled linseed oil, tung oil, or a modern polyurethane finish. Let each coat dry fully before adding the next.
- For a traditional touch, wrap the handle with leather, cord, or suede for grip.
Testing And Shooting Your Ash Self Bow
When you first shoot your bow, go slowly. Shoot a few arrows at low draw length, then gradually work up to full draw.
- Listen for any creaks or cracks. Minor noises are normal, but loud pops or visible splits are not.
- Check that both limbs return to straight after each shot.
- Store the bow unstrung when not in use to prevent set (permanent bending).
Example: In my experience, the first few shots can be nerve-wracking. But if you’ve tillered carefully and checked each step, your bow should shoot smoothly and with surprising power.
Maintenance And Longevity
A well-made ash self bow can last for years, but it needs regular care.
- Store in a dry place: Moisture will weaken the wood over time.
- Inspect for cracks: After each use, check for new splits, especially near the handle and tips.
- Restring carefully: Always unstring the bow when not shooting.
- Reapply finish: Refresh the oil or finish every few months.
Pro Tip: If you notice a limb bending more than the other over time, you can re-tiller the bow by removing a small amount of wood from the stiff limb.
Common Mistakes And How To Avoid Them
Many first-time bowyers run into similar problems. Here’s how to sidestep them:
- Removing too much wood too quickly: Always shape and tiller gradually. You can’t add wood back once it’s gone.
- Ignoring grain direction: Working against the grain leads to splinters and sudden breaks.
- Stringing the bow too soon: Wait until tillering is nearly complete before using a full-strength string.
- Using wet or unseasoned wood: This causes warping and cracks as the bow dries.
- Skipping the finish: Unfinished bows absorb moisture and weaken.
Warning: If you see a deep crack or hear a sharp snap during tillering, stop immediately and inspect. Shooting a damaged bow is dangerous.
Credit: www.youtube.com
Example Timeline: From Log To Bow
Building an ash self bow is not a weekend project, but here’s a rough breakdown:
| Stage | Time Estimate | Key Activity |
|---|---|---|
| Wood Selection & Preparation | 1-2 hours | Choose and rough out stave |
| Shaping the Stave | 2-4 hours | Remove bark, outline, rough shape |
| Tillering | 4-8 hours | Refine limbs, even bend |
| Finishing | 1-2 hours | Sanding, oil, handle wrap |
| String & Testing | 1 hour | Make string, shoot test |
These times are for a first bow. As you gain experience, the process becomes faster.
Frequently Asked Questions
How Do I Know If My Ash Stave Is Dry Enough To Use?
A simple test is to weigh the stave and check the weight weekly. When the weight stops decreasing, the wood is dry. You can also check moisture content with a meter, below 10% is ideal. If you’re unsure, store the stave in a dry place for at least 6 months before using.
Can I Use Other Woods With The Same Method?
Yes, the basic steps work for many hardwoods like hickory, maple, or elm. However,