How to Fix Arrow Rest Contact Problems Before They Ruin Accuracy
Arrow-rest contact usually means timing, clearance, or spine is out of sync. The fastest fix is to identify the contact point first, then verify drop-away timing, then run a powder or marker clearance test, then rotate the nock, then validate blade setup, and only then confirm spine with bare shaft and paper. Skip that order and you can chase bad paper tears, waste time, and keep a contact issue that hurts accuracy.
This guide is part of our Archery basics: beginner guide to bows and shooting series.
1) Identify the contact point first

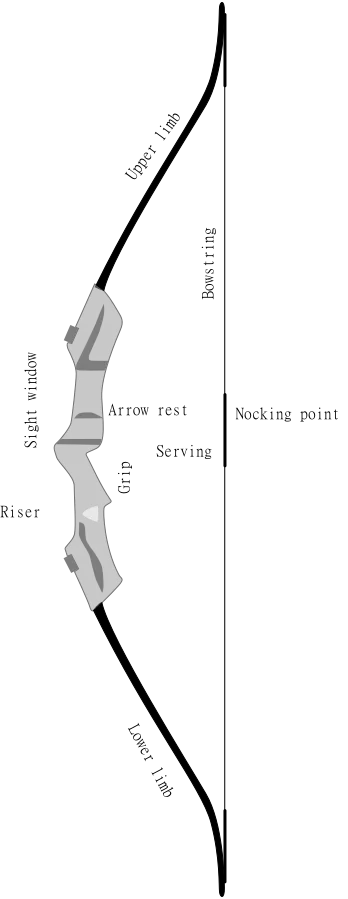
Before turning any screws, determine exactly what is touching: launcher arm, containment arm, shelf, riser, cable, or the back of the shaft. That single detail narrows the problem far more than paper alone. A mark on the launcher usually points to timing, blade setup, or nock orientation; a mark on a containment arm often points to clearance, vane clocking, or form. This is the same logic used in setup guides from rest makers such as QAD, Hamskea, Ripcord, and in setup resources from Lancaster Archery Supply and Easton.
2) Verify drop-away timing second
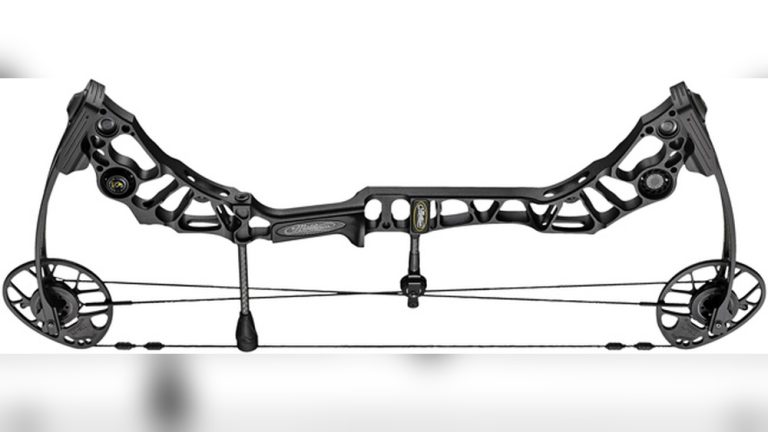
If the rest is a drop-away or hybrid design, verify timing before changing arrow spine. Manufacturer setup guidance for QAD, Hamskea, and Ripcord consistently emphasizes matching cord length, draw-cycle activation, and launcher position so the launcher is where it should be at full draw and is fully clear through release. If the launcher is late, early, or rebounds, the rest can contact the shaft even when paper looks acceptable.
Use a side view at full draw and release to check whether the launcher is in the expected position for the rest model. The exact timing point differs by rest design and activation geometry, so follow the manufacturer’s setup instructions rather than a generic clocking rule. If the cord path rubs the riser, the cord anchor slips, or the launcher doesn’t return consistently shot to shot, timing is still suspect.
3) Run a powder or marker clearance test third
After timing is verified, use foot powder, talcum powder, dry spray marker, or lipstick to reveal the exact transfer point. Powder tests are especially useful because a paper tear can look fine while the vane or shaft still clips the launcher or containment arm. That is why setup resources from rest manufacturers and archery retailers often treat clearance testing as a separate step from paper tuning.
Dust the launcher tip, vane edge, or containment arm lightly, then shoot one arrow. A clean swipe on the coated area shows contact. A streak on the shaft or vane base usually means the arrow is flexing into the rest, not just passing nearby. If the mark shifts with each shot, stop and recheck timing and nock orientation before touching spine.
4) Rotate the nock fourth
Nock rotation can solve contact without changing the rest at all, but it works best after timing and clearance have been checked. On compounds, start with the vane orientation that keeps one vane away from the launcher arm or riser path; on recurves, use a starting point that keeps feathers or vanes away from the shelf or side plate. The goal is simple: move the fletching path away from the problem surface, then confirm the change with powder or marker.
Rotation helps most when only one vane is clipping a predictable point. It will not cure a shaft that is dynamically weak for the setup, nor will it fix a launcher that is dropping at the wrong time. If the same mark returns after rotation, move on to blade setup and spine instead of repeating the same adjustment.
5) Validate blade setup fifth
Blade launchers are sensitive to width and stiffness. If the blade is too wide, the fletching can ride the edge; if it is too narrow, the shaft may lose support or contact the launcher tip. If it is too stiff, the arrow may ride hard and react inconsistently; if it is too soft, the shaft can collapse into the blade under load. Manufacturer setup guidance from fixed-blade rest makers and retailer tuning resources generally treats blade selection as a match between arrow diameter, shaft behavior, and the amount of support the rest is expected to provide.
A useful way to think about blade selection is this: choose the lightest, narrowest blade that still gives stable support for the arrow and does not collapse under the setup’s launch load. Wider or stiffer blades are not automatically better. They may clear broad shaft profiles, but they can also increase contact risk if the arrow is already dynamically weak. Conversely, a blade that is too soft can aggravate contact on heavier points or longer shafts.
6) Confirm spine with bare shaft and paper last
Once clearance is confirmed, use paper and bare shaft work to confirm whether the arrow matches the bow. Easton’s spine-selection guidance and chart-based setup tools emphasize that draw weight, point weight, arrow length, and bow geometry all change dynamic spine. Bare shaft tuning is most useful after contact is eliminated because a shaft that is striking the rest can fake a spine problem.
At sensible tuning distance, a bare shaft that groups with fletched shafts and shows a reasonable paper tear suggests the setup is close. If the bare shaft still lands consistently left/right or high/low relative to the fletched group after clearance is clean, adjust setup variables before blaming the rest again. In other words: fix contact first, then let the bare shaft tell you what the bow is really doing.
What you need first
Gather the tools before touching the rest. A clear check sequence is faster than random adjustments, especially on drop-away rests where a timing fault can look like a spine problem.
- Foot powder, talcum powder, or a dry spray marker
- Lipstick or another transferable marker for fletching
- Allen keys for the rest and sight block
- Spine chart or selection program
- Bow square or nocking point reference tool
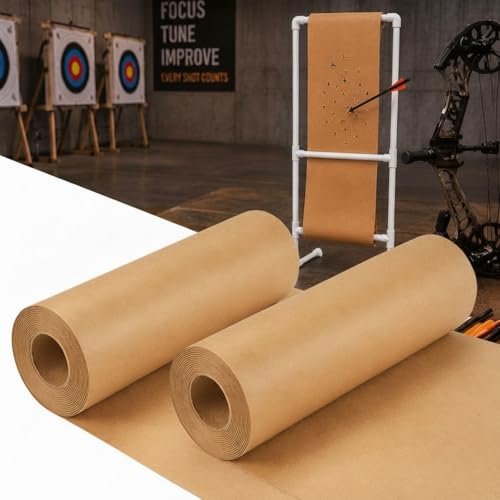
- Paper tuning frame and clean paper
- Bare shafts for follow-up checks
- Notebook for draw weight, arrow length, point weight, and rest setting
Record the setup before changing anything
Write down draw weight, brace height, arrow length, point weight, centershot, nocking height, and cam synchronization if the bow uses dual cams. Those settings change how a shaft flexes through the shot and how it tracks through the rest. If a rest swap created the issue, the notes make it easier to reverse the wrong change. For more setup context, see paper tuning, bare shaft tuning, arrow spine charts, drop-away rest timing, and centershot setup.
- Measure and note the current rest position, launcher angle, and cable connection point.
- Mark the current nock orientation on one arrow with a fine line.
- Set up a paper frame and a powder test station at the same shooting lane.
Start with the symptom
Look at where the mark appears before turning screws. Contact on a launcher arm points to a different fault than contact on a containment arm, and an arrow that falls off the rest points to a different problem again.
Fletching on launcher arm
That usually points to timing, nock rotation, or a blade mismatch. On compound bows, launcher arm timing can be off even when paper shows a clean hole. On fixed blade rests, a blade that is too wide or too weak can let vanes ride the tip. In service bays, the common pattern is a bright swipe on one vane and a matching powder streak at the launcher edge.
Fletching on containment arm
Containment-arm marks usually come from clearance, vane orientation, or form. Check whether the vanes track the arm on launch, then inspect for bow-hand torque, loose sleeve material, or an arrow that is too weak for the setup. A repeat mark in the same spot often means the vane path is predictable and can be corrected with rotation or alignment.
Arrow falling off the rest
That is often a setup fault, not a paper tear problem. Improper rest adjustment can make an arrow fall off the rest, especially if the launcher sits too low or the containment arm is not centered. Stop and recheck nocking point, rest height, and launcher position.
Clean paper hole, bad groups
A perfect paper hole can still hide persistent arrow contact. Paper tuning is the first stage in arrow setup, but it is not a full diagnosis. If groups open up while paper looks clean, move to a clearance test and bare shaft follow-up instead of assuming the rest is correct.
How do you tell if rest timing is off?
Timing is off when the launcher rises or drops at the wrong moment relative to full draw and release. On a drop-away rest, the cord length and cable connection must match the draw cycle. QAD-, Hamskea-, and Ripcord-style setup instructions all point back to the same principle: the launcher must be activated and cleared in the window the manufacturer specifies for that rest design. If the launcher is late, early, or bouncy, check timing before changing arrow spine.
Drop-away timing signs
A launcher that is still up at release can leave blade contact, while one that falls too early can create bounce-back or inconsistent support. The correct position at full draw is rest-specific, so follow the rest maker’s setup guidance rather than relying on a generic “vertical at full draw” rule. Some models are designed to sit in a different starting position or activation range depending on cable routing and draw-cycle geometry.
Cord length and cable connection checks
Inspect the cord path, attachment point, and set screw at the rest if present. A short or long cord changes when the launcher moves through the draw cycle. If the rest uses the bow cable, confirm that the anchor point has not slipped and that the cord does not rub the riser. Lancaster Archery Supply and rest manufacturers both stress keeping the cord path consistent and centered so the activation point does not change shot to shot.
When late or early drop causes bounce-back
Late drop leaves contact. Early drop can let the shaft settle, then rebound into the launcher or riser. The fix is not to guess at timing from a forum rule of thumb, but to return to the manufacturer’s activation point, then confirm with repeated shots and powder marks. Recheck after each change.
- Set the bow at full draw and inspect launcher position visually from the side.
- Move the rest cord connection in about 1/4-turn increments, then reshoot one arrow.
- Stop when the launcher reaches the same timing point on repeated shots.
Fix nock rotation and vane orientation
Nock rotation can move the vanes away from a blade or riser, and it often solves contact without touching the rest. It works best after timing has been checked, because a bad launch cycle can beat the best nock orientation. If the powder streak is isolated to one vane, rotation is usually a high-value change.
Compound vane clocking
On compound bows, a common starting point is to orient the cock vane so it clears the launcher arm and riser path at full draw and release. The exact clocking depends on vane shape, vane height, and the rest design, so a manufacturer setup diagram or shop reference is more reliable than a one-size-fits-all rule. Use visual clearance or powder to confirm the change.
Recurve vane clocking
For recurves, the goal is to keep the feathers or vanes clear of the shelf or side plate area throughout the shot cycle. If a recurve arrow still marks the rest, check nocking height and arrow spine before making major rest changes. Recurve setup is especially sensitive to nocking point height and plunger/center-shot interaction, so small shifts can matter.
When rotation will and will not help
Bad nock rotation is a major cause of blade contact. Rotation can help when the vane clips only one point of the launcher or containment arm. It will not cure a weak spine that is flexing the shaft hard into the rest. If the same strike pattern comes back after rotation, the next step is blade setup or spine verification.
Check spine before changing the rest
Arrow spine belongs in the top tier of checks because a shaft can flex into the rest even when the rest is set correctly. Spine errors are common when draw weight, arrow length, or point weight changes without a shaft recheck. Easton’s spine charts are built around these variables for a reason: dynamic spine is not fixed once the shaft leaves the box.
Weak spine symptoms
A weak spine can cause the arrow back end to contact the blade. The shaft bends more than it should and may show erratic groups, tail-left or tail-right behavior, and vane rub even after the rest is moved. Recheck the spine chart before moving the launcher again. Common clues include a broad left/right miss pattern and a bare shaft that lands consistently away from the fletched group.
Stiff spine symptoms
Too stiff a shaft can create poor flight patterns and stubborn group left-right errors that do not disappear with timing changes. A stiff shaft may not show obvious blade smash, which is why paper can look fine while groups stay poor. When that happens after clearance is confirmed, the bare shaft comparison becomes the cleaner diagnostic.
Arrow length, point weight, and bow settings
Longer arrows and heavier points weaken the dynamic spine. Higher draw weight can also weaken the dynamic spine. Centershot, nocking height, and cam sync also matter because they change how the shaft leaves the bow and how much correction the rest must absorb. If the current shaft is far outside the chart, reselect arrows instead of chasing rest settings.
Blade launcher width and stiffness: how to choose the right one
Blade choice should match the arrow and the bow, not just the rest model. A wider blade can help support some shafts, but it also increases the chance that the vane will ride the blade edge if clearance is already tight. A narrower blade can reduce contact area, but it may not support heavier points or longer shafts as well. Stiffness matters too: a blade that is too soft can collapse and create inconsistent support, while a blade that is too stiff can transmit more shock and still leave contact if the arrow path is not centered.
A practical selection process is to start with the manufacturer’s recommended blade range for the rest, then choose the narrowest and lightest stiffness that still supports the arrow cleanly at your draw weight and point weight. If the arrow is long, the point is heavy, or the bow is drawing hard, the blade often needs more support. If the arrow is short and the setup is already close to the riser, a lighter blade may clear better. When in doubt, the powder test tells you more than appearance alone.
Arrow-rest contact matrix
This table puts the symptoms in order so the wrong fix is less likely. Use the rest type, the fastest test, and the first fix to decide whether to adjust nock rotation, cord timing, blade setup, spine, or form first.
| Symptom | Likely cause | Rest type | Diagnostic order | Fastest test | First fix |
|---|---|---|---|---|---|
| Fletching on launcher arm | Timing or blade mismatch | Drop-away, mechanical, hybrid | Timing, then clearance, then spine | Powder on vanes and launcher | Cord timing first |
| Fletching on containment arm | Clearance, rotation, or form | Capture-style, hybrid | Clearance, then nock rotation, then form | Lipstick on the vane edge | Nock rotation first |
| Torn bottom vane | Low clearance or weak spine | Fixed, drop-away | Clearance, then spine, then bow setup | Foot powder on the vane base | Blade setup or spine |
| Perfect paper tear but bad groups | Hidden contact or spine mismatch | All types | Clearance, then bare shaft, then spine | Powder test after paper | Check clearance first |
| Arrow falling off the rest | Rest height or timing fault | Mechanical, hybrid, drop-away | Rest position, then timing, then nock height | Full-draw side view | Rest height or timing |
| Inconsistent contact after a rest swap | Alignment or cord change | Drop-away, mechanical | Alignment, then cord timing, then spine | Repeat powder test at full draw | Re-center and retime |
How do you check vane clearance on your bow?
Use a powder, spray, or marker test to find the exact impact point after a shot. This is the quickest way to separate a true clearance problem from a paper tear that looks worse than it is. Powder spray can reveal impact points on the back of the arrow.
Powder or lipstick test
Dust the launcher, containment arm, or vane base with foot powder, then make a single shot. Lipstick marker works the same way on the vane edge. Keep the coating light so the transfer pattern stays readable.
Reading the wear marks
A clean swipe on the launcher tip means vane contact at that point. A streak on the back of the shaft points to flex, timing, or spine. If the mark is on the arm but not the vane edge, the problem may be rest geometry rather than vane shape.
What a clean pass means and what it does not mean
No visible transfer is a good sign, but it is not the final word. You still need a paper check and, if groups remain open, a bare shaft check. Some contact problems still show a bullet hole through paper, so the clean hole alone does not close the case.
Say your compound bow shows a clean paper tear at 20 yards, but a powder test leaves a bright streak on the launcher arm. That points to a hidden clearance fault, not a paper issue, and the next move is timing or nock rotation rather than a rest height change.
How to interpret bare shaft tuning after clearance is confirmed
Bare shaft tuning becomes meaningful once the rest is no longer touching the arrow. If the bare shaft still lands left or right of the fletched group, that offset is now more likely to be dynamic spine, centershot, nocking height, or cam sync rather than hidden contact. If it lands high or low, nocking height, rest height, and launch consistency move up the list.
Use the bare shaft together with paper instead of treating one result as final. A close paper tear plus a bare shaft that groups with fletched arrows usually means the setup is near correct. A close paper tear plus a stubborn bare shaft offset means the bow is still asking the shaft to correct too much in flight. In that case, adjust one setup variable at a time and repeat the test.
What a right-left bare shaft offset usually means
A consistent right-left offset often points to spine balance, centershot, or cam timing/sync rather than rest contact. A weak shaft can behave differently than a stiff one, so check the arrow against the chart before moving the launcher again. If the offset is only present in the bare shaft and not the fletched group, the bow is telling you the arrow dynamic is still not matched.
What a high-low bare shaft offset usually means
High-low separation can point to nocking point height, rest height, or launch timing. On bows with cams that are not synchronized, the shaft can also leave the bow inconsistently and show vertical separation that looks like a rest issue. Confirm the setup variables first, then retest.
Which bow setup variables matter most?
The variables that most often change rest clearance and spine behavior are draw weight, point weight, arrow length, centershot, nocking height, and cam sync. Those are the levers that most directly change how much the arrow flexes and how it enters the rest. Brace height, plunger tension, cable routing, and vane size also matter, but they usually come after the main six.
Draw weight
Higher draw weight increases launch stress and can make a shaft act weaker dynamically. If draw weight has changed since the last tune, repeat the spine check rather than assuming the old shaft still fits.
Point weight
Heavier points weaken dynamic spine and can increase launcher or blade interaction. If a setup suddenly starts rubbing after a point change, the arrow may simply need a different spine class.
Arrow length
Longer arrows flex more and often move the shaft toward a weaker dynamic behavior. Even a small length change can be enough to alter clearance and bare shaft impact.
Centershot
Centershot changes the arrow’s path relative to the riser and rest. If the rest is centered incorrectly, you can get marks, paper issues, or a bare shaft offset even though timing is correct. For a deeper walkthrough, see centershot setup.
Nocking height
Nocking height changes the vertical relationship between the nock, rest, and string. Too high or too low can show up as vertical tears, launcher marks, or inconsistent bare shaft height.
Cam sync
On dual-cam bows, cam sync affects how the string launches the arrow and how the shaft leaves the bow. If one cam is out of time, the arrow can leave inconsistently even when the rest is adjusted correctly. That is why timing, clearance, and spine should be checked in order before deeper tuning.
Common mistakes
Most bad fixes come from changing the wrong variable first. The fastest way to lose time is to treat one symptom as proof of one cause.
- Chasing paper tears too early instead of checking clearance first
- Changing rest height, cord timing, and nock rotation at the same time
- Ignoring form, clothing, or bow-hand torque when marks repeat on one side
- Raising or lowering the blade too far before checking spine
- Keeping a drop-away rest that drops late, then blaming the arrow shaft
A common first-timer mistake is to swap from a wide blade to a weaker blade and then to a new shaft, while never checking timing. That can turn one simple contact problem into three separate ones. Adjust one item, reshoot, and record the result before the next change.
If the same mark returns after two controlled adjustments, stop and recheck the rest from scratch. A recurring mark on different arrows, with the same launcher position, usually means the setup is not stable enough for further tuning.
Frequently asked questions
Why is my arrow fletching hitting the arrow rest?
The most common causes are launcher timing, nock orientation, or arrow spine, with form and clothing as possible extras. Start with a powder test, then check whether the vanes strike the launcher arm or containment arm. That tells you which variable to move first.
How do I tell if my rest timing is off?
Watch the launcher at full draw and during release. If it is not in the expected position at full draw or it stays up too long, timing is suspect. A side view and a powder test are better than paper alone for this check.
Can nock rotation stop arrow rest contact?
Yes, if the vanes are clipping the launcher or riser at the wrong angle. On compounds, choose the nock orientation that keeps the vane away from the launcher path; on recurves, choose a starting point that keeps the feathers or vanes clear of the shelf area. Rotate the nock, then confirm with a powder mark.
How do I check vane clearance on my bow?
Apply foot powder or lipstick to the launcher, vane edge, or containment arm, then shoot one arrow and inspect the transfer. A clear swipe shows contact. If the mark shifts after each shot, retime the rest before changing arrows.
What causes an arrow to bounce off the rest?
Late or early launcher movement is the usual cause on drop-away rests. A cord that is too short, too long, or attached incorrectly can make the launcher rise or fall at the wrong time. Recheck the cord and set screw before touching spine.
Should I change arrow spine if I have contact problems?
Only after timing and clearance are checked. A weak spine can let the back end hit the blade, and a stiff shaft can still group poorly. Use a spine chart or selection program against draw weight, arrow length, and point weight before reordering shafts.